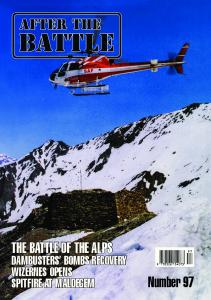
THE KOKODA TRAIL
Number 137 3 7
9
770306
154080
£3.95
NUMBER 137 © Copyright After the Battle 2007 Editor-in-Chief: Winston G. Ramsey Managing Editor: Gordon Ramsey Editor: Karel Margry Published by Battle of Britain International Ltd., The Mews, Hobbs Cross House, Hobbs Cross, Old Harlow, Essex CM17 0NN, England Telephone: 01279 41 8833 Fax: 01279 41 9386 E-mail:
[email protected] Website: www.afterthebattle.com Printed in Great Britain by Warners Group Publications PLC., Bourne, Lincolnshire PE10 9PH. After the Battle is published on the 15th of February, May, August and November. LONDON STOCKIST for the After the Battle range: Motorbooks, 33 St Martin’s Court, St Martin’s Lane, London WC2N 4AN Telephone: 020 7836 5376. Fax: 020 7497 2539 United Kingdom Newsagent Distribution: Warners Group Publications PLC., Bourne, Lincolnshire PE10 9PH Australian Subscriptions and Back Issues: Renniks Publications Pty Limited Unit 3, 37-39 Green Street, Banksmeadow NSW 2019 Telephone: 61 2 9695 7055. Fax: 61 2 9695 7355 E-mail:
[email protected]. Web site: www.renniks.com Canadian Distribution and Subscriptions: Vanwell Publishing Ltd., PO Box 2131, 1 Northrup Crescent, St. Catharines, Ontario L2R 7S2. Telephone: (905) 937 3100 Fax: (905) 937 1760 Toll Free: 1-800-661-6136 E-mail:
[email protected] New Zealand Distribution: Dal McGuirk’s “MILITARY ARCHIVE”, P.O. Box 24486, Royal Oak, Auckland 1030 New Zealand. Telephone: 021 627 870 Fax: 9-6252817 E-mail:
[email protected] United States Distribution and Subscriptions: RZM Imports Inc, 880 Canal St., Stamford, CT 06902 Telephone: 1-203-324-5100 Fax: 1-203-324-5106 E-mail:
[email protected] Website: www.rzm.com Italian Distribution: Tuttostoria, PO Box 395, 1-43100 Parma. Telephone: ++390521 29 27 33, Fax: ++390521 29 03 87 E-mail:
[email protected] Dutch Language Edition: SI Publicaties/Quo Vadis, Postbus 282, 6800 AG Arnhem. Telephone: 026-4462834 E-mail:
[email protected]
KOKODA TRAIL
Between July and November 1942, Australian army units fought a hard and difficult jungle campaign against Japanese units along the Kokoda Trail — a narrow, mountainous, jungle-enveloped pathway across the Owen Stanley Range in Papua New Guinea. The Japanese, having landed in the Gona area on Papua’s north shore, were pushing southwards towards Port Moresby, and the Australians were throwing whatever they could into the fray to stop them. However, in a series of stiff battles, the Japanese South Seas Detachment pressed on, forcing the Australians to give ground and retreat ever closer to Port Moresby. Its fall would mean the loss of New Guinea. It was Australia’s darkest and most-difficult hour of the war.
CONTENTS 2
WAR FILM Kokoda — The Movie
22
GERMANY Milag-Marlag POW Camps at Westertimke
24
ITALY The Fall of Rimini
43
Front Cover: Walking the Kokoda Trail. A group of hikers toils up the historic track across the Owen Stanley Range in Papua New Guinea, scene of bitter fighting between the Australians and Japanese in July-November 1942. (Phillip Bradley) Centre Pages: Aerial reconnaissance photograph of the Milag-Marlag naval POW complex at Westertimke in northern Germany taken by a photo recce aircraft of the US 106th Group on April 14, 1945. (Luftbilddatenbank Ing.-Büro Dr. Hans-Georg Carls) Back Cover: Memorial plaques commemorating the Canadian contribution to the breaching of the Gothic Line and the liberation of Rimini in September 1944. Beyond is the Porte d’Augusto, the ancient city gate from Roman times. (Glenn Hodgson) Acknowledgements: The Milag-Marlag story is based to a large extent on Gabe Thomas’ excellent book Milag. Captives of the Kriegsmarine. Merchant Navy Prisoners of War, Germany 1939-1945, published by the Milag Prisoner of War Association in 1995. For further help with this story the Editor would like to thank Jeff Smith and Frian Lit. Photo Credits: ATL — Alexander Turnbull Library, Wellington; AWM — Australian War Memorial; IWM — Imperial War Museum, London; NAC — National Archives of Canada; USNA — US National Archives.
2
AWM 027025
THE KOKODA TRAIL
The fighting along the trail was hard and desperate and troops of both sides suffered equally from the hardships imposed by the climate and terrain. After advancing doggedly for 51 days the Japanese troops came to within sight of their objective, Port Moresby, but then the Japanese high command decided to abandon the push, and ordered a withdrawal. The Australians followed on their heels but it took another 35 days of very heavy fighting before they regained the northern end of the track and recaptured Kokoda. Army photographer Thomas Fisher pictured Australian troops leading packhorses and mules down the precipitous curving track into Uberi valley at the beginning of the trail.
AWM 027054
For the heavily-laden troops, it was a matter of sheer determination to achieve the steep climbs and slippery descents of the trail, their toiling made even more strenuous by the humid climate with its hot days and chilly nights, the torrential rain and mud, the wet boughs and vines, the mosquitoes and leeches, the malaria and dengue. Here men of the Australian 16th Brigade move up the trail in October 1942.
THE KOKODA TRAIL trail meandered some 50 miles through the jungle-covered mountain ranges until it emerged at the Sogeri Plateau above Port Moresby. No more than a native track, its possible use as an invasion route had been
By Phillip Bradley given scant consideration by the Australian command.
PHIL BRADLEY
Following the declaration of war in the Pacific on December 7, 1941, the Japanese armed forces carried out a remarkably swift series of operations to establish a perimeter of defence well away from the Japanese homeland. A key bastion of that defensive arc would be the main island of Papua and New Guinea. On January 21, 1942, only six weeks after the start of the war, a Japanese force captured Rabaul (see After the Battle No. 133), thus providing a vital anchorage and staging post for further attacks against Papua and New Guinea to the south and the Solomon Islands to the south-east. Then on March 8, a Japanese naval force landed at Lae and Salamaua, on the northern New Guinea coastline. Their aim was to establish an airbase able to support the critical landing to be made at Port Moresby. However a US carrier-based raid from the Lexington and Yorktown sank three transport ships and thus delayed the planned landing. It would not be until May 7 that the Japanese invasion convoy would sail from Rabaul for Port Moresby. Again the two American aircraft carriers played a vital role in stopping the invasion, though both were badly damaged, the Lexington sinking on May 8. But critically, the Japanese attack force returned to Rabaul. With their naval invasion force stymied, and with the critical loss of most of their carrier force at Midway in early June, the Japanese command decided on June 14 that the advance on Port Moresby would be undertaken by a land force that would cross Papua overland from north to south. On the night of July 21/22, Japanese landings took place at Gona, on the Papuan northern coast. The landing force, the Yokohama Advance Butai, included Lieutenant-Colonel Moto Tsukamoto’s 1st Battalion from Colonel Masao Kusunose’s 144th Regiment plus the 15th Independent Engineer Regiment, a company from the 5th Sasebo Naval Landing Force and attached artillery and pioneers. A basic road wound its way south-west from the Japanese beach-heads at Gona and Buna to the small government station at Kokoda. Here the mountains of the Owen Stanley Range towered over the Yodda Valley, barring any movement towards the south coast except by foot over what would become known as the Kokoda Trail. The
Another group on the Kokoda Trail, August 2006. Our author, Phil Bradley, joined nine high school students and two teachers from London’s Dulwich College for the trek along the historic track. The group made the expedition in the spirit of one of Dulwich College’s most renowned old
boys, the explorer Sir Ernest Shackleton. Under the expert guidance of Frank Taylor, from Kokoda Treks and Tours, they experienced a remarkable journey in the footsteps of history. The current trail follows a somewhat easier route than that used in 1942. 3
4
For the Japanese troops moving south, the track began at Kokoda. From there the path leads along the western side of the Eora Creek valley, passing through the native villages of Deniki, Isurava and Alola, after which it crosses to the eastern side of Eora Creek, and ascends to the first spur of the main range at 7,000 feet just before Templeton’s Crossing — a total climb of 5,500 feet in less than 20 miles. Just past Templeton’s Crossing is the Gap, a broken, jungle-covered saddle in the main range, about 7,000 feet high at its central point, with higher mountains on either side. The trail runs about six miles across the gap over a muddy, broken track, in places just wide enough for one man to pass, and then goes downward to either Myola or Kagi, and on to Efogi, Menari, Nauro, Ioribaiwa, the Imita Range and Uberi, traversing peaks 5,000 and 6,000 feet high and sharp east-west ridges with altitudes ranging from 3,000 to 4,000 feet. The southern edge of the Owen Stanley Range is at Ilolo and Koitaki, where the elevation is 2,000 feet. The distance between Kokoda and Ilolo is only 50 miles as the crow flies but due to the mountainous climbs and descents the actual distance to be covered by the troops was nearly twice as much.
AWM 013288
A Papuan Infantry Battalion (PIB), comprising 30 officers and 280 men under Major Bill Watson, had been deployed between Kokoda and the coast. The Papuans were reinforced by the Australian 39th Battalion, despatched from Port Moresby in early July. The 39th was a militia battalion that had been raised for service in Australia (including Australian territories). This was distinct from the Australian Imperial Force (AIF) battalions that had been raised for service worldwide and considered the cream of the Australian army. The 39th was commanded by Lieutenant-Colonel William Owen, who had served with the AIF 2/22nd Battalion in Rabaul during the Japanese invasion. A number of other AIF officers also came into the battalion. Most of the men in the unit were very young, with an average age under 20, and their proud commander later called them his ‘pathetically young warriors’. With native carriers helping, the first company from the 39th Battalion crossed the Owen Stanley Range via the Kokoda Trail and arrived in Kokoda on July 15. The carriers were arranged by a Yodda Valley plantation owner, Bert Keinzle, who would prove to be the vital cog in organising the allimportant supply line for the Australians. The first contact between the opposing forces took place in the afternoon of July 23 when a PIB patrol encountered part of Tsukamoto’s battalion just east of Awala, approximately halfway between Kokoda and the coast. Colonel Owen moved Captain Sam Templeton’s B Company of the 39th Battalion up to reinforce the PIB and form a blocking position east of Gorari, some 20 miles east of Kokoda. On July 25 the Japanese attacked and forced Templeton’s company back towards Kokoda. Owen’s second company, Captain Arthur Dean’s C Company, was still moving along the Kokoda Trail and he therefore decided to have his remaining two companies flown into Kokoda. However, with only two aircraft available, only a platoon could be carried and this joined Templeton’s men at Oivi on July 26. Again the Japanese pressure forced the Australians back, this time leaving the brave Templeton behind.
The first Australian troops to experience the vagaries of operating along the trail were from the 39th Battalion, a militia unit, despatched north from Port Moresby on July 7 — two weeks before the Japanese landings — to reinforce the Papuan Infantry Battalion that was guarding the sector between Kokoda and the Papuan northern shore. Their first contact with the Japanese occurred on July 24 near Gorari. This picture of men of the 39th Battalion making their way back along the trail was taken in August 1942.
TRACK TO PORT MORESBY
AIRFIELD
KOKODA VILLAGE
Kokoda, from which the trail received its name, is a little village set on a small plateau around 1,500 feet above sea level. It contained a Papuan Administration post, a rubber plantation
and a mountain airfield. By July 28 the Australians had been forced back to Kokoda, where they distributed their meagre forces in defensive positions around the plateau.
July 30, Captain Dean arrived with C Company and, two days later, Captain Noel Symington joined with A Company. To help ease the supply situation, Bert Keinzle had managed to open an air dropping zone at the Myola grasslands. On August 4, Lieutenant-Colonel Allan Cameron, like Owen another veteran from the invasion of Rabaul, arrived to take com-
mand of what was now termed Maroubra Force. On the 6th, Captain Max Bidstrup arrived with 39th Battalion’s D Company. Total Australian strength at Deniki was now 36 officers and 471 men and Cameron was planning to retake Kokoda. Symington’s company managed to get into the town and on August 10 his men held a series of Japanese attacks before withdrawing.
PHIL BRADLEY
Owen now defended Kokoda with some 80 men from the 39th Battalion and the PIB, dispersed around the raised plateau of the administrative centre. In the early morning hours of July 29 the Japanese began their attack and, though it was repulsed, Colonel Owen was shot and he later died. With Major Watson now in command, the Australians pulled back into the mountains at Deniki. On
USNA
TRACK TO BUNA
The view from the plateau towards the airfield today. Lieutenant-Colonel William Owen, the commander of the 39th Battalion, was mortally wounded in this area in the early morning
hours of July 29, when a sharp engagement with the Japanese advanced units forced the Australians out of the village and back into the mountains. 5
For the Australian troops moving north from Port Moresby, the Kokoda Trail began just north of Ilolo plantation, the first climb taking them 1,200 feet up to Owers’ Corner, which lies at 2,000 feet. (Later during the campaign, Australian engineers pushed the access road from Port Moresby north to Owers’ Corner, thus shortening the jungle footway by around three miles.)
The track then dropped 1,600 feet to Uberi only to rise again, 2,000 feet up the Imita Range, part of it up the infamous ‘Golden Staircase’. Down from Imita it followed the course of a rushing stream for about three miles and then climbed out again across the 3,000-foot Ioribaiwa ridge and 3,800-foot Maguli range to reach Nauro at 2,400 feet.
After Nauro, there were the ranges and gorges through Menari and Efogi (where the track split, one route going through Kagi and another through Myola) and the long upward climb to the
centre ridge of the Owen Stanley Range, where the track passed across the Gap at around 7,000 feet. It then dropped sharply down to Templeton’s Crossing at Eora Creek.
6
From there the track followed the course of the Eora Creek, past the village of that name and then steadily downhill for about ten miles through Alola, Isurava and Deniki to Kokoda. Ever since the war there has been considerable debate about whether the historic path should be called the Kokoda Trail or the Kokoda Track. ‘Trail’ is probably of American origin but has
served throughout WW1, now shared the toil of his men in this new war, so far removed from any previous experience. His main concern was that, despite Keinzle’s sterling efforts, there was a critical lack of the promised supply along the track. Potts took
over command of Maroubra Force on August 23, although, due to the supply issues, his two advance battalions remained at Myola and his third, the 2/27th Battalion, remained in Port Moresby. Potts had his hands tied from the start.
USNA
ISURAVA On August 13 the Japanese moved on Deniki and, though their attacks were again held, they came again the next day and forced Colonel Cameron to pull his men back to Isurava. There they dug in using their bayonets and helmets. On the 16th a new commander, Lieutenant-Colonel Ralph Honner, arrived at Isurava to take over the 39th Battalion. Honner had previously served as a company commander with the 2/11th Battalion in the Middle East. He found the 39th in poor shape, suffering from a lack of food, sleep and shelter but could only tell them that they had to stand and fight. Also on August 16, the first company of the 53rd Battalion arrived at Alola, the second company following on the next day. Like the 39th, the 53rd was a militia battalion but had spent most of its time in Port Moresby unloading shipping and was not well trained. The clashes at Kokoda had set off alarm bells back at New Guinea Force HQ and Brigadier Arnold Potts’ 21st Brigade from the 7th Division AIF had been rapidly despatched to Port Moresby, assembling at the southern end of the Kokoda Trail by August 15. Another AIF brigade, the 18th, was sent to Milne Bay where another Japanese landing was anticipated. On August 15 Brigadier Potts had been ordered to use his brigade (which comprised the 2/14th, 2/16th and 2/27th Battalions) to recapture Kokoda. The first of his battalions sent off along the track was LieutenantColonel Arthur Key’s 2/14th Battalion. Carrying loads of some 30 kilograms, the men set off over the trail, beset by the poor track conditions, in particular the steepness of the climbs and descents and the incessant mud that became worse as more men traversed the path. The 2/16th Battalion followed two days later. The 46-year-old Potts, who had
been used in many Australian history books, and was adopted by the Australian Army as an official battle honour for the units that served in Papua in 1942. ‘Track’ comes from the language of the Australian bush, is used in the relevant volume of the official history, and is commonly used by veterans. Thus, both are correct.
The native carriers, nicknamed the ‘fuzzy wuzzy angels’, provided a priceless service to the Australian army throughout the Kokoda Trail campaign and beyond. After bringing forward 40-pound supply loads over the diabolical track, the carriers would then take the wounded soldiers back. At the start of the campaign in August, the Australians controlled around 5,000 carriers and, by October, some 11,000 men though only 1,250 were forward of Myola. Given little more than basic food and occasional shelter, they gave their all, including hope to the wounded in their care. In this picture, taken during the later coastal fighting, four native Papuans are carrying a wounded soldier but along the rugged Kokoda Trail eight or more sure-footed carriers were often required to traverse the treacherous climbs and descents. 7
PHIL BRADLEY
AWM P01637
Left: Private Bruce Kingsbury of the 2/14th Battalion, who won the Victoria Cross for action on August 29. By August 14, the Australians had been forced back to Isurava, where they built up a defensive position using the remnants of the 39th Battalion, who held the line until relieved by the veteran 2/14th Battalion, lead elements of which began arriving on August 26. On the 29th, the Japanese attacked with such force that they succeeded in breaking through the 2/14th’s right flank. This created a serious threat to Battalion HQ and the whole battalion. The platoon on the flank was ordered to counter-attack and regain the position. Private Kingsbury, one of the few remaining survivors of No. 9 Platoon, which had been in constant contact with the enemy since August 27, volunteered to join them. In the counter-attack he rushed forward firing his Bren gun from the hip through terrific machine-gun fire, and succeeded in clearing a path through the enemy for the platoon, a courageous action which made it possible to recapture the position. Continuing to sweep enemy positions with his fire and inflicting an extremely high number of casualties on them, Kingsbury was then seen to fall to the ground shot dead by a bullet from a sniper. His posthumous Victoria Cross was the only one awarded during the Kokoda Trail campaign. Right: Kingsbury’s present-day grave at Bomana Cemetery outside Port Moresby. gun and firing it from the hip, wading into the enemy line, clearing a path forward. The position was restored but a sniper claimed
Kingsbury, the fallen hero later awarded his nation’s highest military honour, the Victoria Cross.
PHIL BRADLEY
From August 19 to 21, the Japanese landed the main body of Major-General Tomitaro Horii’s Nankai Shitai, or South Seas Detached Force, at Buna. The force comprised the remaining two battalions of the 144th Regiment, two battalions from Colonel Kiyomi Yazawa’s 41st Regiment plus significant artillery and support units. The latter included 875 native carriers from Rabaul and 400 horses. Lieutenant-Colonel Genjiro Kuwada’s 3rd Battalion of the 144th Regiment would join up with Tsukamoto’s battalion in front of Isurava, while Major Tadashi Horiye’s 2nd Battalion of the 144th would advance along the east side of the Eora Creek valley via Missima to Abuari. On the morning of August 27, Potts ordered the 53rd Battalion, now deployed across the other side of Eora Creek at Abuari, to retake Missima, further forward. During the move, the battalion commander, Lieutenant-Colonel Ken Ward, was ambushed and killed. Having also failed to retake Missima, a concerned Potts pulled the 53rd back to defend Abuari and thus protect the critical Alola and Isurava positions. At 1600 hours, just as the first units of the 2/14th Battalion were reaching the front line, the Japanese attacked the 39th Battalion positions at Isurava. Under heavy supporting fire, the Japanese broke into Honner’s left flank, but swift counter-attacks restored the position though the fighting went on through the night. On August 28, most of the 2/14th Battalion had moved into positions at Isurava, while the 2/16th Battalion had reached Alola and then moved across to Abuari. Most of the ineffectual 53rd Battalion had withdrawn to Alola. The following day, August 29, the Japanese again pressed hard at Isurava. Having lost his platoon commander, Corporal Lindsay Bear took charge and rallied the men, accounting for some 15 enemy soldiers himself with a Bren gun before being wounded. Still the Japanese came on. A party from HQ Company, led by Sergeant Bob Thompson, went forward to restore the line. Private Bruce Kingsbury was amongst them, taking over the wounded Bear’s Bren
The area where Kingsbury won his VC, looking east. The slope to the right goes down to Eora Creek. Kingsbury was shot dead 8
by a Japanese rifleman positioned on the rock. The information panel describes the action.
PHIL BRADLEY
The daunting Eora Creek valley figured prominently in the Kokoda Trail fighting. This is the view looking north along the jungle stream valley. There were tracks along both sides of the canyon but the main trail followed the left (western) side.
ordered to withdraw. Unsure of the situation at Alola, the 2/16th men made their way up Eora Creek in the night, each man holding the bayonet scabbard of the man in front and rubbing fluorescent fungi onto his pack to maintain contact. One of the intelligence sec-
tion NCOs led the men out. Up on the main track, the 2/14th Battalion also raced to get back as the Japanese flanking moves came. The battalion commander, LieutenantColonel Key, along with his staff, was cut off and never seen again.
PHIL BRADLEY
On the left flank, Captain Claude Nye’s B Company faced continued assaults as the Japanese tried to get around the Australian position on the high ground. The commander of Nye’s 10 Platoon, Lieutenant Harold ‘Butch’ Bisset, was one of those to fall as he moved among the forward positions. He would die the next morning with his brother, Captain Stan Bisset, the 2/14th Battalion Intelligence Officer, by his side in the last hours. Corporal Charlie McCallum, a Bren on one hand, a Tommy gun in the other, flailed the enemy, holding the line as his comrades pulled back. Brigadier Potts sent a company of the 53rd Battalion forward while some of the relieved 39th Battalion platoons returned to the front line of their own accord. One of the 2/16th Battalion men watched them head back into the fight: ‘When I saw those poor bastards, tottering on their bleeding, swollen feet, turn round and go straight back to Isurava, I knew they were good.’ The Japanese were attacking at Isurava with five battalions of fresh, top-line infantry and Potts had to reconsider his position. Still denied his third AIF battalion and adequate supply, in part due to continuing concerns at Milne Bay, Potts decided he needed to keep his force intact between the Japanese and Port Moresby. He withdrew the 2/14th Battalion to the rest house area, halfway back to Alola. The Japanese companies kept pressing and, having now moved into Abuari, they were firing with machine guns across the valley into Alola village. The 2/16th Battalion force under Major Frank Sublet held the track down to Eora Creek but, late on August 30, he too was
Alola (where the two tracks joined) and Isurava (where the 2/14th Battalion fought) are on the left of the valley, Abuari (where the 53rd Battalion and the 2/16th Battalion were deployed) on the right. Note the steepness of the slope on the right.
A Bren and a Thompson gun recovered from the battlefield at Alola. 9
A Damien Parer photo taken at Eora Creek village on August 27, 1942 — the day the Japanese launched their first attack on Isurava, four miles to the north. Australian war correspondent Osmar White, who covered the battle for the Melbourne Herald, wrote: ‘I will never forget the scene as Eora came into sight halfway down the last ridge. Hundreds of men were standing about in mud that came up to their shins. The whole village, built of pandanus and grass, looked as if it were about to founder in the sea of mud.’ Eora Creek village fell to the Japanese on August 30. wounded. Also cut off, Captain Sydney ‘Ben’ Buckler took charge of the wounded group, as well as 42 other men, and moved them down into the thick jungle of the Eora Creek ravine. One of the wounded, Corporal John Metson, had been shot in the ankle and was
PHIL BRADLEY
Brigadier Potts pulled his force back to the Eora Creek crossing and 2/16th Battalion’s D Company held fast on the hill above the village. They remained till the next morning, taking a considerable toll on the Japanese, who had rapidly moved forward. The Australian rearguard was desperately trying to give the native stretcher bearer teams time to get the wounded back along the difficult track. Three hundred carriers had to be sent forward from Myola to bring out the 30-odd stretcher cases. Many men who should have been on stretchers chose to struggle back on their own, aware of the shortage of carriers. Corporal Lindsay Bear was one of them, even though he had a bullet in both ankles and another in one of his knees. Bear could only shuffle his way along, supported by his one good leg and a wooden pole. He joined up with Corporal Russ Fairburn, who had a bullet lodged near his spine and together they somehow made their way back. Another wounded man, one leg blown off below the knee, hobbled along the track. When offered a stretcher party he retorted: ‘Get them for some other poor bastard! There are plenty worse off than me.’ For many other badly wounded men still in the front lines at Isurava, the situation was graver still. With the withdrawal order given, Lieutenant ‘Mocca’ Treacy of the 2/14th Battalion organised stretchers to be built for the
AWM 013257
AWM 055163
Many of the most memorable images of the Kokoda Trail fighting were made by Australian photographer/cinematographer Damien Parer (left). Appointed as Australia’s first official photographer by the Department of Information (DOI), Parer sailed to the Middle East with the first contingent of the Second AIF in January 1940 and spent the next year photographing and filming Australians training for service and then in action during the early victories in Libya, the fighting in Greece and Syria and at the siege of Tobruk. Returning to Australia to cover the fighting in the Pacific, he arrived in New Guinea in June 1942, and in August and September filmed the Australians fighting along the Kokoda Trail. The eight-minute film he completed from the footage, Kokoda Front Line, was recognised with an Academy Award in 1943. After completing another film on the New Guinea fighting, Assault on Salamaua, and increasingly unhappy with DOI for its parsimony and interference, Parer resigned his position with the department on August 24, 1943, and began working for Paramount News. He went on to cover American operations, and was killed by a Japanese machine-gunner while filming US Marines at Peleliu (see After the Battle No. 78) in the Palau archipelago on September 16, 1944.
The comparison was taken from the track leading down into the village from Templeton’s Crossing. Like before, Eora Creek is little more than a cluster of huts. 10
unable to walk. Knowing that a stretcher would take eight men to handle, Metson refused to be carried and crawled his way along behind Buckler’s party. Buckler sent Lieutenant Treacy with two men to get help from Myola but Treacy found progress difficult moving alongside the main track. It took his group a week to reach Myola, by which time the area had been abandoned by the Australians. Treacy thereupon headed south-east, reaching Dorobisolo on September 22. Buckler waited five days for Treacy before heading down Eora Creek to the Yodda Valley, keeping well to the east of the Kokoda Trail. After ten days, his group reached the village of Sengai, south-east of Kokoda, where it was decided to leave the wounded. Private Tom Fletcher volunteered to stay with the five wounded and two fever-ridden men while Buckler led the rest back to Allied lines. Before they left, Buckler’s men paraded in front of the wounded. Following the Kumusi River upstream, Buckler’s party met American troops on September 28 near Jaure. Supplied with food, they then climbed over the Owen Stanley Range to Dorobisolo, reaching it on September 30. After two more days walking, the group of two officers and 37 men carried out the last leg of its journey down the Kemp Welsh River to Rigo using ten crude river rafts, arriving on October 3. Meanwhile there was a tragic finale for Fletcher’s small party at Sengai. Their presence at the village was betrayed to the Japanese and all were callously murdered.
PETER BUCKLER
AWM 013489
Left: Captain Sydney ‘Ben’ Buckler, the 23-year-old commander of A Company, 2/14th Battalion, pictured on his return to Allied lines, after leading 39 men on an epic fiveweek trek across the wilderness east of the Kokoda Trail. Cut off from his unit at Isurava on August 30, Buckler’s party managed to escape through the jungle moving within earshot of the Japanese positions for weeks, finally reaching friendly lines at Rigo on October 3. Right: Sydney Buckler pictured at the Anzac Day parade in April 1990. Buckler died in February 1995. To break the Japanese hold on the track, three companies attacked back from the pocket: Captain Claude Nye’s B Company of the 2/14th, Captain Frank Sublet’s B Company of the 2/16th and Captain Doug Goldsmith’s C Company of the 2/16th. A Company of the 2/16th would support B Company in the assault down the track. Lieutenant Bill Grayden commanded 15 Platoon, part of C Company, attacking on the left flank. He watched as the forward troops were deployed in an extended line, and how they then waited beneath the steady rain with their groundsheets around their shoulders, their bayonets fixed to their rifles. A
PHIL BRADLEY
BRIGADE HILL Brigadier Potts’ strategy was now one of holding rearguard positions along the track as he withdrew, intending to make a stand at a suitable spot south of Myola. As they moved back through Myola, the Australians destroyed the food and ammunition that they could not carry. Still hounded by supply difficulties and the need for his third battalion, the 2/27th, Potts withdrew all the way across the main range back to the high ground above Efogi. Here, at Mission Ridge and Brigade Hill behind it, he deployed his three battalions to hold the Kokoda Trail and stop the Japanese advance. Potts positioned Lieutenant-Colonel Geoff Cooper’s fresh 2/27th Battalion to hold Mission Ridge. The 2/14th Battalion took up positions astride the ridge behind Cooper, while, further back, Potts spread out the 2/16th Battalion along the ridgeline of Brigade Hill. On the night of September 6/7, the forward troops of the 2/27th watched the Japanese columns move down Kagi Ridge from the main range, using torches made from captured Australian insulation wire to light their way. The Australians had nothing with the range to fire on them. The first Japanese attacks on Mission Ridge came just before dawn on September 8, hitting Captain Charlie Sims’ A Company of the 2/27th on the right flank. The attack was supported by mountain gun artillery fire. The entire company ammunition supply plus the battalion and other company reserves were used up in holding the enemy attack. But even as the Australians reflected on their success, the Japanese were making the decisive move of the battle, a flanking manoeuvre by three infantry companies from Major Horiye’s 2nd Battalion of the 144th Regiment. They advanced undetected around to the north of the Australian position and then up onto the ridge among the strung-out 2/16th Battalion positions further back on Brigade Hill, taking up a strong position astride the track and cutting off almost the entire 21st Brigade. It was an astonishing move, totally out-manoeuvring the Australians. Potts had badly erred in underestimating his enemy and in not deploying suitable outposts on his vulnerable northern flank. Only his brigade headquarters and Captain Brett Langridge’s D Company of the 2/16th remained outside the cut-off position.
3-inch mortar fired into the Japanese positions ahead, the dull thuds echoing back along the ridge. As the support fire ceased, the line moved forward at a steady walking pace, shouting and firing, trying to frighten the enemy troops. Small-arms fire laced through the undergrowth from both sides, but with the benefit of dug-in positions, the Japanese fire told. Though the Japanese defenders were forced back into a narrow enclave, they held the main attack along the vital track. Some of Nye’s men made it through but 17 men, including Nye himself, were killed. On the left, Sublet also got some men through, Bill Grayden amongst them. Listening to the attack heading his way, Brigadier Potts was heard to remark that the intensity of the fire was far greater than that he had heard at Gallipoli. As a last resort to open the track, Potts had Captain Langridge attack with his D Company from the brigade headquarters side. Using 18 Platoon, plus the men who had earlier broken through, Langridge made the assault. He led 18 Platoon forward on one side of the track with Grayden and the breakthrough remnants on the other. With the attackers exposed on the relatively open ground before they entered the rainforest, the stubborn Japanese defenders held the assault, the brave Langridge being killed at the head of his men only a few paces from his company’s position. Lieutenant Henry ‘Blue’ Lambert, one of Langridge’s platoon commanders, also fell. Captain David KaylerThomson took over the remnants of D Company and was told, ‘the brigadier wants you to try again.’ He replied: ‘I haven’t enough, but I’ll try.’ He then turned to Alan Haddy, the company sergeant major, and said: ‘Well this looks like good night nurse, good morning Jesus, Alan.’ ‘Well we can’t live forever, boss’, Haddy replied. However, the new attack was cancelled – Potts knew he had to keep his remnants between the Japanese and Menari for as long as possible to enable the rest of the brigade to withdraw. Potts pulled out at 2000 hours that night, single file down the trail to Menari.
Having withdrawn from Isurava and Eora Creek, the Australians set up a new defensive position at Mission Ridge and Brigade Hill behind it, with the 2/27th Battalion occupying positions on the ridge. This is Mission Ridge seen from the east with New Efogi village in the foreground. The initial Japanese attack at dawn on September 8 came up the ridge from Old Efogi which was off to the right (outside the picture). The 2/27th Battalion positions were near the top of the ridge. The Japanese surprise flanking attack later in the day, which cut off most of 21st Brigade, went around the back of the feature. 11
AWM 072329
The view is along the crest towards Menari. The Japanese encircling movement that cut off the main force of 21st Brigade came up the side of the ridge from the right in this general area.
Today the crest of Brigade Hill remains cleared and a memorial plaque to the fallen was erected here in 1996 (visible on the
left). The positions of the original crosses are now marked by sticks in the ground.
STEVE DARMODY
The bodies of the Australian soldiers killed during the Brigade Hill fighting were buried on a cleared stretch of land along the top of the hill. This photo was taken in April 1944, prior to the relocation of the graves to Bomana Cemetery at Port Moresby.
12
AWM 013262
The likely location where Parer shot the scene — the Vabuiagi River crossing on the Menari side of Brigade Hill.
VIC LEMON
PHIL BRADLEY
Cut off from the main track, the remainder of 21st Brigade moved south through the jungle, attempting to rejoin the Kokoda Trail further back towards Menari and Nauro. The 2/14th and 2/16th Battalion remnants combined under Lieutenant-Colonel Albert Caro and made it back to Menari the next day. Back on Brigade Hill, Captain Mert Lee held a rearguard position with B Company of the 2/27th Battalion, buying vital time for the withdrawal, at one stage leading a brazen counter-attack against the Japanese. Carrying the brigade’s casualties out with them, the 2/27th Battalion made slow progress and were beaten to Nauro by the Japanese advance. The battalion had taken seven stretcher cases and nine walking wounded with them but the main force left them behind on September 19. Corporal Johnny Burns and Private Alf Zanker remained with the wounded in the jungle east of Nauro, caring for them for two weeks until help arrived on October 2. The stretcher cases reached the 2/4th Field Ambulance on the 9th.
is in Parer’s original footage. In some publications it has been printed in reverse.
PHIL BRADLEY
Damien Parer filmed native carriers crossing a creek on the way back from the front line. This still photo is reproduced as it
In July 2004, Parer’s relatives and friends had a plaque in his memory placed on one of the creek boulders. ‘His extraordinary war photography helped forge the nation and remains as an enduring Australian legacy.’
Johnny Burns (left) and Alf Zanker (right), the two 2/27th Battalion medical orderlies who stayed with the stretcher cases hidden in the jungle after the withdrawal from Brigade Hill, caring for them for two weeks until help arrived. 13
PHIL BRADLEY
Menari village today, with Brigade Hill in the background. along the crest, but the enemy shells were directed into the tree foliage above them, the
PHIL BRADLEY
IORIBAIWA Brigadier Selwyn Porter took over command of Maroubra Force at Nauro on September 10. Porter decided that the next suitable defensive position on the Kokoda Trail was back at Ioribaiwa Ridge. Fortunately, significant reinforcements were now arriving. On September 11, Caro’s composite battalion began to move back through LieutenantColonel Cameron’s newly arrived 3rd Battalion, part of the 14th Brigade that had been defending the Port Moresby coastline. Then, on September 14, the 2/31st and 2/33rd Battalions from the 7th Division’s 25th Brigade deployed along Ioribaiwa Ridge with the 2/25th Battalion in reserve behind them. As his brigade went into the line, Brigadier Ken Eather took over operational control of what was now, the ‘must hold’ position in front of Port Moresby. With four fresh battalions plus Caro’s composite battalion, Eather had the strength to hold a much-weakened Japanese force rapidly outrunning its supply lines. An ambush position was set up at the former supply dump at Ofi Creek below Ioribaiwa Ridge where the Australians knew the Japanese troops would gather. Captain Ron Christian’s 2/16th Battalion platoon sprung the trap, causing considerable casualties before pulling back to the heights above. Corporal Brian Maloney and Private John Walker opened up with Bren guns from positions overlooking the crossing. Some 20 to 30 enemy soldiers fell before Christian’s ambush party headed back to Ioribaiwa Ridge. The Japanese responded with deadly mountain-gun fire onto the ridge. The Australians thought they would be safe dug in
AWM 013289
Right: Finally relieved after weeks of fighting in dense jungle, and having proven its mettle at Gorari, Kokoda and Isurava, the depleted 39th Battalion parade at Menari before its commander, Lieutenant-Colonel Ralph Honner, after their withdrawal in early September. Lieutenant Sidney Johnson stands at the head of his ‘ragged bloody heroes’. The men standing behind him have been identified as (l.t.r) Arnie Wallace, Bill Sanders, Harry Hodge, Kevin Surtees, George Cudmore, George Puxley, Kevin Whelan, Len Murrell, Dick Secker, Neil Graham, Clive Gale and Jack Boland. A sturdy walking stick was as vital as a rifle on the Kokoda Trail.
Relics of the fighting at Menari. In the foreground is an Australian 2-inch mortar. 14
shell fragments raining down on the men below. Lieutenant Bill Grayden, who had survived the 2/16th Battalion counter-attack on Brigade Hill, sheltered in a pit while shells hit the trees above him. One of the bursts caught Private Harry Whitfield, just eight yards away from Grayden, across the forehead with a shell fragment, mortally wounding him. Private John Baker was with Whitfield in a trench and now moved behind a tree with Private Charlie Lintott, who had also been hit by shrapnel. Another burst caught Lintott a second time and during a lull in the shelling, Bill Grayden moved over to bandage his wound. Grayden saw the flash from the mountain gun down in the valley and then he was blown sideways and down the hill, his eardrums shattered. Baker and Lintott were dead. On September 15, the Japanese made their push for Ioribaiwa Ridge but were foiled by the staunch Australian defence. They came again the next day, desperately attacking all along the line. Again the Japanese made a key move on the flank, infiltrating into some unguarded 3rd Battalion positions. One of the battalion’s platoons was busy digging in at the time, apparently without sentries posted and the Japanese got past them onto a dominant knoll. Captain Bert Madigan of the 2/16th put in a counter-attack but was wounded by a mountain-gun shell as the attack stalled. From their high position on the eastern flank, the Japanese now controlled the ridge.
AWM 026835
2/16th Battalion carried out a successful ambush here during the Australian retreat to Ioribaiwa Ridge on September 14.
Truly accurate comparisons are very difficult in the jungle but Steve Darmody achieved this remarkable one. The two large
boulders on the left confirm the correctness of the spot, as do several other smaller stones on the riverbank.
STEVE DARMODY
Native carriers crossing Ofi Creek, between Nauro and Ioribaiwa Ridge. The stream’s deep ravine created a formidable barrier. The
15
AWM 061957
Imita Ridge, the final ‘no further retreat’ position before Port Moresby, as seen from Owers’ Corner to the south. The Australian forces pulling back from Ioribaiwa Ridge deployed here on September 17 fully expecting another Japanese assault, but it never came. The Japanese high command had decided to
16
Japanese landing at Milne Bay, was certainly causing ructions at the headquarters of the supreme commander in the South-West Pacific Area, the American General Douglas MacArthur. Ignorant of the scale of the Japanese threat and of the supply fiasco, MacArthur blamed a lack of ‘aggressive leadership’ for the Australian position. The
Australian commander-in-chief, General Thomas Blamey, was ordered to New Guinea, much to the chagrin of the New Guinea Force commander, Lieutenant-General Sydney Rowell. With considerable angst between them, General Blamey replaced Rowell with Lieutenant-General Ned Herring.
PHIL BRADLEY
Brigadiers Eather and Porter agreed that the Australians should withdraw to Imita Ridge if it was necessary and this intention was passed on to the divisional commander, Major-General Arthur ‘Tubby’ Allen. Allen told Eather to hold for as long as possible but the latter decided to withdraw to a firmer base at Imita Ridge, deploying there by midday on September 17. Another fresh battalion, the 2/1st Pioneers, moved up to augment the Australian force, now numbering a considerable 2,500 fighting men. The 25pounder guns of the 14th Field Regiment now also supported the Australian defence from Owers’ Corner. The units of 25th Brigade carried out extensive patrolling of the area between Ioribaiwa and Imita Ridges. Eather had no intention of again being caught unaware by the enemy. The patrols were of around 50 men with a good allocation of automatic weapons. Private Norm Stokes was with one of the 2/33rd Battalion patrols, intent on ambushing any enemy advance. His company had left their positions on Ioribaiwa Ridge with much noise and apparent confusion but had not gone far, lying up in a kunai grass patch just behind the ridge. Further forward was an abandoned supply dump, any remaining tinned food pierced by bayonet to spoil the contents. C Company waited throughout the night. The Japanese came the next morning, setting up two machine guns, the one on the right almost on top of a waiting Australian infantryman. His burst of Tommy gun fire was the signal for the ambush to be sprung. It was all over quickly, a whistle blast signalling the Australian withdrawal, without casualty. The Japanese came no nearer to Port Moresby than that point. The continuing withdrawal along the Kokoda Trail, allied to the concerns over the
abandon its drive on Port Moresby and ordered their forces on the trail to pull out and withdraw to the north. Army photographer George Nicholson took this photo on December 16, 1943, when members of the Australian Military History Section visited the spot.
Our comparison was taken from a slightly higher position and shows the succession of steep ridges over which the Kokoda Trail passed.
PHIL BRADLEY
AWM P02423
On September 28 the Australian 25th Brigade counterattacked, starting the Australian offensive to regain the territory lost. Here two native carriers and a member of 2/4th Field Ambulance climb the so-called ‘Golden Staircase’ rising towards Imita Ridge. More than 1,000 steps were cut into the ridge’s south slope. Each was battened at its edge by a rough log, which was sometimes broken and often slippery with a coating of mud. In climbing the stairs, soldiers had to lift their leg over the log and put their foot down on the step behind in what was frequently a puddle of mud and water up to six inches deep. The official caption of this photo taken by A. F. Hobson in October 1942 states that the carriers are climbing the stairs towards Ioribaiwa, the next ridge to the north, and it is possible that the photo was taken on the south slope of that hill, where another 4,000 stairs were cut into a much steeper gradient than at Imita Ridge (see the relief sketch of the two ridges on page 6). THE JAPANESE WITHDRAWAL With the Australians now defending the final key ridge position in front of Port Moresby, more patrols went out to determine where the Japanese would attack. Apart from some minor clashes in no man’s land, there was no further action and, on September 25, Brigadier Eather began to probe forward. On the 28th he attacked Ioribaiwa Ridge only to find the Japanese had left. On the 30th, 2/25th Battalion patrols entered Nauro and also found it unoccupied. The Japanese had gone, abandoning their attack on Port Moresby when they were on the very doorstep. The 3rd Battalion found evidence that some 2,000 Japanese troops had occupied the area between Ioribaiwa and Nauro. With similar numbers and in prepared positions on dominant terrain, the Australians may well have held any attack on Imita Ridge, but it would have been a very bloody affair. The Japanese decision to withdraw had come about for a number of reasons. Chief among them had been the delays and losses that had been imposed on the Japanese force during the fighting withdrawal of the Australians back from Kokoda. As the Japanese advanced, their supply lines increased, and then failed. Without an effective native car-
Phil Bradley took his comparison on the south slope of Imita Ridge. This is the first major climb when travelling north along the Kokoda Trail. Walking the historic trail is today rapidly becoming more popular. While there were only 67 travellers in 2001 there were 3,750 in 2005. To regulate and exploit the increasing trekking activity, the PNG government in 2002 set up the Kokoda Track Authority. It charges foreigners $87 and students or children $44 for a permit to walk the trail. The revenues are to be shared equally between the Authority and the provincial governments of Kokoda and Koiari, the former using it for rangers and the track’s upkeep, and the latter to spend it on health care and education for the tribes along the route. However, much of the funds for the provincial governments are lost through corruption and, bereft of their support money, the landowners have repeatedly threatened to close the track if things did not improve. In 2005 the Authority raised $300,000 from trekking permit fees.
rier system or the possibility of air supply, everything had to be manhandled forward by the troops and, by mid-September, the Japanese soldiers were starving and very low on ammunition. However, the Japanese command never had an issue with sending half-starved, ill-supplied troops into battle. The decision to withdraw had been made at a strategic level. The fighting at Guadalcanal in the Solomon Islands (see After the Battle No. 108) had taken its toll on the Japanese resources and the landing at Milne Bay on the southern Papuan coast had been repulsed. Reinforcements and supplies would now be sent to Guadalcanal as the first priority; Port Moresby would have to wait. From General Horii’s force, two battalions of Colonel Yazawa’s 41st Regiment were the first to withdraw on September 16, followed by the three battalions of the 144th Regiment on September 26. A rearguard force based around the 2nd Battalion of the 41st Regiment would delay the Australians during the withdrawal. With the Japanese force in retreat, Generals MacArthur and Blamey pushed hard for the Australians to retake Kokoda and then drive the Japanese out of Papua as soon as possible. With the Japanese now directing
considerable army and naval resources to Guadalcanal, it was possible they would win that battle and then be in a position to resume the attack on Port Moresby. MacArthur stated his concerns on October 17: ‘It is now necessary to prepare for possible disaster in the Solomons’. As with the earlier fighting, the key to a successful move across the Kokoda Trail would be supply. When the 3rd Battalion reached Nauro, two companies were tasked with clearing suitable air-dropping grounds in the Brown Valley. The first drops took place at Nauro on October 4, though the recovery rate was always a problem. As the Australians moved north along the Kokoda Trail, other dropping grounds were constructed at Menari and Efogi. The Australians did not catch up with the Japanese rearguard until after they had crossed the main range and were approaching Templeton’s Crossing. It was now October 8 and Brigadier Eather would need to move his battalions forward to engage the Japanese. At the same time, Brigadier John Lloyd’s 16th Brigade was advancing up the track from Port Moresby. Lloyd had passed General MacArthur at Owers’ Corner and been told, ‘the eyes of the Western world are upon you’. If nothing else, Lloyd knew his 17
AWM 027083 PHIL BRADLEY
The road back. Looking north from Nauro across the Brown River valley towards the Menari plateau and on to Efogi in October 1942. Osmar White wrote: ‘Blue valley after blue valley. Ridge and valley, and valley and ridge. Mile upon endless mile of hills seen from open patches of grassland.’
The same ridges and valleys, blue in the early morning mist, in August 2006. The supply dropping took place along the valley to the right. 18
AWM 027019
Right: A C-47 of the US Fifth Air Force dropping food supplies on a cleared space in the Brown River valley at Nauro during the advance of the 25th Brigade in October. The Fifth Air Force, part of SouthWest Pacific Theatre and responsible for supporting both the New Guinea and Guadalcanal operations, initially had only the 21st and 22nd Troop Carrier Squadrons for transport and supply duties. Their combined strength at the start of the Kokoda counter-offensive was 41 C-47s but, due to lack of maintenance personnel, only 26 of these were operational. A new troop carrier squadron, the 6th with 13 C-47s, touched down at Ward’s Drome in Port Moresby on October 14 — the first such squadron to fly across the Pacific from the United States — and an additional squadron, the 33rd, would arrive later on. (The four squadrons were formed into the 374th Troop Carrier Group on November 12). However, supplying the various land forces by air remained a major problem. Cargo parachutes and containers were scarce and normally reserved for ammunition, medical supplies and bottled liquids. Rations, clothing and individual equipment were wrapped in sacking or blankets that did little to absorb the impact of the drop. Osmar White wrote: ‘It was fascinating to watch cases of bully beef explode as they hit ground. The gold-coloured tins scattered like shrapnel.’ brigade had great expectations on it. The Japanese rearguard held the Australians until October 15 before pulling back along the track where more fighting took place. Meanwhile, General Blamey was getting impatient with the 7th Division’s commander, Major-General Allen. On October 21, General MacArthur added his comments in his own message to Allen: ‘Progress on the trail is NOT repeat NOT satisfactory’. Allen had moved his HQ forward to Myola and had deployed three battalions, the maximum he could supply. He now moved Lloyd’s 16th Brigade (comprising 2/1st, 2/2nd and 2/3rd Battalions) up to relieve Eather’s tiring 25th Brigade. The 25th Brigade casualties starkly illustrate the difficulties of warfare along the Kokoda Trail. In their month’s fighting the brigade had lost 68 men killed, 135 wounded and a staggering 771 men sick. On October 20, the day it moved into the front line, Lieutenant-Colonel Cedric Edgar’s 2/2nd Battalion made its first attacks. The Australians soon discovered how skilful the Japanese were at using the terrain and camouflaging their positions. The first the forward troops knew of the enemy presence was when a devastating blast of small-arms fire opened upon them. That night the Japanese force moved further back and took up new positions for the following day. They formed up on what was perhaps the best defensive position on the Kokoda Trail, the steep ridge on the northern side of Eora Creek, able to bring enfilade fire, including artillery, along the approach track from Templeton’s Crossing. The Japanese commander, Colonel Masao Kusunose, had mustered the remnants of his 144th Regiment here, and though considerably weakened, it contained a nucleus of very experienced and determined troops. The 16th Brigade reached Eora Creek on October 22, taking up positions on Bare Ridge, on the southern side of the ravine, opposite the Japanese fortress. The Japanese defenders opened fire on the exposed Australians, wounding the 2/3rd Battalion commander, Lieutenant-Colonel John Stevenson. Brigadier Lloyd decided to split Lieutenant-Colonel Paul Cullen’s 2/1st Battalion and attack from two directions. Though the Japanese positions commanded the creek crossings, Lloyd wanted them, so
PHIL BRADLEY
he directed Cullen to move across the bridges and then attack up the main track into the teeth of the enemy defence. Captain Basil Catterns’ B Company got the thankless task. The battalion’s two other companies were sent across Eora Creek further upstream with orders to climb a steep spur up onto the high ground and attack the western flank of the Japanese position. Captains Alex Sanderson and Arch Simpson led the companies and it was planned that they would attack at the same time as Cullen’s men. Unfortunately for Sanderson, two of his company’s platoons and all of Simpson’s company failed to find their way up onto the heights. This was not surprising given that a waterfall had to be negotiated as well as the thick scrub. Though Sanderson had only the 17 men from Lieutenant Keith Johnston’s platoon with him, he led them into an attack on the Japanese flank. The platoon was then counter-attacked and surrounded and only four men survived. When Sanderson’s body was later found, it was ringed by some 300 spent shells from a German Mauser pistol that he had obtained during earlier service in the Middle East. Meanwhile the first men made their way across the bridges over Eora Creek on the night of October 22/23. The patrol, led by Lieutenant Ken Burke, was caught by Japanese machine-gun fire and suffered 13 casualties. But Brigadier Lloyd wanted the bridges taken so Colonel Cullen decided to do it himself. Together with his adjutant, Captain Geoff Cox, he crawled over the bridge and through the dead bodies from Burke’s foray to find the enemy machine-gunner gone. He quickly ordered Captain Peter Barclay’s company to descend Bare Ridge and cross the bridges. Most of Barclay’s men made it across to the north bank but, hemmed in at the base of a ravine, the company’s problems were only beginning. The breaking dawn revealed that Lieutenant Bill Politt’s platoon, in trying to stay to the right of the track, was trapped between the river and a sheer rock wall. The trail here traverses a steep slope and there is no feasible alternative to it. The Japanese defenders dropped grenades down onto Politt’s men until Lance-Corporal James Hunt managed to get up the slope and shoot two enemy soldiers,
thus saving the platoon. Meanwhile, Lieutenant Jim McCloy’s platoon had found a spur and had succeeded in getting forward up the incline to the left of the track, though Captain Barclay was killed during this move. McCloy could hear Sanderson’s flanking attack further west but the two platoons he now commanded could not move from their tenuous position below the Japanese positions. With McCloy having cleared the way, Captain Catterns now took his B Company straight up the ridge, digging in no more than 30 yards below the Japanese positions, protected from direct rifle fire but under constant grenade attack. The bravest of the men went back down the slope and across Eora Creek each night to get food and ammunition. A Vickers gun was brought forward along Bare Ridge on October 25 but dawn brought the enemy artillery into action and a direct hit destroyed the gun position. A
3-inch mortar that began firing on the Japanese positions on the 26th was also knocked out soon thereafter by well-directed enemy mountain-gun fire. Another 3-inch mortar blew up the next day, when a bomb went off prematurely. (The bomb had come from an air resupply.) During the night of October 26/27, heavy rain made Eora Creek a flood and washed out the bridges making supply even harder. On the same day, Japanese reinforcements arrived. General Horii knew he commanded the best defensive position along the Kokoda Trail and wished to delay the Australians for as long as possible. Brigadier Lloyd finally realised that he had to get stronger forces onto the high ground to turn the Japanese western flank. The 2/3rd Battalion, now under the command of Major Ian Hutchison, made the wide flanking move across Eora Creek, as Sanderson had earlier done. A company from the 2/2nd Battalion under Captain Bruce Brock was also
PHIL BRADLEY
AWM 027060
Left: Troops of the 2/25th and 2/33rd Battalions, heading for Menari, cross the Brown River below Nauro in October 1942. Above: Sixty-four years on, members of Phil Bradley’s hiking party find that a sturdy log still provides the best means of crossing the watercourse.
The Japanese defence position above the Eora Creek ravine. It was precipitously steep and muddy, with mountain guns, mortars and machine guns deployed in support. 19
AWM 013572
Major-General George Vasey, commander of the Australian 7th Division, raises the flag over Kokoda on November 3, 1942.
in front of Kokoda, but the Australian division commander, General Allen, had been relieved of his command, a victim of General MacArthur’s opinion that progress was unsatisfactory. The 224 soldiers of Lloyd’s brigade who had been killed or wounded in the attack on the Japanese Gibraltar at Eora Creek belied MacArthur’s criticism. On October 28, Major-General George Vasey was flown in to Myola to replace Allen. Lieutenant-Colonel Cullen’s 2/1st Battalion took up the pursuit of the Japanese rear-
guard back from Eora Creek, entering Alola on the afternoon of October 30. After the 2/2nd Battalion secured the bridge across Eora Creek to Abuari, Lloyd’s 16th Brigade pushed east through Abuari. Meanwhile Eather’s 25th Brigade moved north via Deniki heading for Kokoda and troops from the 2/31st Battalion entered the abandoned town on November 2. The Japanese rearguard had left two days previously. Just after 1100 hours on November 3, General Vasey hoisted the Australian flag above Kokoda.
PHIL BRADLEY
attached. Hutchison took his force even further out to the north and, on October 27 and 28, attacked the Japanese western flank in three columns, each of some 200 men, keeping 300 yards apart. Corporal Lester Pett was in the forefront of the attack, wiping out four enemy bunkers as the Australians unhinged the Japanese right flank. Catterns’ men rose from their positions on the front slope and stormed over the crest to find the enemy gone. The Australians had broken the Japanese
The ceremony signalled the end of the Kokoda Trail campaign but much fighting lay ahead at the Japanese beach-heads.
The flagpole site at Kokoda, pictured by Phil Bradley in August 2006. The white memorial stones on the open green carry 20
bronze plaques dedicated to all those who fell in the campaign; to the native carriers; and to the Australian units that served.
In 1943, a memorial cairn was set up at Sogeri, near the southern start of the Kokoda Trail. It reads: ‘In memory of the officers, NCOs & men of the Australian Military Forces who gave their lives on the Kokoda Track, Jul — Nov 1942. To strive, to seek, to find & not to yield.’ This photo was taken in October 1944. The road off to the left is the beginning of the ‘Snake Road’ built by the Australians in late 1942 that leads to the start of the Kokoda Trail at Owers’ Corner.
Now located in a neat little park, the memorial itself remains unchanged.
The McDonald’s Corner memorial, at the location where the wartime Kokoda Trail began at Ilolo (before the access road from Sogeri was pushed through to Owers’ Corner). The place got its name from PJ McDonald who ran a rubber plantation here in 1942. The memorial was built in 1967, for the 25th anniversary pilgrimage of the 39th Battalion veterans. The rifle and tin hat are original, formerly issued to PJ McDonald.
The memorial to the Kokoda campaign at Isurava, looking north-east along the Eora Creek valley. The four pillars of the memorial acknowledge Courage, Endurance, Mateship and Sacrifice. The memorial was opened in August 2002 by the Prime Ministers of Australia, John Howard, and Papua New Guinea, Sir Michael Somare.
PHIL BRADLEY
PHIL BRADLEY
PHIL BRADLEY
AWM 076622
The Kokoda Trail campaign was over but General Vasey continued to drive Brigadier Lloyd forward to reach the coast as soon as possible. On the day that Kokoda fell, Lloyd’s men had contacted the Japanese rearguard at Oivi, some ten miles further east towards the coast, the brigadier himself coming under fire. The Australians crossed the Kumusi River on November 15 and had made the first contact with the Japanese coastal positions by the 18th. Other Allied troops had also been sea and air lifted into the area. But a great deal of costly fighting lay ahead before the Japanese beach-heads at Buna, Gona and Sanananda would be eliminated. On November 9, General Blamey addressed the troops of the 21st Brigade at the Koitaki cricket ground, just east of Sogeri. In an unfortunate choice of words, he stated that ‘it’s not the man with the gun that gets shot, it’s the rabbit that is running away’. The assembled men took great offence at the remark. Blamey later tried to explain his choice of words to Brigadier Ivan Dougherty, then in command of the 21st Brigade, but the damage had been done. He never again held the respect of the Australian soldiery. One group of men who gained the utmost respect of the Australian soldiers was the native carriers, the ‘fuzzy wuzzy angels’. Without their help in bringing forward the supplies, the Kokoda Trail campaign could never have been fought. But it was their selfless dedication as stretcher bearers that forever would be remembered by all those who fought and were wounded.
21
JASIN bOLAND
The movie Kokoda, released in 2006, is a clear reflection of the growing interest in Australia for the savage campaign fought in the jungles of New Guinea. For decades Kokoda was overshadowed by Gallipoli, the disastrous campaign of the First
22
KOKODA – THE MOVIE Kokoda track were the untrained and illequipped militia of the 39th Battalion Australian Infantry. Often never having held a rifle before, and with an average age of 18 to 19, these volunteers and conscripts were primarily engaged for ancillary services such as building roads. Instead they were sent in to mount an offensive against the Japanese until they could be relieved by Australian Imperial Force units. Regulars scornfully
By Gail Parker
called them ‘chocos’ — ‘chocolate soldiers’ — who would melt in the heat of battle. In the event they earned the respect of everyone by demonstrating courage and determination, staying on to fight after their relief arrived in the face of Japanese forces who outnumbered the Australians ten to one.
JASIN bOLAND
Alister Grierson, who graduated from the Australian Film, Television and Radio School (AFRTS) in 2004 made an impressive debut directing his first feature film Kokoda, a moving commemoration of a harrowing campaign by Australian troops during WWII. The principal crew that he assembled were all students together at the school, so for most of them this was also their debut. Grierson co-wrote the script with John Lonie, who teaches scriptwriting at the AFTRS. Produced by Leesa Kahn and Catriona Hughes of GFN Productions, the film was shot on a low budget in 28 days in southern Queensland. Working with Grierson on the film was Jules O’Loughlin a free-lance director of photography based in Sydney who began his career in the arts 15 years previously as a stills photographer, now having a portfolio of some 3,000 photographs taken in over 40 countries throughout Asia, Central America and the Middle East. O’Loughlin then pursued a career in cinematography and after gaining entry into the AFRTS, he shot over 15 short films and documentaries. Kokoda was also his first full-length feature film. Only Shane Bourne, who plays the doctor, and William McInnes, portraying the colonel, were well-known actors, the remainder of the cast comprising Jack Finsterer and Simon Stone (brothers Jack and Max Scholt), Travis McMahon (Darko), Luke Ford (Burke), Tom Budge (Johnno), Steve Le Marquand (Sam), Angus Sampson (Dan), Christopher Baker (Blue), Ewen Leslie (Wilstead) and Ben Barrack as the lieutenant were relatively unknown actors. Kokoda is a film made as a commemorative tribute to Australian fighting forces in 1942. It centres on a fictional small patrol cut off behind enemy lines from supplies and communications, attempting to rejoin their battalion in the lead-up to the decisive battle at Isurava, a village on the Kokoda Trail in Papua New Guinea. Among those who particularly distinguished themselves on the
World War, which is generally regarded as a defining moment in Australia’s coming of age, but in recent years awareness of Kokoda has increased greatly and the battle is now looked upon as another crucial event in the nation’s history.
Kokoda tells the story of a patrol of the 39th Battalion that is cut off behind enemy lines in the run-up to the Isurava battle of August 1942. This publicity shot lines up the cast. Standing at rear: Christopher Baker (Blue) and an unnamed soldier. Middle row: Travis McMahon (Darko), Angus Sampson (Dan), Jack Finsterer (Jack Scholt), Ewen Leslie (Wilstead), Steve Le Marquand (Sam). Front row: Tom Budge (Johnno), Simon Stone (Max Scholt) and Luke Ford (Burke).
The movie contains numerous scenes that vividly portray the difficulties of jungle fighting, the ferocity of nightly combat The film title also represents the closest Australia came to being invaded by the Japanese and a gruesome theatre of war that defines the WWII Australian fighting spirit just as Gallipoli does for WWI. Papua’s infamous jungle terrain makes it the most difficult battleground on earth and it is featured as prominently and graphically as any character in this film. Clearly captured on the screen is the contrast in the chaotic crashing progress of the inexperienced Australian patrol as opposed to the Japanese who appear camouflaged, stealthily silent and deadly, their faces unseen, therefore shown as an inpersonal enemy. Prior to filming the cast spent an intense period at a boot camp on reduced rations while being immersed in visual and reading material relevant to the script. They were also introduced to rifle practice and patrolling by the SAS. The actors were also given the opportunity to meet with some members of the original 39th Battalion, many of them claiming that this was most
(left), the toils and fears of the ordinary soldier and the suffering of the wounded (right).
important in bringing home to them exactly what these men went through in the jungle of Papua. A similar area of dense jungle terrain was found on and around Mount Tambourine near Brisbane. Located nearby is the Canungra Military Area which dates back to the Second World War when the base was established to train soldiers in jungle warfare techniques. It now houses the headquarters of the Australian Defence Intelligence Training Centre. Filming commenced on September 29, 2005 and finished on November 4. Having decided to film the movie largely with hand-held cameras, which gives the impression that the viewer is almost an unseen member of the patrol, cinematographer O’Loughlin comments that the physical challenge of having to hold and carry around a heavy camera while moving around with the actors on steep slopes and rocky terrain was extremely tiring. The setting is vivid including the malarial nightmares of Jack Scholt and the dysentery and illness experienced by many others as
The movie’s final sequence includes a recreation of the famous picture (see page 14) of the weary survivors of the depleted 39th
the film hammers home its harrowing account of a time spent in this hell-like situation. One point of interest is that William McInnes (the colonel) played his part for free. ‘I suppose in a minor way,’ he said, ‘doing this part is like tipping my hat to my father’s generation. It’s only a day’s work and I decided to donate my fee to the serviceman’s charity Legacy. So at least someone will get something out of it.’ Kokoda has received several nominations and awards. The Australian Film Institute nominated Phil Eagles for the best costume award, and Phil Stuart-Jones for design and best visual effects. The Film Critics Circle of Australia nominated Jules O’Loughlin for the best cinematography and he was also nominated for the same award at the Inside Film Awards in 2006. Likewise, Adrian Rostirolla was nominated for best editing and Nicholas McCallum for best production design. And in April 2007 Kokoda was awarded the Special Jury Award at the WorldFest-Houston International Film Festival.
Battalion parading in front of their commander, LieutenantColonel Ralph Honner, played by William McInnes (right). 23
IWM BU4666
From 1941 to 1945, the small village of Westertimke in northern Germany was the location of a complex of prisoner of war camps known as Milag-Marlag. Although generally named as one, and both reserved for naval POWs, the two camps housed two distinctly different categories of prisoners. Milag (short for MarineInternierten-Lager) was for captured Merchant Navy seamen and
Marlag (Marine-Lager) for captured personnel of the Royal Navy. Milag on average held between 2,700 and 4,200 internees, and Marlag about 1,000 to 1,500, but numbers would rise considerably in the closing months of the war. This is the main camp road of Milag, pictured by British Army photographer Sergeant John Gordon on the day of the camp’s liberation, April 28, 1945.
MILAG-MARLAG POW CAMPS AT WESTERTIMKE Westertimke is a small village in northern Germany. It lies some 30 kilometres northwest of Bremen on the road to Hamburg, between Tarmstedt and Zeven, in flat, rather desolate and relatively infertile sandy land dotted with pine-tree woods and agricultural villages. From July 1941 to April 1945 the village was the location of two large prisoner of war camps, containing two different categories of naval POWs. One camp, the Marine-Lager (Navy Camp) — or Marlag for short — was for captured Royal Navy personnel; the other, the Marine-InterniertenLager (Naval Internees Camp) — or Milag — was for captured Merchant Navy seamen. During the Second World War, over 5,000 merchant seamen from more than 320 ships were captured by the Axis forces, and they formed a special category of prisoners. Merchant sailors were civilians, not soldiers, and under the Hague Convention they should have been treated as civilian non-combatants and returned home. However, naturally reluctant to do so lest they would crew other merchant ships or join the Armed Forces, the Germans argued that since Allied merchant ships were armed, their crews could not be regarded as non-combatants. However, as they were not members of the Armed Forces either, they could not be given full POW status, and so the Germans created a new class of prisoners: the Naval Civilian Internee. In actual fact, not all personnel aboard merchant vessels were civilians. During the war, British merchant ships were armed to defend themselves against enemy attacks, and the personnel manning the guns on these DEMS (Defensively Equipped Merchant Ship) vessels were members of the Armed Services. However, the Germans kept the crews of merchant ships together and the captured DEMS gunners were incarcerated with their Merchant Navy crewmates. Allied merchant seamen and Royal Navy 24
personnel captured by the Germans were initially concentrated in Stalag X-B at Sandbostel, south of Bremervörde, in two special compounds known as Ilag (InternierungsLager) 10 and Marlag (Marine-Lager), both created in April 1941. However, with the number of naval prisoners increasing rapidly (by July 1941 there were over 2,000 inmates in the Ilag compound and some 1,800 in the Marlag one), and as a result of complaints
By Karel Margry filed by the Protective Power (Switzerland) with the German government regarding the overfilling of the two compounds, in the summer of 1941 the Germans agreed to create two special camps for them at Westertimke, 20 kilometres away to the south.
WESTERTIMKE
Westertimke lay some 30 kilometres north-east of Bremen, on the road to Zeven.
LAGER III LAGER IV
Westertimke
INDER-LAGER
DULAG
Skagerrak-Strasse
N
MILAG
trasse Dönitz-S
MARLAG
M
sports grounds
The Milag-Marlag camp complex, begun in 1941 and subsequently added to, in its final form consisted of six lagers: Milag, for Merchant Marine personnel; Marlag, for Royal Navy personnel; Milag (Inder), for Indian seamen of the Merchant Navy; Dulag (Durchgangs-Lager), used as an interrogation and transit compound; Stabslager (Lager III), living quarters for the German administrative personnel; and Wache (Lager IV), living quarters for the German camp guard. Compare this plan with the Allied aerial reconnaissance photo (overleaf) taken on April 14, 1945. ning around the inside about four metres from the main fence. Four watchtowers were erected, one on each corner of the camp, in which the Germans placed machine guns and searchlights. To obstruct the view from and into the camp, woven matting covers were erected on the outside wire along the side of the camp nearest Skagerrak Road. Starting in October, the men began construction of additional barracks. These were in fact the old barracks from their own Sandbostel compound. The huts there were dismantled, transported to Westertimke by lorry and re-assembled. As each barrack at Sandbostel was taken away, its occupants followed behind. Some parties were taken by lorry, but most had to walk the 20 kilometres. By Christmas 1941, a second construction gang had arrived from Sandbostel and
164 prisoners were working on Milag. Construction continued all through the winter, which was particularly wet and cold. By February 1942 the camp had more or less attained its final form. It consisted of some 36 sturdily-built barrack blocks, which included some 24 accommodation huts, an admin block, a camp hospital, a central kitchen, two dining and recreation barracks (one for officers, one for ratings), a post and parcels block, and several washrooms and toilets. A sports field was contained within the camp’s perimeter. A large water-filled hole in the ground, which had been found on site and included in the enclosure, had become the camp fire-pond. Camp roads were eventually built by the POWs using rubble supplied by the Germans from air raids on Bremen.
ATB
MILAG POW ASSN
MILAG NORD In July-August 1941, an advance working party from Sandbostel’s Ilag compound — made up of strong ratings, ship’s carpenters, petty officers and several chief officers, under the command of Captain Lewis (commander of the SS Stanpark, sunk by the Admiral Scheer on January 19, 1941) — was sent to Westertimke, their task being to convert a disused Luftwaffe training establishment into a prison camp. The Luftwaffe camp was on a plot of land immediately south of the village, just across the main road that passes the village. When the party arrived at the new location, after an exhausting forced march, they found only six rather dilapidated huts — four accommodation barracks, a toilet block and a washroom — arranged in a square around an open parade ground. Once recovered from the foot journey, the men’s first task was to fence themselves in. Fences, gates and watchtowers all had to be constructed from timber cut from the local woods. They erected a five-metre-high double barbed-wire outer fence with a singlestrand warning-wire on shorter stakes run-
O
The Kommandantur, the camp commander’s office, was located on Skagerrak Road opposite Milag’s main gate. A side extension contained a jail with a few cells.
Today, only a handful of the original camp buildings survive and the Kommandantur is one of them. Considerably revamped, it is now a nice little villa at No. 20 Sandstrasse. 25
MILAG POW ASSN
northern edge of the village, and known as Lager III and Lager IV. When Milag was first formed, Captain Lewis was elected by camp vote to be Senior Confidence Officer (SCO), to act as gobetween for the Germans and the prisoners, with Captain Alfred Hill assisting as Camp Leader (Ratings). Later, with the camp so much expanded, a Management Committee was formed to run the internal administration of the camp. Elected by camp vote, it was made up of Captains Hill, Andrew Cavaye and Robert Findlay-Notman. When, a few months later, Lewis was dismissed by the Germans and sent to another camp, Captain Findlay-Norman was appointed to take his place as Senior Confidence Officer. Although the prisoners had had no say in his appointment, Notman was generally respected by his fellow inmates as well as by the Germans and, although not popular, proved to be an effective administrator and fair and trustworthy SCO. Under Notman’s leadership, the Central Committee controlled various departments, responsible for such activities as lavatory and washroom cleaning, camp kitchen, hospital, Red Cross parcel distribution, etc. The committee’s Camp Office was first located in part of the kitchen hut, but later moved to Block No. 9. In 1943, Captain Hill was dismissed as Camp Leader (Ratings) and replaced by Captain Cavaye. Many inmates judged Cavaye, who had previously acted as camp interpreter, to be too pro-German for their liking. The prisoners held in Milag comprised many different nationalities. Britain’s wartime merchant fleet contained men from every corner of the empire and beyond: Britons, Canadians, Australians, but also Indians, Burmese, Chinese, seamen from Egypt, Malta, Aden, Goa, etc. Added to these came the sailors of captured merchant ships from Allied countries: Norwegian, Dutch, Greek, American, etc. In all, some 29 nationalities were represented in Milag. The mixture of so many nationalities and races from all over the world gave the camp a flavour and character unknown in any of the other prisoner of war camps. All nationalities were put together in the same barracks, except for the Indians and Chinese who were housed in a separate hut, No. 36. The Americans, never more than 71, were all together in Block No. 35.
The camp’s main gate, across the road from the Kommandantur.
26
Assisting the camp commanders of both Milag and Marlag were two security officers, Oberleutnant Güssefeld and his assistant Oberfeldwebel (later Oberleutnant) Schoof. Their job was to keep track of what was going on in the camps, locate any clandestine radios and prevent escape attempts. Güssefeld, who spoke good English, could be seen snooping around the camp at all hours. The Milag-Marlag staff further included a supplies officer, Inspector Heuken; a medical officer, Stabsarzt Dr Trautmann; and an economic officer, Korvettenkapitän Müller. The German guards at Milag were Kriegsmarine servicemen on temporary leave from active duty but, from 1944, they were mostly replaced by older or disabled Kriegsmarine ratings. The majority of these treated their charges with sympathy and understanding, although there were always one or two mean ones among them. The guards were housed at two smaller camps, built a few hundred metres away along the main road at the
A Merchant Marine POW and a Kriegsmarine camp guard smile for the camera near the gate.
ATB
MILAG POW ASSN
Running parallel to the camp’s northsouth axis and connecting with the main road was Skagerrak Road and off this was the German Kommandantur office, opposite the main gate. Running at right angles to this road was Dönitz-Strasse, which led to the Marlag camp, and off this were the fuel and other stores, the camp vegetable garden and a brick-built shower block, which both camps shared. The accommodation huts in the prisoners compound each contained 14 rooms, five large ones on each side of a central corridor and four much smaller end rooms. Fitted out with double-tier bunks, two wooden tables, benches to sit on and a cast-iron coal stove, the larger rooms accommodated 22 men in the ratings’ barracks and 16 to 18 men in the officers’ barracks. The smaller rooms housed only four men. Eagerly sought after, the latter were mostly occupied by barrack captains, committee men and camp workers in the ratings’ huts and by Captains and Chief Engineers in the officers’ huts. Each ratings’ hut thus contained some 235 men, each officers’ hut some 175, the camp’s total capacity being some 5,300. Like Stalag X-B at Sandbostel, the prison camps at Westertimke fell under the overall jurisdiction of the Kommandeur der Kriegsgefangenen (Commander of POWs) in Wehrkreis X (Army Home District X). However, being naval camps, they were run by the Kriegsmarine. Overall commander of the Milag-Marlag complex was Korvettenkapitän Horst Schüre, and from March 1944 Fregattenkapitän Schmidt. Each camp had its own commander, known as the Lageroffizier (Camp Officer). Milag’s first camp commandant was a man named Prüsch. An officer in the peacetime German merchant navy with a reserve commission, he had served on passenger liners and cruise ships. A snob, who liked to show off his connections with British and Prussian aristocracy, he was nicknamed ‘Jimmy Sauerkraut’ by the prisoners. Prüsch was replaced by Major Henzell of the German Marines and he in turn was replaced on May 19, 1944 by Kapitänleutnant (later Korvettenkapitän) Walter Rogge, who would remain camp commandant until the end of the war. An honest man with a good sense of humour, who treated the prisoners fairly and at times ignored orders from higher up if he found them too harsh, he was much respected by the prisoners.
All that remains to mark the spot of the camp gate today is an unobtrusive track leading into the trees.
MILAG POW ASSN
MILAG POW ASSN
For most of its existence the Milag camp held between 2,700 and 4,200 internees, although the occupancy would swell to nearly twice that number in the closing months of the war. As the war went on, some groups departed, and others arrived. On April 6, 1942, a group of 167 Norwegians arrived in the camp. The crews of five Norwegian merchant ships interned in neutral Sweden at the beginning of the war (beefed up with numerous evaders from Gestapo arrest), they had tried to escape to Britain on the night of March 31/April 1 with five other ships (Operation ‘Performance’) and, on detection, had scuttled their vessels rather than let them fall into enemy hands. The Germans had declared them ‘pirates’ and were going to put them on trial and Milag was only an intermediate stage of their deadly journey. They were kept in a separate barracks, No. 24, initially cordoned off from the rest of the camp with barbed wire. Arriving with the Norwegian sailors were six Norwegian women and a little Norwegian girl (locked up in the admin block), and a group of 56 British, mostly volunteers from the 1939-40 Winter War in Finland who had since been interned in Sweden and had tried to escape on board the Norwegian ships. On February 3, 1943, 163 of the Norwegians (one had escaped, the women and the girl had been sent to a camp at Bieberach in November 1942, one man was away in a TB sanatorium, and two were in the camp hospital, and were kept hidden there by the hospital staff until liberation) were removed from Milag, being taken first to Rendsberg prison and later, after their trial, to jails at Sonnenburg and Berlin-Tegel, going on to various concentration camps later on. In all, 43 of them would die in imprisonment, and many would come out so weak that they died shortly after liberation. In mid-1943, 32 Irish seamen were sent from Milag to a labour camp at BremenFarge (where five of them would die from typhus in March 1944). In September 1943 a new group of prisoners arrived in Milag: some 90 Italian merchant seamen — masters, chief officers and chief engineers — who had refused to sail from Italian ports and join the retreating German forces when Italy dropped out of the war. On arrival in the camp they were terrified by the possibility of reprisals from their former enemies, but they soon found that they were accepted as just another group of victims from the war. Daily life in Milag was little different from that in normal POW camps, every day having a routine of roll-calls, work details, food hand-outs, and long spates of boredom.
Muster on the parade ground square in the ratings’ compound. Taking the prisoner count from the roll-call leader is what looks like a Kapitän zur See, identity unknown.
ATB
Captain Robert Findlay-Notman, Senior British Officer in Milag from 1941 to 1945.
The northern half of what was the Milag camp has since the war been developed into a housing estate, occupied by nice bungalows and villas. This is the site of the parade ground as seen from the same direction today. Roll-calls were held at 8 a.m., 1 p.m. and 6 p.m. At first there was only one roll-call for the whole camp, but as the camp population grew, the muster was divided up in three sections, one for the officers and two for the ratings, and each handled by a section of guards under its own Feldwebel. The 1929 Geneva Convention stipulated the rules under which military POWs could be made to work by their captors and also how they should get money in order to be able to buy things. Officer POWs were entitled to receive a regular allowance but were exempt from work (although they were free to volunteer for work in order to gain extra wages) but other ranks had no choice and had to work for their Lagergeld (camp money). Being civilians, not soldiers, merchant seamen officially fell outside these rules, but as far as work and pay was concerned the Germans treated them as if they were ordinary POWs. A day’s work earned a prisoner 40 pfennig. Scores of inmates acquired regular jobs inside the camp, such as working in the kitchen, the parcels office or the camp administration, but many other jobs were assigned on a day-to-day basis. Working parties were selected at the morning roll-call, and divided into a morning and an afternoon shift. A sizable number of prisoners were put to work on labour details outside the camp. Some men loaded trucks at the railway station, others dug ditches, cut wood, or did
domestic duty at the nearby military barracks, but most men were sent to labour at local farms, planting crops, bringing in the harvest, milking the cows, etc. The latter jobs were eagerly sought after for it gave the best opportunity to scavenge some extra food. Food supplied by the Germans was the same as in other POW camps and consisted of two slices of bread and a mug of Ersatz coffee in the morning, a bowl of watery soup made out of potatoes or turnips at noon, and three potatoes in the evening. Sometimes a small amount of margarine, a teaspoon of jam or a small piece of cheese was issued with the bread, and about once a month a bit of horsemeat and some sugar. This meagre diet was hardly sufficient to sustain a man and therefore the main focus of thought in the camp, overriding most other subjects, was the arrival or non-arrival of Red Cross parcels. Red Cross packages on average provided up to 80 per cent of the camp’s food. Parcels were prepared by the various national Red Cross societies and sent in bulk to the International Red Cross Commission (IRCC) in Geneva for onward transport to the German authorities. Until August 1940, it was vitally important for a seaman’s capture to be reported to the IRCC for, until then, parcels were addressed to individual POWs. After that date, parcels were sent in bulk relative to the number of inmates in a camp. The Germans always did their utmost to see to it that the parcels came through and, although 27
WESTERTIMKE
DULAG
TO POW CEMETERY
SHOWER BLOCK
MILAG
MARLAG
MILAG POW ASSN
MILAG POW ASSN
The whole camp was surrounded by a 18-foot-high double barbed-wire fence. A single-strand warning wire ran along the inside of the main fence, about 15 feet away from it.
30
block, where the men were showered and examined for lice while their clothes were being sterilised in an oven. The Milag camp hospital started out fairly primitive with only one small ill-equipped operating room for emergency cases. The hospital initially was in charge of Doctors Karel Sperber, Peter Brownlees and Mitra Mrityunjoy. In November 1942, Dr Sperber, a Czech Jew, was removed from Milag and taken to the concentration camp part of Sandbostel. His place as the camp’s Chief Doctor was taken by Major Robert Harvey, RAMC. Under his leadership, the hospital was enlarged in a new barrack where it eventually comprised a reasonably well-equipped operating theatre, a general ward, two small isolation rooms, a consultation room, rooms for doctors, a dental surgery (the domain of Captain Julius Green), a laboratory (led by Captain A. D. V. Aldridge, RAMC), a storage room, and an attached galley and bathroom. A fine surgeon himself, Harvey carried out numerous successful operations, including many appendix removals and hernia repairs. Assisting Harvey as surgeons were Dr Brownlees, Lieutenant Hugh Singer, RNZN, and Lieutenant Commander Knight, RNVR, while Brian Singleton, a First Radio Officer, assisted as anaesthetist. Dr Green, the dentist, extracted over 10,000 teeth from Milag seamen and manufactured about 900 sets of false teeth. The Milag hos-
pital facilities also served the Royal Navy prisoners at Marlag. Considering the malnutrition, poor sanitation and overcrowding, the general health of the Milag inmates remained comparatively good. The greatest threat to physical well-being was tuberculosis, an infection that has a greater spread among sailors. Aware of the problem, between February and May 1943 the camp doctors carried out a mass X-Ray screening of all 3,000 inmates, which revealed several cases of TB that could then be separated for treatment. The camp hospital had its own tuberculosis ward, but the more serious cases were sent to the POW sanatoria at Reserve-Lazarett Königswartha or Reserve-Lazarett Elsterhorst. Skin diseases were treated at Oflag IX-A/Z Rotenburg and there was a school for blind POWs at Kloster Haina near Bad Wildungen. Although the diet was sometimes near starvation, no inmate of Milag died of hunger. Most deaths were caused by TB, cancer or heart disease. One man, First Radio Officer Walter Skett, was murdered by a German camp guard on the night of May 13/14, 1942. Whilst on his way to his usual trading with a German guard after lights out, Skett was shot without warning by a guard on watch at the kitchen hut, then, while lying on the ground wounded, killed with a second rifle shot.
MILAG POW ASSN
disruptions and delays at times caused great hardship (the winter of 1942/43 was especially difficult when for several months no parcels arrived), in general there was little evidence of theft or tampering. In addition to nutritious food stuffs, including luxuries such as tins of real coffee and bars of chocolate, the parcels contained cigarettes, books, games, musical instruments, and useful stationary such as letter paper and camp diaries. Even the packaging material — the plywood crates in which the parcels were sent and the strings and cardboard of the parcels — found many different uses in the camp. In addition to Red Cross parcels, relatives were allowed to send one letter and one parcel, not heavier than 12lbs, per month. These were forwarded to the Red Cross who added an extra slab of chocolate before sealing the parcels. In general, private parcels took longer to reach the prisoners and were more likely to disappear in transit. The Germans issued no clothing to the POWs and, with their garments and shoes slowly disintegrating as time wore on, many prisoners wrote home asking for pieces of clothing to be sent and many a private parcel contained warm cardigans, socks and underwear. Prisoners on outside working parties naturally took any opportunity to forage for food. They stole potatoes or sugar beet from fields or clamps and bartered eggs or sausages with villagers or guards in exchange for soap, cigarettes or chocolate from the Red Cross parcels. These outside acquisitions were forbidden and anyone caught bringing goods into the camp risked a stint in the punishment cell. Some guards were known to turn a blind eye to such smuggling but most prisoners took the safe course and ate the food raw wherever found. Like most POW camps, Milag had no sewage or drainage system and the lavatory cesspits had to be emptied manually, the liquid being hand-pumped into a wagonmounted tank called the ‘Smelly Nellie’ and then released onto the fields outside the camp as fertiliser, and the solid waste being scooped out and deposited into the ‘SevenFunneler’ (a cart holding seven barrels). A job disliked by everybody, it was naturally used to punish offenders against camp rules or, if none were available, assigned to those arriving last at roll-call. Despite regular cleaning, the lavatories became infested with flies in the summer, which, together with the regular plague of sand flies, caused misery in many a barrack. Every summer the huts would be evacuated and fumigated with sulphur, but they were never entirely without bugs. Every couple of months the whole camp would be formed into groups and taken to the nearby shower
Especially during winter the camp took on a bleak and muddy appearance. This is the view from Barrack No. 26. The huts across the road are Nos. 19, 18 and 3.
‘Smelly Nellie’, the wagon-mounted tank used to dispose of the liquid from the camp lavatory cesspits. Being detailed to the latrine gang was generally considered to be one of the most unpleasant chores in the camp.
ATB
Above: Today a large villa occupies the site of the cemetery. Remarkably enough, the small chapel survives intact inside the house, the whole structure having been incorporated into its kitchen. Right: A small plaque mounted on the entrance post recalls the site’s former use. After the war, the 40 sailors and merchant seamen men buried in the POW cemetery were transferred to the Becklingen CWGC War Cemetery located some 65 kilometres to the south-east near Soltau on Lüneburg Heath.
ATB
To bury the dead from both Marlag and Milag, a small cemetery was set up in a plot on the far side of Marlag. Between January 1942 and April 1945, 40 men were buried there, 36 of them British Merchant Navy seamen. Milag’s camp population included various Catholic and Salvation Army missionaries, taken prisoner as passengers, and these attended to the spiritual needs of the inmates. One Army padre, the Rev. White, came from another camp to assist Anglican Padre E. Ball and Brigadier Best of the Salvation Army. After many requests had been turned down, the clergymen finally secured permission to turn one of the empty barracks into permanent chapels, the Catholic and Anglican congregations each getting a separate room. In the Catholic end, a chapel dedicated to Stella Maris, Our Lady of the Sea, was set up in July 1942, embellished with paintings of the Sainte, coloured window panes, wood-carved altar rails, a Sanctuary lamp, etc. Two masses were held every day, as well as evening prayers. The Brothers of the Sacred Heart conducted baptisms and gave religious instruction to a number of converts. Milag’s camp canteen, located at one end of the ratings’ dining and recreation barracks, was run by John (‘Jet’) Watson. Allowed out under guard to visit suppliers, and through some astute buying, Watson managed to keep the canteen reasonably well stocked with fresh fruit, eggs, beer, nonalcoholic Brauser beer, lemonade, tobacco, matches, toilet paper and a wide range of other necessities which the prisoners could buy with their Lagergeld (camp money). In addition to the beers and soda available from the canteen, the inmates consumed considerable quantities of ‘hootch’ — homemade alcohol. It was usually made from sugar beet smuggled in by outside working parties, plus raisins and prunes from Red Cross parcels and distilled in improvised stills, usually made from beer barrels stolen from the canteen. Hootch was a commodity that could be drunk, sold or used in bartering. Brewing was forbidden and the guards would confiscate any still they could find, but the practice could never be erased. Some prisoners drank too much and became thoroughly drunk. Those making a nuisance of themselves risked a couple of days in the camp prison. Despite warnings from the camp medical officers, consumption of badly distilled alcohol caused several disasters, men being paralysed or blinded by its poison or even dying from it. Milag’s camp theatre was of a level attained by few other POW theatres during the war. The Merchant Navy Theatre, or MNT as it was known, was founded by Cyril Mann and Bill Campelton, who had already set up a theatre at Sandbostel. Their first production, which premiered on December 24, 1940, was Aladdin’s Lamp. Milag’s theatre crew included several professional entertainers from the pre-war entertainment world, such as actor Milo Lewis, harmonica
MILAG POW ASSN
Right: The small cemetery created for inmates of both Milag and Marlag lay just about 300 yards west of the latter (see the aerial on pages 28-29). This is its wooden lattice lynch gate, built by a POW work detail. The cemetery had two plots, a Christian one on the left and an Indian (Muslim) one on the right. A small stone chapel was built at the end of the central lane.
MILAG POW ASSN
Right: The interior of the camp’s Stella Maris Roman Catholic Chapel. The drawing comes from the camp diary of Brother Joseph Henry (Joseph Laflamme), one of the Sacred Heart missionaries imprisoned in Milag, who was the choir master of the chapel. 31
MILAG POW ASSN
The Orama Band, one of Milag’s professional musical groups, on stage in the camp theatre in barrack No. 27. The whole 18-man orchestra was captured when the troopship Orama was sunk off Narvik on June 8, 1940. Milag also featured a camp cinema. Known as the Nimmodeon, after its enthusiastic manager Robert Nimmo, it showed movies and newsreels rented, together with a projector, from the Germans. Tickets were five pfennig. Screenings were initially in the officers’ dining hall, but in October 1943 the cinema took over the galley barrack vacated by the Indian seamen after their transfer to the Inder-Lager (see below). Between October 1943 and February 1945, a total of 24 sound films were shown there, most of them German-language, but four of them in English. The Milag Sports Association organised various sporting activities on the flat open sports ground at the southern end of the
MILAG POW ASSN
player Tommy Reilly and Vic Hammett and his band (all of them trapped and interned in Germany at the beginning of the war), the 18-man Orama Band from the Orient Line troopship Orama, sunk off Narvik on June 8, 1940, Shakespearian actor Henry Mollison, etc. There was so much talent in the camp that the MNT boasted some 200 members divided over three companies, each with its own producer. Under Mollison’s and Lewis’ direction, the MNT went from strength to strength. Originally, rehearsals and performances took place at one end of the officers’ galley, where an existing small stage was extended and improved, but in early 1943 the prisoners secured permission to turn Barrack No. 27, an empty hut in the ratings’ compound, into a permanent theatre. Built by the available ships’ carpenters and electricians, and festively opened on April 19, 1943, it included a stage, complete with floods and spotlights and orchestra pit; a props room; hairdressing room; box office; and an auditorium with 352 seats. In all, between December 1940 and April 1945, the MNT staged 49 productions. The German camp authorities, realising the value of having so many men channel their energies in harmless activities good for camp morale, allowed actors, set makers and stagehands to be absent from roll-calls. In addition to the MNT, there were other groups providing entertainment for the prisoners: the Chordites male voice choir, led by Jimmy Rapp, which grew from 8 to 45 singers and included a large Welsh contingent; the Skylarks concert party, led by Micky Marks on piano and with coloured guitarist Joe Lyons, James McBride on accordion and Dave French on trumpet; and the Plantation Choir guitar quartet led by Carlos de Pass.
ATB
MILAG POW ASSN
POWs skating on the camp’s fire-pond located between Barracks Nos. 35 and 36.
camp. Football was the most popular game, fielding ten clubs, each with first, second and third division teams, whose matches drew large crowds of spectators. There were also three cricket leagues, each having its first, second and third team; a league of eight baseball teams, made up of American seamen with an odd British player thrown in; and a league of five rugby teams. Teams were named after well-known clubs in each sport, and there were tournaments, derby matches and the occasional match against teams from Marlag. There were a number of professional and amateur boxers in Milag and boxing tournaments were started in the summer of 1942, first in the open air and later on in the camp theatre block. In winter, prisoners even went ice skating. Under the direction of one of the Canadian prisoners, they produced home-made skates. A part of the sports ground was encircled by low bunds, flooded by means of irrigation pipes, and turned into an ice rink large enough to hold ice-hockey matches. More intellectual activities were provided by the Camp Library, led by Second Officer W. G. Ellis, and stocked with books sent by the Red Cross, the YMCA and other agencies and with books received by individual prisoners and then donated to the library. To keep the men busy, senior officers held classes in several sea-going skills, such as navigation, cargo handling, engineering, mathematics, preparing applicants for Board of Trade examinations. Text books and examination papers were obtained via the Red Cross, and many men sat and passed written parts of the examinations for higher grade officers’ certificates while at Milag.
Later a larger ice rink, large enough to hold ice-hockey matches, was created by flooding the open plot behind Barrack No. 35. See the plan opposite. 32
Today the location of the fire-pond is marked by a shallow depression in the ground, heavily overgrown. The fire-pond and ice rink are both visible in the aerial on pages 28-29.
N
MILAG POW ASSN
In the evenings, the schoolroom barracks took on a completely different role and became a gambling casino. The camp’s Entertainments Committee rented out tables to enterprising individuals and groups. Gambling games included poker, fan-tan, roulette, wheels of fortune, and even a horseracing game, the latter consisting of model horses being moved across a table race-track at the throw of dice. The game was run by the Milag Jockey Commission. Bets could be placed with six Tote clerks, odds were shown, and all bets were recorded by a team of cashiers, who calculated the odds to be paid. A percentage of the Tote profits were put in a Red Cross Fund. Many of the prisoners regarded the Lagergeld as ‘Monopoly money’ and, not realising that the money paid out by the Germans would later be deducted from their Ministry of War Transport seaman’s back pay, squandered large amounts of it with betting and gambling. Unlike Armed Forces POWs, Merchant Navy POWs did not fall under an overall rule of strict military-style discipline. Crews, whilst on ship, obeyed their officers but, once ashore, had no obligation to do so. Order in the camp was kept by mutual agreement. However, discipline in Milag was certainly different from that maintained in Marlag. Merchant seamen have always included a complement of rough characters and this affected social and moral conventions in the camp. Fights and brawls among inmates, drunkenness, undesirable activities such as gambling and clandestine alcohol-distilling, were phenomena that occurred in every camp, but appear to have been distinctly more frequent in Milag. Reports of homosexual activity being rife in the camp and even rumours of the existence of a homosexual brothel in one of the huts, although difficult to substantiate, may indicate a certain moral laxity. The camp population certainly included a ‘criminal element’, who carried out nightly break-ins on the parcels hut or raided the gambling room, seizing all the money on the table. The senior officers and Central Commission did their best to maintain discipline and order, and the prisoners themselves punished anyone caught stealing from fellow-inmates with a good beating, but the evil and abuse could never be altogether expunged. Beginning in 1942, the Germans initiated efforts to persuade British POWs to turn traitor and join a unit on the German side — the British Free Corps. The man behind the Corps was a British turncoat, John Amery (renegade son of Leopold Amery, then Secretary of State for India and Burma). Despite German support, the widespread distribution of propaganda leaflets among POWs, and intensive recruiting drives, the scheme never really got off the ground and the British Free Corps remained a paper unit with very few members. In order to lure more POWs into joining the Corps, the Germans created special ‘holiday camps’ where men would be sent for a month, enjoy good treatment and food, and hopefully be seduced to change sides. A number of Milag inmates took clever advantage of this scheme, pretending an interest in joining, benefiting from a few weeks of luxury, then ‘changing their minds’ and be returned to Milag without prejudice. Of the about 70 men finally enlisted into the Free Corps, seven were merchant seamen or men who came from Milag. The first was Kenneth Berry, a 17-year-old sailor captured on the Cymbeline, recruited by Amery himself in early 1943. Two others were Alfred Minchin, an Able Seaman from the Empire Ranger, and Fred Lewis who left Milag for the Stalag III-D/517 ‘holiday camp’ at Genshagen in May 1943 and then volunteered in July. Minchin and Berry later returned to Westertimke several times as recruiters hoping to enlist others. Captain Notman, the Senior Confidence Officer, did his best to
A sketch plan of Milag drawn up in 1945. Compare with the aerial on pages 28-29. obstruct their efforts, ordering leaflets to be handed in and warning that he would report any traitor to the British authorities. Despite his admonitions, Minchin and Berry managed to recruit two more men in May 1944: Ronald Voysey, a cabin-boy from the British Advocate, and Herbert Rowlands, an oiler from the Orama. In June they returned to Milag to pick up two more recruits, Dennis ‘Blondie’ Leister and Eric Pleasants. The latter were not merchant seamen, but small-time crooks from the Channel Islands, who had been arrested by the Germans and, pretending to be merchant seamen, had been sent on to Milag in early 1944. During the war there were several repatriations of elderly, disabled and physically or mentally unfit prisoners from Milag. Such repatriations, regulated by Article 86 of the Geneva Convention, were carried out through the International Red Cross and candidates had to be examined and approved by a Mixed (German-Swiss) Medical Commission, which visited the camp on various but infrequent occasions. There were also a few exchanges of fit, healthy men against captured Germans. The first exchange from Milag took place in March 1943, when 24 cabin and messroom boys were returned home via Jeddah in Saudi Arabia. On June 21, 103 healthy seamen left on an exchange through Portugal and on October 16 a party of 50 elderly and some seriously-wounded inmates departed
to join a group of 4,200 British POWs from various other camps to be repatriated through Sweden. That same month, four men were released via Spain. In March 1944 five Indian seamen were exchanged through Ankara in Turkey, and on May 13, 28 men left to be repatriated through Spain. A final repatriation occurred on January 13, 1945, when 80 disabled seamen and 64 American captains, officers and ratings from Milag and other camps left to be released through Switzerland. In all, between 1941 and 1945, 517 men were returned home from Milag in at least eight group repatriations and exchanges or individual releases. With so many radio officers and wireless operators present in the camp, it is not surprising that several illicit radios were constructed. Frederick Warner, Radio Officer of the British Strength, had been on the Marconi development staff and he built numerous ultra-short-wave receivers and even, shortly before liberation, a transmitter. Quartz crystals were obtained from either the coal supplies or from the ashes strewn on the camp pathways. At one time there were apparently 17 home-made sets in the camp. One was secretly passed to Marlag in March 1944. The best set was a mains-powered Volkssender (People’s Radio), stolen from the village doctor in 1943 and kept hidden in the camp library. Being able to listen to the BBC kept the prisoners informed about the progress of the war. 33
ATB
ATB
houses, now used as homes and modernised beyond all recognition. This is what used to be Block No. 13, today No. 7 Im Bogen. Right: The adjoining house, formerly Block No. 13a, now No. 9 Im Bogen.
ATB
Left: In addition to the Kommandantur, six more of the original camp buildings survive, but they are not grouped together or easy to find. Hidden among the villas in the housing estate that today occupies the northern half of the camp are two former wash-
ATB
Above: Tucked away inside the copse that now covers the southern half of the camp are two more of the wash-houses. This is Block No. 31, now also in use as a dwelling. Below: Block No. 32, partly lived-in, partly used for storage.
34
Despite German postal censorship, considerable information regarding Milag reached Britain through written correspondence. Captain Green, the camp dentist, who had connections with British Intelligence, included coded messages in his letters home. Captain Notman, the Senior Confidence Officer, appears to have had secret communications with the British authorities as well. MI9, the secret service created in 1940 to help soldiers evade or escape, and other intelligence agencies, communicated with the prisoners through coded messages in letters (although most of these went to Marlag rather than to Milag) and through coded messages in BBC broadcasts. All through the war, there were various escape attempts from Milag, either by individuals or by groups, but few were successful. Shortly after their arrival in April 1942, the Norwegian seamen captured during Operation ‘Performance’ began a tunnel hoping to escape before they were transferred elsewhere. The tunnel started in Barrack No. 19 (to where the Norwegians had temporarily been moved), but it was discovered after a week and before digging got very far. One of the Norwegians, Ordinary Seaman Einar Sørensen from the Buccaneer, made a successful escape in August, jumping from a train near Berlin that was carrying him from Milag to a security camp and reaching England in September 1942.
JEFFREY SMITH
In June 2004, ex-Milag prisoners George Smith and Ken Fuller returned to Germany, accompanied by George’s nephew Jeffrey Smith, to visit the sites of their wartime imprisonment. George, aged 16 in 1940, and Ken, 18, had been ships mates aboard the troop-carrying ship Orama, sunk off Narvik by the Admiral Hipper on June 8, 1940. Captured together with 278
By December 1944, Milag contained some 4,200 nationals of 26 different countries, of all ranks from captains to stokers, as well as a few passengers from sunken vessels. Conditions in the camp were slowly getting worse. Beds and bedding had become short and the
huts dilapidated; the lighting and fuel supply, which had both always been poor, had deteriorated still further. When the pumps for the camp water supply broke down, water had to be carried into the camp from nearly a kilometre away.
JEFFREY SMITH
Between March and August 1943, the inhabitants of Barrack No. 16, led by Second Engineer John Morris, dug an escape tunnel. Starting at one end of the hut and about 160 feet long, it ended in a potato field some 35 feet beyond the wire. A group of inmates called ‘The Thugs’ gathered clothes, food, information and maps for the potential escapees, trained them to be physically fit, and coached them on what to expect once out. On the night of August 6/7, 12 men made a successful escape through the tunnel. Their absence was discovered the following afternoon, and all men were caught within two weeks, most having got no further than 15 kilometres from the camp. Recaptured escapees were punished with three weeks solitary confinement, followed by transfer to a tighter-security camp. A second tunnel was begun in April 1944. It started in a rabbit hutch that was set into the ground, a sliding panel in the rear wall giving access to a small chamber that was the start of the tunnel proper. Ready in August, it was 120 feet long. On the night of August 18/19, five men escaped through it. Again, the tunnel was discovered before it could be used again, and all the escapees were soon recaptured. As far as is known only one man made a successful ‘home run’ from Milag itself. In August 1943, Arthur H. (‘Dicky’) Bird, Third Mate of the Australind, after carefully planning and preparing his escape all by himself, made off from his farm work detail, took three days to walk to the small port town of Harburg on the Elbe, convinced some Swedish sailors to smuggle him aboard their ship, and successfully reached the safety of Sweden where he reported to the British Legation in Stockholm.
others of the crew, they spent the rest of the war as POWs, first at Sandbostel and then at Westertimke. George was a member of the original working party that started construction of the camp in the summer of 1941. Here (L-R) George, Ken and Jeffrey pose in front of Block No. 32, one of the buildings that George helped to erect.
Ken and George at another of the original buildings surviving today: the shower block, located midway between Milag and Marlag along what was then known as DönitzStrasse (see the aerial photo on pages 28-29). POWs of both camps were taken here on a rotation basis and in groups to shower and have their clothes deloused. After the war it was turned into a canteen for personnel of the Timke-Kaserne (the old Marlag camp turned Bundeswehr barracks) but today it is privately owned and stands empty. (Ken Fuller passed away on May 18, 2005.) 35
The Marlag camp for captured Royal Navy personnel, located less than half a mile south-west of Milag. It was divided into two compounds, ‘M’ (for Mannschaften (ratings) but later given to petty officers and leading hands) and ‘O’ (for officers), the two parts being separated by a section which contained the camp’s main gate, its Kommandantur and administrative block, and a large coal dump.
36
brick-built shower block along DönitzStrasse; Milag’s camp hospital, and the camp cemetery. The German commandant in charge of Marlag (‘O’ and ‘M’) was Kapitänleutnant Backhausen. Senior British Officer was Captain D. Graham Wilson, commander of the armed merchant cruiser HMS Vandyk, sunk off Narvik on June 10, 1940. For Marlag ‘O’ it was Lieutenant Commander Jackson and, for ‘M’, Chief Petty Officer Graham, both submariners. The sick bay was in the hands of Lieutenant Commander Knight. By February 1943, there were some 150 officers and 50 orderlies in Marlag ‘O’, and about 650 chief petty officers, petty officers and leading hands in Marlag ‘M’. These included quite a few members of the American, Canadian, Australian, Norwegian,
ATB
MARLAG NORD The Marlag camp for Royal Navy personnel was built at the same time and in the same way as Milag, a workforce from the Marlag compound at Sandbostel arriving in June 1941 to expand and fence in an existing camp of Westertimke’s Luftwaffe training airfield. Located on the same side of the main road as Milag, but a bit further to the west and further away from the road, its north-eastern corner was only 300 metres from the south-western corner of Milag. Of about the same size as Milag, it consisted of two compounds, one for the officers (Marlag ‘O’) and one for the other ranks (Marlag ‘M’), the two sections separated by a 100yard-wide internal gap, which comprised the German compound and a large coal dump. Naval ratings were used by the Germans in the construction of the camps and, for a while, in farming and forestry work in the neighbourhood, but gradually they were all transferred to Lamsdorf, Stalag VIII-B, and other stalags, from where they would be assigned to working parties. The last went in mid-September 1942. Two days after this, all remaining personnel in Marlag ‘M’ — petty officers and leading hands — were moved over to ‘O’ compound, whilst wash-houses and other buildings were still to be completed. They were with the officers for almost two months, until November 12, by which time ‘M’ compound was ready and they were returned. In its final form, the camp comprised 31 barracks. Compound ‘O’ had ten barrack blocks: three accommodation huts (two for the officers and one for the orderlies), a kitchen/dining hall, a wash-house, a lavatory block, a sick bay, canteen, theatre (also used for religious services and classes) and a spare hut. Also included in this enclosure were a fire-pond and a football pitch. Compound ‘M’ had 13 larger huts (ten of them accommodation blocks) and eight smaller huts. Marlag was organised in the same way as Milag and shared several facilities with it: the
Greek and other Allied navies. Part of one hut was occupied in the latter days by Free French Navy personnel. In September 1943 a few Italian Navy officers arrived, taken prisoner after the surrender of Italy. In September 1944, 400 civilians from Ilag Giromagny in the south of France took over a number of unoccupied huts adjacent to those of the remaining ratings. Naval prisoners had a long record of escape activity and the searches of the camp by German security personnel were always severe. Marlag became somewhat notorious for the number of escape attempts made from it. An escape committee under Commander Beale received valuable help from England. Escape equipment, sent by MI9 and hidden in seemingly innocent private parcels, began to arrive in Marlag in July 1942. The list of items sent between then and April 1945 included two tiny radios, compasses, foreign currency, two cameras, a typewriter, date stamps, 283 maps and plans, 135 forged passes and a large supply of files and hacksaw blades. The biggest escape attempt was via a tunnel (named ‘Mabel’) dug underneath one of the wooden huts in the ‘O’ compound, the exit to be a few yards outside the outer wire fence. The few men who got out were soon recaptured. One of the more legendary escapes was performed by Lieutenant David James. Noting the bewildering number of uniforms to be seen in wartime Germany, James decided to escape in full naval uniform, carrying a Bulgarian naval identity card in the name of ‘I. Bagerov’ — ‘a name no doubt not chosen at random! James slipped away from a bathing parade on December 9, 1943, his place being taken by ‘Albert RN’, a dummy made by Lieutenant Robert Staines and captured war artist John Worsley. In a lavatory, James changed into his smartest kit, which his family had sent him, and got as far as the dock gates at the Baltic port of Lübeck before being recaptured. After a spell in solitary, he performed the same trick — this time disguised as a Swedish sailor — and made his way to Danzig, where he was smuggled aboard a Swedish ship that took him to Stockholm. James was the only man to make a successful ‘home run’ from Marlag. Among those held at Marlag were three holders of the Victoria Cross: Lieutenant Commander Stephen Beattie, awarded the VC for his role in the St Nazaire raid on the night of March 27/28, 1942 (see After the Battle No. 59), and Lieutenants Donald Cameron and Godfrey Place, given the award for their midget submarine attack on the Tirpitz on September 22, 1943 (see After the Battle No. 17).
When it became a Bundeswehr military barracks in 1963, the Marlag site changed its appearance considerably, many of the wartime huts being pulled down and other more-permanent buildings erected in their place. This is the main entrance as it looked when we photographed it in 1975.
ATB
ATB
Left: Closed by the Bundeswehr in 1996, the former military domain is now a fledgling industrial estate known as the TimkePark. However, a few stone-built structures from the original
INDER-LAGER In September 1943, the Germans decided to separate the 630-odd Indian, Adenese, Burmese and Chinese seamen in Milag from the other prisoners. They were put in a newly-erected camp, located in the woods on the other side of Westertimke, and which was known as Lager III or the Inder-Lager (Indians Camp). It was a self-sufficient camp, with its own canteen and theatre, but without a hospital, sick inmates being treated at Milag’s hospital. Chief Officer Herbert Jones, a Brit who could speak Hindustani, volunteered to leave Milag and join the Indians as their Confidence Officer. In general the inhabitants of the InderLager were worse off than their European fellow-prisoners. Not accustomed to the cold climate of northern Germany, they suffered more from the lack of food, fuel and sufficient clothing. Being mostly of Muslim faith, their religion forbade them to eat the nonHalal meat provided by the Germans (a deficit that could hardly be compensated by the few camp-bred chickens and rabbits) and required them to observe Ramadan and pray five times daily. Jones pleaded with the German camp authorities for extra blankets, fuel
and rice, filed protests with the Swiss Protecting Power, and even wrote to the Grand Mufti of Darul-Alum Deoband, asking for a relaxation of religious rules, in vain as it turned out. The inhabitants of the InderLager fared badly from a scarcity of Red Cross parcels and letters from home, and their contact with their families was further handicapped by the German decree in July 1944 that all letters home should be written in English. Not surprisingly, the death rate among the Indians was higher than among Europeans. Of the 40 deaths recorded among the naval prisoners at Westertimke, ten were men from the Inder-Lager. The number of inmates in the small camp decreased further for several other reasons too. In May 1944, 48 Chinese seamen were removed from the Inder-Lager to a special work camp for Chinese internees in Hamburg-Wilhelmsburg. An unknown number of them died from the harsh forced labour they were subjected to there. A number of pro-German Indian seamen were transferred to Königsbrück to join the Free Indian Legion. By late 1944 there were 538 inmates left in the InderLager.
ATB
DULAG NORD Some 300 yards west of Milag, along Dönitz-Strasse and opposite the shower block, was a further, much smaller POW camp — Durchgangslager Nord (Transit Camp North), or Dulag Nord for short. Like all Dulags, it was used for receiving, registering and interrogating new prisoners. The bombing of the original Dulag Nord at Wilhelmshaven in February 1942 had caused the facility to be transferred to Westertimke. It was here that the about 200 Army Commandos and Royal Navy men captured after the St Nazaire raid were initially imprisoned. Arriving on April 8, 1942, they were kept here until the Germans decided to break them up, Navy and Army personnel, officers and men, each being sent to separate camps. The Norwegians from Operation ‘Performance’ were also kept here for a while. Officially no contact was allowed between those in the Dulag and the other two camps but surreptitious semaphore signalling enabled prisoners passing the Dulag to communicate with those inside. Milag-Marlag prisoners sentenced to solitary confinement were locked up in Dulag’s barbed-wire-enclosed two-cell prison block.
POW camp still stand, like this one – the wash-house, in the centre of what was once Compound ‘O’. Right: The kitchen/ dining room block in the north-west corner of Compound ‘O’.
From September 1943, the Indian, Adenese, Burmese and Chinese seamen in Milag were put in a separate little camp of their own, called the Inder-Lager. Comprising four accommodation huts, it was located on the Westertimke side of the
main road just west of the village (see the plan on page 25), but today no trace of it can be found. However the farm nearest to its site still has what clearly appears to be a section of an original camp hut. 37
ATB
Looking east along Bäckerstrasse in Zeven today. The timber-framed house in the left background survives to form a link with the past. By the first week of April, the distant rumble of artillery gunfire could be heard. The Germans knew the end was coming too. There were no more roll-calls and all working parties had stopped. On April 7, the 38 Irish seamen who had been taken away from Milag to work at Bremen-Farge two years ago, returned to the camp. On April 9, great excitement engulfed the camps when the inmates noticed that the guards and machine guns from the watchtowers had disappeared. That afternoon, Korvettenkapitän Schmidt informed the
Senior British Officers at Milag and Marlag that the Germans intended to evacuate all Armed Services POWs — the Royal Navy and RAF prisoners — on foot to Lübeck, emptying Marlag and Dulag and leaving Milag and the Inder-Lager to be handed over to the Allies. Most of the existing guards were taken away and replaced by some 50 others, mostly elderly men, who were ordered to stay and surrender the merchant navy prisoners. However the German evacuation plans turned into a dismal failure. With the regular guards gone, hundreds of Marlag inmates left
MILAG POW ASSN
LUFTBILDDATENBANK ING.-BURO DR. CALIS
LIBERATION By early 1945, with the tide of war running against Germany, conditions in Milag-Marlag became more difficult. The winter of 1944/45 was severe, with freezing temperatures, cold winds and snow covering the camp. Red Cross parcels had stopped coming through, increasing hunger and deprivation among the inmates. In early February, new prisoners began arriving in the Westertimke camps, adding to the overcrowding. The first new arrivals were groups of Bulgarian and Rumanian POWs, marched here from camps further to the east lest they fall in the hands of the advancing Soviet armies. On February 4, 1,916 RAF officers, evacuated from Stalag Luft 3 at Sagan (see After the Battle No. 87) on January 28, entered Milag-Marlag, followed later in the evening by another group of 1,050. To house the new arrivals, the Royal Navy men in Marlag ‘M’ were moved at short notice into Marlag ‘O’ or Milag, freeing their own compound for the RAF men. In Milag the church, library and school barracks had to be reverted to accommodation blocks to house the newcomers. The next day, February 5, the Germans cut the food rations by 25 per cent. With over 3,000 extra mouths to feed, near-starvation reigned in the camps until March 5 when a consignment of Red Cross food parcels finally reached Westertimke to somewhat alleviate the situation. In late March, having heard that the western Allies were across the Rhine, Milag’s parcels committee decided to hand out an extra issue of parcels from the emergency supply. By early April 1945, the Allied armies in the west had advanced well into Germany and were approaching Bremen (see After the Battle No. 135). Through their secret radios, the inmates of the Westertimke camps were well informed about the progress of the war and knew that liberation could not be far off.
IWM AP277867
Right: By April 1945, with the western Allied Armies streaming across northwest Germany, the inmates of MilagMarlag were daily expecting their liberation. On April 24 the British Guards Armoured Division reached the town of Zeven, just 13 kilometres east of Westertimke. Associated Press photographer Worth pictured a Bren carrier and infantrymen of the Welsh Guards advancing through the town. Two days later the Guards dispatched a tank/ infantry force westwards with the specific mission of liberating the POWs at Westertimke.
Fearing strafing attacks from friendly fighter-bombers the prisoners had already made sure that the Allied pilots would recognise the camps as housing prisoners of war. After the Royal Navy prisoners had been marched out of Marlag on the 10th, those that remained behind painted ‘POW GONE N-E’ in big white letters on the roof of the huts in Marlag ‘O’, and ‘MERCHANT NAVY STILL HERE’ on the roofs in Milag. A photo recce aircraft of the US 106th Group photographed the camps and the painted roofs on April 14. 38
On April 24, camp commandant Walter Rogge and his supplies officer, Inspector Heuken, left Milag-Marlag to contact the British under a white flag. They carried a letter from Generalleutnant Eberhard Rodt of the 15. Panzergrenadier-Division, proposing a truce so that the POWs could be evacuated out of the fighting zone. Here Rogge (in front) and Heuken, both blindfolded, are being escorted to 32nd Guards Brigade HQ. However, their proposal was turned down and both men ended up being prisoners of the Guards.
IWM BU4656
During the night of April 27/28, the Welsh and Scots Guards reached Westertimke and liberated Milag and Marlag. The following morning British Army Film and Photo Unit photographer their camp during the night and hid in the woods. Others entered Milag and were hidden there by their fellow-prisoners. Some even received help from the local villagers and found hiding places at neighbouring farms. At Marlag’s morning roll-call the following day, April 10, only 187 of the 670 inmates from ‘M’ compound turned up. Most of Marlag’s inmates — including Captain Wilson, the Senior British Officer — were rescued from the march, only a small contingent leaving under Captain Baker that afternoon. Just a few kilometres out, near the town of Zeven, the prisoners column was accidentally strafed by a pair of P-47 Thunderbolts, killing two Naval officers and wounding several men. (The column would eventually arrive at the Bad Schwartau artillery barracks, north-west of Lübeck, on April 23, where they would be liberated.) On April 11, the Marlag men who had evaded the evacuation painted ‘POW GONE NORTH-EAST’ in big white letters on the roof of their huts, then vacated Marlag and transferred themselves to Milag. To avoid further accidental strafing by friendly aircraft, the Milag inmates painted ‘MERCHANT NAVY PRISONERS STILL HERE’ on their barrack roofs. On April 14, delegates from the Swiss Embassy and the Red Cross visited the camp.
Sergeant Gordon arrived to picture the freed camps. His first shot was taken from the guard tower in Milag’s north-west corner overlooking the parade ground in the officers’ compound.
On April 16, the Marlag and Dulag compounds filled up again, a contingent of 1,940 French and Polish POWs and another of 1,800 American POWs crowding into the former and about 275 newly-captured British soldiers from Sandbostel under Major Harcourt entering the latter. Milag’s camp commander, Korvettenkapitän Rogge, assumed command of all Westertimke camps, which by now contained some 8,000 prisoners. He reassured Captains Wilson and Notman that he did not intend any further evacuations and would stay until he could hand over the prisoners. However, by April 19, with the front moving from Bremen to Hamburg, it looked as if the prisoners would be caught up in the fighting. The 15. Panzergrenadier-Division moved into the area and began preparing for defence. In direct contravention of the Geneva Convention, tanks, self-propelled guns and troops took up position in the immediate surroundings of the camps. With worries mounting, the POWs dug slit trenches on the parade ground and in the sports field, and Captain Wilson formed a Royal Marine guard who began a permanent patrol of the perimeter, both to prevent German front-line troops from moving into the camp and to keep inmates from leaving it. The Allied formations advancing towards Westertimke were the 53rd (Welsh) Division
and the Guards Armoured Division. Over the next few days, several parties of British soldiers, captured in the fighting, were brought into the small Dulag camp. Some were wounded and were transferred to the Milag hospital. On the 24th, the Kommandantur compound and Lagers III and IV were turned into a field hospital for wounded German soldiers. That day the Guards Armoured, after heavy fighting, captured the town of Zeven, only 13 kilometres east of Westertimke. On the 26th, the division’s 32nd Guards Brigade despatched the Scots-Welsh Guards Group on a foray to the west, their orders being to seize the high ground north of Westertimke and liberate the POW camps that were known to be in the village. The Guards met heavy opposition along the road all day but by nightfall had reached the village of Ostertimke, just four kilometres from Westertimke Meanwhile there had been developments at Milag-Marlag. During the morning, the German guards surrendered to Captain Wilson. Then at 1 p.m. Korvettenkapitän Rogge and his supplies officer, Inspector Heuken — at the request of Generalleutnant Eberhard Rodt of the 15. Panzergrenadier-Division — left Milag to contact the British under a white flag. They carried a letter from Rodt proposing a ten-hour truce, to begin at 3 p.m.
IWM BU4657
Right: On April 19, with liberation still over a week away and with the situation at Milag-Marlag becoming more chaotic by the day, Captain Graham Wilson, the Senior British Officer of Marlag, had formed a number of reliable Royal Marine prisoners into a guard who began a permanent patrol of the perimeter, both to prevent German troops from moving into the camp and to keep inmates from leaving it. The Royal Marines were able to maintain at least some order and discipline. On the 28th, with actual liberation having come, SubLieutenant Micky Wynn of IS9 (WEA) Team No. 4, who had arrived with the Guards to regulate matters in the camp, issued the Marines with rifles from the German guardroom and instructed them to mount an armed guard over the camp. Here the RM party marches off to take up their posts. 39
IWM BU4658
and to be used to move the 8,000 prisoners through the lines and out of the danger zone. Regarding the proposal as just a ruse to gain time, Brigadier George Johnson of the 32nd Brigade turned it down on the spot. Despite their protests, Rogge and Heuken were not allowed to return, but detained as prisoners at the Guards Divisional HQ. Next morning, April 27, the Guards resumed their advance. Fierce fighting took place for possession of Kirchtimke, the last village before Westertimke, with many British tanks being blown up on mines. Back at Milag-Marlag, it was clear to the prisoners the German troops had little eye for the protected status of the camps: tanks took up position along its eastern side, mortars and Nebelwerfer multi-barrelled rocket launchers were firing from close by, and an artillery observer was making ready to use one of the guard towers until called off by one of the German camp officers. In the afternoon a Allied light aircraft flew over the camp and
A large group of happy prisoners look up to Sergeant Gordon as he pictures them from the roof of the Parcels Office overlooking the roll-call square in the ratings’ compound. The huts in the background are Nos. 4 (left) and 3 (right), with Nos. 29 and 28 visible in between. dropped a message telling the inmates to stay clear of the officers’ compound at the northern end of the camp, as the British attack would come in from that direction. Many POWs took refuge in the trenches dug in the football field at the other end of the camp. Late in the afternoon the Guards despatched a tank/infantry force (No. 3 Squadron of the 2nd Welsh Guards and G Company of the 2nd Scots Guards) for the final push to Westertimke. Reaching Lager IV, which the Guards knew to be the camp housing the German guards, the tanks set most of the huts on fire with their Besa guns and the artillery shelled the village, after which the infantry rushed the camp. The Germans had gone. By now it was dark. Cautiously, Major C. A. La T. Leatham led his
squadron into the village, finding it devoid of enemy troops. Shortly after midnight, No. 13 Troop made contact with the Milag POWs, placing their tanks at each corner of the camp. Shortly after, a Scots Guards patrol reached Marlag. The hurrahs and cheers of the freed inmates rang through the night. Liberation had come. Travelling with the Guards was an MI9 field party, IS9 (WEA) Team No. 4, led by Squadron Leader John Evans and Sub-Lieutenant Michael (‘Micky’) Wynn, whose task it was to take charge of the Westertimke camps after liberation, interview and debrief the former prisoners, and arrest any Germans guilty of war crimes. Evans, a famous cricketer, had himself escaped from a German POW camp in the First World War, and his 1921 book about his exploit, The Escaping Club, had widened his fame. Wynn, a Naval officer who had been captured at St Nazaire (where he had commanded MTB 74 and lost an eye), had himself been imprisoned at Dulag and Marlag. Sent on to Oflag IV-C at Colditz (see After the Battle No. 63) in January 1943, and repatriated in January 1945, he was on a personal mission as well: he had vowed to return to Milag-Marlag to release the man who had saved his life at St Nazaire, his Chief Motor Mechanic Bill Lovegrove.
MILAG POW ASSN
Left: Watched by some 5,000 freed prisoners, the Red and White Ensigns (brought to the camp by Sub-Lieutenant Wynn for just this occasion) are hoisted up the flagstaffs on the parade ground. The formal liberation ceremony was attended by Major-General Allan Adair of the Guards Armoured Division, Brigadier George Johnson of the 32nd Guards Brigade and Lieutenant-Colonel James Windsor-Lewis of the 2nd Welsh Guards, the commanders responsible for the camp’s deliverance, who can be seen standing in front of the flag-staffs. The hut in the background is No. 9, the Parcels Office. 40
IWM BU4665
Going through the camp, Sergeant Gordon came across part of the crew of the steam trawler Caldew, the very first civilian ship’s crew to be captured during the war and also the only British fishermen who were POWs in the war. Owned by the Saint Andrew¹s Steam Fishing Co Ltd and sailing from Fleetwood, their ship had been sunk off the Faroe Islands by gun-fire from U-33 on September 24, 1939. The crew was picked up by the Swedish steamer Kronprinsessan Margareta, which in turn was stopped by the German destroyer Friedrich Ihn three days later, and the Caldew men had spent the next five years and seven months in captivity, first at Sandbostel and later at Milag. As they were fishermen, not merchant seamen, their families back home had been in a particularly difficult predicament, receiving no financial support from their employer, nor from the Ministry of War Transport when they agreed to take over liability for paying the wages of captured merchant sailors — a matter which had been a cause of great worry to the incarcerated crew. From left to right are: Mate Albert Cooke, Chief Engineer Thomas Payne, Bosun Charles Ellis, Deckhands Harold Ashwell, George Triffett and Alec Mulholland and Fireman Hector Pearson. Absent from the picture are the ship’s captain Skipper Thomas Kane, Second Engineer Fredrick Rowe and Deckhand George Brooks, who had been exchanged for German prisoners in Lisbon in June 1943, and Cook John Shutterlin, who had been repatriated via Gibraltar in January 1945. sight-seeing the battleground, looting the Kommandantur buildings and farms, and touring the neighbourhood in ‘liberated’
vehicles. They also disarmed the Marines guarding the food stores and took away the remaining Red Cross parcels.
IWM BU4662
Arriving at 6.30 p.m. on the 28th, Wynn’s first essential was to restore order and discipline, and stop the looting inside and outside the camp to which many inmates had taken. He decreed that from now on there was to be only one camp exit — the main gate — and, procuring 39 rifles from the German guardroom, instructed a party of reliable prisoners, mostly RN Marines, to mount guard over the camp. Over the next few days, with the help of the ex-prisoners, he found and arrested many of the German camp officers and NCOs, including the security officers, Güssefeld and Schoof. At 11 a.m. there was a formal liberation ceremony on the parade ground. In the presence of Major-General Allan Adair of the Guards Armoured Division, Brigadier Johnson of the 32nd Guards Brigade and Lieutenant-Colonel James Windsor-Lewis of the 2nd Welsh Guards, the Red and White Ensigns which Lieutenant Wynn had brought with him were hoisted up the flagstaffs amid cheers from a crowd of some 5,000 prisoners. Captain Wilson formally thanked the Guards for liberating MilagMarlag and then formally handed over to Lieutenant-Colonel Appleby of the Prisoners of War Exchange Unit (PWX). The following day, April 29, a convoy of 40 Army lorries arrived to start the first 1,200 prisoners on their journey home. The men were sorted out, the patients from the camp hospital and those that had been prisoner longest going first. The first convoy pulled out at 5 p.m., the lorries taking the men to the airfield at Diepholz from where American C-47s flew them to Brussels. From there, RAF Lancaster bombers took them to England. Over the next two weeks, the camp was gradually emptied, some men flying out from Tarmstedt instead of Diepholz. In the days after liberation, the PWX Unit had a difficult time keeping control of the prisoners. The Royal Navy and RAF contingents maintained excellent discipline, but the Merchant Navy men were out of control. They passed in and out of the camp at will through the many holes made in the wire,
Gordon also pictured another group who were an anomaly in this naval camp: a party of RAF prisoners. Nearly 3,000 RAF men,
evacuated from Stalag Luft 3 at Sagan in Poland, had arrived at Milag-Marlag in early February 1945. 41
IWM BU4668
42
ATB
Climbing the guard tower in Milag’s south-west corner, Sergeant Gordon took this shot down Skagerrak-Strasse. On the right are is the ratings’ compound, with Barrack No. 23 closest to the camera and No. 20 further down. The open space in between had earlier been occupied by huts Nos. 21 and 22 but these had been removed by April 1945. As the aerial on pages 28-29 shows, the prisoners had used the plot to dig slit trenches. Note the wording painted on the roof of No. 20. On the left of Skagerrak-Strasse, visible further in the distance, are the workshops and the stores hut. Westertimke village lies beyond the trees.
ATB
The stores hut is the only wooden camp structure that survives to this day. Part of it is now an abode, the rest is used for storage. The track going off to the left leads to the shower block.
ATB
AFTER THE WAR Even as the naval prisoners were being evacuated, the officers’ compounds of both Milag and Marlag were taken into use as POW cages for German prisoners, Marlag ‘O’ being turned into Civil Internment Camp No. 9 detaining Germans suspected of war crimes. Among them for one day, May 22, was an as yet unrecognised Reichsführer-SS Heinrich Himmler after he had been arrested near Bremervörde (see After the Battle No. 14). In 1946 Marlag’s deserted ‘M’ compound served as a realistic film set for the Ealing Studios POW movie The Captive Heart, directed by Basil Dearden. Meanwhile, Milag had become a youth punishment camp. From 1952 to 1961 the huts housed German refugees from the eastern provinces. In 1963 the former Marlag became a military barracks, the Timke-Kaserne, home of Flak-Raketen-Bataillon 31. Over the years, several new buildings were added to it before it was relinquished by the Bundeswehr in 1996. Today it is an industrial estate known as the Timke-Park. Several of the old barracks buildings have been pulled down, but among those still standing are some of the original Marlag structures, notably the washhouse and the canteen block. The site of Milag has changed out of all recognition since the war. The officers’ compound at the northern end is now a housing estate while the ratings’ part has become fully overgrown with trees and bushes. All the accommodation huts have gone, and there is not even a trace of their foundations to be found in the underbrush. However, a few of the more permanent camp buildings survive: the Kommandantur office (now a family bungalow); the German stores hut next to it (one part used as dwelling, the rest as storage space); the brick-built shower block along what used to be Dönitz-Strasse (now empty), and four of the camp’s washrooms: two in the officers’ compound (both now small bungalows absorbed into the housing estate) and two in the ratings’ part (nicely tucked away among the trees). On April 28, 2005 — the 60th anniversary of the camps’ liberation — the Milag POW Association erected a small memorial at a spot beside the former Kommandantur and opposite what used to be the main gate. Mounting a silver plaque with a plan of Milag, it reminds passers-by that this was once the site of a naval prisoner-of-war camp.
Left and above: The memorial unveiled by the Milag POW Association on the 60th anniversary of the camp’s liberation. It stands between the former Kommandantur villa and the stores hut.
IWM C4879
Before the Second World War Rimini was a highly sought after resort on the Adriatic coast of Italy. In September 1944 it was highly sought after for another reason. The Allies, then struggling through the Gothic Line, saw it as the key to the Romagna, the plains of which they considered ideal tank country, if they could only get there before the autumn rains. During the final stages of the assault the Canadians, coming by way of The capture of Florence and the crossing of the Arno river at the beginning of August 1944 (see After the Battle No. 129) finally brought the Allies in Italy up against the Gothic Line along its entire length. Conceived as one of their main defensive positions in the autumn of 1943, the Germans had abandoned work on it when bolder strategy employed by Generalfeldmarschall Albert Kesselring, the Oberbefehlshaber Südwest (Commander-inChief South-West), at Cassino and Anzio in the south had paid off. Work on it had hastily recommenced in June 1944 as a result of the Allies’ rapid thrust north and, while still incomplete, it was particularly formidable on the western coastal strip, through the central mountain passes of the central Apennines and on the Adriatic coast. The challenge for the Allies was to reach the plains beyond the Apennines before the autumn rains arrived. If they could achieve that, they would be able to use their superior mobility and firepower to push towards the River Po and, possibly, beyond. General Harold Alexander, the Commander-in-Chief of the Allied Armies in Italy, had originally intended for the main weight of his next thrust to be made through the centre but, after persuasion from the commander of British Eighth Army, Lieutenant-General Oliver Leese, decided to switch it to the Adriatic. There were several reasons for this. The Allied requirements for the invasion of southern France (see After the Battle No. 110) had robbed him of his best mountain troops, the French Corps. In addition by switching to the eastern coastal section his troops would be fighting in more familiar terrain and could exploit their advantage in tanks, guns and aircraft.
the San Fortunato ridge, and the Greeks and New Zealanders, along the coast, were competing for the honour of getting there first, the latter won. Rimini was heavily bombed before the entry of ground troops and many of its buildings and most of its bridges were destroyed. Only one bridge survived, the Ponte di Tiberio over a branch of the Marecchia river that ran through the middle of the town, seen here in mid-distance.
THE FALL OF RIMINI By Jeffrey Plowman and Glenn Hodgson
RIMINI
GREEK BRIGADE
Right: The attack on Rimini was part of a larger offensive by the Canadian Corps and British V Corps. 43
IWM C4681
Prior to taking the town itself, the Greeks and New Zealanders had to take Rimini airfield, located alongside the coastal highway THE ASSAULT ON THE GOTHIC LINE The Allied assault on the Gothic line was finally launched on August 25, when troops of the Eighth Army crossed the Metauro river and, immediately, entered into something of a vacuum. As it so happened, the LXXVI. Panzerkorps of the German 10. Armee had chosen this moment to regroup and had withdrawn from the outer works of the Gothic Line, thus missing the full weight of the opening thrust of the Allied assault. When they did finally find out about the Allied intentions three days later, when a copy of Leese’s message to his troops fell into their hands, the Canadian and British troops were already across the Foglia river and well into the, still incomplete, and barely manned defences. Many minefields had been found to be still set at safe, while some of the much-feared Panther turrets had not even been mounted, some being found still sitting on their transportation trailers. Though the LXXVI. Panzerkorps reacted swiftly by transferring two divisions, it was too late to save the Gothic Line. Unfortunately for the Eighth Army this success could not be maintained. Between September 5 and 7 the weather turned against them and torrential rain turned the dust to the familiar clinging mud. The Eighth Army was forced to pause for several days to allow it to prepare a set-piece assault on the next obstacle, the Coriano ridge, a pause which also allowed the Germans to transfer the equivalent of five divisions to the Adriatic sector. The assault on the Coriano feature began on the night of September 12/13 and it finally fell two days later to converging thrusts from the Canadian Corps on the right and British V Corps on the left. But the most desperate German resistance was left for the San Fortunato ridge, which only fell after three days fighting, thus opening the way to Rimini and the plains beyond. Right: This map from the Greek official history, although with Greek lettering, gives a good overview of the operations south of the city. 44
some five kilometres south of the city. The buildings and hangars in the foreground were scene to some of the fiercest fighting.
THE CAPTURE OF RIMINI AIRFIELD The 2nd New Zealand Division (commanded by Brigadier Stephen Weir who had taken over after Lieutenant-General Bernard Freyberg had been injured in an aircraft crash on September 3) was switched over to the Adriatic coast at the end of August but did not take part in the assault of the Gothic Line in that sector, as it was part of the corps de chasse. Based at Iesi throughout
the early stages of the fighting, the 3rd Greek Mountain Brigade, commanded by Colonel Thrassivoulos Tsakalotos, was placed under the division’s umbrella, as a result of the request of the Greek government. It was not until September 13 that the New Zealanders came under operational command of the Canadian Corps, though they were not committed immediately. Instead, to give them experience, the Greek Mountain Brigade was
ATL DA7590
Critical to the defence of the aerodrome was this Panther turret on its northern end, which held a commanding view of, not only the entire airfield, but the lower slopes of the San Fortunato ridge as well. It was finally knocked out on September 17 by a Sherman commanded by Lieutenant Phil Collins of C Squadron, 18th Armoured Regiment. Using the cover of smoke laid down by artillery fire Collins’ tank crept up to a house adjoining the airfield and opened rapid fire on the turret, damaging the gun and eventually forcing its crew to abandon it. Collins later received a Military Cross for this action. talion. Fighter-bombers flew in to attack the airfield but, just short of it, the Greeks were forced to go to ground by bazooka and machine-gun fire. Their supporting tanks, after blasting holes in houses as they advanced, also ran into trouble. Directly to the left of the airfield a self-propelled gun opened fire, along with a Panther turret. Sergeant Peter Wood’s tank from No. 10 Troop was hit and brewed up, three of the crew killed outright. Lieutenant Phil Collins put down a smoke screen to hide his other tanks then dragged the wounded Woods from the burning tank. The only other survivor, Trooper Doug Bull, got out through his hatch and made his way back on foot to their Regimental Aid Post. The Germans started to pull out on the left and Collins and his other tanks moved in that direction to encourage them. Nothing more was heard from the self-propelled gun and the Panther turret could not be reached before nightfall but its crew later evacuated it and blew it up. On September 16 the advance continued on the left as the 3rd Greek Battalion captured two further small settlements. The 2nd Battalion on the right with No. 9 Troop in support began to systematically clear the south edge of the cemetery, linking up with the 1st Battalion at the south-west corner. The failure of the Royal Canadian Dragoons to cross the Marano river meant that the Greeks and New Zealanders had to secure their right flank with their carriers. In the
centre the 1st Battalion was unable to advance much further. The airfield was heavily mined and there was another Panther turret at the other end with a commanding field of fire over the whole area. The situation remained the same on September 17, with the Greeks slowly pushing forward on the right, while around 3.30 p.m. the other battalion on the left captured one of the airport buildings but were pinned down. The problem lay with the Panther turret at the far end of the airfield. It was not only affecting the Greek attack, the Canadians assaulting San Martino on the left were also losing tanks to it and the brewups could be seen from the airfield. An air strike was called on it but the six aircraft that delivered the attack all missed, while the 25pounder fire called down on it had little effect. It was left to Lieutenant Collins of No. 10 Troop to come up with a solution of his own. A diversion was set up at the south end of the field with another tank, while 25-pounders covered the Panther turret with smoke. In the meantime Collins’ tank, stripped of all essential gear and loaded to capacity with armour-piercing shells, set off around the west side of the airfield. After following a tree-bordered lane and through vines and scrub, they took up position alongside a house. When the smoke over the Panther turret cleared they poured round after round into it, putting the gun out of action and then knocking chunks of metal off the turret until the crew abandoned it.
JIM SLOAN
ordered forward to clear the approaches to the Marano river. As an introduction to battle it was probably an unfortunate choice. Sending a unit more experienced in mountain warfare into battle along the coastal flats was bad enough but they were also up against the veteran 1. Fallschirmjäger-Division (Generalmajor Richard Heidrich). In addition, while the latter may have been below strength in infantry, they were nearly up to full strength in artillery. Canadian intelligence reports indicated that they were backed up by the 1. Kompanie of Panzerjäger-Abteilung 525 with two Nashorns and two Sturmgeschütze IIIs, plus 11 Tigers from the 2. Kompanie of schwere Panzer-Abteilung 504. Also present was the 162. (Turkistan) Infanterie-Division (Generalleutnant Ralph von Heygendorff ), comprising Caucasian and Slavic Russians who had volunteered to fight with the Germans. The initial attack was to be made against two hamlets known as Monaldini and Monticelli, south of the Marano river. The attack was launched at 2 a.m. on September 14 through rolling farmland replete with farmhouses, orchards and copses, all extensively fortified with trenches and machine-gun posts. In addition there were concrete machine-gun bunkers or dug-in tank turrets at each set of crossroads. The Greeks found movement at night difficult and were eventually repulsed with heavy losses, losing a third of the troops engaged since the action began. This failure prompted an immediate rethink of the strategy. The 22nd NZ Battalion along with some 17-pounders from 33rd Battery, 7th NZ Anti-tank Regiment had been in reserve behind the Greeks. Thus No. 1 Company of the 22nd Battalion was detached and immediately sent forward to support the Greeks and a few hours later B Squadron of the 20th NZ Armoured Regiment arrived. Thus reinforced, the attack was resumed that evening with more success, in an almost textbook fashion. With the infantry from 22nd Battalion providing support for the tanks, they followed the Greeks through vineyards and dust-covered farm buildings into Monaldini. The hamlet fell after a short sharp attack, being defended only by a couple of Spandaus and a few infantry. After Monaldini was secured the force turned its attention to Monticelli, from which the German defenders withdrew as the tanks and infantry approached. The advance continued the following morning, September 15, the airfield at Rimini being the next objective for the 1st Greek Battalion. The Marano was crossed around 10 a.m. and in the afternoon C Squadron of the 18th Armoured Regiment came forward to replace the tanks of the 20th Armoured Regiment. For the renewed attack No. 11 Troop was assigned to support the 3rd Greek Battalion on the left in its attack on the hamlet of Casalecchio, which consisted of just a church with a couple of houses nearby. During the morning the German defenders had given the Greeks trouble but with support from No. 11 Troop they took it with no difficulty at all. A few paratroopers held out in the church but were quickly dislodged when the tanks came forward. On the right flank, No. 9 Troop supported the 2nd Greek Battalion but there was practically no liaison between the Greeks and the tanks, plus they ran into more serious opposition. Here the area was strongly held with garrisons in the hangars, airfield buildings and houses on the seaward side of the road, all backed up by a Panther turret. This broke up the infantry attack before it got very far and it soon bogged down. To make matters worse their supporting tanks were further back, still in heavily vegetated country short of the airfield. In the centre things initially went better for No. 10 Troop supporting the 1st Bat-
The crew and tank that took the gun out. Top (L-R): Troopers Jim Sloan, Maurice Wooley and Lieutenant Collins; bottom: Troopers Pete Dodonski and Doug Rutherford. 45
Right: Rimini town fell on September 21. That day British Army photographer Sergeant Menzies arrived to document the capture of this important objective and his first shot showed some Greek soldiers gathered around a wrecked church on the outskirts. According to the official caption, the building was bombed and shelled while being used as an observation post by the Germans.
GLENN HODGSON
IWM NA 18878
THE ALLIES ENTER RIMINI With the turret gone the Canadians and Greeks were able to commence their advance on September 18, along with C Squadron, 19th Armoured Regiment, for support. During the afternoon the drive resumed and by dusk they had cleared the airfield. Some progress was made the next day, September 19, during which No. 9 Troop under 2nd Lieutenant Graeme Brown dislodged some machine-gun and sniper posts in the hospital buildings lining the coast road. On September 20, the 3rd Greek Battalion attacked the town of Santa Maria, while the 2nd Greek Battalion swung its right flank northwards and, after overcoming strong opposition, secured the main building of the Ospedalletto Camsco. Moving forward on a road inland from the Rimini airfield one of the tanks of No. 11 Troop came up against another anti-tank gun pointing straight at it. Throwing the tank into full reverse its crew backed behind a house before the gun got a shot in, only to find themselves coming under attention from a haystack in a nearby field that was observed to be swinging round towards them! Second Lieutenant Chris Cross’s tank put a smoke shell into the stack revealing a Panther turret under it. Their accompanying Greek infantry took the crew prisoner. That evening the 5th NZ Brigade came forward to occupy the area between the airfield and the Marano river, while the Canadians on the left finally took the San Fortunato ridge. Later that night the fine, but overcast, weather gave way to heavy rain. Earlier that evening No. 11 Troop under Lieutenant Cross rounded up some Turkoman prisoners, who were able to confirm that the Germans had withdrawn beyond Rimini. So it was that, before dawn on September 21, Cross and 2nd Lieutenant Arthur Maurice set off for a reconnaissance Right: Glenn Hodgson found that church was the Maria della Colonella along the Via Flaminia, the main road into town. of Rimini. They followed Route 16 and then turned off along the Via XX Settembre as far as the Ausa river, where they found the bridge there damaged but not demolished. They crossed into the rubble-strewn Corso d’Augusto and on towards the centre of the city, searching out a way forward for the tanks. They then retraced their steps meeting some Italian civilians on the way back, who confirmed that the Germans had left. No. 11 Troop immediately set off, while Cross guided 2nd Lieutenant Frank Avery and Sergeant Mick Kenny of No. 8 Platoon, 22nd Battalion, along the same route to the Ausa and arranged for them to meet the tanks in the Piazza Cavour. The platoon immediately set off for the piazza, arriving there at 6.30 a.m. The tanks in the meantime made straight for the Ausa, the troop
ATL DA7595
Left: Two days later, one of the New Zealand official photographers, George Kaye, took this shot of Greek soldiers which, according to the caption, showed them marching out of Rimini on their way north in pursuit of the retreating enemy. Given that they are actually going past the Maria della Colonella in a southerly direction one cannot help but think that the photograph was posed. 46
GLENN HODGSON
IWM NA18781
Sergeant Menzies next pictured a crew from No. 12 Troop, 19th NZ Armoured Regiment, digging around the suspension of their bogged Sherman in order to free it from the bank of the Ausa river. Towering in the background is the Arco d’Augusto, the city gate begun by Roman emperor Augustus in 14 A.D. and completed under his successor Tiberius 13 years later.
While this was going on Lieutenant Maurice found that the Via XX Settembre bridge would take the weight of his scout car and, accompanied by a Greek carrier, pushed on to find that the 1900-year-old Ponte di Tiberio was still intact. There were still demolition charges in place but these were quickly removed and Brigade Headquarters notified. (In fact the bridge owed its survival to the action of a German commander who,
on appreciating its historical significance, had ordered the charges to be left undetonated.) Maurice, in the company of Cross and a Canadian engineer, then made his way on foot onto the main channel of the Marecchia river and established that the Route 16 bridge was down and there was no immediate crossing place for the tanks. They were soon pinned down by Spandau fire from the opposite bank but managed to get away.
IWM NA18782
GLENN HODGSON
commander’s tank succeeding in crossing it, after charging down into the water and up the other side. The remaining two tanks got bogged but were soon winched out by the first tank. They then followed the Mercantino-Marecchia tramway into the Piazza Cavour, meeting up with No. 8 Platoon whereupon they drove up the steps of the Palazzo dell’Arengo and parked under the portico.
After the war the channel of the Ausa was filled in (the river being presumably piped underground) and today the area is a series of public parks, the one in which the tank came to grief being known as the Parco Alcide Cervi. Glenn took his comparison from the cycleway that runs through the park. The Arco d’Augusto forms an easy reference point.
Left: Menzies next followed a patrol from the 3rd Greek Mountain Brigade entering the city through the same arch. The men are not wearing any weapons or webbing and they definitely
look like they have been asked by the photographer to enliven his shot. Right: The Via XX Settembre becomes the Corso d’Augusto at this point. 47
IWM NA18783
Below: Piazza Giulio Cesare was renamed Piazza Tre Martiri after the war in memory of three partisans that were hung there by the Germans. The bell tower on the right is the Torre dell’Orologio.
GLENN HODGSON
Above: The same patrol approaching what was in 1944 the Piazza Giulio Cesare. The town was heavily shelled and divebombed during the battle and the effect of the bombardments is clearly visible.
48
GLENN HODGSON
IWM NA18789
Right: Taking leave of his Greek extras, Menzies next photographed the bombed Tempio Malatestiano cathedral on Via IV Novembre. Rimini’s importance as the junction of the main coastal railway with the line from Bologna and the industrial north had made the town the object of frequent air bombardments. These raids killed upwards of 1,000 townspeople and caused widespread material damage — both in the old medieval city and in the newer area between the railway and the sea. Further harm came from Allied field artillery and naval guns. German engineers contributed to the destruction in 1943 by levelling wide areas on the seaward side of the city in order to provide fields of fire for their coastal batteries, and in September 1944 demolishing the Ausa and Marecchia bridges and blasting buildings into the main thoroughfares in order to hinder Eighth Army’s advance. From these various causes some 75 per cent of Rimini’s buildings, many of them famous historic monuments, ended up razed or damaged beyond repair. Apparently feeling a need to excuse for the destruction of this architectural treasure, the official caption for this picture again emphasised that ‘during the battle for the town, the enemy were using the cathedral for a number of purposes, including OP work from the tower.’
GLENN HODGSON GLENN HODGSON
IWM NA18790
The church (above), a memorial to the Malatesta family who had ruled Rimini in the 15th century and a religious site since before the 13th century, has been restored with meticulous care and attention to detail. Right: The absence of the roof in the wartime picture initially fooled Glenn as he thought it had been taken outside.
Left: The completely destroyed altar in the cathedral. Above: Now restored to its former glory. 49
Right: After entering Rimini No. 11 Troop of the 19th Armoured Regiment drove into the Piazza Cavour, the site of the local government buildings, and up the steps of the 13th-century Palazzo dell’Arengo to take shelter from airbursts under its portico, their march order being Lieutenant Cross’s tank The Lame Duck, followed by Discord and Maleesh. While there, an unnamed Canadian photographer captured this view of Corporal Frank Harvey on radio in Discord watched on by Trooper Nick Styles. Apparently the rest of the troop was off looting!
GLENN HODGSON
In the meantime the Greek Brigade set off at 6.45 a.m. with orders for the 2nd Battalion to take the eastern part of Rimini, the 1st Battalion to bypass the town to the west, while the 3rd Battalion was to make for the centre of the town. The latter arrived in the Piazza Cavour around 7.30 a.m., some 15 minutes after the tanks, where they were greeted by the mayor of Rimini and immediately began to hoist flags around the city. (In a pleasing gesture the Greeks later in the day asked the Canadians for a Canadian flag to fly beside the Greek one from the town hall. When no Union Jack or Canadian ensign could be found, an Auxiliary Services red banner was used.) Following this success, No. 12 Troop was sent in to provide additional support for No. 11 Troop, however one tank got so badly bogged trying to cross the Ausa that it had to be left till the next day. The other two tanks drove into the town and joined No. 11 Troop in the Piazza Cavour. While this was going on the 2nd Greek Battalion on the right had entered the modern area of the city, on the coastal side of the main railway line. Their supporting tanks from Nos. 9 and 10 Troops were initially held up after losing one tank on a mine but managed to get forward after the squadron commander found the bridge nearest the coast could carry tanks. After this both battalions pressed on to the Marecchia river.
GLENN HODGSON
NATIONAL ARCHIVES OF GREECE
Right: Today the palazzo is much as it was in 1944 and there is no sign of where the tanks climbed up onto the portico.
More Allied troops pictured in the Piazza Cavour. 50
The same spot beside the square’s ornamental fountain.
GLENN HODGSON
‘Canadian and Greek troops entering Rimini by way of the only unblown bridge’ says the official caption to this Canadian photograph.
The picture in fact shows the Ponte di Tiberio, the bridge just north of the old city and crossing the southern arm of the Marecchia river. Glenn found that the shot was looking northward, which means that the troops are actually not entering
but leaving the city. Of Roman times, begun under Emperor Augustus and finished under Tiberius in 21 A.D., the bridge was saved from demolition by a German commander who realised its historical significance. 51
GLENN HODGSON
ATL DA7641
Perfect comparison taken by Glenn Hodgson in April 2006.
By September 30 Allied engineers had constructed a Bailey bridge to replace the broken road bridge that lies downstream from the Ponte di Tiberio, the Ponte di Mille on the Viale 28
Ottobre, the second road that leads out of the old city to the north. Kaye photographed the broken bridge and the Bailey from the Ponte di Tiberio.
After the war the southern arm of the Marecchia was closed off and today ends in a lagoon on the western side of the Ponte di
Tiberio. The river’s old outlet to the sea is now used by locals as an anchorage for their pleasure craft.
GLENN HODGSON
ATL DA7640
George Kaye pictured the Ponte di Tiberio on September 30.
52
IWM NA19045
Right: Some 400 metres north of the Ponte di Tiberio the engineers had also built two Bailey bridges across the northern, main arm of the Marecchia, adjacent to the demolished bridge on the main road out of the city, which at this point is named the Via XXII Settembre. After an initial crossing place was bulldozed to allow tanks to cross, construction of more substantial bridges had commenced to serve the New Zealand Division as they continued their drive north. The demolished bridge was used as a basis for a high-level Bailey, while a low-level Bailey was constructed for tanks. The view is towards the south bank, so the lorries taking the lower Bailey (just visible on the extreme right) are returning to Rimini.
The earlier discovery, that the Ponte di Tiberio was intact, forced a change of plan: 4th NZ Armoured Brigade was now to push on into the Romagna with all possible speed. Thus early in the afternoon C Squadron, 19th Armoured Regiment, and No. 1 Company, 22nd Battalion, crossed the Ponte di Tiberio and drove up to the north branch of the Marecchia river where they engaged German positions on the north bank. At 7 p.m. that evening the infantry began to wade across the river and soon became involved in some intense fighting with German paratroopers on the other side. While they were doing that, 6th NZ Field Company started bulldozing a crossing place for the tanks, completing it later that night. The next morning around 2.30 a.m. C Squadron crossed it and joined the infantry. By first light the bridgehead across the Marecchia was firmly established. Thus the battle for Rimini was over and that for the Romagna had begun.
GLENN HODGSON
On September 27 and 28 a heavy gale swept the Rimini area, flooding the Marecchia. The following day, AFPU photographer Sergeant Levy pictured the swollen river swirling along and around the bridges.
Today a new permanent bridge replaces the pair of wartime Baileys. The Via XXII Settembre is the continuation of the two roads from the Ponte di Tiberio and the Ponte di Mille, which converge and join just south of here. The distinctive house on the south bank survives, albeit somewhat dwarfed by the high-rise building behind. 53
ATL DA7637
Just north of here along the main road lies Celle, scene of fierce fighting between the 22nd NZ Battalion and elements of the 1. Fallschirmjäger-Division. pictures. This was a feeling that continued for the following half hour as she suddenly closed her booth and dragged me across the road to talk to some elderly gentlemen standing outside a café. Fortuitously, one of the gentlemen, Rossi, turned out to be a mixture of shopkeeper and local historian and was able to provide invaluable assistance and recollections. After several minutes of animated conversation over the pictures, Rossi led us to his shop where his son showed an interest in one in particular: an image of a
heavily bogged tank in front of a large archway/gate. He asked where I got it from, to which I replied ‘a friend acquired it from the Imperial War Museum in London’. He chuckled and casually told me he had the original photograph on a wall at his home. Over the next couple of hours Erin and I were treated to the most generous display of hospitality, imparting of knowledge and experience, of pride in one’s home, and of honest emotion that one could ever hope to find. We followed Rossi out of his shop and to
ATL DA6696
GLENN HODGSON
The idea for this article arose while Jeff Plowman and I (Glenn Hodgson) were both employed at the same scientific research organisation in New Zealand. A change in direction led me to apply for redundancy and take the opportunity of spending some time in Europe. The suggestion by Jeff that I might like to do a little research in Rimini was eagerly accepted by myself and thus the project was born. Two years later, after the exchange of numerous e-mails, with copious images and maps, I found myself in Rimini with my partner Erin. Rimini was, and still is, a popular beach and holiday resort on the Adriatic coast of Italy. I arrived in April 2006, not the height of the tourist season, but it was busy nonetheless. Armed with only a smattering of Italian, our first port of call was the local information office, where their staff managed to identify over half the photographs I had. On their advice I returned early on my second morning to talk to Bertha, a Rimini native who had lived through the years of conflict, and now sold bus tickets from the kiosk outside the Information Centre. Bertha was an exceptionally strong personality who, after accepting my stuttered explanation in Italian, pored over the pictures I handed her. In a matter of seconds she transformed from a loud, gesticulating Italian senior citizen to a woman entranced by the images, her scrutiny so intense it seemed she was back in the
GLENN HODGSON
The following day, when George Kaye photographed the same two bridges, the water had already begun to subside.
About a kilometre upstream from the pair of Bailey bridges on the main road, the New Zealand engineers constructed yet a further high-level Bailey over the Marecchia using the piers and abutments of another wrecked bridge. This too was photographed by George Kaye. 54
This is not an exact comparison but was chosen to show the distinctive outline of the hill in the background, on which is located the independent kingdom of San Marino. The bridge in this picture is on the Via Nuovo Circonvallazione, the city’s modern-day bypass road.
GLENN HODGSON
The Piazza Giulio Cesare was renamed Piazza Tre Martiri after the war in memory of three partisans that were hung there by the Germans on August 16, 1944 — five weeks before the city’s liberation.
This arrangement of paving stones in the piazza marks the spot where it happened.
GLENN HODGSON
GLENN HODGSON
his home a few streets away where we were privileged to see the pride he held for his city. Furnishing his home in every available position were artefacts of Rimini’s history from centuries ago through to today. Leaving his home, Rossi escorted us personally around the city and recounted, often in single words, what had happened and where. The words ‘bombidartto’ (bombed) and ‘distrutto’ (destroyed) were repeated with frightening regularity. Of particular interest were Rossi’s comments about the main square in Rimini, which in the pre-war years had been known as Piazza Giuglio Cesare (Julius Caesar Square), yet on all the present-day maps it was named Piazza Tre Martiri (Three Martyrs Square). Rossi explained the reason for this, and enriched the facts with his own supplementary commentary. During the Nazi occupation the Germans had executed by public hanging three local men (Italian partisans) in the square. Whether their deaths had inspired some sort of covert organisation, resistance or uprising amongst the local population was not clear, but their deaths had been significant enough to rename the square in the subsequent years. What made the story stand out for me was when Rossi proffered that the three men had been ‘banditi‘ — bandits/(petty) criminals — and dismissed them out of hand with a good deal of contempt in his voice as he did so. What was fascinating was that in times of war, even disreputable men could become heroes — men who would probably have been condemned within society outside of wartime, were remembered in history as martyrs by the same society when their lives were taken by the invading force. Either that or Rossi had had some experience with those men all those years ago and he still bore a grudge. Rossi concluded his tour in the piazza by directing us to a bookshop that contained a local section with a selection of books covering the history of the war in Rimini. We exited the shop and farewelled Rossi, grateful for the unique experience and indebted to him for his generous assistance. I got down to business the following day, covering a large area of the city by foot and bicycle, following in the footsteps of the various Allied photographers and matching up their pictures I don’t expect I’ll meet Bertha or Rossi again, but the experience I had in their hands, in their Rimini is one that I will carry for life. I felt an intimate attachment to the city when we left. They had honoured the lives given by others in the fight for their region, and I hope my account of our experiences there plays some small part in remembering not only the soldiers who fought there, but the locals as well who had just as big a part in the history.
Plaque in the Piazza Cavour erected in 1979 to mark the 35th anniversary of the liberation. ‘To remember for all times the soldiers from various continents, the partisans and the civilians who in the autumn of 1944 gave their precious live in this land for liberty and democracy.’
In the public park near the Arco d’Augusto is a memorial to the Canadians who breached the Gothic Line and contributed to the liberation of Rimini. The Canadian unit that operated closest to the town was the 48th Highlanders of Canada. No mention of the Greeks or New Zealanders though! 55