THE WORLD’S ONLY RC SCALE MODEL MAGAZINENA FF S TIO CALE N
AL S
FREE FULL SIZE PLANS
GENERAL WESTERN
www.flyingscalemodels.com
METEOR
30” WINGSPAN FOR ELECTRIC POWER
CONSTRUCTION FEATURE
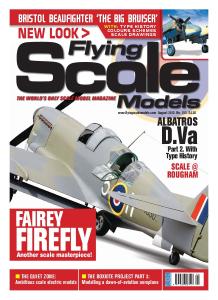
MAILED-FIST FIGHTER! GLOSTER GAUNTLET - BUILD JEFF HARNALL’S 1/5TH TRUE SCALE MODEL OF THE R.A.F.S LAST OPEN COCKPIT FIGHTER BIPLANE.
SUBJECT FOR SCALE ● SUPER-DETAIL A.L.BENTLEY SCALE DRAWINGS ● COLOUR SCHEMES FSM AUG 16 COVER.indd 1
PROPELLER STEP-BY-STEP
August 2016 No. 201 £4.99
DISPLAY DUMMY - MAKE A WW1 DARK & LIGHT LAMINATED SCALE WW1
08 9 771368 900059
29/06/2016 10:16
FORMATION AUG 16
29/6/16
14:48
Page 3
THE ISSUE AHEAD...
Formation...
FLYING SCALE MODELS - THE WORLD’S ONLY MAGAZINE FOR SCALE MODEL FLYERS
ON THE COVER
Looking for biplane scale subject a little less mainstream? Then take a look at Jeff Hartnoll’s Gloster Gauntlet. It’s to 1/5th scale, with a wingspan of 78” 2,000mm for 2.0-2.4 cu.in. four stroke engine. The first of a twopart construction feature starts in this issue.
AUGUST 2016 NO.201
10
4 CONTACT Just for starters
6 COUNTERWISE
New products for scale modellers
FULLSIZE FREE PLAN FEATURE 10 GENERAL WESTERN METEOR
30" wingspan for electric power designed by Peter Rake,
16 MITSUBISH A6M ZERO
Alex Whittaker examines Steve Foxon's take on the definitive Japanese warbird
22 DUMMY SCALE AXIAL WW 1 PROP
Paul Blakeborough traces the step-by-step technique of replicatining one of those WW1 laminated propellers for static scale model display
22
28 SUBJECTS FOR SCALE DOUGLAS A-20 BOSTON/HAVOC
Designed when the lean inter-war years of slow military aircraft development were ending, this Douglas attack aircraft filled an urgent need when war came in 1939 .
34 DOUGLAS BOSTON/HAVOC SCALE DRAWING
1:80 super-detailed drawings by Arthur L. Bentley
38 BOSTON/HAVOC FLYING COLOURS US, British, Comonwealth, French and Russian warpaint
42 MAILED FIST FIGHTER
Build Jeff Hartnoll’s 1/5th true-scale, 78.7" (2000mm) wingspan model of the RAF's last open cockpit fighter biplane. Suits 2 2.4 cu.in. four-stroke engines (Part 1)
50 FREE FLIGHT SCALE NATIONALS
Alex Whittaker is dazzled by the sheer variety of models at this year’s late-May Holiday event
56 SCALE SOARING
42
Chris Williams finds a feast of fine scale gliders of many kinds on the event curcuit
60 TECHNO SCALE
Mike Evatt finds more flying scale web sites to click on
62 QUIET ZONE www.flyingscalemodels.com
Spare the power loading! Peter Rake advises sensible motor sizes for small lightweight electrics
AUGUST 2016 FLYING SCALE MODELS 3
CONTACT AUG 16.QXT TONY OK.QXT
29/6/16
10:07
Editor: Tony Dowdeswell Publisher: Alan Harman Design: Peter Hutchinson Website: ADH Webteam Advertising Manager: Sean Leslie Admin Manager: Hannah McLaurie Office Manager: Paula Gray FLYING SCALE MODELS is published monthly by ADH Publishing, Doolittle Mill, Doolittle Lane, Totternhoe, Beds, LU6 1QX. Reproduction in part or whole of any text, photograph or illustration without written permission from the publisher is strictly prohibited. While due care is taken to ensure the contents of Flying Scale Models is accurate, the publishers and printers cannot accept liability for errors and omissions. Advertisements are accepted for publication in FLYING SCALE MODELS only upon ADH Publishing’s standard terms of acceptance of advertising, copies of which are available from the advertising sales department of FLYING SCALE MODELS.
Page 2
CONTACT n a few, just a very few occasions, an answer to a problem mercifully drops into your lap from an entirely unexpected source - and I have to say that in my own case, such a relief comes rarely! I had reached a point in my own model building, that I needed to produce a scale static dummy for one of the two-tone Maple-andWallnut wood laminated propellers that were applied to those German WW1 aircraft. Originally, I had planned to take the easy route with the quarter-scale example that Proctor Enterprises, in USA, listed on their web site to suit their Albatros D.Va kit. I had already taken this easy route with some other of their Albatros bits, including the spun metal spinner - but by the time I went back to them for the propeller, their tame prop-carver had retired and the line had been discontinued. Thus, a bandsaw/chisel/carving knife exercise was in prospect, but not before the Maple and Wallnut woods could be sourced in the requisite lamination thicknesses - and source there appeared none. Then, quite out of the blue (quite literally one might say, because the screen on my laptop is indeed blue!) came an offer from Paul Blakeborough of a how-to feature for FSM, describing how he had produced a two-tone wood dummy scale propeller for his 1/5th scale Pfalz D.XII. Paul could probably feel his hand being bitten off when his offer was rapidly accepted - and he also helpfully directed me to a source of woods, in the appropriate thicknesses that would replicate the required light-and-dark laminated effect. Paul’s step-by-step discourse is here in this issue. It’s the kind of howto technique material that we really value to fill the pages of FSM and such features on any aspect of scale modelling will always be very, very welcome - so let’s be hearing from you all.
O
EDITORIAL ADVERTISEMENT & CIRCULATION: Doolittle Mill, Doolittle Lane, Totternhoe, Beds, LU6 1QX. Tel. 01525 222573 Fax. 01525 222574. Email:
[email protected]
FREE FLIGHT SCALE ON THE UP!
CIRCULATION TRADE ENQUIRIES: Seymour Distribution, 2 East Poultry Avenue, London, EC1A 9PT 020 7429 4000.
AVIATION PAINTINGS OF THE YEAR 2016
NEWSTRADE: Select Publisher Services, 3 East Avenue, Bournemouth. BH3 7BW. 01202 586848 Email:
[email protected] SUBSCRIPTIONS: Doolittle Mill, Doolittle Lane, Totternhoe, Beds, LU6 1QX. Tel. 01525 222573. Fax. 01525 222574. PRINTING: Henry Stone Ltd., Oxfordshire
No U.K. R/C Power-and-Scale Nationals this year over the traditional late-August holiday week period, but Free Flight Scale managed to escape the enforced ‘down-year’ by combining with the Free Flight Nationals, that look place over the late May holiday week end. It produced a bumper crop of ambitious scale free flight entries, as Alex Whittaker’s photo report in this issue confirms. During my Secondary School years, I joined the school Art Club. It did not take long for the school Art Master to dismissively snort at me “...you’re just a bloke who draws aeroplanes ...”. Well, I did and not very well at all - and I did not stay long in his little after-hours group. But each time I go to the annual Guild of Aviation Artists’ Aviation Paintings Of The Year Summer Exhibition, I really do appreciate those who can draw and paint pictures of aeroplanes - quite simply because is does not take much of an inaccuracy in the outline and detail shape of an aircraft image, to destroy the effect! If you’ve spent your life being interested in aeroplanes, then the shapes of individual aircraft tend to be ingrained on your mind, so inaccuracies, even minor ones tend to stick out a mile. Those who do get it right, really get it right! From Tuesday 19th, to Saturday 24th July, literally hundreds of Aviation paintings from the U.K.’s most accomplished aviation artists will be on show at the Mall Galleries in London. Daily opening hours will be 10am to 5pm, with a late evening extension on Thursday 21st - and best of all, entry is FREE! Until next time, have a good flying scale month...
TONY DOWDESWELL (c) Copyright Flying Scale Models 2016 ADH Publishing. The paper used on this title is from sustainable forestry
SHORT SUNDERLAND: a shape, superbly and accurately captured in this aviation art study that will be on show at The Guild of Aviation Artists’ annual exhibition this year.
4 FLYING SCALE MODELS AUGUST 2016
ADS.indd 1
24/05/2016 10:49
NEW PRODUCTS AUG 16 Tony OK
29/6/16
10:14
Page 2
NEW PRODUCTS
BUY LINES STRICTLY FOR BALSA BASHERS here's a firm and timid tendency among scale model aircraft kit manufacturers to stick to the mainstream, so well known types attract duplication, upon duplication, upon ...., well you get the picture. One man who's not afraid to stick his neck out into untapped territory of Rob Bulk of RCB Kits.com in the Netherlands - and with conventional balsa kits too! So it's more than satisfying to report no less than four new models in the RCB range, recently added to an already extensive and interesting line. Let's take a look first at the rarely modelled Messerschmitt M.19 (also referred to as the BFW 19), a low wing light sport aircraft designed by Willy Messerschmitt, and first flown in 1927. The model, to 1/5th scale spans 1,900mm (75") and is designed for electric power (typically G32 550kv) running on a 3S 4000 mAh lipo battery and five function R/C systems operating the four primary control functions and wing flaps.
T
6 FLYING SCALE MODELS AUGUST 2016
Formers and wing ribs are CNC cut and the built sequence is aided by RCB's unique 'Tab Lock' assembly system. The kit costs 169 Euros. If you think that is a bit unusual, then try this one. Alexander Lippisch was a leading pioneer of tailless flight, commencing with models and gliders in the early 1920s and progressed to some of the most advanced combat aircraft concepts of WW2, one of which, along the way, was the rocket powered Messerschmitt Me 163 - before projecting even more advanced jet propulsion types that never actually became a reality. His first powered tailless aircraft was the Lippisch Storch IXB, built is late 1935 and first flown with a Bristol Cherub engine in 1934. The RCB model is to 1:5 scale, spanning 2,060mm (81"), for electric power, typically a 4120-7 motor drawing power from a four-cell 3700-4500 mAh pack. The kit includes CNC cut parts, 'Tab-Lock' assembly, vac-formed engine cowl and dummy exposed Cherub
engine and pre-formed wire main undercarriage. Kit price is 219 Euros. Now for a Warbird with a difference. The Avia BH3 was a low-wing fighter type designed and built in Czechoslovakia in 1921, entering service in 1923. The shape is highly reminiscent of the late WW1 Junkers D.1 and was an interesting example of advanced thinking when, immediately post WW1, the air arms of most nations were wedding themselves to the biplane concepts for a couple of decades. The RCB Kits model is to a scale of 1:6.8, having a wingspan of 1,500mm (59"), intended for four function controls (REMA) and 35 to 45 650kv electric power from a 4S 3,200 to 5,000 mAh lipo power pack. The all-wood airframe kit also provides vacformed engine cowl, cockpit headrest, prop. spinner, pilot figure and some small detail parts, plus ready-shaped undercarriage. In addition to the rolled plans with all parts shown, there's also a CD of photo instructions with many stage-by-stage construction
NEW PRODUCTS AUG 16 Tony OK
29/6/16
10:15
images. Kit price for the Avia BH3 is 169.50 Euros. However, if pure mainstream scale subjects are your preference, then what could be more so than the Battle of Britain period Supermarine Spitfire Mk.1? RCB's rendition of this perennial favourite, at a scale of 1:7.5 is yet another electric power offering with a wingspan of 1,500mm (59") that suits 870kv outrunner motors like their recommended Typhoon Xtreme 3820, driven from a $S 3700 to 6s5000 lipo pack. Wood Avia BH3
Page 3
components are again CNC cut, while the kit also includes rolled plans, vac-formed cowl, air scoops, dummy exhaust stacks, spinner, cockpit canopy, plus control horns, control cables and control surface hinges, and it also comes with a step-by-step photo sequence of the construction. The airframe is also designed to take retracts, either electric or pneumatic. Price: 169.50 Euros. The kit is designed to accommodate retracts if preferred, and comes with cintrol Lippisch Storch
horns, control cable runs and control surface hinges, plus rolled plans and pictorial instruction on CD. Four function R/C is required, and a lipo battery of 4S 3700 to 6S 5000/ The kit costs 169.50 Euros. Any of these kits can be ordered via the RCM kits web site RCBkits.com where a lot more detail can be found of their extensive range of scale model kits, including pictorial build sequences.
Messerschmitt M.19
JR GOES RETRO rom classic cars to just about anything, it's very much a retro-world these days! The white haired brigade (and those who take the Grecian Two Thousand fix) among us will well remember the ubiquitous 'DoubleU' two-piece folded anodised metal transmitter cases and, sometimes, open gimbal control sticks that were standard way-way back. As a nostalgic throw back to that era, JR have applied that retro look to the transmitter of their new Mercury R/C System, which combines JR's latest DMSS 2.4GHz circuitry with that retro look that is even authenticated with one of the old analogue volt meters on the front face. They've not bothered with the open gimbals through which, super smooth though these were, did let in the rain - but the trims are simply analogue sliders as we used to use back then. The Mercury Retro XBus transmitter and RG812BX receiver combination will be available from all MacGregor/JR stockists for £644.95.
F
AUGUST 2016 FLYING SCALE MODELS 7
NEW PRODUCTS AUG 16 Tony OK
29/6/16
10:15
Page 4
BIG SAITO TWIN Saito's range of four stroke petrol engines has recently expanded to include their FG-61TS, which uses the horizontally opposed cylinder configuration. Displacement is a full 60.6cc (that's appox. 3.7 cu.in.) and the engine tips the scale at 2.18 kg (4.8 lbs). It features a Walbro carburettor unit and runs on a 21 x 11 in. - 23 x 10 in. propeller. Price £949.95 from MacGregor/Saito stockists.
TOUCH SCREEN MULTI CHEMISTRY CHARGER or electric power, the charger is the fuel source, and while a bottle of fuel is an easy pick-up, like buying milk, the electric aficionados need quite a lot more functionality from their obligatory 'refuelling device'. The Potenza C80 charger provides an intuitive touch screen interface, 80 watts of power and is designed to Balance-Charge, Balance-Discharge, and Cycle power packs.
F
Its facilities include: G Intuitive TOUCH SCREEN interface with large graphical display! G AC/DC operation (110-240VAC, 11-14VDC) G 80 Watts charging power (up to 10A) G 10 Watts discharging power G Charges LiPo (1-6S), LiFe (1-6S), LIon (1-6S), NiMH (1-16C), NiCd (1-16C), Pb (1-10C) chemistries G Automatic Lithium Chemistry balance charge cell detection G USB power output port (up to 3A) for powering any USB device while charging other batteries G Ten pre-programmed memories G Eight user memory slots G DC Power Supply output mode G Servo tester/driver G Includes JST-XH balance connectors G Includes DC and AC power input chords G Variety of charge leads included for: EC3; EC5; Traxxas; Deans; JST (Red); Futaba Available from all Hobby Plastic/MacGregor stockits, price £72.95.
TIN DONKEY FROM DESAU! he Junkers D.1 was the world's first purpose-designed ground-attack aircraft and to do that hazardous mission as safely as ;possible for the pilot, it was the first all-metal (give or take a few bits here and there) aircraft with even some armour protection for the driver. By no means an elegant aeroplane, it did nevertheless have an excellent performance, with a top speed of 140 mph and a service ceiling of 20,000 ft. So congratulations to Balsa USA for producing a 1:4 scale model of the type that features a three-piece wing (including the under-fuselage centre section), plus wide and lengthy upper fuselage access hatch for easy access to radio gear and engine/fuel system. The kit also features dummy scale BMW IIIa engine and removable vac-formed ABC tail cone for easy access to the closed loop rudder control system which is also provided. At quarter-scale, it spans 88.5" and is designed to fly on a 35-62cc spark ignition petrol engine or 1.8-2.4 cu.in. four-stroke glow. British agent for Balsa USA is Pegasus Models, who advise a U.K. retial price of £325.00
T
MAKE A DATE WITH 2017!
ross & Cockade International is the First World War Aviation Historical Society, which publishes a subscription-only quarterly publication featuring all this relevant to this historic period of aviation. The Society also annually offers a printed calendar, which features a stunning art picture for each of the twelve months, painted by some of the leading aviation artists. For 2017,the line-up will be:-
C
January: Sopwith Camel February: Junkers D.1 March: Nieuport 17 in head-on attack with German two-seater April: Focker Triplane May: Sopwith Bat Boat 1913 June: Caproni Bomber over Venice July: Short 184 August: AGO C.1 twin boom September: Ansoldo A.1 Balilla October: Albatros D.III November: Willy Copens Hanriot HD-1 December: S.E.5a and Albatros D.Va For U.K. and residents thoughout Europe and worldwide the Cross & Cockade 2017 Calendar is available from Cross & Cockade International, 11, Francis Drive, Westward Ho!. Bideford, EX39 1XE or online at: www.crossandcockade.com Prices (inclusive of mailing) are:U.K.: £11.00. E.U countries: £12.50/ 16 Euros. R.o.W: £13.50/$23.00 (Airmail); £12.50/ $21.00 surface mail).
8 FLYING SCALE MODELS AUGUST 2016
FSM AUG 16 P09.indd 1
21/06/2016 11:41
PLAN 520 WESTERN METEOR Tony OK
29/6/16
10:27
Page 2
FULL SIZE FREE PLAN FEATURE
GENERAL WESTERN
METEOR
A 30" span scale model designed by Peter Rake, with the prototype model build and flown by Pat O'Donnell s you can see from the date on the plan this is another of those designs of mine that has been hanging about for some time. Models were built from the design, but suitable photos were always sadly lacking. Fortunately, Pat O’Donnell came to the rescue and the result is the model you see presented here.
A
THE MODEL The model was drawn up during my
phase of designing types suited to the GWS IPS style power units, but the plan actually shows a small outrunner motor instead of the not always reliable brushed unit. If you wanted to revert to that power arrangement, it shouldn’t be too difficult to sort out the modification. Similarly, the model shows closed loop controls on the plan but a quick look at the photos reveals that Pat opted to use lightweight pushrods on his model. Either method works well but the closed loop system is the more accurate in
10 FLYING SCALE MODELS AUGUST 2016
scale terms. The plan also shows scale rib spacing, which results in a rather high rib count. That’s not a problem if you use the laser cut parts the publisher will make available, but for anyone choosing to hand cutting parts, the rib count could easily be reduced by omitting every other rib. Once again, less accurate, but it would reduce both workload and the overall weight of the model. Among other options that might be considered, the sheet tail surfaces could
PLAN 520 WESTERN METEOR Tony OK
29/6/16
10:27
Page 3
easily be replaced with built-up structures using laminated outlines. The model is intended to be flown three channel (rudder/elevator/motor speed), but since the aileron positions are indicated on the plan, the more enterprising amongst you may decide to make it a four channel model. You would, however, have to reduce the dihedral, which would mean replacing the spars shown.
EQUIPMENT The motor shown (a 15 gram outrunner) will provide ample power when coupled with a 2S LiPo pack. Any similar small motor will be fine, but avoid using anything with much more powerful. The plan shows 5 gram servos, but the more modern 3.7 gram servos would save a little weight. I’m not sure how well they’d stand up to the constant pressure of closed loops though. The indicated hatch will provide ample access for installing the equipment and changing battery packs. Pat ended up using an 850 mAh pack, largely because he needed the nose weight. Keep the tail light, mount the equipment as far forward as practical and a smaller pack will work out fine. You should be aiming for a flying weight of around eight ounces, although Pat’s model turned out a little heavier than that at closer to ten ounces, so you do have a little leeway. Once the spars are joined wing construction begins with the centre section.
TAIL SURFACES Let’s start with the simplest part of the model. As already stated, these could be built-up structures with laminated outlines but that’s something for the individual builder to decide, whether he wants to go to that additional effort. As designed, the all-sheet tail surfaces work fine for a minimal increase in weight - the weight of wood gained is offset against the weight of glue not required. The only actual building (and I use the term loosely) involved is joining the elevators. Cut a groove into the leading edges where the joiner will fit and glue the elevators to the joiner. Use the tailplane as a guide to ensure you get the spacing correct. After that it’s just a case of sanding overall and rounding off the edges. Hinging and fitting the horns is best left until after the tail surfaces are covered.
The spar is lowered over one wing panel and the panel assembled around it.
WINGS Despite the number of ribs involved the wings are easy enough to build, although they do need to be built in a specific order. As noted on the plan, start by joining the spars with brace B. Also, glue together parts WT1 and WT2. Once dry, begin the actual construction by pinning down the spar over the centre section drawing and also pinning down part TE1 and the leading edge. Now glue in place ribs R1, R2, R3 and R4, all of which should be at 90 degrees to the building board. Glue in the 1/16” ply strut plates and allow the assembly to dry completely. Unpin the centre section and lower one side of the spar over the wing drawing, pinning it in place. Pin down TE2 and the leading edge, gluing as required. Glue in place the assembled wing tip, angled upwards to meet the spar end. Fit
Finally the built side is packed up while the second wing panel is built.
Fuselage construction follows the time honoured technique of starting with two matched side frames.
AUGUST 2016 FLYING SCALE MODELS 11
PLAN 520 WESTERN METEOR Tony OK
29/6/16
10:27
Page 4
Although not quite the order in which I described, this shot demonstrated how the entire fuselage can be braced (pinned down) while formers and stringers are added.
With the top decking and wire parts in place, the nose blocks are fitted and shaped.
all remaining wing ribs, ensuring that they are all at 90 degrees to the building board. Finally, glue in place the 3/32” balsa strut mount plates and allow to dry. Once the first wing panel has thoroughly dried (overnight?) unpin it and lower the opposite spar over its wing drawing. Repeat the above process until you have a complete wing assembly. Remove the wing from the board, shape the leading and trailing edges and sand smooth overall. That’s it; the wing is now ready for covering. Easy, wasn’t it? The advantage of building the wing in this manner is that it is almost (somebody is bound to prove me wrong, but they’ll have to work really hard at it) impossible to end up with unequal dihedral. Also, as long as the spars aren’t soft balsa, there is no weak spot just outboard of where the centre section struts attach to the wing talking of which, the P-clips mentioned on the drawing are nothing more technical than thin brass strip wrapped around the strut wire and hammered flat to snugly enclose the wire. They are then drilled to accept the screw that will hold them against the ply strut plates. Since the strut positions are shown on the wing drawing, it’s worthwhile marking them onto the ply plates. Then, since most of us are likely to end up with slightly differing P-clips (the holes probably won’t all be in exactly the same place) use the clips themselves to mark the wing plates for drilling the screw holes - and label the clips as to where they need to go on the wing. If desired, the P-clips can be soldered to the appropriate centre section strut once said struts are there to be soldered to. If in any doubt that your mounting screws will hold securely in the ply plates, add a small rectangle of ply above each screw position to act as a doubler. So, without further ado, let’s move onto the fuselage assembly.
FUSELAGE
The obligatory naked model shot reveals the basically simple structure that results in a nicely rounded shape.
The fact it will sit on a coffee-table demonstrates the compact nature of the model.
12 FLYING SCALE MODELS AUGUST 2016
Although possibly slightly more intricate than the fuselage on many of my designs, it really isn’t that difficult to build. As long as the basic box structure at its core is straight and square, the fuselage will go together fairly quickly. So, the basic box would be as good a place as any to begin since all the other parts attach to it. Start by marking the sheet fuselage sides with the former positions and then score and crack inwards the front sides. A shallow V-cut into the inside of each side will allow the sides to be lightly cracked without making a gap on the outside. The groove should be filled with glue as you pull in the nose onto F1, but we aren’t quite ready for that just yet. First we need to build the complete side frames over the plan, making sure that both grooves do actually end up in the inner face of both frames. Once we have the two frames to hand, these can be joined using formers F2, F3 and F4. Before allowing these to dry, ensure that the assembly is perfectly straight and square. Now apply glue into the grooves and pull in the nose onto F1. Check that it remains straight and square and that both sides angle inwards by the same amount. Allow this assembly to dry completely before proceeding. Pull together and glue the tail, fitting the cross
PLAN 520 WESTERN METEOR Tony OK
29/6/16
10:27
Page 5
braces as you go. Pay particular attention to keeping the rear fuselage both straight and square. Fortunately, the top of the rear fuselage is flat, so this operation can be performed with the fuselage inverted over the plan. Once this assembly is completely dry, remove from the board and bind and glue the wire parts to ply formers F2, F3 and F4. Bind and solder together the front centre section struts. Don’t worry that the rear c/s strut can pivot, it won’t be able to once the wing is in place, simply because of the braced front struts. Also bind and solder together the main undercarriage legs, but don’t fit the axle wire until you have finished shaping the front fuselage blocks. An alternative route here, if you detest shaping around wires sticking out, is to tack-glue the block balsa sections in place and shape them, then remove them and fit the wires. However, I’ll continue to describe the build as I would do it - with wires already in place. Fit the decking formers F5T, F6T, F7T, F8T and F9T and add the 1/16” balsa sheet decking paying attention to NOT distorting the fuselage box in the process. Temporarily fit scrap balsa spacers where the tail surfaces will go and glue the tail fairing blocks to F9T only. The spacers will be removed once all the shaping and sanding is complete, so don’t glue them too securely. Now, fit all the remaining side and bottom formers, parts TS and the 1/16”x 3/3” balsa stringers. Don’t make the stringers too soft or you may cause yourself handling problems during the shaping stage. Temporarily glue in place the lower and side nose blocks and even more lightly tack glue in place those that will form the access hatch. As you’ll notice, Pat didn’t do it quite as shown on the plan but making the hatch L shaped (as shown) will mean that you retain easy access to the motor, as well as radio and battery access. Now comes the messy bit; carving planing and sanding the fuselage to shape. Once you have that done, remove the block balsa parts and hollow them out to accommodate your chosen motor. Fit the motor, noting the thrust lines, before gluing in place the fixed blocks. Arrange your hatch retaining system (Pat used magnets and washers), remove the tail surface spacers and solder in place the final undercarriage leg. Now sit back and admire your handiwork because all the building is done.
On a model this simple (in outline and “surface detail), the dummy cylinders are essential to retain the scale appearance ”
CUT PARTS SET FOR THE GENERAL WESTERN
METEOR Get straight down to construction without delay! This month’s full size free plan feature is supported by a laser-cut set of ready-to-use balsa and plywood components. This provides the parts that, otherwise, you would need to trace out onto the wood before cutting out and includes wing ribs and tips, tail centre parts, fuselage doublers, top deck,formers etc.
IT DOES NOT INCLUDE STRIP AND SHEET MATERIAL OR SHAPED WIRE PARTS
Price £35.00 plus carriage: £11.50 (UK); Europe £26.00
Order set CUT/FSM 520 Shipping Note: For shipping to destinations outside the UK and Europe, you will be charged our standard flat-rate price of £49. This covers most destinations and secures your order with us. However, we will contact you accordingly with an accurate total shipping charge prior to dispatch and either issue a refund or a PayPal money request for the balance.
Visit our secure website:
www.flyingscalemodels.com to order yours
Order direct from:- ADH Publishing, Doolittle Mill, Doolittle Lane, Totternhoe, Bedfordshire, LU6 1QX, UK. Tel: 01525 222573/
[email protected].
AUGUST 2016 FLYING SCALE MODELS 13
PLAN 520 WESTERN METEOR Tony OK
29/6/16
10:27
Page 6
All set to commit aviation, even if the balance wasn’t quite right at first.
COVERING AND FINISHING Covering any model is all a matter of personal taste but just make sure it’s lightweight covering (no Solartex please). Pat used a combination of lightweight film and a painted finish, but obviously this carries a weight penalty. Especially since it is so difficult to achieve a salisfactory result in silver paint when using only a lightly sprayed coat. Yes, you can have any colour you like, as long as it’s silver. I believe Pat’s scheme is of his own making, rather than a scheme used on the full size machine. The wing struts are just streamline section bass strip and are intended to be purely cosmetic. However, if you want to make them functional, feel free to do so. On a model this simple (in outline and surface detail), the dummy cylinders are essential to retain the scale appearance, but can be as simple, or as complicated as you care to make them. Pat has opted for fairly simple basic cylinders and that works just fine. However, more detail is allowed if that’s what does it for you. Personally, I usually enjoy making the ‘twiddly bits’. On this model they are likely to be a bit vulnerable in a less than perfect landing - small wheels and grass
flying sites are not a match made in heaven for smooth landings.
FLYING The only point I’ll make here is to insist that you balance the model to hang just a hint nose low when supported at the point shown on the plan. Pat managed to end up with a slightly tail heavy model when he first attempted to fly it, with fairly predictable results. That, combined with much more power than required (E-flight Park 280), resulted in a model highly
sensitive to elevator and one that wanted to go vertical if the throttle was increased. Fortunately, he was able to get the little Meteor down with nothing worse than a broken prop. Balanced correctly and fitted with a 5.25” x 4.75” prop., the model now performs faultlessly but could still use a bit more down and right thrust because of the excess power. A Park 250 would be a better option if you have to use an E-flite motor. I
10 Once correctly balanced the model has proved to be a steady performer that should cause no problems at all. Looks good, flies well, who needs more?
14 FLYING SCALE MODELS AUGUST 2016
FSM AUG 16 P15.indd 1
21/06/2016 11:44
FOXON ZERO Tony OK
29/6/16
14:59
Page 2
CLUBMAN SCALE
Mitsub Alex Whittaker examines Steve Foxon's take on the definitive Japanese warbird
16 FLYING SCALE MODELS AUGUST 2016
FOXON ZERO Tony OK
29/6/16
14:59
Page 3
bishi A6M Zero
teve Foxon is a well known scale modeller. He is also a keen warbird enthusiast. Like many of us, he follows the summer scale shows up and down the country. His model is of all built-up traditional construction, using mostly balsa and plywood. It was built from the Meister kit. She is constructed to quarter scale, giving a wingspan of 108”. The wing area exceeds 2,000 sq. inches, delivering a design wing loading between 35-38 ounces per sq. foot. Steve has fitted his Zero with a 3W 85cc petrol engine.
S Plan
The Model is built to the Meister Giant Scale Models Plan. This plan allows for a two piece wing.
Wings The wing is designed with a flat bottom for easy building, with no need for jigs. It uses a mix of plywood and balsa ribs fitted to pre-notched spars. The whole is then sheeted over up to the spar in the time-honoured manner. The plan allows for different versions of Zero, with different wing spans.
AUGUST 2016 FLYING SCALE MODELS 17
FOXON ZERO Tony OK
29/6/16
15:00
Page 4
1
2
3
4
5
1: The grp cowl comes in the kit or available separately. 2: Robarts retracting tailwheel assembly. 3: Trademark Zero exhaust stubs faithfully modelled. 4: Steve opted for the fully opening canopy. 5: The Japanese pilot was supplied by Real People Pilots.
Tail The tailplane and rudder ribs are 1/16” balsa, covered in 1/16” balsa. There is a pine block to support the rudder control.
Fuselage Up to the trailing edge position, the fuselage employs plywood formers. After that balsa formers are used. These are then
The Zero has a very practical wide track undercarriage.
sheeted over in 1/8” balsa.
Spinner
Engine
Scale spinner and backplate are Manufacturer’s items.
Steve chose a 3w 85cc petrol twin with Rexcel electronic ignition.
Prop The 28”x8”Menz prop was sourced from Falcon Props. Steve rates these props, and the Falcon service, very highly.
The Exhaust The exhaust is home made. Being a professional Welder /Fabricater Stevefound this bit of the build a bit of a doddle.
Cowl and Canopy Steve used the
FOXON ZERO Tony OK
29/6/16
15:01
Page 5
Manufacturer’s moulded items. The cowl is grp.
Top coat paint came from Fighteraces.
importantly, she can execute equally long slow scale-like approaches using her flaps. When I asked Steve to sum up her overall flying abilities, all he said was: “Not a lot to say, really. She flies just spoton. No vices whatsoever. You can even land her without flaps !”
Rivets Undercarriage/Retract The retracts are made by UK Premier Retracts. Steve says that these are excellent quality and work very well.
Looking me squarely in ther eye, Steve vouchsafed that he had indeed applied 30,0000 rivets entirely by hand.
Decals Tailwheel This too retracts, and is a commercial Robarts item.
The roundels are sprayed on and the vinyl letters and numbers were stuck on. These were supplied by Steve Kash.
Covering
Pilot
The model is covered in 25 grams fibreglass cloth supplied by FibreTech, and sealed with their G4 Pond sealer.
The wonderfully care-lined and aggressive Japanese pilot is made by Real People Pilots.
Painting
Flying
Steve used a cellulose primer to lay down a substrate for further work. He used masked-off primer to get the panel lines.
I have seen this Zero fly on three occasions, and she is capable of suitably slow scale-like take-offs. Perhaps more
Building Manual Download Readers may download the free Builder Manual here: www.meisterscale.com/ Zero/MEISTER_ZERO_INSTRUCTIONS.pdf I
Specifications: Scale: Wingspan Weight: Engine: Prop:
1/4 108” 38lbs 3w 85cc twin . 26x8 prop
6: Steve’s Zero uses Premier UK air operated retracts and Airflight Custom wheels. 7: Steve Foxon and his 108” span Zero from the Meister Giant Scale plan.
6
7
AUGUST 2016 FLYING SCALE MODELS 19
www.flyingscalem
NEVER MISS AN ISSUE
SUBSCRIBE TODAY! £ www.adhpublishing.com 42 Get your copy delivered to your doorstep before it reaches the newsagents by subscribing
www.adhpublishing.com
✆
01525 222573
✉
[email protected]
JOIN THE ELECTRONIC REVOLUTION Enjoy FSM on your iPhone, iPad, Android phone or tablet PC. Visit the App Store or Google Play and search for “Flying Scale Models” or visit PocketMags.com to purchase single issues and subscriptions to read on your device or PC.
FSM DPS SUBS.indd 32
16/02/2015 15:00
scalemodels.com
Follow us on Facebook
Follow us on Twitter
facebook.com/pages/FlyingScale-Models/495012097186048
@ScaleModelFlyer
ALSO AVAILABLE FROM ADH PUBLISHING...
RC B O O KS
www.adhpublishing.com/shop ● MASTER MODELS ● TYPE HISTORY ● IN DETAIL ● SCALE DRAWINGS ● FREE PLANS
● CONSTRUCTION ● TECHNIQUE ● SHOW REPORTS ● FLYING COLOURS ● HOW TOʼS
● GLIDERS ● ELECTRIC ● SCALE INDOOR ● SCALE REVIEWS ● SCRATCH BUILD
44
SUBSCRIBE FOR ONLY
£
SUBSCRIBE FOR ONLY
£
55
SEE THE ADH WEBSITE FOR MORE...
FSM DPS SUBS.indd 33
16/02/2015 15:01
AXIAL DUMMY WW1 PROP TONY OK
23/6/16
10:04
Page 2
CONSTRUCTION TECHNIQUE
Author Paul Blakeborough’s 1:5 scale model of the late WW1 Pfalz D.XII fighter resplenent with its dummy scale propeller, carved from Wallnut and Lime, which closely replicate the Maple and Wallnut of the full size
AXIAL DUMMY WW1 PROP TONY OK
23/6/16
10:04
Page 3
MAKING A SCALE AXIAL WW1 PROPELLER Paul Blakeborough traces the step-by-step technique of replicatining one of those WW1 laminated propellers for static scale model display ome of the WWI propellers that can be found on museumbased aircraft are beautifully formed from laminated layers of different woods. I’ve always gazed in awe at the craftsmanship and wondered whether I could make one to put on one of my models for flying, but in most cases the propeller at scale size is much too large for our model engines. But there’s nothing wrong with using one for static display! Amongst many others, the Axial Company made propellers in Berlin,
S
Germany and were fitted to a range of aircraft including Fokker and Pfalz types. They were generally made from a laminate of Walnut and Maple woods. In the factory-fresh new condition, the colours of the varnished wood would have been beautiful. Unfortunately photography back then was only in Monochrome so we can only imagine the colours. However, there are companies making replicas today for use as both static and live on full size WWI replica aircraft. One of these, in Germany, showed me online how the full size item
As well as Axial, the two-tone laminated propellers for German WW1 aircraft were also made by Garuda. This is the prop on the Albatros D.Va replica at the RAF Museum, Hendon.
AUGUST 2016 FLYING SCALE MODELS 23
AXIAL DUMMY WW1 PROP TONY OK
23/6/16
10:04
Page 4
2
1
1: Careful cutting of Lime wood using my fretsaw.
4
2: Some Walnut and Lime laminations were shorter and were joined on the Centre hub.
5
4: Every workshop ‘Weight” I could find to weight things down!
7
5: Ensuring a good 24 hours passed before disturbing the ‘Sandwich’.
8
7: Small bandsaw used to cut out the profile, then finished with Permagrit !
8: First tentative cuts with the Stanley Knife.
3
3: The selection ready for laminating using Aliphatic resin.
6
6: A photo was used at scale size to obtain correct profile, which was then transferred to the wood.
9
9: The first blade back-face just about there.
“ I used a good quality clear polyurethane gloss varnish for finishing and gave it around six coats over a period of a week giving a light sand in between ”
Axial Manufacturer’s Logo as applied to front face of both blades
Garuda Manufacturer’s Logo
was made. This fired my interested in having a go myself, but after study I decided to make it using a slightly different process. The full size version is made from seven laminations of wood. Each of these segments were bandsawed to shape before being assembled in a stacked, staggered pattern to form the correct pitch of blade. The unit was then hand crafted to final shape. With my model-size version, I decided to laminate the sheets first then carve the pitch in afterwards. Luckily I found an engineering diagram online of the propeller so I had a guide for dimensions. Choosing the size I wanted to make (1:5 Scale) I cut out the seven sheets at the correct size. (For economy I actually used half size pieces on some and joined at the hub). The sheets were then laminated using aliphatic glue and weighted down for 24 hours. Marking the centre of the hub on the wood, I then drew thereon the front outline or the Prop. With my bandsaw and fretsaw I then cut
24 FLYING SCALE MODELS AUGUST 2016
out the scrap from around the outline, and sanded to the finished profile shape. When I then moved to the next stage of shaping the prop. the task at first looked daunting, but as I started cutting away the rear face of the blades, it became apparent that the laminations are a major guide as to how much to take off one side and match to the other. I used a Stanley knife and wood chisel to shave off the excess wood. Once satisfied that the blades matched roughly, a final shaping with my favourite Permagrit tools and sanding pads left a reasonable finish. Once the rear (easier) face of the propellor was successfully shaped, it was time to move on to the front face. The difference is that the blades have a convex section (Airfoil) and a little more care was required to ensure that I didn’t take off too much material. So I Kept a constant close eye on how the laminations looked on each side to make sure that what wood was removed was equal on both blades. Fortunately, with the rear faces
AXIAL DUMMY WW1 PROP TONY OK
29/6/16
17:33
Page 5
10
11
12
10: Starting to get then ‘knack’ on the matching blade
11: Fine tuning with the chisel, both woods cutting reasonably well.
12: ‘Permagriting’ the roots at the Hub.
13
14
15
13: Over on the front a similar process, ensuring a good match on both blades.
14: A good sanding to give a smooth finish for the Polyurethane Varnish.
15: Arbout six coats of varnish, with a fine sanding between each one.
16
17
18
16: The Hub, drilled and tapped to suit my Laser propshaft.
17: Decals of Axial Logo applied before a final Varnish coat.
18: Simulated Hub faceplate from Aluminium plate, Plastic Padding and scrap ‘Stubby’ nuts.
AUGUST 2016 FLYING SCALE MODELS 25
AXIAL DUMMY WW1 PROP TONY OK
23/6/16
10:05
Page 6
finished, there was less guesswork involved as I had a datum to work up to. Again the blades were carefully finished and finely sanded to give a smooth surface for application of a varnish. As the prop. was to be used for static display only, I chose to drill and tap the centre of the hub so that I could simply wind the propeller on/off the crankshaft. I used a good quality clear polyurethane gloss varnish for finishing and gave it around six coats over a period of a week, giving a light sand in between each coat. This really brought out the colours and looked very satisfactory. To achieve the final true scale effect, the propeller then needed a front ‘Boss’ and some Axial decals. The Boss was made from a 1/16” disk of sheet aluminium with holes drilled in the appropriate place and stubby nuts and bolts glued into the holes where it would have been fastened to the hub on the full size. The centre was made from Plastic Padding filler stuck to a small wood dowel and spun up in my pillar drill, then formed to a hexagonal shape. For the decals, I found an Axial picture online and used it to produce my own decals using my inkjet printer. Once affixed in the correct places, a light coat of the same gloss varnish sealed them in position. All-in-all the effort was well worth the work involved and the satisfaction that I had made it myself far out-weighed the time spent doing the job.... Many fellow modellers have asked where they could purchase one... I reply with “... it’s simply a one off” ... But maybe it’s a business opportunity for someone ?!?!!??
[email protected] I
CAN’T GET THE WOOD Y’KNOW... s Paul mentions, the woods used for the laminated propeller of the full size German aircraft made by Axial (and also Garuda), were Maple and Walnut. A combination that produces the same visual effect is Walnut and Lime, which Paul says, carve and sand well. He obtained both from Cornwall Model Boats Ltd, 3b, Highfield Road Industrial Estate, Camelford, PL32 9RA (Tel: 01840 211009). Look them up on line at:-
A
www.cornwallmodelboats.co.uk They list both Walnut and Lime in 1000 x 100mm sheets in thicknesses that start from 0.5mm and include 3; 4; 5and 6mm. The 4 and 5mm thicknesses ard probably right to achieve the six or seven laminations for a 1:4 or 1:5 static scale dummy propeller.
26 FLYING SCALE MODELS AUGUST 2016
AeroDetail series shown in
lane of the
£
Finding the detail needed to finish a scale mode can be difficult and getting full size images is not always practical. Our range of detail photo collections provides extensive close ups of a wide range of popular aircraft all on CD in J-peg format Junkers Ju87G-2 Stuka CD65 The aircraft that defined the term
Hawker Typhoon CD109
The Hawker Typhoon was a British single-seat fighter bomber, produced by Hawker Aircraft. While the Typhoon was designed to be a medium-high altitude interceptor. 117 images
Hawker Tomtit CD64
Mid 1930s RAF biplane trainer aircraft, from the era open cockpits of silver dope and polished metal. (140 images)
Hawker Tempest Mk 2 CD63 The final development of Hawker
Hawker Sea Fury FB XI CD62
Hottest of all the piston-engine fighter aircraft, the carrier-bourne Sea Fury is also admired for its elegant profile. (140 images)
Hawker Hurricane MK1 & MKIV CD61 Two versions of the famous ‘Hurri’ – one a true Battle of Britain survivor painstakingly restored to perfect authenticity, plus the cannon-armed, Mk.IV ‘tank buster’. (170 images)
. P+P
Grumman F3F CD54
A study of the faithfully replicated example of the 1930s U.S. Navy biplane as seen at the 2001 Flying Legends Show. (34 images)
Gloster Gladiator CD53
The Royal Air Force’s last biplane fighter, star of late 1930s air shows and flown in combat during early WW2, including Battle of France, Battle of Britain, Mediterranean operations and North Africa. (50 images)
Fokker D.VIII CD52
The Fantasy of Flight Museum’s example of the late WW1 Imperial German Air Service monoplane fighter, in full detail. (69 images)
Fokker D.VII CD51
The most famous of all the German fighter aircraft of WW1. The collection depicts the RAF Museum, Hendon’s authentic, restored example. (44 images)
Focke Wulf FW 190A CD50
Germany’s ‘butcher bird’ fighter of WW2, active on all combat fronts from 1941 onwards.
De Havilland DH84 Dragon CD42
Bucker Bestmann CD28
DE Havilland DH 60 CD41
Bristol M.1C CD27
Forerunner of the more famous DH 89 Dragon Rapide, this collection depicts a superbly restored example. (40 images) The aircraft that set the British ‘club’ flying movement on the road to success during the 1930s. (140 images)
De Havilland DH 53 CD40
1920s lightweight low wing sports aircraft designed to a low-power specification. Machine illustrated is the sole remaining example. (60 images)
Curtiss P-40M CD39
One of the later versions of the famous Curtiss Warhawk, the WW2 fighter aircraft that saw service in just about every combat theatre of operations. (100 images)
Curtiss P-40B Tomahawk CD38
Rare, full restored example of the early version of the Curtiss fighter aircrfaft that was at Pearl Harbour on Dec. 7th 1941 – and survived the attack! (130 images)
Curtiss Jn-4 ‘Jenny’ CD37
An authentic, restored example in full detail. (130 images)
Fieseler Storch CD49
Curtiss Hawk 75 CD36
No authentic example now exists, but the accurate replica photographed in extensive detail in this collection is as good a guide as can be found of this elegant 1930s RAF fighter. Includes some general arrangement pictures authentic to the period. (55 Images)
Fairey Gannet ASW1 & T.2 CD48
Comper Swift CD35
Grumman FM-2 Wildcat CD58
Fairchild Ranger CD47
A combo collection featuring the RAF Museam’s Hart bomber and Hart Trainer, plus Shuttleworth’s Hind. (115 images)
Hawker Fury CD59
First of Grumman’s highly successful line of prop-driven ‘Cats’, the Wildcat, in guises from F4F-3 to FM-2 held the line after the Pearl Harbour attack and served from then until the end of WW2. It was idea for operations from the small escort carriers. (90 images)
Grumman F8F Bearcat CD57
Hottest of Grumman’s prop-drive fighters – it arrived too late for action in WW2 but was standard ship-borne fighter equipment in the immediate post-WW2 era. (90 images)
Grumman F7F Tigercat CD56
The awesome twin engine long range fighter of the late WW2 era operated by US Navy and US Marines. (60 Images)
Grumman F6F Hellcat CD55
The US Navy’s most important, and most successful fighter of WW2, photographed, close-up, from nose to tail and wing tip to wing tip. Example shown is part of The Fighter Collection, based at Duxford. (90 images)
✁
Y
(INC
Arguably the first military STOL aircraft, this storky looking aircraft has long been a modellers’ favourite. Two examples are represented, the machine at the Fantasy of Flight Museum in Florida and the RAF Museum Cosford’s example. (90 images)
Hawker Hart & Hind CD60
ONL
12 .99
Making a scale model?
The Royal Navy’s post-WW2 anti-submarine workhorse, that also served with a number of other air-arms. Most images are of Mk.T.2, that was more-or-less the same as the ASW.1. (110 images) Elegant U.S. high wing light aircraft in full detail. Two examples shown. (60 images)
Erco Ercoupe 415 & Avalon Ercoupe CD46
The elegant twin finned light/sport aircraft. Both original Type 415 and later Alon resurection examples. (115 images)
DHC Chipmunk CD45
A bumper bundle of images that provides a vast array of detail pictures, plus photos of examples in both RAF trainer and civil colours. (70 images)
DH Tiger Moth CD44
The ‘export’ version of the Curtiss P-36 that saw service in durng WW2 with Finland and during the ‘Battle of France’ in May/June 1940. Example shown is a combat veteran. (130 images) 1930s racing aircraft. Example depicted is the radial engined example at Shuttleworth Mussel (91 images)
Cierva C.30 Autogiro CD34
A study of the example hung in the Fantasy of Flight Museum, finished in RAF WW2 colours. (35 images)
Christen Eagle CD33
The spectacular, stylish aerobatic biplane revealed in closeup. Example shown is the two-seat version. (90 images)
Chrislea Super Ace CD32
Late 1940s civil light aircraft with distinctive twin fins and nosewheel type undercarriage. A fully restored example. (123 images)
Chilton DW1 CD31
Original upright engined version of this diminutive British low wing sports/racer. (90 images)
Much close-up detail of civil register example, plus further detail of the IWM Duxford’s example in Royal Navy trainer colours, showing the blind flying hood. (110 images)
Chance Vought F4U-1D Corsair CD30
De Havilland DH89 Dragon Rapide CD43
Radial engine version. Example from Fantasy of Flight Museum. (79 images)
Graceful twin engine biplane airliner that saw service from pre-WW2 through to the mid 1950s. Several are still flying and three are shown in this picture collection. (100 images)
)*
Authentic example as exhibited at the Fantasy of Flight Museum, in WW2 Luftwaffe colour scheme. (43 images) Early WW1 fighter monoplane. Example depicted is the faithfully authentic replica built by the Northern Aero Works and operated by the Shuttleworth Trust museum. (100 images)
Bristol F2B Brisfit CD26
Full close-up detail, including photos of engine cowls for both Rolls Royce Falcon and Hispano-Suiza engines. (28 images)
Bristol Bulldog CD25
This collection depicts the example assembled from two donor airframes and restored to superb standard by Skysport Engineering. It can now be seen at the Royal Air Force museum, Hendon. (60 images)
Boeing Pt-13/17 Stearman CD24
Subject aircraft is a current British civil register example used for air-show displays. (54 images)
Bleriot Monoplane CD23
The Shuttleworth Museum’s machine, the oldest original example still flying. Much close-up detail showing all the exposed rigging, structure and the “bedstead” main undercarriage, plus Anzani engine. (74 images)
Bell P-39Q Airacobra CD22
Superbly restored example of this much-maligned WW2 fighter aircraft that was used with great success by Russian forces in the ground attack role and with saw much action in the south Pacific, from where this restored example was recovered. (130 images)
Beech D18 Staggerwing CD21
The distinctive back-staggered 1930s biplane with retracting undercarriage. (45 images)
Avro 504k CD20
The Shuttleworth Museum’s superbly maintained machine, in full detail. (140 images)
Arrow Active II CD19
Sole remaining example of this 1930s racing and aerobatic biplane restored to pristine condition. (50 images)
Aeronca Sedan CD18
The last and most graceful of the Aeronca line of light/ sports aircraft in fine detail. (80 images)
The famous ‘bent wing bird’ in super detail. (132 images)
Bucker Jungmeister CD29
See many more online at flyingscalemodels.com
ORDER FORM - Aerodetail CDs Please send me the following CDs:
Please debit my credit card for £
Name:
(VISA / Mastercard - please delete non-applicable)
Address:
Card No:
£12.99 (including p+p)* per CD *UK only Postage: (Europe); £2.50 (World); £3.50
Expiry date:
Send to:
Postcode:
CCV:
ADH Publishing Ltd,
Daytime Tel No:
SIGNATURE:
Doolittle Mill, Doolittle Lane, Totternhoe,
I enclose a cheque for £
DATE:
(Made payable to ADH Publishing)
Order on line at www.flyingscalemodels.com or aero-modeller.com
Cd advert2-Dec12.indd 1
Bedfordshire, LU6 1QX. Great Britain. Tel: 01525 222573 Fax: 01525 222574 Email:
[email protected] Allow 21 days for delivery
18/10/2012 16:03
A 20 S FOR S TONY OK
29/6/16
09:55
Page 2
Subjects for Scale
DOUGLAS A-20 B DESIGNED WHEN THE LEAN INTER-WAR YEARS OF SLOW MILITARY AIRCRAFT DEVELOPMENT WERE ENDING, THIS DOUGLAS DESIGN FILLED AND URGENT NEED WHEN WAR CAME IN 1939
o what’s in a name? In this case, the manufacture’s basic design nomenclature it was DB-7, in the USAAC is was the A-20 ‘Havoc’, and even in one variant the P-70, while to the RAF it was the ‘Boston’ and also the ‘Havoc’ depending on the variant. Whatever, one can be sure that such a spread indicates a tractable and successful
S
aircraft type. Throughout aviation history, one the of the ‘challenges’ which designers and manufacturers of military aircraft have often faced has been that of obtaining, from the customer, an accurate definition or specification for what is actually required. In such cases, the customer has had no very clear idea of what was needed but will
28 FLYING SCALE MODELS AUGUST 2016
‘know it when they see it’! Such an approach has led to its spectacular failures - and also some successes in aircraft design and procurement, whether it has been as result of customer initiative or one where an aircraft manufacturer has, in their own business interest (or even commercial survival), used their own ‘crystal ball’ to be
A 20 S FOR S TONY OK
29/6/16
09:55
Page 3
BOSTON/HAVOC ready with a warplane that would fill an anticipated eventual requirement. During the early 1930s the U.S. Army Air Corps became interested in the concept of a multi-engine ‘Attack’ aircraft, a terminology nowadays being well defined as a “tactical military aircraft that has a primary role of carrying out airstrikes with greater precision than higher altitude bombers, and is prepared to encounter strong low-level air defences while pressing the attack”. That definition is of course the result of experience honed well over more that half a
century, but when the USAAC began their study there was little to go on beyond a half hearted investigation soon after WW1 that resulted in a twin Liberty engine powered triplane designed by their own Engineering Division, designated the GAX (Ground Attack, Experimental). Without combat experience to call upon for guidance, considerations ranged around the possibility of a multi-function aircraft capable of tree-top level strafing of enemy troop formations, gun emplacements, tanks, fuel dumps and lines of communication. It might also undertake the task of medium
altitude conventional bombing and ground observation. Thus, while this wide ranging operational brief took time to crystallise into a workable operational specification, the Douglas Aircraft Company took the bull by the horns to proceed independently with a new aircraft design that could satisfy the Military as closely as possible when they had finally made up their collective mind of what was needed. Commencing in March 1936, what took shape in the Douglas Aircraft design Department was their Model 7A attack bomber, to be manned by a crew of three,
Boston Mk.IIIs of No.107 Squadron, operated from RAF Great Massingham in 1942. The fourth aircraft, in the background, is a Short Stirling.
GENERAL CHARACTERISTICS Length: 47 ft 11 in (14.63 m) Wingspan: 61 ft 4 in (18.69 m) Height: 17 ft 7 in (5.36 m)
AUGUST 2016 FLYING SCALE MODELS 29
A 20 S FOR S TONY OK
29/6/16
09:55
Page 4
Looking rather less aggressive than the appearance eventually developed, the prototype Douglas DB-7B immediately following its first flight.
An R.A.F. Douglas DB-7 Boston Mk.1 with most of the airframe finished in matte black, with green/dark grey upper surfaces.
Bomb leader A-20J of the 410th bomb group, 9th Air Force. Most G and H models had solid-noses with six forward-firing 0.5" calibre machine guns, but the clear vision nose of the J variant was a valuable feature for bomber-leader aircraft.
30 FLYING SCALE MODELS AUGUST 2016
powered by two Pratt & Whitney Wasp Junior radial engines. To fulfil the range of tasks anticipated, the design provided for an interchangeable fuselage underside section to accommodate either a bomb bay or observation compartment and design work progressed until the end of that year when work was suspended, pending further USAAC studies. Late in 1937, based on observations of air actions in both Spain and China, USAAC invited proposals for an aircraft with a range of 1,200 miles carrying a 1,200 lbs. bomb load and a speed in excess of 200 mph. The Douglas response offered a revised version of their Model 7A powered by two P & W R-1830 engines of 1,100 hp each, which deleted the observation compartment option in favour of two different alternatives, a pure attack configuration with six nose mounted 0.30” and two 0.5” calibre machine guns or a similarly powered Model 7B, with enlarged bomber bay and multiple-panel glazed nose section to position a bomb-aimer and bomb sight. Of the five manufacturer offers, those of Douglas and North American Aviation (with their NA-40 which later emerged as the B-25 Mitchell) were selected for prototype construction, the Douglas machine in its DB7B configuration flying for the first time in October 1938. It should be remembered at this point that development of this new Douglas aircraft took place against a backdrop of extreme pre-WW2 isolationist fervour in USA, determined to keep the country at arms length from the clearly deteriorating prospects for peace in other
A 20 S FOR S TONY OK
29/6/16
09:55
Page 5
parts of the world, including Europe. The Douglas DB-7/A-20 aircraft was thus developed in a situation where military spending, although slowly expanding, remained restricted before USA’s postDecember 1941 entry into WW2 that led to an exponential explosion of their aircraft development and production.
France pushes the boat out Consequently the first actual quantity production order for the new Douglas bomber came from France. The French aviation industry had long suffered from lack of political ‘grip’ and from debilitating Nationalisation policies so that the l’Armee de l’Air urgently needed modern combat aircraft to counter the clear danger from Germany. France placed an order for 100 DB-7s in February 1939, five months ahead of the initial USAAC Douglas A-20 order. Further French orders followed. The l’Armee de l’Air received its first of 60 DB-7s at Casablanca, French Morocco in January 1940 and squadrons immediately began working up to operational status there. When the German Blitzkrieg attack into eastern France commenced in May, the initial DB-7 combat action took place near St.Quentin on 31st of the month. However, the speed of the German advance was such that France capitulated the following month, leaving a further 135 aircraft awaiting delivery in California or at various points along the delivery route.
Britain too Pre-WW2, the British aircraft industry, though in better shape than that of France, had a
production capacity tailored to peacetime military aircraft procurement and was ill equipped to satisfy the requirements of the successive Royal Air Force expansion schemes. So, with U.K. aircraft manufacturers well inundated with demand, the obvious and indeed only alternative source was in USA, where an order was placed in February 1940 for 150 aircraft that were to a specification cross between the DB-7B and the US spec. A-20. Initially given the name ‘Boston’, numbers were subsequently supplemented by taking over the undelivered aircraft from the French order, but with specification similarly revised. The first opportunity that the RAF had to extensively check out the flying qualities and performance of the Boston had been in April 1940 when two RAF officers were able to fly one of the French aircraft. In a report to the Aeroplane & Armament Experiment Establishment, Boscombe Down, they indicated the French DB-7 aircraft as “ ...very pleasant to fly, has not vices and is very easy to take off and land. Handling with one engine out is exceptionally good”. They went on to say “...the aeroplane represents a definite advance in the design of flying controls. The designer has achieved controls which, while
being light enough to obtain full movement at quite high speeds, are in no way overbalanced for small movements. As a result the aircraft is extremely pleasant to fly and manoeuvre. The tricycle undercarriage makes take-off, landing and ground handling very simple and pilots should be able to fly the type successfully with minimum, instruction”. In the course of the war, 24 R.A.F squadrons operated the Boston. It first entered service with Bomber Command in 1941, equipping No. 88 Squadron, whose first operational action took place in February 1942 against enemy shipping. Then, in July 1942 United States Army Air Forces bomber crews, flying RAF Boston aircraft, took part in operations in Europe for the first time, attacking enemy airfields in the Netherlands. Bostons were also used extensively by both the RAF and South African Air Force during the North African campaign that lead to the defeat of German and Italian forces there.
Night Fighter Pre-WW2, little consideration had been given to the development of a counter to night-time bomber attacks, except at the secret British experimental radar facility at Bawdsey, where theoretical work at least had started as early as 1936, followed by development of airborne interception
Sun-Soaked! The aircrew disembark from their No. 12 Squadron R.A.F. Boston at a North African landing ground in June 1942.
AUGUST 2016 FLYING SCALE MODELS 31
A 20 S FOR S TONY OK
29/6/16
09:55
Page 6
squadrons were disbanded in early 1943. The Turbinlite was also applied to RAF Coastal Command B-24 Liberators, stalking U-Boats in defence of Atlantic convoys.
To Russia, with compliments...
An all matte black Boston of No. 23 Squadron R.A.F. Note the flame damper on the engine cowl and the 'breezy' position of the gunner.
radar systems capable of being installed in aircraft. By mid-1940 a workable production system had been installed by a Bristol Blenheim and then in Bristol Beaufighters in time to operate against the post-Battle of Britain Luftwaffe Blitz against British cities, industrial centres and port facilities. In October 1940, the USAAC addressed this new development in aerial warfare. As a result, sixty of the early production run of A20s were converted to P-70 night fighters, all delivered by September 1942. These were equipped with SCR-540 radar (a copy of the British AI Mk IV), the glazed nose often being painted black to reduce glare and hide the details of the radar set, and had four 20 mm (.79 in) forward-firing cannon. The P-70 was thus the first American night fighter aircraft in service, not to be confused with the later Northrop P-61 Black Widow (see FSM March 2016) which was the first (from the ground up) American purpose-
designed night fighter. The P-70s and P-70As saw combat only in the Pacific during World War II and only with the USAAF.
Strike a Light! A further twist of the night-fighter concept applied to the Boston/Havoc was the Turbinlite System which used an ultrapowerful 2.7 million candlepower searchlight. The Turbinlite Boston would be brought onto an enemy fighter by ground radar control until the onboard radar operator could pick up the enemy aircraft and then direct the pilot until he could illuminate the enemy aircraft. At that point a Hawker Hurricane fighter accompanying the Turbinlite aircraft would make the attack. Unsurprisingly, this rather tenuous system, that relied upon the capability of two aircraft to hold close station in the darkness did not work too well and the Turbinlite
From 1942 onwards, Soviet Union forces received more than 3,400 DB-7/A-20 aircraft, which was close to 40% of all production. Early examples came from stocks held back in USA after the collapse of France, but continuing versions of the type led to deliveries of A-20s from type ‘B’ through to ‘H’ so that the A-20 became the most numerous foreign aircraft in the Soviet bomber inventory. In fact, the Soviet Air Force had more A-20s than the USAAF. The Soviets were dissatisfied with the four .30-calibre Browning machine guns capable of firing at a top rate of 600 rounds per gun per minute and replaced these with the faster-firing, 7.62mm calibre ShKAS, capable of up to 1,800 rounds per gun per minute. During the summer of 1942, the Soviet Air Force Bostons flew ultra-low-level raids against German convoys heavily protected by flak. Attacks were made from altitudes as low as 30 ft and the air regiments suffered heavy losses. The general opinion was that the aircraft was overpowered and therefore fast and agile. It could make steep turns with an angle of up to 65°, while the tricycle landing gear made for easier take-offs and landings.
To war with USAAC It was almost one year after the French had taken delivery of their DB-7s, that the first A20A Havocs were delivered to the USAAC/USAAF 3rd Bombardment Group at Savannah Georgia. Initially, the engines suffered from overheating and after modifications were made to improve engine cooling, pilots reported good results. These
WW2-era caption on the rear of this publicity photo identifies the aircraft as a "Douglas DB-7a in flight over Santa Monica, California, prior to hand-over to British representatives", but does not explain the French-style r/w/b/ fin stripe.
32 FLYING SCALE MODELS AUGUST 2016
A 20 S FOR S TONY OK
29/6/16
09:55
Page 7
were used for training exercises from September 1941 and shortly afterwards, the aircraft was officially designated the Havoc and the type equipped the 58th Bombardment Group at Hickman Field, Hawaii where two were destroyed at the raid on Pearl Harbour of December 7, 1941. The first Havocs to perform bombing missions in the Pacific were operated by the 3rd and 89th Bombardment Group and began operations on August 3, 1942 from Port Moresby, New Guinea. This unit was later joined by the 312th and 417th Bombardment Groups and by September 1944, the Fifth Air Force had a peak inventory of 370 Havocs. By the war’s end, all three groups were operating with A-20Gs. The majority of aircraft were used in low-level missions and some aircraft were equipped with three-cluster bazooka tubes under each wing. In Europe, the Douglas A-20 did not operate in any numbers until early 1944 when Bombardment Groups joined the 9th Air Force in preparation for the invasion of Europe. These concentrated on invasion targets - coastal positions, airfields and German communications - and played an important part in the campaign against the German troops in Normandy. In the aftermath of D-Day the A-20s were used to support General Patton’s 3rd Army during its advance across France, as well as taking part in the Battle of the Falaise Pocket, thereafter taking part in the attacks on the German Siegfried Line, and in Operation Market Garden, the ‘Bridge-toFar’ at Arnhem. In November 1944 units of the 9th Air Force operating the A-20 began to convert to the Douglas A-26 Invader, leaving only one A-20 equipped Group, the 410th during the Battle of the Bulge where this Unit won a Distinguished Unit Citation for making repeated attacks on German troop concentrations during 23-26 December 1944, helping to break the momentum of the German counter attack. The 410th continued to operate the A-20 into April 1945.
Inside the loaded bomb bay of an R.A.F. Boston. The bombs are slung horizontally, although on the earliest variants, the bombs were hung vertically.
Armed and ready! Crew of a No.107 Squadron in the process of boadring their aircraft at R.A.F. Great Massingham in April 1942.
Still playing about with the shape! The 131st Douglas DB-7 was used to test the possibility of a twin-fin tailcone.
In other Skies The Royal Australian Air Force was, by default, one of the earliest recipients of the Douglas Boston, when DB-7s intended for the Netherlands East Indies air force in crated transit through Australia got no further when Japanese forces over-ran these Netherlands territories in early 1942. These aircraft were impressed into RAAF service after assembly which entailed working from manuals written in the Dutch language. Later variants were subsequently supplied, for action in the Pacific war theatre. Royal Air Force and South African Air force Bostons were an important part of the air war across North Africa from 1941 to 1943, while USAAC flew A-20s there from the time of the Operation Torch in November 1942, thereafter following through with the 15th Air Force in the drive up through Italy.
Bearing full D-Day Invasion Stripes, this is a Douglas A-20J based at Gosfield, U.K. in June 1944. This late A-20 variant has a clear-vision nose devoid of the 'bird-cage' frameswork of earlier marques.
All done Production ended on September 20, 1944 with total of 7,098 Bostons/Havocs built by Douglas and an additional 380 built by Boeing. By the time of VE Day, most if not all USAAF A-20 Havocs were replaced with the Douglas designed follow-on, the A-26 Invaders while the de Havilland Mosquito largely replaced the R.A.F. Bostons. When WW2 ended, most Havocs were scrapped and by the early 1960s, only six complete airframes were known to be in existence. Recently, more Havocs have been discovered at crash sites in Russia and the jungles of New Guinea and are undergoing restoration. I A Texas Air National Guard A-20B of the 111th Observation Squadron in late 1940. It later saw action during Operation Torch, in North Africa.
AUGUST 2016 FLYING SCALE MODELS 33
A 20 SCALE DRAWING Tony OK
29/6/16
10:02
Page 2
SCALE 1:80
DOUGLAS DB7 and A-
A 20 SCALE DRAWING Tony OK
29/6/16
10:02
Page 3
A-20 HAVOC / BOSTON Drawn by ARTHUR L. BENTLEY
A 20 SCALE DRAWING Tony OK
29/6/16
10:02
Page 4
SCALE 1:80
DOUGLAS DB7 and A-
A 20 SCALE DRAWING Tony OK
29/6/16
10:02
Page 5
A-20 HAVOC / BOSTON Drawn by ARTHUR L. BENTLEY
A 20 FLYING COLOURS Tony OK
29/6/16
09:35
Page 2
DOUGLAS A-20 BOSTON / HAVOC FLYING COLOURS
A 20 FLYING COLOURS Tony OK
29/6/16
09:36
Page 3
A 20 FLYING COLOURS Tony OK
29/6/16
09:36
Page 4
DOUGLAS A-20 BOSTON/HAVOC FLYING COLOURS Boston Mk.III, flown by Flight Lieutenant of No. 107 Squadron, based at R.A.F. Great Messingham, 1942. Chirchill ‘V’-sign under cockpit
Boston Mk.III, of No.24 Squadron, South African Air Force, Western Desert.
No.24 Sqn., S.A.A.F. Motto ‘Per noctum per diem’ (By night and by day)
Boston Mk.III, of No.24 Squadron, South African Air Force, Western Desert.
GB 1/32, 2nd Escadrille
Havoc Mk.1 of No.23 Squadron, R.A.F., U.K. based, 1941
GB 1/32 2nd Escadrille
Boston Mk.III ofNo.88 ‘Hong Kong’ Squadron R.A.F.; smoke screen layer, Normany Beaches, 1944. Subsequently operated with 2nd Tactical Air Force.
Douglas DB-7, No.97 of GB 1/32, 2nd Escadrille, l’Armee de l’Air, 1940 GB 1/19, Ist Escadrille, Starboard fuselage side; Port side is left-to right mirror image.
Douglas DB-7, No.100 of GB 1/19, Ist Escadrille, Vichy Air Force, 1942
Drone Radio Control
Only
£4.99
Zone
(in the UK)
Radio Control Drone Zone
Into quadcopters, hexacopters, octacopters, UAVs or drones? Fancy having a go at FPV racing? Want to master aerial photography or filming? Need help building or setting up your multi-rotor? Confused about which model to buy? Worried about staying on the right side of the law? Then you need a copy of the latest Drone Zone from the publishers of RC Rotorworld, the UK’s best-selling model helicopter magazine. Due to the overwhelming success and popularity of the first special issue published earlier this year, we have made the very easy decision to turn Radio Control Drone Zone into a regular, bi-monthly addition to ADH Publishing’s portfolio. Drone Zone will offer expert buying advice, reviews of the latest machines and accessories, tips on where and how to fly safely, in-depth features on aerial photography and video, build tips and technical articles, as well as general features on subjects including GPS, FPV and electronic systems. Regular features will include: • New product reviews • Buyer’s guide to the latest models • Technology features on FPV and aerial photography • Building your own drone from scratch or kit • Drone dictionary with a full list of words, acronyms and terminology • Plus, experts tips on drone dos and don’ts, safety advice, staying within the law, setting up and how to fly With all this focused content and more, Drone Zone is a must buy special for all UAV, drone, quad and multi-rotor enthusiasts. The next issue (Dec/Jan) will go on-sale Thursday 12th November. For more details visist the ADH website at www.adhpublishing. com/shop/store/products/drone-zone-special-edition
NOW hly t n o m bi-
SUBSCRIBE NOW ON TEL: 01525 222573 FAX: 01525 222574
✁
DRONE ZONE Name ..................................................................................................................... Address................................................................................................................ ................................................................................................................................... ................................................................................................................................... ................................................................................................................................... Post/zip code ................................................................................................... Country ................................................................................................................ Telephone Number.......................................................................................
Please debit my credit/debit card for £ ....................................... Visa
Mastercard
Maestro
other .............................
Card No. ....................................................................................................
6 issue Subscription UK - £26.00 inc p&p Euro - £38.00 inc p&p WW - £43.00 inc p&p Cheques payable to: ADH Publishing Ltd.
Starting with issue ...................................................................
Expiry date................................. Start date ........................................ Security Number (last 3 digits on signature strip) ............................
Signature .................................................................................... Issue No (if applicable) ........................................................................... Date .............................................................................................. Please mail this form to; ADH Publishing, Doolittle Mill, Doolittle Lane, Totternhoe, Bedfordshire, LU6 1QX, United Kingdom Tel; +44(0)1525 222573 Fax; +44(0)1525 222574 Online; www.adhbooks.com (Photocopies of this form are acceptable)
www.adhpublishing.com www.adhpublishing.com www.adhpublishing.com p 47 DroneZone 123.indd 8
17/05/2016 12:06
GAUNTLET PART 1 Tony OK
29/6/16
15:20
Page 2
CONSTRUCTION FEATURE
GLOSTER GAUNTLET PART 1: Build JEFF HARTNOLL'S 1/5th true-scale, 78.7" (2000mm) wingspan model of the RAF's last open cockpit fighter biplane. Suits 2 - 2.4 cu.in. four-stroke engines wanted to do something a bit out of the ordinary for my next scale model and, having never built a biplane before, I thought that would be a good idea. But the need to assemble four wing panels had previously always put me off, so I decided that if I were to build one, it would have to be reasonably quick to produce.
I
42 FLYING SCALE MODELS AUGUST 2016
GAUNTLET PART 1 Tony OK
29/6/16
15:21
Having seen many biplanes around the competitions, I noticed that most of these have the top and bottom wing panels always joined as one. So, after a little chat and a few thoughts, I decided I’d have a go. But which should I choose as a subject to model? After scouring through a few books and magazines I selected the Gloster Gauntlet, which I thought would be a nice subject and had not been done to death as a model.
Page 3
1
Research Having searched for a good three-view I also obtained a copy of the RAF Maintainence Manual for the Gauntlet from the RAF Museum at Hendon. The latter was the source of much useful technical information and very useful detail about the bare airframe which could be translated into model format. Size was the next question and I selected 1/5th scale, which would give me a practical size airframe with plenty of wing area, that would also fit into my Estate-type car. Thus, a few weeks later I had a set of drawings to work to and after another week or so, I had a set of parts ready cut, with which to commence the build. To keep the enthusiasm going, I like to get the tail feathers out of the way first because I find these are always a bit boring.
1: Complete tailplane ready for final covering. Note the strip-wood leading edge riblets inserted between the main ribs and sanded to section.
2
3
Tailplane Photos 1 & 2: This is built flat on the building board in the ‘Eric Coates style’ over a balsa sheet centre core, so start by laying down the two 3/32” balsa panels, to which are added the rear and centre spars, followed by the ribs. When that’s done, turn the work over and repeat the stage on the opposite face of the centre core. Then, add the leading edge and sand to section, remembering to cut out the lightening holes in the sheet core that will help to keep the tail-end as light as possible. Those holes could be cut before the build begins if you wish. I used Robart hinges for the elevators.
2: Taiplane covered and elevator hinged. Note lightening holes.
4
3: Fin structure is built similar to tailplane on sheet centre blank.
5
Fin & Rudder Photo 3: This shows the build for the fin and rudder, the build technique for which follows the same technique as for the tailplane/elevator with a sheet balsa centre core. Take note of the rudder mass balance and also the hardwood blocks that anchor the flying wires.
4: Initial lay-down of wing ribs over lower spares. Note the template to set the dihedral angle on end-rib.
6
5: The ribs are set to vertical using a setsquare.
7
Wings Photos 4 to 8: The wing spars are 1/4” square spruce. Start by laying down the bottom spars over the plan, packing up the rear spar to the contour of the airfoil lower surface. Lay down the 3/32” wing ribs, making sure, as a preparatory step, that the ribs at the strut position have the slot cut in. It’s a lot easier doing it when the wing is built. Add the 3/16” wing root rib, setting at the required dihedral angle, then apply the 3/32” spar webbing, front and rear, followed by the sub-leading edge. The leading edge riblets are next, followed by the 1/16” wing trailing edge. When that’s all done, the leading edge
6 & 7: Here the front and rear wing spare have been built in and the aileron hinge spar too.
AUGUST 2016 FLYING SCALE MODELS 43
GAUNTLET PART 1 Tony OK
29/6/16
15:21
Page 4
sheet and plywood spars to one side of the front rear spars can be added. You will need access for the brass tube and wire joiners on the other side. I found it easier to cut a piece out of the ribs where the ply braces fit and slide them down, but you may, as an alternative, remove that part of the rib. Fit the ply brace, remove the thickness of the ply brace, remove the thickness of the ply and refit the rib.
8
Ailerons Photos 9 to 11: Built flat on the building board in the same manner as the tail surfaces. Hinges used on the prototype were, again, Robart type, but if anyone wants to apply external horns, this may be done. The plan shows internal linkage and control horns, the aileron servos being fitted to the sides of the ribs, with extension leads run in to the centre section. 8: Wing leadin edge riblets have now been added and faced with leading edge strip.
Photos 12 to 15: With the wing panels now assembled, the centre sections are built next. Lay own both wing panels over the plan, set the dihedral angles to suit for both panels and then lay the front and rear bottom spars in place. Then, slide the wire and brass joiners through the ribs. Add the packing pieces and tapered shims by epoxying into position and leave to dry Next, fit the top spars, followed by the plywood braces, ribs and also the other ply braces to the wing panels. While the whole panels are fixed, also add in the plates for the wing bolts. Complete the outline of the top section with soft wire or aluminium tube.
10
10: One of the ailerons, with all the basic structure in place. including the leading edge, hinge blocks and the ribs, cut to wedge shape from strip balsa.
9
9: Each aileron is assembled around a centre sheet core.
Wing centre section
11
11: Covered aileron, hinged and hung on one of the lower wing panels.
12
Fuselage Photos 16 to 20: The fuselage is built around a basic box section, with top, sides and bottom formers thereafter added to achieve the rounded external cross section. Sheet the front section, just the top first to allow access for the centre section wires, followed with the stringers around the rear. Mark the front and rear stringer positions, then use a straight edge to mark the interim stringer positions along the remaining formers. A suitable width file may then be used to slot the formers, prior to gluing all the stringers in place following the lines of the slots. Finally, use a dowel wrapped with sandpaper to sand in between the stringers.
Main undercarriage The core of this is a simple wire structure, with no springing. Be sure, when soldering the joints that these are well bound and that the solder has flowed properly. Those with the equipment and the skill should consider silver soldering for strength.
Top Centre Section Rigging
12: Ribs and associated components of the upper wing centre section.
44 FLYING SCALE MODELS AUGUST 2016
Photos 21 to 24a: Fix the front and rear cabane wires to the top of the centre section, being careful to make the front and rear incidence jigs shown on the plan. Clamp these to the fuselage and fix the bottom cabane wire clamps to the fuselage formers. Take great care to ensure that the incidence is set at 2-3 degrees positive. I used a Hangar 9
GAUNTLET PART 1 Tony OK
29/6/16
15:22
Page 5
13
14
15
13: First stage of the upper centre section assembly, with ribs clamped to set dihedral angle.
14: Centre section ribs all inplace. Note the tube/wire trailing edge.
15: Finished upper centre section structure complete. Note the wing panel retainer tongues.
Incidence Meter to set this up accurately. When all is square, secure the work with the remaining bottom clamps. I found it easier to cover the underneath of the centre section first. Cut slots, feed the wires through and clamp, then fix to the fuselage. When satisfied with the accuracy of the fitment, the sheeting of the fuselage may be completed. The servo extension leads may now also be run down the rear wire and taped in place. Add balsa each side of the wires and sand to shape.
epoxy 1/16” plywood doublers either side, remembering to drill holes in the ply doublers for the flying wire brackets. Assemble the wing panels to the fuselage and secure the wings by bolting the centre section. Position the wire struts, complete with two brass tubing pieces (it’s a fiddley job so a helper is useful here). When the four wires are in place, put the wing jig in place and secure it with rubber bands (the height of aeromodelling technology here!). Then, use the incidence meter to check the incidences of the top and bottom panels - if you’ve done the job properly, then no adjustments will be needed, but if there
are discrepences, corrections may be applied using ply shims at the front and rear positions on the wing jig.When all is correct, just solder the brass tubing onto the wire struts top and bottom and then repeat for the other panels. This adjustment is required because, although the structure is solid, it is possible to induce a slight twist in the outer part of one of the wing panels - I had 2.3 degrees on one and 2.5 deg. on another - not a lot, but I adjusted it for peace of mind. On completion, dismantle the wings, ready to fit the anchor plates for the flying wires. For a neater job, I covered the bottom of the top wing and the top of the bottom wing. A small cut was then made
Rigging Mainplane and Tail Photos 25 to 28: Epoxy the brass tubing to the ribs at the strut positions and also
was the next question and a selected 1/5th scale which would give me a practical “ Size size airframe with plenty of wing area, that would also fit into my Estate car ”
GAUNTLET PART 1 Tony OK
29/6/16
16:23
Page 6
GLOST
GAUNT ER LET (PLAN
FSM3
31) Full size copies of this p lan are availab Flying S le from Plans Se cale M odels rvice, A DH Pub lishing, Doolittle Doolittle Lane, To Mill, tternho Bedford e, shire, LU 6 1QX. Tel enquirie 01525 222573 s@adh publish Price £ 24.50 p ing.com lus p&p ( U .K £2.50 Europe ; £4.00; Rest or World £ 6.00.
GAUNTLET PART 1 Tony OK
29/6/16
15:22
Page 7
CUT PARTS SET FOR THE
16
GLOSTER GAUNTLET 16: The rear fuselage is assembled around a basic box structure.
17
Get straight down to construction without delay! This month’s full size free plan feature is supported by a laser-cut set of ready-to-use balsa and plywood components. THESE PARTS SETS PROVIDE: formers, doublers, wood wing ribs, blue foam wing ribs, blue foam wing panels (not veneered) and tips, elevator and rudder core sheet.
Price £149.50 plus carriage: £11.50 (UK); Europe £26.00
(Order FSM/Cut 331)
17, 18 & 19: Formers are added around the box to form the final cross section and stringers applied. Note scalloped shape between stringers.
Shipping Note: For shipping to destinations outside the UK and Europe, you will be charged our standard flat-rate price of £49. This covers most destinations and secures your order with us. However, we will contact you accordingly with an accurate total shipping charge prior to dispatch and either issue a refund or a PayPal money request for the balance.
Visit our secure website: 18
19
www.flyingscalemodels.com to order yours
20
20: Stringered rear fuselage, here covered and ready for fitting of the tailcone components.
Order direct from:- ADH Publishing, Doolittle Mill, Doolittle Lane, Totternhoe, Bedfordshire, LU6 1QX, UK. Tel: 01525 222573/
[email protected].
AUGUST 2016 FLYING SCALE MODELS 47
GAUNTLET PART 1 Tony OK
29/6/16
15:23
Page 8
Designer Jeff Hartnoll readies his Gloster Gauntlet for a competition flight during the 2010 BMFA Nationals at RAF Barkston Heath.
in the covering and the plates secured with nuts and bolts, with the nuts epoxied securely in place. The wings are then reassembled with the fuselage for the refitting of the strut wires, which are thereafter completed by the
addition of balsa fairings, that are then finally sanded to airfoil shape. Now for the flying wires, turnbuckles and metal fittings, which I obtained from Mick Reeves Models. A little jig can be made up to get the correct lengths of the flying
22
wires, by using two lengths of piano wire, with a bend in each end. Each wire is then slid into a small wheel collet at each straight end. Place one of the bends in one of the plates and the other bend in the opposite plate. Then, tighten the
21
21: The wire cabane struts shaped ready for installation.
23
22 & 23: The cabane strutes in their retainer brackets, with fuselage former clamped in place.
48 FLYING SCALE MODELS AUGUST 2016
GAUNTLET PART 1 Tony OK
29/6/16
15:23
collet and remove from the plates. This establishes the correct length of the flying wire. Add a turnuckle to each flying wire end, cut a length of flying wire to the same distance between the turnbuckles and silver solder together. Repeat for the remaining flying wires and, on completion, it’s just a case of covering the wings. Fair over the wing struts with balsa and shape to airfoil section before finally rigging the wing panels. Do NOT over-tighten the flying wires which keep the struts locked in the panels.
Page 9
24
24a
24 & 24a: Secured to the upper wing centre section, prior to application of fairing strips.
Radio equipment access For access to the receiver and power pack, the bottom hatch comes away and access here is aided by disconnecting the rear undercarriage struts, which allows the undercarriage assembly to swing forward. There is plenty of room to position the radio gear to suit your preferences and plenty of room too, to accommodate a lage fuel tank. I
25 & 26: Slots cut into the upper and lower surfaces of appropriate wing ribs for the anchor points for the wing interplane stuts.
27: Wing incidences were checked using a Hangar 9 Incidence Meter.
28: The wing incidence templete refered to in the text and shown on the plan.
NEXT ISSUE: In Part 2, next month, designer Jeff Harnoll finishes off construction, and includes surface detail - plus an option for glass fibre or conventional built-up wood engine cowl.
AUGUST 2016 FLYING SCALE MODELS 49
FF SCALE NATS Tony OK
29/6/16
14:32
Page 2
PHOTO REPORT
SCALE AT THE FREE FLIGHT NATS
BUMPER BARKSTON! Free Flight Outdoor Scale is back, and Alex Whittaker is dazzled by the sheer variety he recent withdrawal of RAF Barkston Heath as the Power Nats venue for August 2016 posed a re-think for the BMFA Scale Technical Committee. This was because the Free Flight Scale flyers hold their competitions at the Power Nats in August too. Now these hardcore scalistas are made of sterner stuff. With the sort of deft footwork that would not have shamed Muhammed Ali, they
T
Andy Hewitt launches his nifty Fokker DVIII.
immediately regrouped. They moved the planned August Free Flight Scale Comps forward to May 2016. Therefore we had a double dose of F/F Scale at the general F/F Nats that traditionally takes place during the annual Spring Holiday weekend at the end of May. This was an inspired stuff from the Lords Of Scale, and meant that we would not be denied our ‘fix’ of outdoor F/F Scale flying. However, it also meant a great
increase of concentrated scale activity over the Nats weekend, which was utterly spiffing, but also very demanding. There was so much going on that I hardly any time to eat or have a little sit down!
The competition events So, over the BMFA F/F Nats weekend there were the F/F Scale Nats Competitions (Power, Rubber and Co2/Electric), the AeroModeller and Model Aircraft Scale
FF SCALE NATS Tony OK
29/6/16
14:32
Page 3
Andrew Sephton’s Tiger Moth banking nicely during climb-out.
Andrew Darby’s Veron Auster AOP 9. Andrew is fine designer in his own right.
A very nice Howard DGA-6 ‘Mr Mulligan’ flown by P. Smith.
Brian Lea’s Curtiss Robin.
Designs Comp, the F/F Kit Scale class, and the Open Flying-Only event. Phew! Whilst I could snap everything that moved, it was impossible to keep up with so many events, sometimes held seamlessly. Competitors and Judges were launching on a broad front, meaning it was very difficult to be in the right place at the right time. In fact, I could not fit in the Open Flying Comp at all. Therefore I decided, as usual, to concentrate on the flying scale models. There was an embarrassment of riches.
continuous. A real F/F Scale feast. One curious thing was the number of insects in flight in the upper air. I was unaware of them on the ground, and they did not come that low. However, when I first saw my flying shots on my big screen at home, I thought my camera’s sensor needed cleaning. In fact, when I zoomed in there were lots of flying insects in almost every frame. They particularly liked the yellow models. No wonder the famous Barkston skylarks were so perky!
In the three ‘Scale Nats’ categories Free Flight Power had four entries, F/F Rubber had six entries, and F/F Co2/ Electric fielded five entries. In the other classes, AM & MA Designs attracted seven entries; Kit Scale attracted 20 entries, and Open Flying Only attracted 15. The runaway success of Kit Scale with its heady mix of practicality, accessibility and nostalgia is obvious from these figures. The healthy numbers for Flying-Only are interesting too.
The attached photos should tell the broad story, but one or two models demand a mention. First of all, I must report on Gareth Tilston’s astounding electric powered Avro Lancaster bomber. In short: she looked right and she flew right. It was so poignant when she swooped low over the runway just like we all saw her full-size sister do just a few years ago - aye, at this very spot. Magic! Gareth also, flew his immaculate DH60 Cirrus Moth to first place in Co2/Electric comp. The baby of the Peterborough is doing well.
The Conditions We were all astounded. There was sufficient sunshine, no significant rain, and the absence of that horrible Barkston Chill for most of the weekend. The wind varied from very light to still flyable, and the flying action was
Fokker D.VII and Avro Shackleton Monique Lyons once again flew her amazing Avro Shackleton. She uses a special foam ‘holder’ to keep all the rubber motors ready for simultaneous release. Needless to say, the model looks
Scout D Andy Hewitt’s Bristol Scout Type D is a very impressive F/F scale aeroplane. It is large enough for radio, but flying at her own will, she looked utterly sublime in the air. Once sorted, she flew very well, and placed 3rd in F/F power.
Nakajima Type 97 and DH 103 Hornet
Lancaster / Cirrus Entries
majestic in flight. However, the big news is that Monzy took First Place in Kit Scale with her Fokker D.VII.
As usual, Ivan Taylor astounded us with his ambition, and consummate F/F scale skills. His radial engined, Pacific Theatre Nakajima Type 97 was exquisite. As if this were not enough, he then flew his twin rubber powered DH 103 Hornet twin rubber scale model are rare, and I noticed that Ivan had built in a device to hold the first wound motor as he went on to wind the second.
Auster Agricola I haven’t seen an Agricola scale model for a number of years, so Peter Fardell’s nifty rubber version was very refreshing. It looked very appealing in the westering sun.
Bucker Bu 133 Jungmann and RAF RE8 Bill Dennis’s yellow scheme on his Bucker Jungmann was very crisp and the model
AUGUST 2016 FLYING SCALE MODELS 51
FF SCALE NATS Tony OK
29/6/16
14:33
Page 4
Charlie Newman’s RWD 8 trailing her closed loop controls.
Derek Knight and his Tiger Moth.
David Beales’ Harvard from the Veron kit, Martin Dilly, Timekeeper.
Peter Fardell’s Fairchild 24 handled the gusts very well.
Brian Waterland timing another epic flight by Gareth Tilston.
Derek Knight timing down his Fairchild 24.
Andy Hewitt’s fine Sopwith Camel.
Mike Kelsey’s S.E.5a in good air and in post-WW1 cival racing colours.
Mike Sanderson’s Guillows Beaver - flew very well.
Monique Lyons Fokker D.VII, placed First in Kit Scale. Finland military colours.
52 FLYING SCALE MODELS AUGUST 2016
FF SCALE NATS Tony OK
29/6/16
14:33
Page 5
Paul Brigg’s Sopwith Triplane from the Veron kit.
We were all astounded. There was sufficient “ sunshine, no significant rain, and the absence of that horrible Barkston Chill for most of the weekend ” flew beautifully, gaining first place in F/F Rubber. His very nicely detailed Royal Aircraft Factory R.E.8 did just as well, with a 1st in F/F Power. Just note that Bill put in lot of effort for all of us over this whole weekend.
DH 108 Swallow and AVRO 707A Derek Knight continues his love affair with Electric Ducted Fan (EDF) models with his DH 108 Swallow and his equally impressive AVRO 707A. I was a long, long, way off across the field at the time, but I think it is fair to say that Derek was having a few problems with their trim at first. When they finally flew, fully spooled-up, they were utterly spectacular to behold. Very smooth, very fast, and quickly covering vast distances. I can see Derek investing in a golf buggy. The Swallow placed 2nd in the AM and MA Designs Class. The Avro 707A
placed 2nd in Open Flying. Not a bad haul on your own EDF system!
English Electric Wren The Flying Smith Brothers are largely distinguished by their colour of headgear, and they both build a very good scale model. As in the choice of hats, they flew two clever, more or less identical, English Electric Wren powered gliders. Both were diesel powered, but it ‘P’, not ‘M’s’. model that made the podium placing: 3rd in AM and MA designs comp. I loved the dummy half of their handcrafted DC diesel ‘twins’. They looked very convincing indeed.
Saab J-29 Tunnan and Supermarine Scimitar Speaking of fast jets, although not new, mention must be made of the superb performance, which Steve Glass extracts from his ducted fan models. His EDF Saab J-29
flies exactly as a jet should. It placed 2nd in F/F Co2/Electric. He then placed 3rd in Open Flying with his Supermarine Scimitar. Steve even found time to enter The Bowden FF/ Event over the weekend, too.
Sopwith Cuckoo and Twin Pioneer
Gareth Tilston with Avro Lancaster, and Brian Waterland, exchange flying notes.
Mike Smith was having a few issues with his latest scale multi - a pretty Scottish Aviation Twin Pioneer. However, he did rather better with his Sopwith Cuckoo, which placed 2nd in F/F power. Mike has worked to his usual meticulous standards on the Cuckoo and has produced a very satisfying scale model. It can stand a good hard look, it really is that good.
Focke Wulf Stosser My auld mate, and fellow engine builder, Billy Hanshaw took 1st place in Open Flying Only with a very good flying
Mike Smith’s ambitious Prestwick Twin Pioneer.
AUGUST 2016 FLYING SCALE MODELS 53
FF SCALE NATS Tony OK
29/6/16
14:34
Page 6
score of 330 and a massive Realism / Complexity score of 40. If you can beat Derek Knight, Stephen Glass and Gareth Tilston et-all, you are in very good company indeed, Billy.
S.E.5a and Sopwith Triplane
Mike Smith’s Sopwith Cuckoo gliding down.
Paul Briggs always builds fine scale models and his S.E.5a flew very well, making 3rd place in F/F rubber. It handled the gusts well, too. Paul also flew a nicely constructed Veron Sopwith Triplane, a classic trad-Brit. model I have never seen in the balsa before.
Derek Knight and DH 108 Swallow EDF with Catapult Assist!
P. Smith gets his DC powered EE Wren away.
Clever, multi-rubber Shackleton launch by Monique Lyons.
Gareth Tilston awaits the right air before launching his DH 60 Cirrus Moth.
54 FLYING SCALE MODELS AUGUST 2016
FF SCALE NATS Tony OK
29/6/16
14:34
Page 7
Stephen Glass’s Saab J-29 Tunnan on full throttle climb out.
Bill Dennis launches his very smart rubber powered Jungmann.
Ivan Taylor’s ambitious DH 103 Hornet twin rubber. Wow!
RWD8 Charlie Newman’s very smart electric powered RWD 8 was giving him a few problems, but once sorted, she put in some lovely flights. This is a very cute model, constructed to Charlie’s usual high standards.
Guillows DHC-2 Beaver I love Kit Scale. Mike Sanderson’s DHC Beaver from the Guillows kit flew extremely well. It also looked a good bet if one was thinking of returning to F/F Scale rubber.
Veron AT-6 Harvard David Beales was flew his delightful yellow Harvard from the Veron kit. It performed very well and looked superb climbing out with the Barkston skylarks twittering away.
The Verdict This was a bumper Free Flight Scale Nats, and sadly I have run out of space. The new arrangement worked really well, and we had a packed weekend of F/F Scale activity. The weather was mild by the cruel standards of Barkston Heath, which
Ivan Taylor with his Auster.
was its own tonic. It had been all doomand-gloom before these F/F Nats. Our applecart had been upset, and we had existential worries about the future of Scale venues. The real fear was of losing RAF Barkston Heath for next year’s venue. On that matter I will say no more at this time: except that I did detect a mood of quiet optimism amongst our Scale movers and shakers. We shall see.
Acknowledgements Once again the BMFA Scale Tech Committee did us proud. Bill Dennis, Andy Hewitt, Chris Allen, and Andrew Sephton amongst many others - made sure that things happened as they should for the rest of us. The Judges, who were many, also worked liked Trojans. The Ladies of The Door at the Indoor F/F Scale contests now became the Ladies of The Meadow, facilitating everything from computing the scores to assisting with the models. The contests were run slickly and efficiently. The number of people to thank is too long to list here, but as ever, Trish Dennis and Gordon Warburton delivered the BMFA Official Scores in record time. I
Brian Lever with his Fairey Junior.
RESULTS
AEROMODELLER & MODEL AIRCRAFT MAGAZINE DESIGNS (9 Entries) 1 G Tilston Avro Lancaster 2 D Knight DH 108 Swallow 3 P Smith English Electric Wren KIT SCALE (20 Entries) 1 M Lyons Fokker D.VII 2 I Taylor Auster 3 C Strachan Piper OPEN FLYING ONLY (15 Entries) 1 B Hanshaw Focke Wulf Stosser 2 D Knight Avro 707A 3 S Glass Supermarine Scimitar
AUGUST 2016 FLYING SCALE MODELS 55
SCALE SOARING AUG 16 Tony OK
29/6/16
15:35
Page 2
On Silent Wings by Chris Williams
SCALE SOARING C
Simon Warren Smith’s Nimbus 4D on tow.
oming so soon after the successful White Sheet scale fly in, it was little short of a miracle that the forecast for this two-day event was a favourable one. As seems to be the case with many events held on M.o.D. land these days, the Ghost Squadron had to overcome many extra hurdles to get the ‘do’ organised, as evidenced when we arrived on the Saturday morning at the appointed later hour, (in case the Cessna wanted to fly!) only to find the gate firmly locked! Order was eventually restored and a convoy of cars made its way to the far side of the airfield, bathed in glorious sunshine and washed by a fairly light wind. There were a few models of note to gawp at over the weekend. Andy Schafer’s highly modified ASW 27F appeared to have a self-igniting up & go turbine if the sound was anything to go by. As it turned out, it was in fact an electric ducted fan, and the 5Kgs of delivered thrust gave all the model any hooner could dream of. The fuselage is from the Rosenthal concern, which was sent off to LET to have a set of carbon
The Wien takes to the sky (slowly!)
56 FLYING SCALE MODELS AUGUST 2016
wings made up for it. The EDF fan unit is a CeFlix 500 unit, running on 12S 5400 Lipos. With four 13Kg servos per wing for the ailerons and the flaps, all 16 channels of the receiver are in use, producing a model weighing in at around 14Kgs. Now, you may think that an aerobatic ceiling tile looping in the space of a small cardboard box is quite something, but the sight of this ASW 27 performing a smooth 150’ diameter loop is something else entirely! Simon Warren-Smith had foregone his usual home-built glass machine in favour of a Paritech Nimbus 4D. No small undertaking, the Nimbus spans some seven metres and weighs in at a fairly hefty 14Kgs, but it’s main attribute seems to be an affinity for the camera, as every shot I took of her was a beauty! Dave Horton has a penchant for WWII German troop carriers, seemingly coming up with a different one each season. This time it was the impressive looking Gotha 242, a model which, whatever it lacks in grace, it certainly makes up for in brutal purpose. Dave describes himself as a ‘restorer’ rather than a builder, and
SCALE SOARING AUG 16 Tony OK
29/6/16
15:35
Page 3
Crowded scene at the Middle Wallop event.
came across the Gotha at the Rheidt Euroflugtag show some five years ago. Built in 1970(!)by a German modeller who also flew the full-size, the model was in a sorry state and about to be thrown away when Dave came to the rescue. Five meters in span, and weighing a muscular 18Kgs, Dave’s model confounded all the armchair critics by soaring with the best of ‘em during the weekend, and he pronounced himself well satisfied. Although not demonstrated at the time, the Gotha has on-board smoke and a fully opening rear section with scale ramps and a rear gunner, presumably fitted with breathing apparatus. It is intended to take the Gotha back to Germany at some stage, although, sadly, the original builder has since passed away. Staying with oldtimers from Germany, the Ghost Squadron’s spiritual leader, John Greenfield, had bought along his latest gargantuan creation, the Wien. Designed and constructed in 1929, Alexander Lipisch’s elegant creation was a harbinger of things to come, with it’s high aspect ratio wing and a planform that would become established in design all the way through to the advent of the later plastic gliders in the 1980s. It could be said that John doesn’t do things by halves, except that he does, most of his models being to half scale and the Wien is no exception.
Unusually for him, he built this machine to someone else’s design, namely one Rolf Fritschi and to date, only one model had been built by Marcus Frey, also well known for doing things by halves! With some modifications, including making the fuselage in two pieces, The Wien spans an almighty 9.6 metre, weighs in at a mindbending 38Kgs, and is of course covered by the LMA’s large model inspection regime. Dwarfed by the tug, the Wien ascends slowly to altitude in a fashion designed to excite the senses of any scale purist, and although she performed only one flight over the weekend, it certainly was a sight to see. Once again, Middle Wallop regular, Brian Sharp, had made his way down from Scotland with a menagerie of models. One to catch my eye was his 1:3.5 scratch-built Olympia 463, which first saw the light at this venue a few years ago. Brian told me:“The aeroplane is the EON Olympia 463 and I had an association with it a long time ago when I was still flying full size gliders. This is the first scale glider that I ever scratch built and it was original finished in the red and white colours of a glider based at Portmoak airfield. It is traditionally built to a scale of 1:3.5 giving a span of 4.28 metres and a weight of 8.5 kg. The airframe was originally covered
Patient pilots in the glider queue.
AUGUST 2016 FLYING SCALE MODELS 57
SCALE SOARING AUG 16 Tony OK
29/6/16
15:36
Page 4
Andy Schafer’s ASW 27F with the ducted fan hidden away.
with heavyweight tissue and then glassed with lightweight glass cloth and epoxy. This finish has been less durable that I had hoped and in recent years had become increasingly tatty. I started a back-to-bare-wood restoration in late 2015 and soon found that there were countless bits of minor damage throughout the structure, the wiring, sloppy servos, broken hinges etc. All the defects were repaired or replaced, the existing paint was removed, the open panels were recovered with ‘tex’ and the whole airframe sanded and filled to a good surface. The airframe has been resprayed in a new colour scheme, although the blue paint appears not to have set
The Gotha in action at Middle Wallop.
properly. I am now in touch with the suppliers trying to get that sorted out. The C of G has been recalculated and has been relocated a bit further back than previously. The model is now flying better that ever and I hope to be using it for many years to come...’ I was interested to hear of his experiences with 2K aerosol paint, because as an ex-vehicle refinisher myself, I couldn’t quite understand how the paint and the hardener could become mixed in an aerosol can. In Brian’s case it seemed that it hadn’t, and even many weeks after
its application, the paint was still soft, and liable to mark if rested against something else. Intrigued, I had a look on t’internet, and seems that buttons have to be pressed, or things twisted on the can to introduce the two components to each other. There is also the issue of, presumably, the paint going off rapidly in the can, making it a onetime use only, and the nastiness of the overspray which, once cured, would be the devil’s own job to remove afterwards. Ah well, that’s progress for you... I don’t know how much the
“ Staying with oldtimers from Germany, the
Dave Horton with his magnificent Gotha 242.
The Ghost Squadron’s John Greenfield with his new half-scale Wien.
Plastic perfection: A DG 808 takes some time out.
58 FLYING SCALE MODELS AUGUST 2016
SCALE SOARING AUG 16 Tony OK
29/6/16
15:36
Page 5
Brian Sharp’s refurbished Oly 463 once more back in action.
organisers paid extra for the decent weather, but the sun shone for the whole weekend and much pleasure was had by all. Thanks must, as ever, go to the Ghost squadron and the hard-working tug pilots for their efforts, and we look forward to doing it all again as the season progresses...
CLIFF CHARLESWORTH It is with some regret that I have to report the passing of Cliff Charlesworth. To anyone who has spent a lifetime in the scale soaring scene, Cliff’s designs are synonymous with art of building wooden sailplanes with balsa, spruce and plywood.
Cliff Charlesworth, having been presented with his original Oly 2b.
He practically kick-started the whole process in the UK with his ASK 18 design way back in the 70/80s, a model which is still being built in quantities around the world today. As the years progressed, so did his stable of models, and it would be unthinkable to attend any scale event in the UK now without seeing one or more of his designs gracing the skies. Way back when, Cliff was instrumental in establishing formal scale glider competitions at his home club, the White Sheet Radio Flying Club. So successful did this event become, it eventually had to be split into two separate events, one for vintage, and one for modern designs. Last
year, the SWSA aerotow at Cheddar incorporated a ‘Cliff Charlesworth Day’ to which the Great Man was invited. He was presented with his original Olympia 2b, the one that graces the front of his book ‘Scale Model Gliders’, a tome with a wealth of useful information therein. He was greatly moved, and vowed to ‘restore the old girl to her former glory’, although, alas, it was not to be. There can be no doubt that his legacy will live on for a very long time, introducing new generations to the traditional art of glider construction... I
[email protected]
he Ghost Squadron's spiritual leader, John Greenfield, had bought along his latest gargantuan creation, the Wien. Designed and constructed in 1929 ”
Cliff at the SWSA event in 2015, surrounded by many examples of his designs AUGUST 2016 FLYING SCALE MODELS 59
TECHNO SCALE AUG 16 Tony OK
29/6/16
11:49
Page 2
Techno Modelling by Mike Evatt
Techno Scale U
Mike Evatt combs
ltra-realistic, museum-quality pilot figures for scale RC aircraft are available from Best Pilots at www.bestpilots.typepad.com Each figure is a sculpted portrait, wearing accurate flight gear. Best Pilot figures are available painted or unpainted. Best Pilots can now have the face of your choice! In cooperation with ThatsMyFace.com, not only can you have yourself as the pilot, if you have a good photo, you can have a relative, a friend, even your favourite pilot from aviation history. Belair Kits at http://belairdigital.co.uk is continuing to expand the range of its laser cutting activity. Want to build a unique model from a plan? Rather than spending hours tracing and cutting out parts before you can even start building, purchasing a Belair Parts Set that includes all the shaped balsa and plywood parts required to build the basic airframe, lets you start building as soon as you roll the plan out. What took my eye on this visit is Roy Vaillaincourt’s latest design a
fabulous S.E.5 in 1/3 scale. Having purchased Reid’s Model Products and Classic Airplanes, Nigel Tarvin decided to open Tarvin Model Products in order to expand their product line to better serve the scale model fraternity. Nigel has been a modeller for over 40 years, with his favourite subject being scale Golden Age airplanes. He hopes to add his own design 1/4 scale Lockheed Vega and others to the product range. As well quite a good range of scale kits Nigel also provides a substantial range of fibreglass cowls and wheel pants etc. Check them out at www.tarvinmodelproducts.com Scale Sailplane Kits at www.scalesailplanekits.com specialize in custom laser cutting for Radio Controlled Sailplanes and offer laser-cut wood short kits in 1:3, 1:3.5 and 1:4 scale from top scale sailplane glider enthusiast and designers; Chris Williams, John Watkins, Jim Owen, Al Clark and David Smith. If you have a plan you wish to build, but want to take out the time and work of cutting the parts, they can help. Their aim
is to produce cost effective wood parts for plans that are already available, while developing our own plans and helping other likeminded designers with theirs. If Spitfires are your thing, then look no further than Tom’s webpages concerned with Spitfire Mk IX - MH434. Tom Verstappen from Belgium has created a stunning website at www.t-birds.be It features incredible photographs of Tom’s mission to create the perfect model Spitfire. The screen-shot shows the amazing detail of the cockpit components. The model is a Brian Taylor design and many of the accessories are available for purchase. Whether building is your passion or your pastime, Top Notch at http://topnotchkits.com can make your building experience better. They offer a complete line of services to get your projects up and running fast. Whether you need CAD Engineering, full size CAD generated plans, Laser cut parts or all of the above, then they can deliver. From concept to construction or kit, Top Notch is your source.
Ultra-realistic, museum-quality pilot figures for scale RC aircraft are available from Best Pilots.
Roy Vaillaincourt’s latest design a fabulous SE5 in 1/3 scale.
Nigel Tarvin also provides a substantial range of fibreglass cowls.
Scale Sailplane Kits specialize in custom laser cutting of Radio Controlled Sailplanes.
Tom’s webpages concerned with Spitfire Mk IX - MH434.
Top Notch Kits produce a sport/scale model of the famous Lear Fan.
60 FLYING SCALE MODELS AUGUST 2016
TECHNO SCALE AUG 16 Tony OK
29/6/16
11:49
Page 3
mbs the information superhighway for more TechnoScale Topics... Their sport scale model of the famous Lear Fan, the last aircraft designed by the brilliant Bill Lear, is one of only a versions available. This model will draw a crowd at any flight line and features over 350 laser cut precision engineered parts. Roban design, develop and produce detailed scale model helicopters that don’t require work that can’t be done because of the lack of equipment. Their website at www.robanmodel.com reveals a cornucopia of products from complete models in many sizes as well as scale fuselages for T-Rex mechanicals. They even have a very good looking 1/18 V-22 Osprey Tilt Rotor VTOL! In 1991, Meister-Scale at www.meister-scale.com evolved knowing that the industry had changed with the demand for larger Warbirds. Jim Meister and Dick Bernier responded quickly with a line of semi-scale heavy metal aircraft. Meister-Scale’s latest laser cut kits are produced exclusively by Lasercut USA. Additionally, they have merged with Aero-Accessories to provide broader product integration and price benefit to
R/C consumers. Their new FW190A Platinum with a wingspan of 102ins and designed for 3.8 - 4.4 cubic.in. I/C Engine features in the screen-shot. Model Aviation is the on-line flagship publication of the Academy of Model Aeronautics USA. These webpages contain a wealth of information about scale topics. However, I found it quite difficult to navigate so I have included the full URL to take you directly to a delightful Rubber Powered Peanut Scale Fokker D. VII. This was Designed and Drawn by Dennis O. Norman and the plan is available as a free download at http://modelaviation.com/peanutfokkerdvii Established in the summer of 1999, Fighteraces are dedicated to producing high quality kits, plans & engines, retracts, associated accessories plus building & finishing materials for the scale builder. Based in a 1000sq ft workshop facility in Chester-le-Street in the North East of England, they ship worldwide with customers throughout Europe, Scandinavia & Iceland, the USA & Canada, South Africa, Australia & New
Zealand. Fighteraces have now completed the highly detailed patterns for their 1/4 scale Convair YF2Y-1 Sea Dart and tooling is now underway to produce the full composite parts for the two test & development models. Look out for more news on their website at www.fighteraces.co.uk And finally www.vanvan.us is the web address of Vanguard Plans who can provide radio controlled scale model aircraft plans, parts and short kits of great aircraft. Their Heinkel He111 H-6 ‘Blitz Bomber’ is just such an aircraft. This is a 1:10 scale, 89” span, for two .50’s. The fuselage, wing centre section, wing outer panels, and tail surfaces all disassemble for transport. A fully enclosed engine cooling is provided and apparently works well. The model can also be converted to electric flight for those who so desire. I
Roban design, develop and produce detailed scale model helicopters.
Meister-Scale’s new FW190A Platinum has a wingspan of 102 ins.
A delightful Rubber Powered Peanut Scale Fokker D. VII.
That’s all there is time for from me this month so flick that switch and if you find something out there of interest that might be good to share, email me at:
Fighteraces latest venture - a 1/4 scale Convair YF2Y-1 Sea Dart.
[email protected] Vanguard Plans’ Heinkel He111 H-6 “Blitz Bomber”.
AUGUST 2016 FLYING SCALE MODELS 61
QUIET ZONE Tony OK
29/6/16
10:38
Page 2
t’s no use you complaining, I know you enjoy this column really. So, there’s more of the usual electric flight nonsense coming up for your delectation. With that said, all I have to do now is think what to write about. I tell you, it’s a hard old life having to come up with fresh nonsense each month. Right then, just let me check what happened in last month’s column and that might give me some ideas for this time around. Ah yes, we were looking at motor setups for some of my older designs. In passing we discussed converting to wet power, with the proviso that the structure would need reinforcing if this was the route you wanted to take. Although, why anyone would want a model covered in oil is beyond me. Yes, I know the original aircraft (since many of my designs are from WW1) tended to be a bit oily, but I don’t recall anybody needing to put one of those onto the back seat of his car. Anyway, bearing all this in mind, I thought we might take a closer look at said structures and model sizes.
I
R/C SCALE ELECTRICS with Peter Rake SPARE THE POWER LOADING! PETER RAKE ADVISES SENSIBLE MOTOR SIZES FOR SMALL LIGHTWEIGHT ELECTRIS
BASIC STUFF Last time we determined that models designed in the way that I like them don’t need masses of power, 50-60 Watts/lb. being ample for the style of prototypes I favour. I realise that to fly correctly, heavier and faster types (like WW2 warbirds) do need appreciably more power, but I don’t build WW2 warbirds so I’ll stick to what I do actually know about (a little bit at any rate). Yes, I much prefer slower, lighter and
Although the cowl hides much of it, the front fuselage is my typical sheet balsa box.
62 FLYING SCALE MODELS AUGUST 2016
QUIET ZONE Tony OK
29/6/16
10:38
Page 3
Once covered and assembled there is no evidence of the underlying structure.
Now this one definitely shows off its’ rubber power style heritage although it was actually designed for radio control.
After tissue covering (printed tissue) the 18” SE5a is hard to tell from a much larger model but weighs less than 2 ounces.
more relaxing models. In fact, if at all possible I prefer to fly three channel models (rudder, elevator and throttle) where the aerobatic capability is restricted to the odd loop and stall turn. Yes, I know, I’m a lazy beggar, but what we enjoy doing is what hobbies are supposed to be about. What this means, of course, is that it has a direct effect on the type of structures I build. Not only can they be more lightly built (in certain cases) because there will be none of the vibration or starting stresses associated with wet models, they also don’t need to be stressed for manoeuvres they won’t be performing. No, don’t panic at that thought, if a model is likely to be flown more energetically, it is designed with that in mind from the outset. So don’t worry that the Sopwith Camel you’re building will start to shed parts the first time you try to roll it. It might do, of course, but that won’t be because of the design, just your building or because you forgot what I said about not having too much power available. As they like to say in certain adds, ‘because of the nature of the hobby, no responsibility is taken for misuse of the product’.
Mind you, although I say the simpler models aren’t designed with aerobatics in mind, that isn’t to say they aren’t capable of doing them without falling apart in the process. Even an idle old bloke like me occasionally feels the urge to throw a model around the sky - albeit only a three channel model. The Eastbourne Monoplane that I used as an example last month, despite being lightly built and only needing a whiff of power to fly, was more than capable of consecutive loops when the mood took me. Yes, I know that’s about as far from scale flying as you can get but sometimes just cruising around isn’t what’s required to relieve life’s little tensions.
MORE BASICS Over the years I’ve developed a fairly specific way of designing my model structures. At the heart of each model is a substantial, sheet balsa sided forward fuselage box in one form or another. Even the round fuselage types that use a ‘shell’ style of construction have this same sheet balsa box built into them. The idea behind this is that this box ties together all the stressed sections of the
model. Motor, batteries, radio equipment, landing gear and even the wings are all attached to this fairly solid section of the fuselage. What this means is that all the factors trying to pull the model apart are tied together and, hopefully, balanced against one another. As long as the wings are designed strong enough to take any aerobatic (there’s that word again) loads they are sufficiently securely mounted that the fuselage’s inertia during said aerobatics won’t turn it into a wingless projectile. Similarly, it will take a substantial knock to dislodge the motor. Sufficiently substantial, in fact, that a dislodged motor is likely to be the least of your worries - you’re more likely to be concerned about the crumpled ruin that was once a model surrounding the motor. That said, any study of my smaller biplane designs will reveal that the lower wings are usually only glued to the fuselage box and rely on the one-piece, firmly mounted, top wing and interplane struts to hold them in alignment. Even this has its’ reasons. Let’s face it, the one part of a model likely to strike the ground almost as often as the wheels is
AUGUST 2016 FLYING SCALE MODELS 63
QUIET ZONE Tony OK
29/6/16
10:38
Page 4
The laminating film covering on this 30” model reveals the reinforced (front sheet box) rubber power nature of the structure. Sturdy but light.
Hidden below all that sheeting even much heavier models (1/6 scale) still use the same basic formula but do use a bit more ply.
Much more the style of constructio n my designs are known for. Box front end and just enough rear structure to hold the tail surfaces in place.
64 FLYING SCALE MODELS AUGUST 2016
a lower wing tip. Consequently, if anything is likely to need repair it’s a lower wing. If that wing can be persuaded to break away causing minimal damage, it has to be better than a bottom wing that tries to turn itself back into a kit of mangled parts. I know the theory works because I’ve proved it. After flying four channel models for a while, it became time for the proving flights of my newly designed Sopwith Pup - a three channel model. As the model raced (?) across the ground, turning to the left, I was trying to correct the turn using the one transmitter stick that wasn’t actually connected to anything (It’s surprising how quickly these things become second nature). Not too surprisingly, the model continued to turn left as it took off. Turning with the model I suddenly remembered where I’d parked my car. Yes, right where the model was heading. Fortunately I’d left the door open and the model promptly proceeded to fly in through said open door. Well, some of it did at any rate because it was too big to fit. The fuselage, centre section and tail surfaces ended up in the car, but all four wing panels were left behind in the process. However, apart from a bit of covering damage, the wing panels had all broken away fairly cleanly; just a couple of hours work had the model fully repaired and ready to fly again. Without that ability to break away pretty cleanly I would probably have found myself building a new set of wings for the model. Okay, so that’s an extreme example and not something I try to make a habit of, but you see what I’m getting at. Glue them sufficiently well that they won’t come off in flight, but not so securely that they rip everything apart when they do come away from the fuselage.
MOVING BACK With the requirements for the front part of the model determined - a self bracing box fitted with wings designed to take potential flying loads - let’s take a look at the rest of the fuselage. Basically the rear fuselage needs to be nothing more than something to space
QUIET ZONE Tony OK
29/6/16
10:38
Page 5
the tail surfaces to the correct distance from the wing (s). What it does need to be, however, is something RIGID to hold the tail surfaces in place. Tail surfaces that can twist about at the least provocation will do nothing for reliable flight performance and make trimming the model far more complicated than needed. Not only rigid, the fuz rear end also needs to be strong enough to withstand the occasional less-than perfect landing. So, whatever you do, nothing less than hard balsa for longerons. Uprights and cross braces can be medium, but longerons MUST be hard if they aren’t to break in even fairly gentle ‘arrivals’. Good glue joints and a sufficiency of uprights and cross braces is usually enough to keep the structure rigid but, if in any doubt, lightweight diagonal bracing will definitely take care of it. Personally I haven’t found them necessary in most cases, but that’s just me being lazy again.
OVERVIEW Throughout all of this you have to bear one thing in mind. I design models to fly, not to survive crashes unscathed. I use just enough structure to do what it’s supposed to do and no more than that. Over the years I’ve found I get the best results from lightweight models. They don’t need huge amounts of power (making for a cheaper power set up) and, because they’re light, the potential for damage in a not-so-great landing is limited by their lack of inertia. They definitely won’t survive a full-on crash, but then very few models will. Beefing up the structure may make them appear stronger, but they aren’t any stronger when it comes to hitting the ground. All the beefing up will achieve is to make them heavier and the heavier they are, the faster they need to fly. As you can probably imagine, a model that flies faster is, when the worst happens, going to hit the ground that much harder than a light model. So, rather than reinforce what is a perfectly adequate structure, just don’t crash the darned thing. Afterall, that is actually the idea of flying models. The clue is in the title, of course. Flying models, not crashing models. Think of it this way, a lighter model will fly more slowly and a slower flying model will be easier to control than a fast model. Since the model is easier to control, and will be landing that much slower still, the risk of crashing is greatly reduced. If the risk of a crash is greatly reduced then there’s no bl***y need to reinforce the structure in the first place. Rocket science it isn’t by any means. Nonetheless it’s surprising how many people will insist on over building in an attempt to impart crash resistance. On engine powered models you do need that extra structure to absorb the vibration and starting stresses (trying push the poor model into the ground while you slap a starter onto it) but electric models suffer neither of those issues. They don’t need to be gripped hard, so are unlikely to be damaged by crushing, and as long as your prop is balanced reasonably well there should
A more recent tiddler (18”) demonstrates that I’ve carried over the basic idea even to models this small.
be no vibration. If there is, it’s a fair bet you’ve got a bent motor shaft. Additionally, of course, there’s absolutely no risk of oil seepage damaging the structure so you don’t need to protect against that.
WHAT SIZE Otherwise known as, ‘How big is the motor mister?’. Nothing too comprehensive here. Apart from the fact that you could fill a book with the details of every motor suited to every model, and I don’t have space for that, you’ll notice that I’m rapidly approaching the end of my allotted space for this month (always a good excuse for not going into too much detail). So, starting really small lets quickly look at converted rubber power type models - or those 18-21” models I like to present at regular intervals. These usually weigh in at less than 3 ounces ready to fly and are perfectly suited to the 8.5 mm geared motor units found in the Parkzone range of RTF (wash your mouth) models. Structures for these models remain pretty much as intended for their original purpose, but supplemented with local reinforcement for fitting motors and radio gear. You may also need to reinforce dihedral braces and how the wings are attached to the fuselage. Although not a great deal heavier (with luck and careful planning) they will be subjected to far more in flight stress than they were ever intended to cope with as rubber power models. Next up the size range are those that were intended to use the old GWS IPS motor units. Always something of a lottery in terms of quality and longevity (some burnt out with alarming rapidity) an ideal replacement motor would be a 15 or 20 gram outrunner. 15 gram in slower flying types and 20 gram in warbird types. Since the models were also probably intended for small Ni-Cad battery packs
the equipment we’ll be fitting will be lighter than intended so structures can remain totally unchanged. It might even be possible to reduce the amount of wood involved but that is really a matter of personal taste. I’d be inclined to leave well alone and just accept that they’ll be slightly stronger than the new, lighter equipment requires. Now we’re up to what I like to think of as s400 size models. Because these were originally intended for electric powered radio control much the same applies to the structure of these. It’s well proven and will be subjected to similar power levels (albeit slightly lighter equipment) so little will need to be changed to update them. These models will tend to be around 36-40” span biplanes and 45-48” span high wing monoplanes weighing in at around 20-30 ounces. A 400 size outrunner (no surprise there then) and 2 or 3S battery packs are a perfect match for original equipment. Getting much bigger than that gets a bit more complicated. Heavier 1/8 scale models (like Albatros types) do well with 480 size outrunners. Since most of these (mine at any rate) were specifically designed with brushless motors in mind, leave the structures exactly as they are drawn. For bigger models, you’ll need to do your own research. Bear in mind what was said about power levels, check the motor specks and act accordingly. A couple of my own 1/6 scale models (Albatros DVa and Fokker DVII) both show motors like the Turnigy 4250 which works well for these 5lb plus models. There you have it then, another 4 pages of me rambling on about stuff you probably already know. But there’s always the chance that someone new to electric flight will find it helpful and that’s all the encouragement I need. As usual, I can be contacted at
[email protected]. No begging letters please. Sending them is my job. I
AUGUST 2016 FLYING SCALE MODELS 65
Classifieds
MANTUA MODELS UK LTD Tel: 01753 856321 Fax: 01753 857444 179 Dedworth Road, Windsor, Berkshire, SL4 4JN
Open Mon-Sat 9.00 - 6.00pm
MANTUA AND AVIOMODELLI AIRCRAFT AND ACCESSORIES Trade enquiries welcome for our full range of aircraft
FSM CLASSIFIEDS.indd 1
MASTERCARD/VISA
✈✈
✈
STEVE WEBB MODELS & HOBBIES Tel: 01928 735225 Fax: 01928 735410
80 Church Street, Frodsham, Cheshire, WA6 6QU
Mon-Sat 9.30am - 5.30pm Closed Wednesdays
MASTERCARD & VISA ACCEPTED email:
[email protected]
15/12/2015 10:13
NEW FROM ADH PUBLISHING
The Modeller’s Guide
Superdetailing, Painting and Weathering
Aircraft of WWII, with airfield accessories, ordnance and diorama
Aleksandar Počuč
‘
SCALE MODELLING: A LOVE STORY READY TO ASSEMBLE TOOLS AND MATERIALS TECHNIQUES BUILDING THE AIRCRAFT ■ SPITFIRE MK. IXC ■ P-47D THUNDERBOLT ■ JU-87D ‘STUKA’ MAKING A DIORAMA
ORDER NOW:
www.adhpublishing.com
✆
01525 222573
Modeller’s guide to superdetailing, painting and weathering aircraft of WWII’ book is intended for both beginners and advanced modellers as it covers wide variety of modelling tasks ranging from basic detailing, scratch-building, painting, weathering, machining custom parts using resin as well as scratch-building part from brass and aluminium and of course, diorama making. Basics about tools, paints and modelling materials have been covered as well. The book revolves around three subjects, P-47D Razorback, Spitfire Mk.IXc and Junkers Ju-87D Stuka, all in 32nd scale. Step by step concept will provide a good reference and ideas to all WWII aircraft modellers regardless of their experience.
✉
[email protected]
FOR ONLY
£18.95 PLUS P&P
ADH PUBLISHING, Doolittle Mill, Doolittle Lane, Totternhoe, Bedfordshire, LU6 1QX. United Kingdon. TEL: +44(0)1525 222573. FAX: +44(0)1525 222574. ONLINE: www.adhbooks.com
p 27 ModellersGuide 116.indd 1
05/02/2015 09:23
FSM AUG 16 P09.indd 1
21/06/2016 11:42