69 Ton Signpost 1 2 nspiration can come upon you quite suddenly. I had always liked an image of an abandoned Porsche King Tiger with its turret turned...
40 downloads
63 Views
4MB Size
69 Ton Signpost
1
Dragon’s Porsche King Tiger Modelled by David Parker Photo Bovington Tank Museum
Photo Bovington Tank Museum
I
Photo IWM via Barry Crook
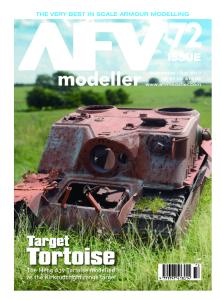
nspiration can come upon you quite suddenly. I had always liked an image of an abandoned Porsche King Tiger with its turret turned to the rear when I came across another picture of the same vehicle with 2 boys sitting astride the gun. Very quickly I had managed to uncover a further series of pictures giving an all round view of the tank and showing that the vehicle had been used as an improvised signpost by the advancing Allies and I was inspired.
The particular Tiger had served with the 3rd company of PzAbt 503 and has been tentatively identified as ‘311’. It appears to have broken down during the retreat from Normandy and to have been scuttled by its crew. Given its thorough photographic coverage I would speculate that it must have been one of the first examples that the advancing Allies came across.
The release of Dragon’s new Porsche King Tiger was all the excuse I needed to begin and at about the same time Andrea released their figure set of the two boys which seemed ideal for my purposes. Photo Bovington Tank Museum
2
Construction MR SURFACER was used to add texture to the hull where zimmerit is missing.
Zimmerit is applied using MILIPUT which can be chipped off easily before it completely cures.
The leverage point on the hatch is drilled out
The interlock on the rear armour is too wide and must be narrowed
With an open hatch MORI comes to the rescue by providing all the internal details on their replacement cupola.
The Pistol port on the turret hatch was drilled out and an ABER plug from their Ferdinand set was fitted.
The welded shell port would normally be hidden by the zimmerit. GREEN STUFF putty was applied around a circle of plastic as a guide.The rivets are from MODEL KASTEN
The muzzle brake is rotated slightly to replicate the photographs
FRIULMODEL tracks replace the kit parts these are the old style crimp together type 3
Painting 1
2
3
4
5
6
Photos 1 to 3
Photo 6
Photos 9 to 10
The initial painting sequence with a dark
The remnants of the zimmerit paste are
These close ups show the application of
brown coat applied before the base coat of
picked out on the turret using a fine brush.
rust stains and chipped paint around the
sand and finally the camouflage pattern
hatches. Note that a wash has been
along with some rusty tones on the turret
Photos 7 to 8
applied to the whole vehicle using a mix of
and engine deck.
I cut down a small chisel brush to the
oils and enamels.
width of the zimmerit pattern and stippled Photos 4 to 5
on different toned ribbed patterns to the
Photo 11
Areas of rusted bare metal are picked out
areas where the zimmerit had been lost.
An overall view of the tank with the
in mottled tones of enamels and the
Areas of red oxide primer were also
chipped zimmerit looking very prominent.
engine deck gets a base coat of dark
applied to areas of more conventional
brown.
damage.
Photo 12 The same ribbed effect was also applied to
5
the areas of flaked zimmerit.
7
8
9
10
11
12
13
14
6
Painting 15
7
16
17
18
19
Photo 13
Photos 15 to 20
chocolate brown colour before getting a
The engine deck is given a top coat of
Scuffs and chips are applied to areas of
wash of rust toned enamels. Next earth
assorted rust tones using enamels.
high wear along with rain streaked stains
toned pigments are brushed into all the
on the vertical surfaces. At this point the
recesses followed by some diluted rust
Photo 14
heavily weathered appearance is really
pigments. After fitting the tracks they are
Although they are not visible on the period
starting to work.
given a light wash on the raised surfaces with more enamels.
photos turret numbers were hand painted on the rear and right side of the turret
Photos 21 to 22 Weld beads are picked out in a Gunze
Photo 27
Photo 15
Colour silver which can be polished when
Because the tank has been at the roadside
Areas of rust were oversprayed with tones
dry.
for some time I added areas of dust to the horizontal surfaces. This shot of the engine
of red brown gouache to unify the underlying enamels followed by areas of
Photos 23 to 25
deck shows it around the turret ring and air
black soot staining around the burnt areas.
The tracks are sprayed with enamels in a
intakes.
20
21
22
23
26
27
24
25
8
Painting
9
26
27
28
29
30
31
32
35
33
34
36
Photos 26 to 27
Photo 29
Magicsculpt. These were the first children's
With close reference to the photographs
Similarly the tracks are sunken into the
faces I had painted and it required a
the lettering was applied to the turret using
base and accumulated debris is added to
slightly different approach - no 5 O’clock
white enamels which was dirtied with
the inside of the tracks and strands of
shadows but pink cheeks instead.
Humbrol No.72.
grass are growing up through the tracks. Photos 35 to 36
Photo 28
Photos 30 to 34
Details of the debris on the upper deck
More debris was applied to the decks with
The Andrea ‘Rascals’ figures were ideal
and turret, notice the bird droppings on the
small stones and sticks scattered around
and required only minor adjustments. I
turret roof.
to add to the feeling that the vehicle has
chose to remove the seated boy’s hat an
been sitting at the roadside for some time.
sculpted a new top to his head using
10
Finishing touches
11
A simple base was made using
Once dry, the tank was repositioned and
the grass was adjusted for a final fit around
polystyrene ceiling tiles into which the
the grass matting was torn into irregular
the running gear and the figures were
drainage ditch was cut to replicate the
sections and glued into place around the
glued into position. The final touch was the
groundwork in the photographs. Whilst the
vehicle, checking all the time that the
fitting of the muzzle brake which I had to
layer of filler was still wet the tank was
positioning looked natural. I kept the longer
leave separate in order to slide the boy
positioned on the base projected by a
grass close to the hull as people walking
down the barrel. This was fitted at a slight
layer of cling film. This allowed me to sit
around the vehicle would tend to wear
angle as seen in the photographs.
the tank into the filler for that realistic
down the foliage. When the grass has
sunken appearance. The ‘footprint’ of the
dried the tank was again removed and the
tank tracks were then cleaned out of any
base was sprayed using gouache. The
remaining filler before it set.
vehicle was then glued into position and
12