Issue 44 cover_Layout 1 13/09/2012 10:32 Page 1
44
SHOWCASING THE VERY BEST IN SCALE AIRCRAFT MODELLING
ISSUE
AIR Modeller
October / November 2012
October / Nov 2012 £6.50 UK $14.95 www.airmodeller.com
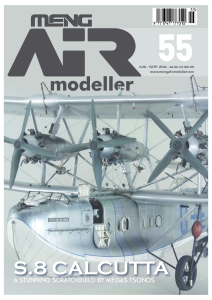
MIRAGE MASTERPIECE
MEGAS TSONOS GOES SUPERSONIC
AIR 44 October November 2012_AFV/26 Jan/Feb 06 13/09/2012 18:22 Page 1
CONTENTS 2
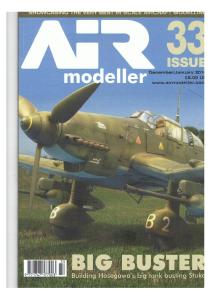
A-10A Jerome Lorusso builds Trumpeter’s large scale Thunderbolt
12
Albatros Marc Guerrero describes his build of the Wingnut Wings 1:32 scale kit of the iconic WW1 German fighter
22
F7F Tigercat Francisco Soldan describes his build of heavily weathered F7F.
28
Mirage Megas Tsonos returns to tackle a 1:48 Greek Mirage
40
Royal New Zealand Airforce P-40E Jamie Haggo builds the 1:32 Hasegawa kit
48
Air Born New releases.
58
F-14B Tomcat Building the 1:72 scale Hasegawa Tomcat described by Luis Mira GomezCalcerrada.
AFV Modeller is published Bimonthly by AFV Modeller ltd Old Stables East Moor Stannington Northumberland NE61 6ES Tel: 01670 823648 Fax: 01670 820274 email:
[email protected] Editor and Designer: David Parker Deputy Editor: Donald Campbell Sales Director: Keith Smith ISSN 1747-177X
We are now on Facebook, ‘Like’ us to follow what we are doing and follow our build projects.
AIR Modeller welcomes contributions from interested parties, but cannot accept any responsibility for unsolicited material. The contents of this publication including all articles, drawings and photographs originated by AFV Modeller ltd become the publishers copyright under copyright law. Reproduction in any form requires the written consent of the publisher. Whilst every care is taken to avoid mistakes AFV Modeller ltd. cannot be liable in any way for errors or ommissions.
1
TRUMPETER’S
MODELLED
2
BY
JEROME
LORUSSO
The Trumpeter has undertaken for a number of years now, a new
Cockpit
journey into the world of larger scale aircraft kits in 1:32 and 1:24.
The aftermarket manufacturers offer many additional detail sets
It is fair to say that most of these models are great, but there are
so that we are spoiled for choice! Cutting Edge, Black Box,
greater difficulties associated with their construction and their
Legends Production, CAM miniatures, and Eduard, help us, to sort
storage! I wanted to accept this challenge and to see if once the
out Trumpeter’s cockpit. I chose the Cutting Edge resin cockpit,
modelling work was completed, if it was possible to get close to a
which fits the model with no problems, adding some details with
convincing level of realism in 1:32 scale. To do so I built the A-10
the photoetched sets from Eduard. I simply followed the
Warthog A, one of the earlier releases in the Trumpeter 1:32 range.
installation instructions, and this detail set is really useful as well
The model is enormous, but it has many flaws, reminding me in
as being very simple to fit. The only drawback is the ejection seat
some ways the old Tamiya kit in 1:48. As I said, the larger scale
rails, moulded integrally with the cockpit tub as they are very easy
places greater demands on the modeller with details that may not
to break. Particular attention should be plaid in the last phase,
be obvious in 1:72 being very obvious in 1:32. The biggest problem
when it comes time to fit the instrument panel and I had to do
areas of the kit are the cockpit, and the canopy.
several test fittings. To paint the cockpit I used every detail from
The rest of the model can be considered reasonably accurate.
my various references, and the video game "lock-on", which has a
Before I started building the model, I spent time in various internet
very realistic rendition of the cockpit! The overall colour is dark gull
searches, gaining wide variety of pictures, for the subject in question.
grey FS36231 with semi-gloss black panels for the various
instruments. The main instrument
mm. For the various cables and
panel is supplied with flight
wires, various copper wires and
instruments in relief, but I preferred
solder ranging between 0.5 mm
to remove these and to open up
and 0.08 mm thickness were used.
the holes for the dials. Printed
All the avionics boxes were built
acetate film with the dials was then
with using scrap resin and assorted
placed behind the panel for the
plastic. All the fixing holes in the
most realistic finish. The beautiful
frames were reproduced with a 0.3
Cutting Edge ejectior seat does not
mm drill.
provide any belts so I added those
Similarly, I reproduced the individual
provided by Eduard.
doors for the various bays. Each of them has a base sheet of 0.25 mm,
Avionics Bays
which has been shaped to follow
The idea of seeing such a big
the fuselage contours. Each of the
model with the avionics bays
doors, had all the screw fixings
opened up had already been my
added and 2 mm long and 0.3 mm
plan. With the reference book by
in diameter copper wire was used
Verlinden, plus all the various
to make the screws. The overall
photos I collected on the A-10, I
colour of all the bays are FS 16473,
sketched out some designs on
deviating from the standard,
paper as a guide to construction,
Insignia white FS 17875.
and then I transferred all the accumulated data to plasticard.
Engines
Each individual compartment is in
The kit provides two resin copies of
proportion to the real ones, for the
what should be the engines, the
compartment walls I used 1mm
General Electric TF-34 Turbo Fans,
plasticard and for the shelves 0.5
but are far from realistic. In 3
addition, the external parts are supplied in
for colouring, I worked from the reference
with copper pipe sections 1.5 and 2.0 mm
clear plastic making them look like a toy.
pictures.
diameter, and the muzzle of the gun is supplied by Cutting Edge. The engine of
I decided model one engine closed and
4
another opened up. In dedicated exterior
Cannon
the cannon is a piece made on a lathe by
set for the kit, Cutting Edge provide a pair
You cannot talk about the A-10 without
a friend (thanks Maurice), while the rest is
of corrected exhaust pipes. I cut the piece
mentioning its main weapon. The design of
scratchbuilt from plasticard, and copper
of Trumpeter resin engine and I
this aircraft is based around the gun that
wire. The feed chutes were made of
reconstructed with plastic discs the
extends for about 7 meters inside the
0.5mm steel rod for greater rigidity, while
missing parts because the kit ones were
fuselage! I planned on showing this detail
the flexible parts of the chutes were made
not accurate. I also reproduced the second
revealing part of it and the ammunition
with 0.6mm copper wire, softened by
set of fans blades, copying from those of
drum. It took me a bit of time and a lot of
heating in a flame, and then wrapped
the kit.
photographic research to determine these
around a former of the correct dimension.
Working from my photographic references
details. Again for this, I made drawings to
For the ammunition drum, I detailed the
I started to add all the missing detail like all
help me to better understand the
front and rear, where you can see a ring of
complex plumbing and electrical boxes, a
geometry of the pieces. I rejected nearly all
bullets, which were made from 0.9 mm
time-consuming process! Naturally the
the gun parts of the model, keeping only a
plastic rod and 9 mm long, the scale size
internal doors were duly detailed too and
few. The seven barrels have been rebuilt
of the 30mm shells.
Within the drum I added about 90 grams,
From these I had to remove some detail,
Tail compartment & A.P.U.
of balast to balance the nose of the model.
using grinding wheels and to drill some
Although I had already done substantial
The compartment for the drum has been
holes, to replicate the real ones.
work in improving the model I wanted to
scratchbuilt, making sure that it would fit
Photoetch, copper wire and solder were
add something of my own. After drawing
alongside all the avionics bays.
used to add the fine detail. To simulate the
what I wanted, I removed both the tail
clamps around the struts I used Tamiya
Undercarriage & wheel bays
cone of the fuselage, and the APU
masking tape cut to size. For these areas
compartment door. Fortunately the plastic
Detail is sadly lacking in these areas of the
the dominant colour is grey FS 16473,
is really soft and can be cut without any
kit. Armed with essential patience and my
which once dried, was weathered using oil
problems. I found several pictures on the
trusty pencil, I made my own details for the
paints. I replaced the rubber wheels of the
internet of some A-10s damaged during
wheel bays. The front compartment is
kit with those from Cutting Edge, which are
the conflicts in the Gulf, with damage in
more complex than the wings, because of
very nice and with a weighted effect.
these areas, showing fully the mechanism
the particular stepped structure of the
and the ribs inside the fuselage. Using the
fuselage. I deleted the internal detail of the
The assembly of the wheel nacelles on the
usual materials I rebuilt all of these parts,
kit, to make my own detail along with
wings was somewhat complicated
although once the work is finished, you will
some Eduard photoetched parts. Once I
because after the required improvements,
see little because it is a hidden area. To
had finished the work on the bays I turned
their position was changed, creating gaps
obtain the internal shapes of the fuselage, I
my attention to the undercarriage legs
which were filled with Milliput and sanded
used a profilometer.
which are supplied as diecast metal, so
smooth with the panel detail re-engraved.
they can support the weight of the model.
5
The APU compartment appears in the Verlinden Lock On book, but I could not find other photos that showed greater detail, without pushing me into extreme detail. The decision to build this was the result of dissatisfaction, with engraving of this door. Once finished I painted the inner section of the fuselage with zinc chromate primer colour, ie yellow FS 33481, which was followed by washing in Umber oil paint to and then a highlighted by dry brushing a lighter tone of the yellow.
Canopy This is one of the biggest flaws of the entire kit. The entire arrangement of the transparent parts is wrong in its shape, especially the windscreen. The solution is to make a pattern from wood and vacuform new ones from acetate or
6
replace them with versions from Squadron.
halves of the fuselage were firmly glued
reconstructed using sections of copper
In either case, they are detailed on their
and stiffened with strips of plasticard inside
pipe and a hypodermic needle and a core
internal faces, with a mix of scratchbuilt
and I put in metal pins so as not to have
of steel wire. Similarly, I rebuilt the jacks in
details and photoetched parts. This was all
any unpleasant surprises in the future.
the wing airbrakes. All the integrally
finished in a satin black. The windscreen
After that, I opend 3mm holes in the
moulded navigation lights were redone
was glued to the fuselage and the seems
fuselage wing root area and in the same
with transparent acetate.
thoroughly filled. To reproduce the gaskets
positions on the wings, to have an
around the canopies I used a drawing pen
alignment of the two sets as precisely and
The model was built and "upgraded" to the
with well diluted acrylic paint. The
solidly as possible.
standards of the real aircraft, like the low
fragmentation line down the canopy was
As expected the separate components
visibility lights, deleting the old radar
created with a thin white decal.
required filling and sanding to make all the
warning system antennas and introducing
joints perfect.
the updated one, I also deleted the GPS
Assembly
antenna, since it was introduced a few
Once I had prepared the various
Details
years ago. In practice there are A-10s with
subassemblies, front and rear fuselage,
Parts that were liable to be easily broken
the Lizard or European camouflage, but
wings, engines and control surfaces, I
were reinforced with steel or copper tubes
the GPS was introduced only after the
sprayed Tamiya Surface Primer, having
and all antennas were given a metal core
replacement of the low-visibility
masked all the opened bays. The two
after being drilled. The Pitot tube, was
camouflage.
7
Armament
here, for the ones from the box, I only
Painting and decals
It is difficult to see a Thunderbolt II armed
tapered the fins on the Maverick. A little
Finally after so much time studying the
to the teeth, whilst it is much more
more attention should be paid in
details and cutting plastic, it's time to get
common to see it with a weapons training
assembling the Sidewinder and the
out the airbrush!
configuration. I chose a classic
alignment of the fins.
The units of the Flying Tigers (23rd Wing)
configuration C.A.S. (Close air support)
I ended up scratchbuilding the rails for the
and those based in Barksdale, Louisiana
consisting of:
"MAV", simply because the kit ones did not
(AFRES 917th Wing), have adorned the
2 AIM-9 L / M, 2 AGM-64 B / D, 2 MK-20
remotely ressemble that actual rails. The
noses of their A-10s with shark mouths
and ALQ-119 ECM pod V-15, long type.
wing pylons voids were detailed with
and heads of a stylized warthog. I found a
The two Sidewinder are from Cutting Edge,
plastic working from photos, and I added
nice decal sheet produced by CAM, ref.
as well as their rails, while the remaining
1mm steel pins for maximum strength
32-139, which besides having a beautiful
armament has to be improved with Eduard
between weapons and their pylons.
head of warthog is also in colour. As
photoetch. I did not have great difficulty
8
reference I also found a close-up in the
book Aeroguide 23. These A-10s sport the
colours freehand and well diluted, for
resolved with further coats of Micro Set
classic three-tone camouflage, or
greater control of the saturation. Each
and Sol. The model was then sprayed with
European scheme, much more interesting
colour has been altered by adding varying
matt varnish to seal it before weathering.
than the dull grey schemes.
amounts of yellow to green FS 34102,
I washed the entire model with hot water
green and pale blue for green, FS34092,
Weathering
and a drop of dish detergent, and after I
and the white and pink to grey FS 36081.
Finally at this stage, I can say that the
blot dried with a soft pencil I sketched the
With each application you create pleasant
model is almost finished!
camouflage.
colour glazes that give a depth correct for
To begin with I treated every panel with a
The European scheme has had three
a three-dimensional model. along the
thin wash of oil paint, raw umber, diluted to
different versions so you have to pay
fuselage I used a piece of cardboard to
90% with white spirit, which creates a filter.
attention to the period of your subject.
shade with the colour in the panels always
After further mixing with black, Van Dyck
I have represented my model with the last
from top to bottom.
brown, and Raw Umber, I went over the
stage of the mimetic and the bands of
I decided copy the decals for the nose
panel lines so as to define them a little
colour on top of the tail, introduced in
onto transparent masking film and I
more gradually. The small spots that are
recent years, which distinguish the various
sprayed the teeth white on black, and the
present across the whole surface of the
aircraft groups, in my case blue and white.
light brown nose. The decision was taken
aircraft, I created with oil colour and
Before starting the painting itself, I pre-
to do this because I felt it might be difficult
turpentine, concentrating on the joints of
shaded the entire model along all the
to get the decals to fit around the nose.
the various panels and surrounding areas.
panels with the black, after which, with the
This was followed by an overall coat of
After this operation, I prepared different
pale green, yellow and white, I have
gloss varnish in preparations for the
colors of Humbrol matt enamel for
created an undercoat for the final colours.
decals. These I found a little inflexible and I
drybrushing, dealing with each colour at a
Given the size of the model I applied the
suffered some minor silvering which were
time. I concluded with a final step, mixing
9
10
silver enamel with umber oil, lightening the shade at
Conclusion
every step.
I finished the construction by gluing all the remaining
I used powdered brown and black pastel pigments to
parts, the weapons, pitot, doors etc. that had been
simulate the dust and the various streaks caused by the
prepared in the previous phases.
airflow that are formed on various surfaces of the
The construction of this beast, was an almost never-
aircraft. These aircraft, flying at low altitude, tend to get
ending project staged across 4 years, and alternating
dirty easily. The weathering work was completed by
between periods of stagnation and other models, and I
loading the airbrush with the original base colours,
am happy to see it finally finished. It leaves me with one
creating small patches of repaired paint where the
unanswered question: Now where the I put it?
aircraft have undergone maintenance.
11
Albatros DV:Layout 1 13/09/2012 18:33 Page 1
1:32nd Scale
Wingnut Wings
Albatros dv
Marc Guerrero 12
When considering the range of items currently available, Wingnut’s Albatros DV is not really a new model, but I chose to wait until the release of the new markings before tackling the build of this superb model kit.
The Albatros DV aeroplane which I chose to copy has a headrest which is to be found neither in the box nor with available accessories. The only way is to create it from scratch. A small supplementary challenge to add a bit of spice to an easy assembly as you will be able to judge. The markings are those of the pilot “Rudi”, reference: 32012
Albatros DV:Layout 1 13/09/2012 18:33 Page 2
13
Albatros DV:Layout 1 13/09/2012 18:33 Page 3
Assembly I started the assembly with the engine which is very visible on the finished model. Some additional wiring, springs for the valves, rigging, and a bit of scratch-building was carried out to enhance the detail. Photos 1 to 3 The valve springs are built quite simply by winding very fine copper wire around those supplied in the kit. A spot of very fluid Cyano glue permanently sticks the copper wire. The motor is assembled easily and the fit is very precise. By looking closely at the assembly instructions and at the black and white photos, it becomes clear that the manifold pipes were often weather proofed by an insulation wrap. I created this strip by using very fine Tamiya masking tape wound around the pipes. The engine was painted as per the Wingnuts instructions. A dry brushing of light grey paint was swept over the manifold pipes in order to highlight the contours and to give a maximum of depth to the texture. The two tubes intended to protect the cables were made out of Evergreen plastic rods, into which I had already drilled 0.3mm holes to enable the cables to protrude. The engine was painted with colours from the Alclad range.
1
2
3
4
5
6
14
Photos 4 to 7 The spark plugs: as the detail supplied by the manufacturer wasn’t to my liking, I simply removed them in order to replace them with far more realistic ones. To do that, I ordered some Masterclub bolts with stems, which replaced nicely the original parts. The stems of the bolts were cut down to the size of the original spark plugs, they were then glued with a drop of cyano. To make the cables, I used very fine wire, which has the advantage of being extremely malleable. To make them more realistic, I flattened the tip of each wire in contact with the spark plug and glued them to
7
8
the narrow edge. With the help of a punch, a small disc of plastic was glued on top and painted gold. Photo 8 The exhaust was hollowed out with the help of a small drill connected to a Dremel. On the other side of the exhaust I made a weld seam with a very fine thread of plastic, stretched and glued with Tamiya liquid glue. All of this assembly is set aside until the final assembly of the fuselage.
Albatros DV:Layout 1 13/09/2012 18:34 Page 4
Photos 9 to 13 The halves of the fuselage are painted with Tamiya XF-59, which corresponds to the colour Flat Earth. Once this is dry, I used a mixture of artists’ oil based paints – Sienna Earth and Chocolate. Using a narrow paint brush, fine wood grains are drawn length-way. With a flat brush this fine marbling is then smoothed in a downwards direction, the overall effect is subtle and very convincing. When one looks at period photos of restored aircarft, the plywood had very fine wood graining, barely visible to the eye. Once the oil-based paint has dried a clear varnish mixed with translucent orange ink is sprayed over the whole area. The lower part is painted in Tamiya XF-76 Interior Green and covered with a clear varnish. A wash of dark Sienna Earth is applied to all the hollows of the uprights in relief, so as to give the best possible impression of depth. Each fuselage frame was painted in the same way.
9
Once done, I realised that the layers of paint on the joints hindered the closing of the half-shells. One must credit the excellence of Wingnuts tooling precision! In order to remove this excess paint, I used a brass rod of exactly the same diameter as the width of the frame. The paint comes off easily when this rod is rubbed in the grooves. When this is done the fuselage closes almost perfectly. There remains only a small gap, which will have to be filled.
10
11
12
13
Photos 14 to 18 The fuselage is glued together using Tamiya liquid glue. However, the glue erases the engraved panel lines on the edges. They therefore have to be scored again. Initially I ran my scalpel’s blade from one end to the other of the structural lines. Then, I used the Squadron engraving tool to slightly widen the furrow. Finally, with a Tiger saw, and using the finest teeth, I hollow out a very fine, slight furrow. Tamiya liquid glue is added to these hollows, which then find a perfect depth.
15
16
14
17
18
15
Albatros DV:Layout 1 13/09/2012 18:35 Page 5
Photos 19 to 24 The headrest which I mentioned in the introduction has to be constructed from scratch. I referred to the excellent photos to be found on the Wingnuts web site. I was therefore able to determine the height and the length of this head rest which was certainly designed specifically for this pilot. To make it I used an Evergreen hollow tube which I bevelled. Unfortunately, I had already installed the head rest supplied in the box, this was removed to make room for the new one I had constructed. Some Mr Surfacer 500 was applied to the perimeter of the head rest and sanding with fine grit paper so that the joint between the head rest and the fuselage is perfect. We now arrive at the only delicate point of this assembly. At the point where the fuselage joins, exactly where the wind screen should be, a small gap remains. In order to fill it a small slither of plastic card was glued with Cyano and filed. The fuselage is now glued and ready to receive the stabilizers. These are glued with Tamiya liquid glue. Some Mr Surfacer is applied with a fine brush at the fuselage’s joint. Once dry, everything is sanded with ultra-fine paper. The result is clean and provides a perfect joint ready for painting. For the trap door underneath the fuselage, I used Eduard parts destined for Roden’s Albatros D II. At the same time the dashboard switches were also replaced by Roden parts.
25
19
20
21 24
22
23
26
27
16
Photos 25 to 27 As the wings fit perfectly to the fuselage we can paint them separately. I painted the wings mauve and green as per the assembly instructions. The upper wings also received a touch of light blue paint. For the choice of colours the assembly instructions tell you all that you need to know … so no worries! Once the colours are applied, highlighting is applied to each panel. With 2mm masking tape the ends of the ribs are covered. A wash of mauve and green paint is applied and then the masking tape is removed. The same procedure is applied to the upper wings, using a dark grey paint. Once dried, a third coat is applied in order to harmonise the colours. The paint is diluted in order to build up the desired effect. The same procedure is undertaken on the wings, using this time a much narrower masking tape. For a perfect hold of the control surface, a fine brass rod is inserted in each piece, whether it be for the wings, the rudder or the stabiliser flap. As the brass rod is supple it can easily be bent to the desired angle, and can solidly attach the rudders, avoiding the possibility of these flying off at the slightest jolt.
Albatros DV:Layout 1 13/09/2012 18:35 Page 6
30
28
29 Photos 28 to 37 - General painting The chosen decoration is not the easiest to create. One needs to take into account the fact that the black and white colours need to be weathered so as to avoid the model looking too much like a toy. Black and white are relatively difficult colours to give life to. The fuselage consists of vertical stripes which are not provided on the Wingnuts accessory sheet, we therefore need to create them. Prior to painting, the fuselage was riveted with “Rosie” the riveter, in order to represent the studs on this fuselage. The challenge is to get the stripes neatly at the edges with no bleeding. Their widths need to be calculated in order to correspond to the plan supplied by Wingnuts.
After a little calculation we’re ready to start painting the fuselage. I chose to make the stripes individually, using masking tape and some Post-Its. The fuselage is varnished with a gloss varnish, in order to get the masking tape to stick easier. The ensuing work is repetitive, lengthy and requires much attention to detail. Once the fuselage is finished, the wings are set without glue in order to check for any adjustments. The photo speaks for itself! Everything goes in smoothly, without any forcing.
31
33
32 34
A light grey dry brushing is applied to the stabilizers. A soft airbrushing of very diluted black (90% thinner) is then sprayed over all surfaces in order to make everything uniform. The wheel hubs and stabilizers are also painted. Once dry, a Sienna Earth wash is brushed over the whole of the fuselage, concentrating on the areas prone to gather dirt, dust and oil. This wash also allows us to dull the immaculate look of the black and white. Pebeo matt varnish is applied over the whole of the aircraft.
35
36
37
17
Albatros DV:Layout 1 13/09/2012 18:36 Page 7
Photos 38 to 40 The motor is installed on its frame and is positioned without any difficulty. A few hoses are added using Wingnut’s excellent instructions sheet as a reference. The gear legs are also positioned and glued using Cyano glue for a superior bond. The frame remains fragile and supple, but is sufficiently solid to support the whole model. The machine guns are built ready for painting. I used the ones supplied by Master Model, which have a pre-formed turned and drilled gun-barrel and an absolutely superb brass canon barrel. The guns are dry brushed with a metallic colour and then the whole assembly is rubbed with graphite dust, obtained by rubbing a lead pencil on a piece of sandpaper. A haze of matt varnish seals it all. For my scene I installed only one Spandau on the plane, keeping the other one to put on the work bench next to the plane.
38 39
41
40
Photos 41 to 42 The wheels were protected with masking tape and the centre was painted, the tyres were slightly flatted through sanding. This easy little trick is very important, so many wonderful subjects are made by talented modellers but lose their necessary realism when static with the tyres appearing unrealistic, especially when it is so easy to add this dimension.
I repeatedly consulted the period photos supplied by the New Zealand manufacturer. Yes, even on WWI aircraft the tyres were ‘crushed’ because of the weight of the plane. The wheel axis was pierced and a tiny pin made and inserted. It’s practically invisible to the eye, but it’s there! The wheels were glued with slow curing glue for plastics in order to avoid them being wobbly.
Photos 43 to 45 The lower wings were glued in place, along with the cabin masts. The correct angle is easily found thanks to the small positioning tabs supplied by Wingnuts. For improved solidity, Cyano glue is first applied to the cabin masts. A set square is used in order to verify the correct wing/ fuselage alignment. No worries! The assembly falls perfectly into the right position. The spinner benefits from the addition of fine Archer rivets placed around the blade exit. The nose is pained white and weathering created via the addition of the same wash as used on the fuselage.
18
Tiny rings made out of copper wire are glued into the rigging holes made by the manufacturer. These are used to attach the rigging wires, made out of 0.22mm fishing wire coloured over with an indelible black felt tip pen. The rigging is created from pieces of cotton bud handle stretched under the flame of a lighter. To tighten the wire once glued in place, it’s enough to heat the flat handle of a spoon on a gas burner and to place it within a few millimetres of the wire (without touching it). The wire becomes taut, but remains supple enough in the event of a knock. For the control wires, I simply used 0.15mm stainless steel electric guitar strings. It’s ideal for this operation and there is no need to paint them afterwards.
42 43
44
45
Albatros DV:Layout 1 13/09/2012 18:36 Page 8
Diorama The base is made out of plywood. The grass is ‘long grass’ from BUSCH and the resin figurines are from Martin Hill (the mechanic) and Model Cellar (the officer). The ferns are photo-etch from Scale Link and the poppies are home made. The stems are from stretched plastic and the petals made from punched paper. The grass is cut in patches and sprayed with various shades of brown, yellow and sand. The decking under the aircraft is made from balsa wood and the planks drawn on with a roller ball pen. A layer of Flat Earth paint mixed with dark brown coloured acrylic ink is sprayed over the whole of the planking. For the oil spills, Tamiya “Smoke” mixed with Modelmix “Tobacco”, is ideal.
Figures Painted with both Humbrol and Revell enamels, drybrushed with their base colour, and highlighted with white. An oil-based black wash is then applied and a mat varnish seals it all. The whole ensemble provides a pastoral feel, despite the fact that the subject matter is overall military. Conclusion We’re presented a model that is much easier to build than it appears. The fit is extremely precise and there is absolutely no need to resort to the use of putty. The details are excellent and despite the scale of 1:32 we have a very reasonably sized model, practically a large 1:48. The only small difficulty was the rigging, which was not complicated as such, but which required meticulous attention.
19
Albatros DV:Layout 1 13/09/2012 18:36 Page 9
20
Albatros DV:Layout 1 13/09/2012 18:37 Page 10
Wingnut Wings
Albatros dv
21
F7F:Layout 1 13/09/2012 18:57 Page 1
22
F7F:Layout 1 13/09/2012 18:57 Page 2
MODELLED BY FRANCISCO SOLDÁN In the mid-90s, AMT released a series of models that culminated in the 1:48 Tigercats. Later, Italeri has re-released several of these kits, including the version in question, the F7F Tigercat 3N. Opening the box, the first thing that attracts attention is the size: the Tigercat was really large with a considerable wingspan and two large nacelles that housed the radial engines. The pieces are well detailed in a plastic easy to work with, and as we shall see, the finesse is pretty good. The kit is a simple project as the number of pieces is not excessive (108) and their fit is very good. Just a couple of things to improve: the wheels, which are vinyl, and will be replaced by excellent resin parts marketed by Royal Resin, and the profile of the propeller blades, which in this case were refined with sanding. Also, since I chose to model a device carried by the alerter radar on the nose, this had to be built from scratch.
The aircraft represented is one that immediately caught my attention. This is an F7F-3N with markings ‘24 red’ and named "Linda". This machine belonged to Unit VMF (N) -513, USMC Serial: 24/WF. Stationed in Pyongtaek (K-6) South Korea during the summer of 1952,the aircraft has great wear on the engine nacelles and the nose area that coincides with the warning line of the blades of the engine (probably a result of operating on unprepared airfields) and the tail with large patches of oil and dust ... . just too much to resist. The first thing I did was to investigate the reason for this discoloration. My research found that many F-7F-Ns were transferred directly into the Navy, adding the warning radar and receiving a coat of black paint for night operations and the apparatus of the time (Twing-Mustang, Skynight F3D). So the wear on the nacelles was because the black paint was very worn, exposing the original marine blue, and even the zinc chromate primer coat of the fuselage. Another feature are large oil slicks and smoke from their radial engines on the nacelle and on the upper wing and fuselage, which shows the typical structure of the Grumman factory, which makes the footprint of the accumulated dust and exhaust present a characteristic pattern.
23
F7F:Layout 1 13/09/2012 18:57 Page 3
ASSEMBLY & PAINTING The Interior parts are decent with some extra detail added in the form of seatbelts and some carefull painting. Base colour interior green and detail parts are finished in acrylics with oil colour washes giving definition. The wheel wells were finished in the same way in the assembled wings, the wings being undercoated in Alclad Aluminium on the leading edges to be exposed with the weathering process. The engines have the ignition wire added with soft copper wire of a scale thickness and undercoated in aluminium with black oil paint washes.The grey crank case and wiring were picked out with a fine brush and acrylic colours.
24
F7F:Layout 1 13/09/2012 18:57 Page 4
The most intense work of the painting is the worn paint exposing underlying surfaces: Step 1 - Apply a coat of Alclad Aluminum. Step 2 - Add a layer of zinc chromate, made with a mix of Tamiya XF-1 and XF-3. Step 3 - Then apply marine blue, XF-18 Step 4- Now wait 72 hours for the entire surface to dry. Once assured that it is, with a fine brush moistened with alcohol remove, carefully and randomly, remove layers of paint. Alcohol has the property that when dissolving paints, it creates a very interesting gradient and blending effect. This process needs to be done very gradually. Step 5 - Once dry, very fine 2000 grade abrasive paper blends the surfaces further and creates realistic fine scratches and chips.
This procedure is applied to other surfaces of the aircraft referring to photographs and observing the different degrees of wear. Also working from reference, exhaust staining and accumulated dust and oil is replicated: - Diluted XF-59 airbrushed gives effective exhaust staining. -With oil colours directly on the paint (using Humbrol thinners) apply burnt sienna and black, first blurred, then outlining around the edges.
Markings were made with masks where the quality of the decals, (one weakness of the model), was not very good. The numeral ‘24’ and the text ‘Linda’ were applied with a mixture of airbrush and fine brush painting. Satisfied with the work, everything was sealed with matt varnish. If the varnish "killed" some of the subtle effects, I worked back into them, so that the model didn’t lose ‘life’.
-Washes in some areas with heavily diluted XF-54.
25
F7F:Layout 1 13/09/2012 18:57 Page 5
26
F7F:Layout 1 13/09/2012 18:57 Page 6
FINAL DETAILS The Royal Resin wheels deserve delicate work. These are painted in XF-1 and XF-53, and then I begin a thorough job of dusting with XF-59, very diluted, and coloured pigment powder from MiG Productions. The wheels begin to add important fine detail to the model. In reality, when the aircraft had its wing tanks empty of fuel and was without a load of weapons, a "falling" tail resulted, photographs show the aircraft’s tail leaning on an oil drum. The final proceedure was to add the clear canopy parts although the sliding section is too thick and would look better replaced by thinner vac-formed parts.
CONCLUSION Without a doubt, this is a very good kit of this aircraft as deployed in Korea. A good result can be achieved from the box with a good scope for some interesting weathered finishes.
27
Mirage F1CG Megas:Layout 1 13/09/2012 17:40 Page 1
ITALERI
M I R A G E F1CG 1:48TH SCALE
28
Mirage F1CG Megas:Layout 1 13/09/2012 17:40 Page 2
MODELLED & DESCRIBED BY
MEGAS TSONOS
COMPLETED PHOTOGRAPHY BY
NICK KAVATHAS
Coming straight from the era of our high school days when the only cement was in an Airfix little white tube, this kit nowadays arrives in an Italeri box, but is in fact the former 1:48 Esci Mirage F.1C. It is still on the market after 30 years, and comes with all the shortcomings of the kits from that era. Although some update sets on the market can help one to cope with the kit, there is still much work to be done to produce a decent model of this significant aircraft. In the paragraphs that follow, written in the order of construction, an in-depth attempt has been made to sort out the majority of the kit’s faults which included a lot of scratchbuilding.
29
Mirage F1CG Megas:Layout 1 13/09/2012 17:41 Page 3
01 A
B
C
02 C
04 A
D
B 03
MAIN LANDING GEAR One of the kit’s serious shortcomings is its landing gear and wells. Scale Aircraft Conversions provides replacement leg parts in white metal form (not reworked but just as provided by the kit - photo 01A) which were very helpful. Being metal, the main gear legs would later absorb much punishment as these would be cemented, by necessity, in place, at a very early stage in the kit’s construction. The white metal main gear legs were stripped of their detail (01B), but for the nose gear there was nothing that could be done except a complete scratchbuild. The main struts were “dressed up” with thin plasticard on their lower sections. I replaced the oleo struts with plastic ones and restored the details of the main gear pivoting points, on top of the oleo struts. I cut and removed a length of the suspension levers which support the mainwheel axles (01C) thus bringing the latter 2.5mm closer to the suspension levers pivot points. In this way, the mainwheels were correctly positioned in relation to the main gear. Although not yet finished, the main gear legs were fitted at their respective places (02) and I checked their symmetry thoroughly. Meanwhile the main wheel wells were taken care of. I opted for the opened gear doors which in this position
SPEEDBRAKES
30
Prominent features on the F.1C fuselage underside are the perforated speedbrakes. These are seldom seen in their extended position, except for reasons of maintenance. In order to replicate the perforations on the model, I used a custom-built set of photo-etched speedbrakes. I found the arrangement of the perforations to be different on the Hellenic Air Force F.1CGs in relation to the version found on the French examples and on the kit. The kit’s speedbrakes were removed (08A) and the photo-etched ones were installed, following their shaping over a soft nail-polishing file (08B). I sanded the speedbrakes a little bit after installation (08C) to make them conform better to the fuselage (09). The speedbrakes interior structure was made of thin plasticard painted in Alclad (10 A-C) and I put a piece of pewter (10D) to simulate the fuselage sidewall visible through the perforations.
05 reveal the engine front fan circular inspection panels, a feature commonly seen in the flight lines, as an engine inspection is always at a premium between flights... I marked with a pencil the shape of the doors (03) on a piece of tape to retain it as a guide for the scratchbuilding of the doors that was to follow. Opening the main gear doors entailed the complete rebuilding of the area. I used pieces of thick black plasticard for the sidewalls and detailed with several photo-etched spares and Archer Fine Transfers riveting (04C) where necessary. The whole area was painted in Alclad Aluminum ALC-101 (04D). When dry, all the rest of detailing in the form of piping, wiring, hydraulic valves and the door locking mechanisms and levers (05) found its way into the wells. The main gear legs in their semi-completed form were painted in a metallic silver-grey finish and fixed in place; I cemented the retraction actuator at this point, and finished the assembly by dressing up the gears with their respective hydraulic lines and wiring (06). A comparison between the kit’s main gear and the finished work on the model can be made at photo 7.
08 A
06 07
09
B C
C
10 A
B
D
Mirage F1CG Megas:Layout 1 13/09/2012 17:41 Page 4
AFTERBURNER & NOZZLE AML provides a decent replacement resin afterburner set for this kit. It can be turned into a real attention-grabber if detailed a little more on it's exterior. This in turn necessitates the cutting off and removal of the two ring panels of the rear fuselage. And when these are removed, the kit’s fuselage reveals a cross-section in a desparate need of reshaping. But more on this subject later on. I started reworking the nozzle assembly by drilling out the holes (11A) through which the nozzle plate actuating rods are operating. The nozzle had to be reinforced so two small metal rings (11B) were inserted and secured with cyanoacrylate. The nozzle assembly and the afterburner cylinder were glued together at this point. I moved on with the nine actuators made of plastic rod and their respective unison ring
11 A
12
(12) that is made of a circular-shaped metal rod of suitable diameter. Then I added the rods made from stretched sprue. Using a power tool and a No11 blade, I shaped the afterburner can exterior (13) which would be visible after its installation in the rear fuselage. Moving on to the turbine exit resin piece (front), I replaced the flat photo-etched flame holders with three concentric rings made of wire (14 A-B) and cemented in three different levels with the outer ring being the rearmost (i.e. closer to the nozzle - 14C). The method of spinning the afterburner on the power tool is also used to paint the different burnt metal shades of the afterburner exterior. The afterburner can exterior was given a first coat of Alclad gloss black primer, over which the rest of
the painting took place. I sprayed shades of matt brown and light buff towards the rear end and metallic copper, clear blue and clear red towards the front (15A). As for the interior surface, I airbrushed matt dark gray shades, treated with dry pastels and finished with black oil colour simulating oil stains. The nozzle operating actuators are now completed with 18 interconnecting tubes (15B) cut to length and shaped accordingly. The final touch, a length of small diameter metal rod, was inserted in the can to simulate the afterburner temperature sensing probe (16), readily visible when looking at the interior. The two remaining sections were cemented together (17) and the assembly was left aside until the end of the construction.
14 A
B
15 A 17
13
B
B
C
16
31
Mirage F1CG Megas:Layout 1 13/09/2012 17:41 Page 5
FUSELAGE To start with, I cut the fuselage halves into three sections (18A-B). The nose section was modelled separately so as to keep the detailed areas as clean as possible. The main section, was corrected on its underside, and rescribed. Finally, the aft section was reshaped to conform to the correct cross section at the point of the ring-shaped rear panels. As the engine afterburner has a circular cross-section, with the engine installed, a tight fit with minimal clearances is instantly seen between the engine and the fuselage at the joint of the rear access panels to the aft fuselage frame. I made a plasticard ring to cater for fuselage scale thickness, its inner diameter being 21.5mm, its outer 24mm. The AML afterburner diameter was used to my advantage and a gap of 1mm between the ring inner diameter and the afterburner was obtained.
18 A
The excess plastic of the aft section halves was removed making the fuselage progressively narrower so as to meet the 24mm diameter needed. The plastic ring was cemented on to act as a guide (19). The halves were installed again on the main fuselage and covered in a thin layer of Milliput epoxy putty (20). A comparison between the original and the reshaped cross-section can be made in photo 21 (A, before and B, after reworking). The main fuselage undersides were sanded down to a flat surface and were completely rescribed (22). Needless to say that the topsides were rescribed as well, the quarter of century-old moulds really show their age on the plastic. I moved on to the fuselage nose section that was heavily detailed and corrected in almost every aspect except, perhaps, for the cockpit transparencies.
21 A
B
B
22 19
20 COCKPIT The Neomega resin set was earmarked for the cockpit but, as it transpired, it was more of a nuisance than an asset… In order to make space for the oxygen bottle compartment which I decided to open, I reduced the resin bathtub side consoles as they were intruding into the compartment by at least 3mm. Plasticard was used to make the compartment (23A) which can be seen from both fuselage sides via access panels. Using a small pinhead I made an oxygen bottle complete with its accessories (23B).Wiring bundles as well as electronic units were also made from stretched sprue and thin plasticard respectively. The area was painted in aluminium colour, all details being added from the top (23C). As the need for nose weight was becoming imminent, the nose cone was fitted with a plastic cap from a pen (24A) that was filled with lead ballast. The whole assembly was secured with white glue (24B) and sealed with epoxy putty. The nose cone was mated to the front fuselage.
32
23 A
B
24 A
B
C
Mirage F1CG Megas:Layout 1 13/09/2012 17:41 Page 6
COCKPIT CONTINUED... The cockpit area immediately under the windscreen includes the Cyrano IV radar monitor with its scope on the right side, the sighting apparatus on the centre and several instruments on the left side. The relevant Neomega part had to be thoroughly reworked (25A) to meet the demands. Problems with the windscreen transparency, included it's out of scale thickness and its lower frame being a part of the fuselage. So, in order to make a thinner windscreen, I cemented it on the fuselage, then cut it together with its “missing” frame and sanded it down to scale (25B). Finally the cockpit sidewalls were given some attention in the form of small plastic strips simulating the fuselage interior framing (25C). I used a dark grey colour for the cockpit interior, adding a little black oil colour for the darker areas where necessary and using dry pastels for the lighter areas. I drybrushed with white oil colour, to help the raised details to stand out clearly. The instrument panel was a sorry sight bearing only a slight resemblance to the real thing. Even the artificial horizon, in itself a large instrument, was missing… I followed the ‘sandwich’ method of drilling out the instruments, adding a clear piece of acetate on the back, placing decals for the dials and finishing by adding all the small details at the front.
25 A
B
I also added was the ALR-66 rear warning receiver monitor, a feature of the Hellenic F.1CGs, situated on the top left corner of the panel (26). In photo 27, the major components of the cockpit front section are seen before installation. Following the installation of the above, the Cyrano IV monitor and scope found their way onto the front right side, cemented in place (28) with the aid of a piece of stretched sprue. The reason behind this late addition is that the scope is a large item that had to be carefully positioned in relation to the rest of the details. I moved on to the cockpit back wall, its upper portion being scratchbuilt. As can be seen in photo 29 and the relevant Neomega resin part went into the spares box without delay… The Martin-Baker ejection seat used is a converted Aires resin piece for the F-4 Phantom being very similar. I cut a small portion of the seat catapult (30A) to ensure that the seat was properly positioned in the cockpit. The seat harness and the cushions were reworked to resemble the F.1CG equipment, using thin lead foil where necessary. The overhead ejection handles were cut and repositioned closer to each other (30B), but although the seat parachute should be made a little narrower too, it was left untouched due to it being finely detailed as a resin piece.
26
27
C 28
30 A
29
B
33
Mirage F1CG Megas:Layout 1 13/09/2012 17:41 Page 7
A V I O N I C S B AY Although the avionics bay is essentially the same on all F.1Cs, there are some differences in this area. Some equipment can differ depending on the production batch or order made by a customer. I started to build the two-storey bay, the upper racks of which are hinged to deploy and rest into the hollow cover which forms part of the fuselage spine. The lower rack was built first, its electronic equipment in the form of boxes made out of black plastic so as to avoid painting. I used a Punch-And-Die set for the small details such as plugs, buttons and wiring terminals.
Small photo-etched spares (31A) and the inevitable labels added a lot of realism in the area. The front upper rack was modelled in the stowed position over the lower rack. Some of the details are hidden but the illusion of depth is achieved (31B-C). The rear upper rack was to be shown in its deployed position, and was modelled together with the panel at the final stages of this construction. In photo 32, a general view of the cockpit area with the seat already installed can be seen, and the work on the undersides and the nose landing gear.
31 A B
32
C NOSE LANDING GEAR The nose gear bay looked promising but I was confronted with the choice of either accepting or discarding the details as the well is too confined. In the end, only the sidewall detailing was retained, the rest being scratchbuilt. I started with the circuit breakers and relay boxes which is a main feature in the wheel well, and is completely omitted by Neomega. The box was made of thin plasticard (34A), and the circuit breakers came from the Archer Fine Transfers rivet details (34B). On the box top (34C) the detailing came from spare photo-etched parts, painted according to my reference photos at hand. A ‘plexiglass’ cover made from thin acetate, was glued over the details. The whole area was then painted in a ‘galvanized’ metallic blue colour (34D) to match the real thing.
The gear itself was scratchbuilt as the kit’s own is a failure beyond description. Only the wheel axles part was retained, the rest modelled around a brass outer rod and a nickel inner one to simulate the shock strut (35A). Epoxy putty and Mr.Surfacer 500 was used at the points where the plastic and brass should look like a cast metal component (35B-C). The gear was given a metallic silver-grey finish (35) to be followed by the rest of detailing. It is seen in (36) in its installed condition pending the nosewheels installation. Before leaving this area of the model a note must be made on the two DEFA 553 30mm single barrel cannons. The barrels are made of a brass tube (33), the muzzles are plastic rods turned on the mini power tool and the troughs were deepened, as the detail in the area was virtually non-existent…
34 A
B
C
D
33 35 A
34
B
C
D
36
Mirage F1CG Megas:Layout 1 13/09/2012 17:41 Page 8
COMPLETING THE FUSELAGE In order to join the front section to the main fuselage, four extensions made of thick plastic were fixed at the point of the air intakes (37) thus making a strong joint of the two fuselage sections. On the main fuselage, the flat surfaces which block the air intake openings were drilled out to allow the intake duct walls to continue further into the fuselage. The air intakes themselves are the Pavla Models resin set which offered a better intake exterior shape. With the use of epoxy putty over a thick plastic extension (38A-B), I modelled a curved sidewall on each intake and inserted the assembly in the drilled out opening already mentioned. The intakes were painted in Model Master’s chrome silver FS-17178 so as to reflect as much light as possible when viewed from the front thus creating a sense of depth. A thin layer of epoxy putty is also used to enhance the bulging of the intake sides (38C) so as to keep in line with the ‘area ruling’ concept of the fuselage. A rectangular opening was made to house the interception light.
The bulb itself was inserted in a hollow recess made of pewter (39), and the whole was covered with a piece of clear acetate. Later on, an oval mask protected the section that was to remain clear during putty application, sanding and painting. At this point the wheels were made ready for installation. A nice resin set is produced by ResinArt and it is used on the model. As I had to ensure that all six wheels should be firmly in contact with the ground, their points of contact were given an additional plasticard extension (40). In this way, they were sanded uniformly without fear of sanding them down to their hubs! Remember, these are very small high pressure tires producing no bulged sides and in order to show even a little ‘scale weight’, delicate sanding had to be exercised. The wheel well doors were modelled at this point (41), all of them (including the nose gear doors) being made of plasticard.
38 A
37
B
C
39
40
41
35
Mirage F1CG Megas:Layout 1 13/09/2012 17:41 Page 9
WINGS Apart from the flaps, the wings are a straightforward affair. The only point of interest here was the replacement of the spoilers with photo-etched custom made ones that offered the advantage of being perforated. I removed the spoilers’ area on the wings and carved the area of the hinge lines (42). I installed the replacement spoilers and added a piece of pewter on the inside (43) to reflect any possible light and give a sense of depth under the perforations. The navigation lights (44) are made from a piece of clear sprue sanded to shape are shown to advantage as well as part of the riveting of the wings. The wing assemblies, minus flaps, were glued to the fuselage and their joint lines were sprayed with Mr.Surfacer 1000 diluted
42
45
with Humbrol Liquid Poly (45). When dry, the putty was sanded down to a smooth finish and the inevitable scribing and riveting added the final touch on the uppersurfaces. I found, by far, the flaps construction, to be the most tedious part of the whole project. The flaps are of the slotted fowler type and they are deployed asymmetrically, the inner ones extending to a higher degree than the outer ones. I used the flap surfaces of the kit but I restored the flaps leading edges and sides with plasticard so as to regain the plastic lost at their removal. I added a slot at each leading edge, made of pewter (46). Archer Fine Transfers rivets were used on a number of frames to simulate the flap
43
44
46
PAINTING
36
The model was masked with soft and wet toilet paper that was inserted in all openings. I applied an amount of Mr. Hobby’s Mr. Masking Sol over the paper to act as a sealing agent (47). I masked the windshield with Bare Metal foil and with a new No11 blade, I cut and uncovered the windshield frames. The smooth finish of the Greek F.1CGs, regardless of their colour fading, made me give the model an overall satin finish. The F.1CGs undersides were actually painted in an aluminum colour which although shiny does not possess the peculiar shine of unpainted metal. I chose to use Alclad for a start (48), oversprayed with gloss varnish to match the gloss Xtracolor uppersurfaces that were soon to follow. This would help the decal application and the final satin varnish would give the model the same appearance all over.
frames reinforcing modification effected on most Greek F.1CGs, each separate flap having its own specific modification status. The rest of riveting was engraved. Each inner flap was mated to its outer sibling before wing installation, and care was taken to obtain the same angle of deflection between the port and starboard pairs. I made several dry fits on the model, I painted the flaps at the same time as the model, but I cemented them at the closing stages of the construction. As for the leading edge flaps, these were scratchbuilt from thick plasticard, and cemented on the model before painting.
47 I extended the Alclad spraying to cover also the fuselage sides to aid weathering. A little later, the model undersides were given a coat of Model Master’s Glosscote varnish. The gloss varnish prepared the Alclad painted surfaces for the satin varnish that was to follow after the application of decals. I masked the demarcation lines with Tamiya 6mm masking tape and proceeded to the uppersurfaces and sides. The basic colour used was the Xtracolor X-125 FS15164 Intermediate Blue. As the model was to be sufficiently weathered, an amount of Xtracolor X-396 Mirage 2000 Dark Blue Grey was also added to produce lighter shades of the basic colour. Additionally, over a number of panels, the Xtracolor X-126 FS-15237 Dark Blue Grey, which is not ‘dark’ at all when compared to the basic colour, was sprayed here and there over the topsides, to create the effects of a sun-beaten surface.
48
Mirage F1CG Megas:Layout 1 13/09/2012 17:41 Page 10
49
50 51
52
PAINTING CONTINUED... I removed the masking tape, made the appropriate corrections where necessary, masked again, this time for the red intake lip areas. Next came the walkways, examples of which are given in the exceptionally good Icarus Decals set (No48015) for the Greek F.1CGs. But as the walkways of the decal set are better if applied on a non-weathered model, I decided to paint them on. I used Bare Metal foil in the process (49). An exhausting affair, but the colours of the walkways were painted in ‘weathered’ shades of red and yellow. In this way, they blended beautifully with the rest. The model was sprayed with black oil colour substantially thinned, and then wiped with a soft paper towel slightly moistened in thinner. With the help of a small round brush, some of the remaining ‘dirt’ was conveyed to areas adjacent to access panels and panel lines (50), thus creating the effect of leaking oil, fuel and hydraulic fluids. This is done especially under the rear fuselage which is usually dirtier than the front. In photo 51, the weathered uppersurfaces can also be seen as well as some of the decals already applied. The Icarus Decals set (No48015) was used throughout except
the walkways (mentioned above) and the Hellenic Air Force insignias. The roundels are painted on, using masks (52) for the same reason as the walkways. The roundel basic colour (when freshly applied on the Greek F.1CGs) was FS-15102. Gradually the colour faded to an indistinct light blue grey, depending on the amount of time a specific aircraft was serving after overhauling, or the roundel position on the plane, (topsides roundels usually fading quicker). I painted the roundels in a lighter and greyer shade than FS-15102, and enhanced the weathered look by mixing the white colour with FS-16622, producing a ‘scale’ white. The model was readied for its satin varnishing. I used the PEBEO artist’s acrylic satin varnish. Not exactly a modeller’s product, it nevertheless produces a very fine film and exceptionally smooth finish. This varnish does not adhere well on metallic finishes and glossy decal films, if applied directly on. So here lies the second reason why the Alclad paint was previously coated with gloss varnish. Thankfully the decals were too small to be troublesome. I chose to model the F.1CG c/n 56, s/n 103, which was one of the first two aircraft arriving to equip No342 All Weather Squadron, 114 Combat Wing, in
1975.Initially flying alongside the F102A Delta Daggers, following the latter’s withdrawal from service, the F.1CG’s bore the brunt of operations in a most demanding environment from every aspect. After 30 years of operations, s/n103, at one time named ‘SKYROS’ (island of Skyros) written in ancient Greek under the cockpit on the starboard side, is found in long term storage in Tanagra AFB in 2006. Then, in the memory of F.1CG aircrews giving the ultimate sacrifice in service, s/n103 is erected on a memorial plinth at Polydrosso village in the area of mount Parnassus, resplendent in her original colors and markings... I was inspired from a very good photo of F.1CG s/n 103, taken by Mr. Arie van Groen on October 4, 1995 at Tanagra AFB, uploaded in Airfighters.com (photo ID: 40695) together with other interesting images of Greek F.1CGs. Needless to mention that Icarus decals covers almost every aspect of the type’s service with the Hellenic Air Force, including all the island names the airplanes of No342 Squadron once sported, even the “Ghost” scheme that was worn by only two airplanes for a very short time… 37
Mirage F1CG Megas:Layout 1 13/09/2012 17:41 Page 11
53 F I N I S H E D A S S E M B LY A lot of work was remaining to be carried out, following the painting and weathering of the model. I detailed the hydraulic panel and its interior switchbox, on the starboard side just under the roundel (53), working in much the same way as for the avionics bay. I finished the avionics bay by adding its scratchbuilt access door, complete with the upwards deploying rear upper electronics rack (54). Seen in the photograph taken by Mr. Arie van Groen on October 1995 at Tanagra AFB, on the panel exterior, the ‘rescue’ arrows are not in line with their front ends on the fuselage, thus denoting a replacement avionics bay access panel. I turned my attention towards the cockpit hood, a lot of work to be done here as well. I sanded the frame so I could see where to glue the details and I put a piece of photo-etched spare folded in the middle, so as to make the hollow channel that houses the hood securing hooks. I detailed and painted the rest of the interior in matt black- grey, and proceeded in the painting of the exterior. Although I masked and painted the opaque strips at the top rear area of the hood (55), I painted the off-white sealant strip around the frame free-hand. In photo 56, the hood can be seen at its position.
54 55
56
57
58 The AIM-9 launch rails were the next step. These are also made from scratch using two pieces of thick plastic sanded to shape, and made hollow at their front end (57). The launch rails were painted in FS-36622 and had their modification status (written in Greek- modern this time!) and serial number put on, using small decals and a lot of patience…
59
Installation of the trailing edge flaps and the stabilators (58) followed as well as some of the smaller details (59) concerning the drag chute well and the engine area. The time came for the afterburner to find its place in the rear fuselage (60). It was put in position and with the help of an extra long applicator (61) it was glued in place. Later, following a closer look and measuring I found, to my displeasure, that the afterburner should be a little more ‘buried’ in the fuselage, standing out by an embarrassing 1.5mm! 38
61
60
Mirage F1CG Megas:Layout 1 13/09/2012 17:41 Page 12
62
63 A
64
B
COMPLETE THE PICTURE A diorama base with nothing but the essentials (62) was made for the finished model to stand on. The surface work was carried out on a piece of plasticard, and is temporarily mounted on the back of a tray as these lines are written, pending the arrival of a more appropriate wooden base. An entry ladder was fabricated from thin brass rod lengths soldered together (63A) and plastic rod footsteps. Painted yellow with black anti-slipping mats (63B), it was cemented in place, and a mechanic’s headset was cemented on the fourth step. The earthing wire was made in two sections separated inside the airbrake (64), so the longer section was cemented on the base, while the model is free to be lifted off its base at any time, carrying with it the shorter section.
A fellow modeller and friend made a fire extinguisher from scratch which he generously presented to make the base all the more complete and life-like. Constructed of plastic rod and plasticard, and detailed with photo-etched hoops and Grandt Line ¼” nuts, the extinguisher trolley was painted in a semi-gloss black. The extinguisher bottle, complete with labeling and painted red was inserted through the partially opened hoops and secured with cyanoacrylate. The project was completed with the addition of the hose which is a length of unpainted black rubber, and the nozzle, made from a small piece of thick plastic sanded and rounded to shape. Photo 65 shows how the fire extinguisher is giving scale to the unfinished model, a marvelous 40-hour project alongside a seven months construction…
65
39
p40e Haggo:Layout 1 13/09/2012 18:58 Page 1
32ND SCALE HASEGAWA JAMIE HAGGO The Royal New Zealand Air Force relied heavily on the P-40E variant towards the beginning of the Pacific Campaign in the Second World War. As the war went on, later variants replaced the earlier E models which were relegated to second line duties where the aircraft were overhauled and given a new paint job. Originally the aircraft were painted in the Du Pont equivalent of Dark Earth, Dark Green and Sky, when they were re-painted local paints were used, in this case NZ Sea Blue Grey, Foliage green and Sky (some state that the undersides were left in the old colour scheme). Seeing these were second line machines they didn’t have the white theatre markings. What is a gift for us modellers is that even though these aeroplanes were not used in combat, they were operated in some pretty harsh climates, the Sea Blue colour being particularly affected by the elements. All this adds up to a great challenge for modellers like me who love weathering, but before we think about this, there is the small matter of building the thing!
40
p40e Haggo:Layout 1 13/09/2012 18:58 Page 2
RNZAF
P40e KITTYHAWK
41
p40e Haggo:Layout 1 13/09/2012 18:58 Page 3
CONSTRUCTION Despite the slightly different parts break down, I tackled this model in the same way as I have done the 48th scale examples; namely putting the separate fuselage parts together in order to make 2 complete fuselage halves. I think models need rivets these days, without them they just look bland to me so each of the parts were primed and then the rivets added using an RB Productions photo etched riveting wheel. At the risk of sounding lazy, there’s little else to say on the construction as it was a breeze. A few areas required a bit of attention but you’ll be able to see these in the captions. However, I will say just a little
01
regarding the Eduard photo etch set which I used on this model. The set is very extensive however I chose not to use everything as I felt it would make things much more complicated for not much extra refinement, for example the cowl flaps are very fiddly and fragile so all I did was use some bits and pieces and the riveter to improve the kit parts.
02 01 Riveting an airframe can be tedious however the results are well worth it turning a bland model into one with depth and detail.
03 02 Hopefully in this photo of the riveted tailplanes you can make out the fine rivets.
04 04 Hasegawa have moulded the rear quarter lights differently in this 1:32 model solving the poor fitting clear parts of the 48th scale kit. 05 Don’t do what I did and paint the area under the quarter lights interior green, they should be the camouflage colour. In any case, mine was weathered using a wash with AK Interactive dark wash (green), post shaded with a very thin dark brown and finished off with a dry brush. 06 Despite the kit parts being very nicely detailed, there’s always some room for some extra detailing. Here some solder and brass wire will add that bit extra. 07 I tend to glue as many parts together with Mr Cement S before painting as it leads to a stronger assembly. In this photo, the parts have been primed and then a mist coat of Alclad Aluminium applied.
05
06
07
08
08 The basic painting is complete, following a coat of AK Interactive worn effects, the base coat was chipped in the same manor as the hairspray technique. The various boxes of equipment have been picked out with Vallejo acrylic.
42
03 One of the few areas of filler was the carburettor intake on the nose, a smear was used as ‘belt and braces’ just in case.
p40e Haggo:Layout 1 13/09/2012 18:58 Page 4
09
10
11
12
13
15
09 A close up of the cockpit floor and back reveals how effective the AK Interactive product is. It is inevitable that some chips need to be added using a fine brush but this isn’t onerous.
14
10 To be honest I was a bit disappointed with the photo etch instrument panel, I think it lacks depth. Next time I’ll use some Airscale or MDC instrument decals and hand paint the details. 11 The Mig wash and AK Interactive filters (streaking grime and dust effects) really add depth. Mig Productions dark earth pigments were used to add mud and dirt brought in by the pilot’s boots.
13 The wheel wells were painted in the same way as the cockpit. 14 Photo etch is also used to enhance the bomb, in addition, Mr Surfacer was stippled to simulate the cast texture of the real thing. 15 In order to use filler to eliminate the join in the spinner, the propeller blades were cut off and pinned so they could be added at the end. 16 At last, ready for paint. You’ll note the canopy has been masked with Montex masks, these are great as the set includes masks for the inside as well.
12 Some of the Eduard photo etch was used but the wiring was a bit flat so it was replaced with thin solder. The area behind the etched lightning holes was drilled out for added realism.
16 43
p40e Haggo:Layout 1 13/09/2012 18:58 Page 5
PAINTING Once again I’m going to refer you to the photos for a step by step,
them on! In all my models I try and mimic what I see in real life and in
however there are just a few things I’ll say to set the scene. First off
pictures, this is the main reason why I have moved away from
the paints themselves, I use exclusively Gunze and Tamiya paints,
traditional techniques such as pre shading and lightning the centre of
this is for a few reasons; their ease of spraying, quick drying times
panels with white tinted base colour. Whilst these techniques are
and I use enamel and oil based products in weathering so these
valued by some modellers, in my eyes these are not at all realistic.
won’t affect the paint work.
Hopefully this model will show you how I go about weathering my models.
Rather than decals, I used a set of custom masks from Ad Astra masks based in Canada. Along the same lines as the Montex product, they are great and very reasonably priced and I can’t recommend them highly enough. There’s no better way to make markings look painted on than to, well, actually paint
01 02 03
04 01 The overall camouflage was painted freehand. Gunze IJN grey was used for the underside, USN Intermediate blue lightened with white and a mix of random greens (but mainly Tamiya IJA green) for the upper side. 02 I tint the paint as I go along in order to break up the colour and add fading. The lightened base colour was applied over panel lines, this may sound odd but on real aircraft, light catches the edge of panels and this helps to replicate this.
05
06
03 The wing root was chipped using the same method as the cockpit. 04-05 The same technique was used on the underside. The original Du Pont colour was a slightly greyer and greener shade of RAF Sky and the Tamiya IJN grey is a close match. 06 A coat of Alclad dark aluminium followed by a Mig Productions dark wash lifts out the detail, note also the brake line added from solder.
44
07
08
07 Note the card masking the wing root, I’ve had tape pull up the base coat over hairspray/AKI fluid before. The lighter colours are sprayed first and then masked. It’s a good idea to mask over any joins to avoid those annoying hairline areas of overspray. 08 Now for the blue parts, this was mixed from Gunze Cobalt Blue, white and blue. I still think it’s a bit dark although I did want sufficient contrast with the camouflage colour.
p40e Haggo:Layout 1 13/09/2012 18:58 Page 6
10
09
12
13
11
09 It’s always a very satisfying moment when all the masking comes off, especially if there’s no need for any touch ups. 10 The squadron codes and serial finish off the painting stage, in this close up you can appreciate the advantage of this method over using decals, especially on a riveted airframe. 11 A filter is a very thin wash which will help blend the paint work and introduce a subtle grimy effect. Here, highly thinned AK Interactive streaking grime has been added outboard of the aileron, you may be able to make out the demarcation. The whole airframe will of course receive a coat of this but another coat, using AK Interactive dust effects will be used on the upper surfaces as well. 12 The advantage of using oils is controllability. You can work them as you see fit until you achieve the effect you’re after and, if you cock it up just wipe it away with white spirit and start again.
14
13 And the overall effect, lovely and grimy.
15
14 The same oil dot weathering was used on the upper surfaces however the colours were different. On the green, white, raw umber, yellow and buff were used. The yellow and buff keep the tone warm while the white fades. Tiny amounts of a bright green were also used in areas to make the colour vibrant. For the blue, white, raw umber and cobalt blue were used.
16
45 15-16 Use oils in different intensities for different effects, here I used a bit more white on the gun access panels for a greater fade. Raw Umber and black were used in areas of shadow to enhance depth. Doing this will add intensity to the overall effect and make the model as a whole look more interesting to the eye even if it’s hard to spot the effect in detail.
p40e Haggo:Layout 1 13/09/2012 18:58 Page 7
P40e
KITTYHAWK
46
p40e Haggo:Layout 1 13/09/2012 18:58 Page 8
47
AIR BORN
new releases
Tamiya 1:48 IL-2 Shturmovik As soon as I pulled the wing sprues from their protective plastic bag I could see that this latest Tamiya 1:48 release was something special. Tamiya have the undisputed edge in surface detail and the wings are all the proof that you need of this. The level of detail is quite breathtaking and anyone with any sort of interest in plastic kits would be able to aprreciate the quality Tamiya have achieved. Some may question Tamiya’s choice of subject here but as soon as you see what they have done there can be no disputing the fact that this is the ultimate IL-2 kit. The kit provides a well detailed cockpit which aside from some seat belts is good to go right out of the box. Also included are a pair of flight crew and a clear moulded bulkhead behind the pilot cleverly avoids the need to fit glazing panles and the beautifully moulded instrument panel comes with individual dials on the decal sheet.
All the cockpit parts have been designed to plug into the underside of the assembled fuselage and as its Tamiya you just know its all going to fit! Sadly all the control surfaces are moulded in place but Tamiya have provided separate actuation rods rather than moulding them in place. There is a choice of underwing bombs and rockets which are as well detailed as the rest of the kit. There is also a choice of open or closed canopies with masks provided in the kit which you have to cut out. Three different sets of markings are provided on the decal sheet and Tamiya have done a good job in offering some of the more colourful markings. Its not a cheap kit but I think when you see the quality of the parts this justifies the cost. I cannot imagine that there would be much requirement for additional aftermarket parts here and this really is one that could be built purely from the box. Stunning stuff!
Airfix 1:72 Douglas A-4B/4P Skyhawk
48
Following the Falklands 'Dog Fight Double' we looked at in the last issue, as you'd expect here's a release of the 'scooter' Skyhawk in it's own box reminding us that this is a nice new tooling showing some serious detail from Airfix. The attractive packaging and coloured finishing guide make these kits feel very good value, especially when you look over the three grey sprues- Airfix simplicity but fine moulding and details such as air-brakes, nice drop-tanks and choice of ordnance. Cockpit detail is sparse but
I'm sure upgrades to fit this kit will appear soon as it's certain to be popular. Along with the cockpit there's a lot of other elements to align before closing the fuselage halves including a long engine exhaust, maybe a few dry runs would be wise. A little disappointed to see the same Argentine markings as the Falklands pack but there is a set of U.S. Navy markings from USS Intrepid from 1966, decals are very nicely done from Cartagraf finishing off a quality kit.
Italeri 1:48 Wessex UH.5 This is one that we have been looking forward to! This is a surprisingly big aircraft when you open the box and Italeri look to have done a very nice job of recreating it. This kit features completely new moulds and the quality and finess of the moulding is on a par with other new Italeri kits with subtle rivet patterns on the fuselage and neat panel lines. The whole quality of the cockpit has been stepped up with plenty of good detail and a photoetched instrument panel, seat belts and the same fret also provides various different grilles For the distinctive intake on the nose there is a piece of nylon mesh which will look so much better than any moulded version. The passenger compartment is also well detailed with more than sufficient provided to allow you to open the sliding door which is moulded separately. The rotors are
very nicely handled with moulded in droop and the wheels are supplied with weighted effects.The kit offers a choice of four different colour schemes with a Falklands War example depicted on the box art and a colourful blue and red rescue scheme included on the decal sheet. The sheet looks good with the exception of the yellow coloured sections which look a little translucent although we cannot judge how they will perform over a dark colour on the model. All in all this Wessex continues the recent Italeri trend towards more advanced contemporary releases with improved levels of detail and superior moulding. This is a surprisingly large aircraft in this scale and promises to build into a superb model with those extra touches of finesse offered by the photoetch. Well done Italeri!
Airfix 1:72 Fairey Swordfish Mk.I Floatplane As the first of Airfix's new generation Swordfish has been met with great enthusiasm, the float version would surely be produced to the same excellent standard and indeed it has. With more parts than the previous release this is an impressive looking package with the now familiar pale grey sprues contrasting against the bright red packaging. The new floats consist of three parts per side and follow suit with the rest of the kit's fine surface detail, the material surfaces are really well handled including some excellent stretched canvass effects. The multi part cockpits look very nice
and well detailed for the scale, before closing the fuselage take care to drill out the attachment holes for the floats as this could prove frustrating later if missed. Plenty of ordnance is included and there's an option of folded wings with a handy alignment jig included along with a torpedo trolly and chocks for the floats to aid in display of the finished piece. Two sets of markings are on offer produced by Cartograf meaning assurance of quality. Another tasty release from Airfix who go from strength to strength with their offerings for the more discerning modeller.
49
new releases
Profimodeller 1:32 B-25 Upgrade sets Profimodeller are a Czech manufacturer which an extensive range of upgrades and conversions and they have just released a series of upgrade sets for the HK Models 1:32 B-25J Mitchell kit. The first set 32088 is a cockpit upgrade which comprises two high quality photoetched frets, resin parts and a colour printed sheet with the instrument dials. This provides a complete replacement instrument panel which is one of the weak areas of the HK kit. The resin and brass rudder pedals are especially nice with the engraved logos on each pedal. There are new seat belts with separate buckles and parts to detail the canopy escape hatch as well as other missing detail from the cockpit roof. The set also provides side wall detail for the passageway under the cockpit floor that runs to the bombardier’s nose position. Although this is unlikely to be highly visible except when viewed from the nose it is a huge improvement
over the blank standard version. One essential upgrade for the HK kit is new gun barrels and Profimodeller have released two complete sets of superb turned barrels. This set 32081 which is for the standard bomber configuration provides three different lengths of barrel to suit the different mounts with perforated sleeves and drilled out muzzles - just superb! Set 32089 is described as outer details and includes photoetched parts to add missing wheel bay details, details for the inside of the nose wheel door, parts to detail the landing lights and a lovely turned brass pitot tube. Other sets are available to detail the bomb bay, the upper turret, waist and tail positions too. The quality is excellent and I will be putting these to good use. For full details of the whole range visit: www.profimodeller.com
Revell 1:72 Boston MkIV / A-20J
50
Revell are certainly collaborating with a wide range of other kit manufacturers at the moment, if this means certain kits become more readily available and at a better price who are we to complain? This may well be the case here with a re-box of the Special Hobby / MPM Douglas 'Havoc' (in US service) or 'Boston' (in RAF service). The kit represents a late version of this bomber and standard of the moulding is what we have come to expect from modern tooled kits with fine surface detail and clean, crisp moulding throughout. Not having seen the Special Hobby release for some time now we're pleased to rate the quality as good as most contemporary manufacturers with a typical parts breakdown
and internal detail adequate for the scale. Of note are the delicate landing gear legs and nice fine panel lines throughout, one negative point to raise is the lack of location points on the cowls to fit the exhausts to (presumably due to the position in the moulding process) and we are left to rely on various degrees and measurements on the instructions. Clear parts look very well moulded and the small decal sheet sharply printed offering one US (based in England with D-Day invasion markings) and one RAF version based in Italy. No fancy photoetch or separate control surfaces, a simple but quality kit of a handsome subject. www.revell.eu will keep you up to date with release dates.
Italeri 1:32 F-86F Sabre ‘Skyblazers’ If I am not mistaken this is a re-box of the recent Kinetic F-86 Sabre kit which Italeri have spiced up with three huge sheets of Cartograph decals for a generous choice of five schemes. As well as the box art Skyblazers scheme there are two Korean war aircraft as well as British and Italian schemes. The kit itself still looks good and features some very pleasing surface detail with delicate rivet patterns and on the wings the rippled surface finish has been replicated and should look superb in a natural metal finish! A basic engine is supplied and the real half of the fuselage is moulded separately to give you the option to remove the tail and expose the engine. The kit also supplies a trolley to carry the tail if that is your preference. Modeller’s never like a fuselage that is split because we know that the join is going to be a problem. Here the F-86 features what must be one of the thickest and most rigid fuselages of any kit making for a very rigid structure when
assembled and even a dry fit of the fuselage parts demonstrates that there should be very few join problems with this kit. The cockpit is reasonable without being exceptional with a choice of nice solid moulded instrument panel or transparent version with open dials. Some additional detailing should be all that the cockpit needs. The kit engine is fairly basic and would need additional detailing should you want to expose it and the same goes for the nose weapon bays which have separate covers. The .50 Cal guns are crude and not very accurate so probably best modelled with the covers on. The kit includes a choice of sidewinder, fuel drop tanks and bombs. Overall this is a very solid basis for a little extra detailing and promises to build into an impressive kit. The decal sheets are an attractive bonus which only add to the appeal of this big Sabre.
Airfix 1:48 Supermarine Seafire FR.46/FR.47 This is a re-release from Airfix but will be welcomed by Spitfire fans as it has great respect and many think it to be one of Airfix's best kits. The FR.47 is the folding wing version and Airfix have done themselves proud by providing two full sets of wings so we shouldn't end up with a cobble together of wing sections with poor alignment. Airfix offer a simple build which will appeal to the more occasional modeller, but the surface detail is as good as any of the modern manufacturers of more expensive productions. The cockpit has a reasonable level of detail which some may want to improve on with aftermarket parts (especially if you don't use the pilot figure) the decals supplied for the instruments would require sanding off the raised moulded details which would be a shame. The build follows the regular steps broken into the two versions to
keep you on your toes. There really is some impressive tooling and moulding throughout this kit with only tiny amounts of flash to dress and some of Airfix's large attachment points in places requiring care when removing parts. A choice of armaments is supplied although the rockets look a little lacking in finesse. The excellent decal sheet provides a version each: FR.46 RNAS Lossiemouth 1948 and FR.47 is based on HMS Triumph in the Korean War 1950. I think Airfix should make more of the fact many of their decals are produced by Cartograf, only the tiniest of logos appears in the corner of the box art. Still a great looking kit and cheap enough to treat yourself to a few resin trinkets should you wish.
51
new releases
Airfix 1:72 Me Bf109E-4 Such a popular subject will please 109 fans and no doubt leave others asking themselves if we need another 109E? Airfix will realise of the competition already available to Luftwaffe modellers and look like to have stepped up to the mark and produced a really great looking kit here at a low cost. Only two sprues offer Airfix simplicity but a very high level of detail, nice fine panel lines and some riveting, a separate engine cowl, separate flaps and rudder…very much a scaled down version of their 1:48 release. A three piece canopy allows displaying in an open position with
decent cockpit and pilot for the small scale. Presuming the parts fit well, the only niggle is some of the hefty sprue attachment points to the parts, I can only presume this is something that speeds up the moulding process? A quality Cartograf decal sheet includes even minute stencils and provides markings (minus any signs of a tail swastika for which you'll have to sort your own to be accurate) for one Battle of Britain aircraft of I/JG3. If getting value for money modelling is a consideration, you really can't knock these new Airfix toolings.
Revell 1:48 Spitfire Mk.XVI
52
Revell's box art depicts a Spitfire with cowls and panels removed which could be disappointing if this option wasn't offered with the kit, thankfully it is and the even better news is that this is actually the lovely ICM kit re-boxed. This kit ( and other versions from ICM) are highly regarded as the best Spitfires in this scale for a detailed out of the box build. Detail is fine and delicate with positionable ailerons and rudder, open or closed engine cowls (with a nicely detailed Merlin) and gun bays. The multi-part cockpit has high levels of detail also only requiring seat belts adding. With some
very small and fine parts present some extra time and care will be worth the effort, there's touches of flash to remove also but ejector pin marks look like they're positioned to be hidden on the finished model. Maybe a bonus over the original release are top quality decals depicting aircraft from No.612 Squadron, Scotland 1949 and No.421 Squadron, RCAF, Germany 1945. A great all-round kit which will be readily available and very affordable.www.revell.eu has more detail.
Airfix 1:72 RAF Red Arrows Hawk After it's first appearance a few years ago, Airfix re-release their nice little Hawk with up-to-date markings from the 2012 display season. The simple sprues have a nice matt grey finish (thankfully not bright red!) with good surface detail, albeit a little heavy on the panel lines in comparison to Airfix brand new toolings, this is high quality moulding and detail.. The large glazing of the canopy includes the detonating cord and leaves the cockpit very visible, a figure being included but we rely on decals for the instrument
panels. Again, Airfix offer a simple build for the novice and enough nice detail and features to interest the more serious modeller looking to make improvements and take finesse to the next level. The new featured decals provide serial numbers to mark every aircraft in the 2012 team, decal quality is excellent with the white looking very opaque which will be important over that bright red. More great value from Airfix, hopefully the subject and the price will encourage young modellers into the hobby.
Italeri 1:48 EA-18G Growler With already a choice of kits in 1:48, Italeri release an 'upgraded moulds' and 'super decal' Growler to tempt us. The sprues seem to include some parts missing from the original release of their G (based in turn on their F version) to produce a production aircraft, namely antennas-a-plenty, WSO instrument cover and a part that at first glance appears to be the IFF 'pizzabox' missing from the previous version but there's no call in the instruction sheet to use it? This is still a very nice looking kit and obviously a recent tooling by the high standards of detail and pleasingly fine edges in places, the complex nature of the shapes look to be broken down in a sensible manner but as you'd expect it appears builders of
these kits have resorted to a little filler here and there. A typically simplistic cockpit relies on decal instruments but we are provided with a great selection of ordnance. A big plus with this kit is the massive decal sheet containing four full marking versions of bang up to date aircraft with Cartograf quality. I'm sure you could pick this kit up for around half the price of Hasegawa's which will leave some budget for some aftermarket goodies (like a replacement cockpit) should you wish. Italeri have done a few fixes along the way with their Super Hornet / Growlers which means they're listening to the modeller- good news. Our thanks to The Hobby Company, the UK importers, for the sample kit.
53
new releases 48187
48190
48188
48189
48191
32067
48185
24004
48184
48186
72047
Scale Aircraft Conversions More upgrades for your next project’s landing gear from the guys at SAC, the white metal parts have inherrent strength with added detail when required. The metal also allows tweaking of the stance to allow your wheels to sit where you want. Staring with 1:48 scale, 48184 is for the Hobby Boss F4U Corsair and 48185 is perfectly coordinated to replace the undercarriage on the new Tamiya Shturmovik. 48186 is for the F-94C Starfire from Kitty Hawk. 48187 is designed to fit Eduard’s Bf109, 48188 is a sizeable set to fit Xuntong’s Tu-2, 48189 is designed for Revell’s 54
F/A-18E/F and will provide some worthy extra support. Skunk Models MQ-9 Reaper gets the attention with 48190 and finally 48191 is a comprehensive set for Academy (and Eduard’s) P-38. In 1:32 there is an upgrade for the Trumpeter Ju-87 Stuka 32067, ideal if you want to remove the wheel covers. In 1:24 set 24004 offers Fw 190 undercarriage and in 1:72 set 72047 provides parts for the Trumpeter Wellington bomber. For more details of the range and stockists take a look at www.scaleaircraftconversions.com
Revell 1:72 BAe Harrier GR Mk.7/9 On opening this box we're met with a very familiar looking 'jumper' (sounds like a Christmas present…) in the form of Hasegawa's late Harrier now boxed by Revell. This kit now has real competition with the Airfix offering of the GR 7/9 which is a very well respected kit. The typical Hasegawa darker grey styrene is cleanly moulded with some decent detail on show but also some simplification in places to provide a simple construction. Hasegawa typically are a little lacking with under-wing stores and this carries across with
the Revell boxing being limited to a pair of Sidewinders and the usual drop tanks. Decals are provided for two aircraft, one based in Kadahar in 2007 and one that will be a highlight of the kit for Harrier fans, the retirement flypast colours from Cottesmore in December 2010. There's a massive amount of stencilling detail to try your patience but would add great finesse. So, a re-box of a decent enough kit with some new decals but competition is strong from the Airfix kit which looks like it's also a cheaper option.
Revell 1:72 He 115 B/C Another Revell re-release of what was originally an old Matchbox kit which will stir up nostalgic memories for some of the multicoloured sprues back in the day. As you'd expect with tooling of this vintage we’ve got heavy detail and raised panel lines to contend with, you would really be starting with the basic shapes if you wanted to bring this kit up to a high standard and re-scribe all of the panels. Three figures are included but the cockpit and internals are extremely basic at best as are the suggestion of the engines. The clear parts are poor, while not being particularly clear
the frame detail is also very soft, luckily aftermarket glazing is available. Although the kit certainly shows it’s age, Revell do include a nice decal sheet of two similar schemes, both Western Europe in 1941, which is very comprehensive. No doubt, this is a handsome sea plane but be prepared for some old fashioned detailing to bring it up to today's standards, the low price of the kit means you could easily budget for some aftermarket details should you wish. Old school fun if thats what you like. 55
new releases
Macchi C.200 Saetta By José Fernandez Published by Mushroom Model Publications Softbacked A5 portrait 112 pages ISBN 978-83-61421-51-1 www.mmpbooks.com This new release from MMP in their compact 'Orange Series' follows the format of these detail packed books with a hugh amount of reference information including pull-out plans in both 1:72 and 1:48. The content follows the established route of development and production along with technical and modification detail to help modellers build a very accurate C.200. More excellent reference is provided by full walk-around detail photographs of preserved and restored aircraft split into separate sections such as canopy, cockpit, engine etc. Period technical
drawings are also a great source of reference along with period black and white photographs and some superb colour wartime shots which are a great help in creating some of the attractive italian camo schemes which are also presented as quality colour illustrations. The colour profiles give dozens of Italian options along with some Allied captured aircraft. Another great comprehensive reference from MMP giving the modeller a cost effective companion to any of the C.200 kits on the market.
Luftwaffe over the Far North- Part 1 M. Góralczyk, A. Wróbel Published by Kagero Softback landscape format 18 pages plus decal sheet Polish and English text ISBN 978-83-62878-10-9
56
Number 28 in the 'Mini Topcolours' series from Kagero provides no less than eight German Luftwaffe colour profiles decals in 1:72, 1:48 and 1:32. The quality of the profiles is superb, as good as any you'll see (as are the Cartograf printed decals) some detailed descriptive text and close-ups of insignia and RLM references
leave you with your homework complete and only the choice of subject to make, 109's here being the order of the day with E, F and G variants covered throughout the War. One Me Bf 110 C-4 is also depicted. Highly recommended reference with first class decals. for more information www.casematepublishing.co.uk
AIR42 Adverts:Layout 1 12/07/2012 15:44 Page 2
Subscribe Today and Start Saving Recieve AIR Modeller direct to your doorstep or Subscribe digitally with the AIR Modeller App* *Available from the apple app store on your iPhone/iPad and now also on Android Market.
In-App Purchases Purchase individual issues (£5.99), a 3 issue bundle (£12.99) or a year subscription (6-issues) for (£23.99). To subscribe on the web (Printed Subscription) go to www.afvmodeller.com then click onto shop and register/login and then go to magazine subscriptions. Now Available on the
Please return your completed form to: AFV Modeller, Old Stables, East Moor, Stannington, Morpeth, Northumberland NE61 6ES
Printed Subscription to AIR Modeller
Your details
UK Europe/ROW USA
Name ................................................................................
6 Months £20.00 6 Months £26.00 6 Months $40.00
1 Year £36.00 1 Year £48.30 1 Year $75.00
2 Year £64.80 3 Year £91.80 2 Year £91.20 3 Year £128.70 2 Year $145.00 3 Year $200.00
BLOCK CAPITALS PLEASE
Address ............................................................................ ..........................................................................................
Cheques ( UK & USA only) send to to the address above. All cheques made payable to AFV Modeller Ltd,
.......................................................................................... ..........................................................................................
Visa
Mastercard
Visa Debit
Maestro
..........................................................................................
Cardholder’s name
Post/Zip Code ...................................................................
Card No.
Country .............................................................................
Expiry date
Security Number
Phone ............................................................................... E-mail ...............................................................................
E-mail:
[email protected] Tel: +44 (0)1670 823648 Fax: +44 (0)1670 820274 www.afvmodeller.com
Luis Mira F14 Q8:Layout 1 14/09/2012 09:32 Page 1
F-14B
58
Luis Mira F14 Q8:Layout 1 14/09/2012 09:32 Page 2
1:72 hasegawa
59
Luis Mira F14 Q8:Layout 1 14/09/2012 09:32 Page 3
The F-14 Tomcat is a supersonic fighter designed to attack enemy aircraft in all weathers and theatres. Its name comes from the initial combination of the name given to this project of the Grumman CAT and the name of Admiral TOM Connolly who fathered the project. In October 1967 Grumman presented his project to the Navy as a substitute for the F-111B. The first F-14 flew on 21 December 1970, the second on May 24, 1971. In June 1972, they began their tests from the aircraft carrier USS Forrestal, the first operational squadron entered service on the USS Enterprise in September 1974. In 1981 new engines ‘General Electric F-110’ were installed and after testing, proved efficient. 1988 saw the delivery of the new F-14D with digital avionics and improved radar, the supply of this type ran from 1990 until 1998. It is basically a two-seater aircraft with an air intake system of variable rate nozzles being convergent / divergent. The variable geometry applied to a naval aircraft offers advantages: with wings open (20 degree angle on the leading
60
edge) the F-14 gets good performance on takeoff and landing, long-range and long-range subsonic flight, air patrol combat missions. Folding the wings (68 degrees) gives excellent performance and minimal response to supersonic blasts of airflow. The folding of the wing is controlled by the central computer to obtain the minimal resistance in each flight condition at a speed of 7.5 degrees per second. A particular feature is called the gloved fin, a retractable triangular area in the leading edge of the fixed part of each wing, these help to optimise the aircraft handling at low and high speeds. The "Jolly Rogers" has been a constant presence in the United States Navy from January 1, 1943. The skull and crossbones have adorned a variety of aircraft including the F4U Corsairs, Phantoms, F-18 and of course our subject here ...
Luis Mira F14 Q8:Layout 1 14/09/2012 09:32 Page 4
The first stage of the project is to get the resin cockpit fitting the kit, as usual this requires a lot of adjusting of the resin parts and constant dry-fits. For sanding this material I use the Dremel at low speed. Once fitted properly it’s time to start the little extra details that are missing; visor brackets and throttle (made from wire of 0.4 mm and a drop of white glue simulating the handles) Also replaced were harnesses, some with photoetch and some
Time now for the landing gear, brake ducts, landing light and clamps (made with masking tape), all airbrushed white and then the pipes, clamps and shock details were painted by brush. The wheels are painted black and then Tamiya Nato Black applied as a wash of grey in the treads to simulate wear. This process is further enhanced by a wash applied with an airbrush and paint very diluted, more or less 5:1 (5 alcohol and 1 paint). The poorly detailed interior of the nozzles was improved by placing strips of adhesive aluminium tape detailed by rolling a toothed cog wheel from an alarm clock making the internal more presentable.
with tin foil as it is more malleable. The base colour applied by airbrush is Tamiya XF-19, then I painted all the details with Vallejo by paint brush. In areas with canvas or leather covering the base colour is darkened with black and then white to highlight. After I applied a filter of highly diluted Titian Cassel earth oil paint, once dry matt varnish is applied to the whole area.
61
Luis Mira F14 Q8:Layout 1 14/09/2012 09:32 Page 5
62
1
2
3
4
The assembly is somewhat difficult in places, especially the back where the fuel tanks will fit later. A large amount of filler and subsequent re-scribing and riveting was required. Don’t forget at this stage to put the counterweight in the nose cone and the pylons that support the missiles are also positioned before painting because of their poor fit. After sanding and scribing I washed the model with water and soap to remove any residue and assure me a better surface for the paint. I masked off the wheel wells which had been previously painted and set about applying the base colours.
Photo 1: With the windshield painted and fitted to the model I masked them and applied black paint with the airbrush to give the interior frame colour. Photo 2: Tamiya primer provides a perfect base for the painting, I masked the entire except for the tail fins. These pieces are painted in black with light grey effects giving some definition to the fins. These are usually pristine on the real aircraft while the rest of the plane tends to be very discoloured and patchy. There are plenty of pictures online that show this effect. Photo 3: I removed the masking to see the result as a whole. Photo 4: The fins were masked and I pre-shaded all the panel lines and randomly across the panels too.
Luis Mira F14 Q8:Layout 1 14/09/2012 09:32 Page 6
5
7
Photo 5: I applied the different shades of grey with Gunze acrylics with a very very diluted paint to gradually cover the pre-shaded base, and subsequent layers covered more and more. Photo 6: I practiced with some white spots very selectively on certain panels. Photo 7: I masked the plane to paint the walkways on top of the intakes and the seating for the folded wing. Photo 8: I removed the masking and brush painted some details. Photo 9: I applied varnish and let it dry for 48 hours.
6
8
9
F-14B
63
Luis Mira F14 Q8:Layout 1 14/09/2012 09:32 Page 7
10
11
12
13
14
Photo 10: I wet the model with water, mixed with a drop of detergent to break the tension, then scattered coarse salt over several random areas. Once it had dried I airbrushed a thin paler grey diluted with alcohol, giving a couple of glazes across the whole airframe, applying also shades of sand in some areas to create more contrast. Photo 11: The salt was then washed off to see the results. Photo 12: The model is varnished with gloss varnish. Once dry I applied the VF-DECALS decals and stencils (courtesy of my friend Germain Diaz) with the help of micro-fluids and micro-set /sol, and these were sealed with another coat of varnish. The whole aircraft was given a wash of a mixture oils Terra Cassel 80% and 20% Umber Earth oils. Photo 13: I applied a Gunze matte varnish in several thin layers and let it dry at least 48 hours. Photo 14: I applied random spots with white oil paint, tapping small areas and then blending these with thinners. Photo 15: Panel lines were defined and picked out.
64
15
Luis Mira F14 Q8:Layout 1 14/09/2012 09:32 Page 8
F-14B 65
AIR42 Adverts:Layout 1 13/09/2012 17:46 Page 1
Scan this QR code Scan code tto o go dir ectly to to a directly g reat selec tion of great selection scale model kkits. its.
u se o h e r a P r iva te W Co
trol te con e l p m
of your orders.
rade yet! Our greatest service upg ng now cheaper than ever! Shippi
TAM60780 Mitsubishi A6M2b Zero Fighter Type 21 (Zeke)
During th the he Checkoutt Process Choose Private te W arehouse Warehouse
Complete control over shipping method and shipping cost
How Private Warehouse Works Your Warehouse Yo our Private W arehouse
Order
Private W Warehouse arehouse Create a shipment p
or Order
Store any individu St individual i di iduall item it for up to 60 days
Have e the items you want shipped, when n you want them shipped, how you want w them shipped.
hlj.com/kit hl lj.com/kit Hobb HobbyLink yLink Japan
@hobb @hobbylink ylink
hobbylink.tv hobb ylink.tv