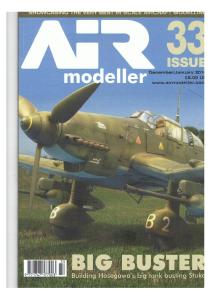
63
DECEMBER/JAN 2015 • £6.50 UK $15.99
MENG AIR MODELLER
DECEMBER / JANUARY 2015
www.mengafvmodeller.com
BUZZIN’
HORNET
Chen Zexi brings Hasegawa’s kit up to speed
CONTENTS 2
‘Big Wing’ Ta-152 H1 Zoukei-Mura’s 1:32 kit modelled by Tristan Estoppey.
12
P-40 Warhawk, part 2 Daniel Zambarbide Suárez takes us step-by-step through his 1:32 project.
20
F/A-18C Hasegawa’s 1:48 kit is reworked and detailed by Chen Zexi.
30
Man Overboard! Jaen-Bernard Andre describes his dramatic F-8 diorama.
38
Westland Wessex HU5 Grega Krizman builds and details the 1:48 Italeri kit
48
Air Born New releases.
56
IPMS Hellas 2015 The Editor presents a small photo report from the Greek National Championships held in Athens.
58
F-5E Tiger II Luc van den Ende reworks the veteran 1:32 Hasegawa kit with spectacular results.
Meng AIR Modeller is published Bimonthly by AFV Modeller ltd Old Stables East Moor Stannington Northumberland NE61 6ES Tel: 01670 823648 Fax: 01670 820274 email:
[email protected] Editor and Designer: David Parker Deputy Editor: Mark Neville Sales Director: Keith Smith
We are now on Facebook, ‘Like’ us to follow what we are doing and follow our build projects.
Meng AIR Modeller welcomes contributions from interested parties, but cannot accept any responsibility for unsolicited material. The contents of this publication including all articles, drawings and photographs originated by AFV Modeller ltd become the publishers copyright under copyright law. Reproduction in any form requires the written consent of the publisher. Whilst every care is taken to avoid mistakes AFV
ISSN 2059-5964
Modeller ltd. cannot be liable in any way for errors or ommissions.
1
‘BIG WING’
Ta-152H1 Z O U K E I - M U R A’ S 1 : 3 2 K I T M O D E L L E D B Y T R I S TA N E S T O P P E Y
2
H
aving missed the initial release of
everyone's taste but eventually proved to be
Zoukei-Mura's Ta-152H1, now sold-out
comfortable to work with.
for some time, I used the so-called
As usual, I began by detaching from the sprues
"Slipstream Edition" of this gracious
and carefully cleaning up every piece, a time-
airplane. Compared to the initial release, this
consuming task since many of them feature
edition features optional decals for a manga-style
prominent moulding lines and steps. This boring
black painted aircraft and a well rendered 300l
stage is crucial as the typical Zukei-Mura
drop tank (unfortunately not the right type of tank
modular assembly sequence requires a rigorous
and attachment system for an operational Ta-
approach to minimize fit issues later in the build
152). Pieces are moulded in a soft black and
(think butterfly effect).
silver-grey styrene which might not be to
3
Engine Assembly of the liquid-cooled Jumo engine was trouble-free and only a couple of enhancements were made:
Alclad
• My references show that exhaust tips
white aluminium,
must be flush with the side cowling panels (a
steel and Tamiya Nato
noticeable difference with the FW-190D),
Black (my ubiquitous scale
accordingly the exhaust shrouds rectangular
black) were used as base colours. A thin
boxes were trimmed-down in order to place
coat of Klear floor polish was sprayed on the
them closer to the engine sides.
black parts for a semi-gloss finish and a coat
Cockpit
• Once assembled in its mount, some
of flat varnish over the aluminium parts to kill
The cockpit is not the best area of the kit, both
pipes/cables were added to the engine as its
the shine. Details were picked-up with
in term of moulding finesse and details.
rear end is clearly exposed through the open
acrylic aluminium paint and weathering was
• Both kit seats (with and without moulded
wheel wells.
achieved using black and brown washes and
harness) are oddly shaped and softly defined
a 6B lead pencil.
so I opted for the bare one and sanded it down
to a better shape and scale thickness. The seat attachment points were scratchbuilt out of styrene card and a cushion was sculpted in Miliput. • The harness was cut out of a Verlinden lead foil and photoetched buckles were taken from a HGW set (also used as reference for the straps length/width). Lead is resistant to manipulations and allows the harness to be twisted and bent into natural shapes with great ease. Once in place it was painted with an offwhite/sandy colour (but an olive green colour would be appropriate too) and slightly weathered with a brown wash. • The instrument panel is crudely defined and the kit instruments decals poorly printed. In addition, most Airscale instruments decals I was eager to use were much too large for the ZM panel. I sorted this out by sanding flat the dials contours and applied a mix of Airscale 4
and ZM decals. A compromise conveniently hidden below the deep coving.
• The kit gunsight was replaced with a
Assembling
and Dymo tape were used to keep rivet
Quickboost item, which fit nicely into the
Assembling of the main parts started with
rows regular and straight. Mr. Surfacer
coving hole.
the multi-parts wings. Despite numerous
was also required to tone down the
• The fuel and GM-1 tanks, placed below
dry-fits, I ended-up with wide joint lines.
predominant kit rivets on the cockpit
and behind the cockpit, respectively, are
Cyanoacrylate glue and Mr. Surfacer were
flanks.
totally invisible but I decided to give them a
called into the rescue and eventually all
Closing the main fuselage halves required
quick paint job anyway!
engraved details, except the wing root
some attention, mostly in the upper front
The cockpit base colour is Tamiya XF-66
panels, were filled and re-scribed.
area. To make the windscreen sit flush with
German Grey. Chipping was applied using
Once the wings were assembled I gave the
the fuselage, the width of the portion
a small piece of foam dipped in Vallejo
model a full rivet job, following the Model
where it sits was reduced. On the rear end,
aluminium acrylic and further weathering
Art 336 plan and references pictures. I
the mating of the 2-parts tail with the half-
was done with black/brown washes as well
used the small diameter MDC punch for
fuselages required the locating tabs to be
as with my airbrush loaded with a highly
this task. The provided MDC spacing ruler
removed, a careful sanding and some
diluted black/brown mix.
5
plastic card. Mr. Surfacer, wiped-off using Mr Hobby Leveling Thinner to avoid any rivet damage, was used to complete the job. Joining the wings to the fuselage required plastic card, spacers
upper cowling was joined to the fuselage main parts.
(made from sprue sections) and Mr. Surfacer on both the belly sides
The lateral cowlings fit perfectly but care must be taken to correctly
and wing roots. Allow yourself plenty of dry fits as this is the most
align the exhausts on both sides. I removed the mesh from the air
complex assembly stage. Note that the MG tubes must be put in
compressor as this an element added by the Americans on their
place before gluing their access hatch (MG are included should you
captured Ta-152H stored at the NASM. Unveiled, the inside of the
want to hatches opened).
intake was rebuilt using plastic card and filler. The small cowling
Unless you choose to leave a side cowling opened, I strongly advise
bumps at the front of the exhaust shrouds were removed and
to depart form the assembly guide and glue the engine mount to
replaced by a flat piece of plastic card, as observed on the Ta-
the upper cowling first. This will make sure the engine and its
152H0 stored at the NASM. The Ta-152H1 might have a small
mount, a crucial element for the assembly of all the other forward
bump at this location but in any case much less pronounced than
elements, are correctly positioned. Once this done, the
what which ZM provides.
6
Painting
Alclad dark aluminium was then sprayed on the wings undersides.
I started by priming the whole model with a good layer of Tamiya
Some areas were then oversprayed with lighter shades.
TS-30 Spray Aluminium Paint decanted into my airbrush. A few
Slightly lightened Gunze RLM65 (which was typically used on fabric
imperfections were corrected at this stage and primer re-sprayed
covered structures) was then sprayed on the rudder and on the
locally.
ailerons undersides. Note that on some aircrafts, flaps were made
Since main markings were painted, a layer of white was then
out of wood and painted RLM76 or RLM65. Gunze RLM76 was then
applied at the wing upper crosses location. Tamiya tape, cut into
applied on the fuselage sides and on the underside, following a W2
shape using an Hasegawa decal sheet as a template, was then
scheme, i.e. leaving the 2nd half of the wings bare metal. This base
place at the cross locations. The same process was used for the
colour was slightly reworked with a lighter shade to break uniformity.
fuselage numbers and RV bands.
The swastikas and fuselage crosses were then painted using self-
7
The markings applied and ready to start weathering the model.
The exhaust stains are built up gradually in thin layers and then areas of wear and selective cleaning are created with scalpels and micromesh cloth to lift the colour.
8
Worn paint on the wing roots is created in the same way.
made masks. They were painted at this stage since they were partially overpainted with the upper camouflage shades. Starting with the wings, the upper colours were applied freehand with a tight demarcation. After having hesitated for ages, I opted for a RLM81/82 combination, which was the standard camouflage pattern for the TA-152C, and other German aircraft, from November 1944. Gunze RLM83 was used, reworked with touches of dark green, violet and brown to achieve the so-called green variant of RLM81. Gunze RLM82 was slightly darkened. The paint was applied in a slightly uneven manner as a first weathering step. The model then received a couple of coats of Future Floor polish, applied straight from the bottle with my airbrush (to get an overall slightly glossy finish) and then every spot where decals would be applied was oversprayed with a good coat of Tamiya gloss varnish X-22 to obtain an ultra glossy finish, thus eradicating any silvering risk. Decals were applied using a mix of the kit decals and those from and EagleCals sheet. They were then sealed with Tamiya X-22 again.
9
Oil stains are built up along the belly of the aircraft using these products
Weathering
Last bits
The exhausts were built up gradually using a 3:1 black/red brown
•
mix using photographic references. A browner mix (2:1
antenna) as well as the FuG 25a IFF (the rod under the fuselage)
black/brown) was used to indicate dirt on the whole aircraft. Oil
were replaced by steel tubes, wire or fine straps.
stains on the underside were created using a similar mix, in
•
combination with black-brown oil paint applied with a brush.
sprue and painted red.
Wing root chipping was done using scalpel blades (mostly a
•
curved one) and micromesh pieces held in self-locking tweezers .
allows the antenna to be coiled like the real thing at attachment
The area was then reworked with oil paint and airbrush.
points. Isolators are small section of 0.4 mm steel tubes.
The Pitot probe, FuG 16ZY (both whip and direction finding loop
Undercarriage position indicators were made out of stretched Antenna wire was made of very fine brass wire. A material that
Micro-mesh was also used to wear selected parts (cockpit flanks,
10
cowling panels). This is particularly efficient when rivets rows can
Conclusion
be exposed, if kept subtle. Finally, a coat of a 1:1 mix of matt and
Slow progression, anticipation and plenty of dry fits are the key to
gloss Pébéo varnish was applied.
obtain the best from Zoukei-Mura's second kit. With its beautiful profile and endless wings, this aircraft won't go unnoticed in your WWII aircraft collection!
11
Curtiss P-40N
Warhawk PART TWO
12
To begin the phase of painting, I always begin with the lighter colour or underside colour, which in this case are the same and that is none other than neutral grey (Tamiya XF-53). That colour was mixed with other greys, lighter colours, cream or earthy colours or white in small proportions, varying the tone of neutral gray in each of the panels that will bring more rich colour to be painted with one colour (Pic1). To the top, before you start applying olive green in the wing roots I apply a layer of silver, in my case, I used a Enamel paint type in silver (Tamiya X-11) (Pic 2) after one hour drying, I started applying the olive. One of the most interesting effects of the P-40 is worn weathered paint on the wing roots and for that I did the following:
1
1:32 Building up the tones of Olive drab on the upper surfaces, leaving the aluminiums paint showing through on the wing roots. Darker Olive drab shading is then applied.
2
MODELLED BY
3
Daniel Zamarbide Suárez
5
4
6
7
13
8
9
10
1) diluted paint until it almost transparent,
you just see the metallic undercoat at the
but worth doing as you get as you apply
with a rough mix of these proportions:
roots leaving it as nuanced as possible.
them, various shades for each of the
90% solvent (Tamiya X-20) + 10% Olive
At this point, the plane and the basic
panels. The model greatly improves.
Drab (Tamiya XF-62)
colour scheme are complete so the next
2) Then I applied successive almost
step is degrading the olive green. To do
The next job is to paint the shark’s mouth
transparent layers on the wing root area.
this, I mix the base colour (Olive drab) with
on the nose of the aircraft. To do this I
3) As I'm working away from the fuselage
different shades of very light brown,
made a copy of the mouth to the scale of
to the wing tips, I will thicken the paint mix
cream-colours or sands that give more life
the plane, and then, with scissors, I cut the
to stop the degradation of green paint until
to model. This is a rather lengthy process
teeth and the pattern from masking tape,
11
12
13
14
15
16
17 tracing over the scale copy. The masks were then positioned on the model and the painting began paint applying the colours with the airbrush as you can see in the step by step sequence. The black detail on the eye was added using a fine drawing pen. Now with sand or cream Vallejo acrylics, applied by brush I made small chips, (pic 19-22) especially in the areas of the engine and weapons covers. This was 14
Now repeated
with the glossy surfaces I started the degradation of green and
in the same way on the undersides but with a clear or pearl grey.
grey with various shades of those colours but this time using oil
I applied a coat of gloss varnish over all surfaces of the model in
paints, which after going blending them, they create an
preparation for applying the decals and I positioned the decals
appearance of wear and use on the plane and then sealing the
and small stencils before applying another coat of gloss varnish.
entire process with a final layer of matt varnish (Pic 24).
19
21
20
22
23
15
24
An interesting effect is adding the fuel stains around the filler located near the cockpit glazing and this was done using the set of AK-Interactive engine oils and grease. A build up of different densities of stains follow the effects of gravity and airflow from the filler point (pic 26). Gloss varnish will add the feel of fresh spills and contrasts perfectly with the matt finish of the rest of the airframe.
16
25
26
27
28
29
30
31
32
33
Pics 29-30, panel line washes are applied to the underside and
the pipes (pics 34-36). The drop tank was next to be weathered
blended for a subtle finished effect and deposits of dirt thrown up
(pics 37-43) beginning with some graphite chips made using a
by the undercarriage are added to the wings around the wheel
pencil and then a dark wash was applied. Assorted fuel stains
wells. The exhaust pipes are painted individually starting with a
were added from the filler cap using different tones of AK
very dark red/brown and then stippling tan and brown shades over
Interactive engine wash. Grey oil paint was used to break up the
this. The details on the exhausts are picked out with a high
uniform grey paint of the tank before brown dirt washes were
contrast black wash (pics 31-33). The exhausts are glued into
applied to the bottom of the tank. The final step was to apply a
place and pigments are then used to add the exhaust staining to
matt varnish to the tank.
34
35
36
17
18
37
38
39
40
41
42
43
44
45
46
47
48
Finally, following the same steps of painting as used on the fuselage, I finished the landing gear with its covers and wheels. For the wheels, the wheels of the Hasegawa kit have poor detail, especially in the tire tread, so I replaced them with resin tires by Barracuda Studios designed for the P-51 Mustang. I was able to insert the plastic wheel hubs into the tires which required some sanding but with excellent results. After having completed all the exterior parts and the finished aircraft only the final assembly of the detail parts that complete the model, with the last job being to add the antenna cables.
Conclusion These 1:32 Hasegawa kits are sensational, fun, simple and very practical to do allowing the modeller to enjoy in all the fields of this beautiful hobby with this type of model. It is a highly recommended kit that does not give you problems and makes you want to build another! Next time it would be one with a skull instead of a shark's mouth!
19
F/A-18C Hasegawa’s 1:48 Kit Modelled by Chen Zexi 熹
F/A-18C Hornet is one of the main fighters of modern U.S Navy. It has great flight performance, climb rate, and is very multifunctional. They have participated in many of the regional conflicts and served as ground attacker and close air support and established an excellent reputation. As a modeller, my favourites subjects are modern jet fighters, so the F/A-18 is definitely one of my greatest loves. In 1:48 scale, Monogram and Hasegawa both have kits which were released at the end of the last century. Comparatively speaking, Hasegawa’s kit has the better shape and details, and also supports various update sets like the Aires cockpit, wheel bays, exhaust nozzles, radar and electronic bays. Wolfpack offer a set of folding wings and a Hornet upgrade set and Eduard have a photoetched detail set all of which enhance the details and accuracy of the model.
20
泽
21
Construction
of depth very well. Some parts of the
I started with the cockpit and I used the
control panel was made from photoetch
Aries replacement resin product which is
and film After finishing the detail painting, I
very accurate and detailed. It is one piece
applied a dark wash over the cockpit parts
with a tub for the sides and main floor. To
and then it was ready to be assembled.
get this to fit into the fuselage it was
22
necessary to thin down the kit fuselage
The next area I looked at was the radar, for
walls around the cockpit, which was done
which I used Aires resin parts too. The F/A-
using a burr in a mini drill. I painted the
18's radar has a sliding structure which
cockpit with a light grey to balance the
allows service crews to take it out for
visual effect since it usually looks darker in
routine maintenance. Because the Aires
photos because of poor light. I painted the
radar only shows the surface details before
smaller details with a brush, for example I
radar is moved out from the fuselage, I
used 3 and 4 different deep greys for the
planned to add more detail, showing the
control panel, which increased the illusion
whole radar when it being serviced.
First I cut the front part of radar out carefully, sanded it thin. I used plastic card to build up the rear structure of the radar and I used a knife and hand drill to add wires and rivet details to the radar, and made the cooling grille on the top from PE mesh. Thin plastic card and brass wire was used to make small detail parts on the radar which were made by working from some pictures of the radar from the internet. I spent a couple of days working on the radar and adapting the fuselage and nose cone to accept it. Moving on with the assembly of the rest of the fuselage and adding all the update parts like the avionics bays and wheel bays, I had to cut away the original parts exactly to be the same size as the aftermarket parts. I had to keep cutting and dry fitting the parts and it took me a whole
23
24
week of work to put them all together. I also replaced the air intakes with new resin parts from too since the Hasegawa parts do not completely show the inside details. One of the most challenging parts of the model was to create the folding wing structures, which I had to make from scratch. I was about to use the Wolfpack update parts but studying photos of the real hinges I found them not entirely accurate or neat so I decided to build it by myself. Photos of the real aircraft show the folding wing hinges and wings panels are together which means they are on the same level after wings are folded. I used 0.5mm plastic card glued to the top and bottom of some plastic rod. Once this was dry I was able to slice this into the individual hinge sections. I made a total of 22 hinge parts to show the main structure which was a long process, plus some other small parts. The Hasegawa kit replicates an early F/A18 and I wanted to make a later production aircraft. I had to change some surface details by myself and I used brass strip, plastic card and photoetched mesh to reshape the radiator openings. I sanded off some vertical tails parts and add 6 small reinforcing panels on certain areas. The final parts of the work included the scratchbuilt Air Refueling Probe, rear radiator opening, formation lights, deepening the panel lines and so on. This is the hard, boring parts of the project, however next is my favourite, which is painting and weathering.
25
Painting The aircraft I built is from VFA-94 No. 401 from between 2008 and 2009. I found some photos of this plane from airliners.net which are from 2007 to 2012 and I also used Fightertown decals. I used Gunze Mr. Color C307 mixed with a little C325 to paint dark grey on up surfaces and C308 mixed with C338 to paint the light grey on underside after priming. I used low pressure and low paint output to define the borderline of these two colours before I added few drops of red brown to both colours to paint the shadows and dirty areas. For colour fading I added a little white to both and painted this on certain faded areas, giving a mottled finish to the paint. After that I masked the plane body to paint the avionics bays, wheel bays and other parts which have different colours. Some parts like the avionics bays, I had to hand paint all the fine details. The exhaust nozzle needed to be masked and then freehand airbrushed again because the edge was too sharp after masking these
26
areas. I painted the whole airframe with gloss varnish for protect and also make the surface smooth for the decals, and the Fightertown decals worked beautifully, with excellent accurate details.
Weathering I painted the whole aircraft with flat varnish after decals were dry to unify the gloss and also because oil paints for the weathering will stick better on this surface. Modern carrier-borne aircraft are usually quite dirty and I used Mig Productions oil colours for weathering. The first step was a filter using Shadow Brown and Faded Blue then another flat base to protect them. The second step is for dirty areas, those places which are not frequently cleaned. I brushed these areas with a thin layer of deep brown oil color, then I used a clean brush with zippo lighter fuel to brush away these colours. Oil colour will stay on the edge more than the middle of the panel and I gradually got the effect I wanted. Another coat of flat base was applied to protect the effect. The last stage is leaking oil. I put oil paint on the leaking panel area and use cotton swab to drag it in the direction of the air flow. I repeated the process to get the required effects.
27
28
Final thoughts The accurate shape of the Hasegawa kit and Aires parts' outstanding details saved me a lot of time but the plane still took me the whole year of my spare time to complete, but I feel it was well worth it, after this turned out as a beautiful F/A-18 model. I hear rumours that Kinetic will release an all new F/A-18 kit in 2016 with folding wings and air fuelling probe details. Let us see if this kit can surpass Hasegawa's F/A-18.
29
Man Overboard! Jean-Bernard Andre’s dramatic diorama of an F-8’s last crusade
T
he picture that inspired me to build this diorama is part of a series where you see an F-8 Crusader basically blown off the bridge of it’s carrier. I was particularly attracted by the big wave caused by the impact and decided to make a large diorama where the F-8 would appear somehow lost in the middle of an ocean. A friend warned me that I would not be able to find the decals for that particular aircraft on the market, so I went for the USS Oriskany based F-8 decals provided in the Academy 1:72 kit, if only because the shark’s head was attractive, indeed, it’s just like putting the shark back into it’s natural habitat! I was told the Academy F-8 kit was rather good despite its age, well detailed and accurate except perhaps where the wheel wells were concerned. I decided only to buy the Aires cockpit set in the belief those wells would not be visible when the diorama was complete. On opening the box I was struck by the large amount of parts and also by the deep gaps between the panels. I did some basic work on the Kit like thinning all the intakes and doing what I could with the undercarriage doors. I had a rather hard time embedding the new cockpit in place...lots of trimming and dry fitting as is often the case with aftermarket sets. Thankfully Academy provided the under-wing surface that raises up when the Crusader lands, as the wings were stripped off during the accident, I had to detail this part thoroughly which I did using plasticard and thin wire using as a reference the very same underwing part that Aires produces in 1:48.
30
31
half a job... With the fuselage closed I needed to paint
your car in the morning, in the evening,
which were too vivid and needed to be
the exposed areas left by the wings. I
when the sun rises or at mid-day, it will
toned down.
couldn’t get the finish perfect using only Aluminium and Smoke Alclad II paints, so I
never appear the same colour. Therefore I just had a glance at the painting
After various tests, I mixed some of my base colours from Tamiya with Alclad
tried to perfect the shadows and highlights using Uschi’s Metallic pigments. There are
instructions and put them in the waste basket!
transparent thinner which has the great advantage of making the Tamiya paint dry
only three shades available but they did the trick. They really work like regular pigments
I used the Tamiya version of these base colours as a basis, but I added some sand
almost instantly. Using several strokes of airbrush over the decals I managed to tone
so applying the Steel tint with a brush
to warm the tones to mimic a dusty reddish
down these in a suitable fashion.
provided some highlights and I managed to create a high sheen by polishing the raised
atmosphere. The plane was not painted uniformly, indeed, as it was supposed to lie
Only one area of work was left: what to do
surfaces with a cotton bud.
on one side with the nose higher than the tail, the nose part was painted in a lighter
with those joints between the panels? I remembered an old interior decorating
As much as I respect the need to
shade of my reddish grey mix, while the tail
rule: “if you can’t hide something, better put
accurately paint the model with the authentic colours, when set in a diorama
itself and especially the area where it joins the fuselage, was painted in a much darker
an emphasis on it” which I did, I wasn’t about to re-scribe all those panel lines! I
we have to adapt colours to harmonise with the surroundings. Indeed a diorama is
tint so as to mimic the shadows that would be caused by the sun and water. Then I hit
used the AMMO of Mig ‘Nature Kursk Effects’ (for tanks) alongside their thinner
supposed to show an event at a particular time, under defined weather conditions and
a big problem that I didn’t foresee: the amount of decals that cover the F-8, and
and white oil paints to put emphasis on the raised surfaces or outline the panels with a
in a particular light. If you have a look at
especially all the red and blue markings
wash.
tape as a further guarantee to avoid leaks and thoroughly greased the plasticine. I then poured about 1 kg of silicon rubber into the box to create my master-mould for the water. When the silicon mould was dry, I started layering coat after coat of tinted epoxy resin. I use the Gedeo brand which is readily available in most art shops in Europe. It is expensive, but is fully cured (and harmless to your health) in about one week while the cheaper and faster drying polyester resin can produce fumes for long periods. Even if the drying time of Gedeo resin is slow, you can manipulate it after about 24 hours and pour a new coat over it
in about the same time, which was fortunate as there must have been 12 coats here. An extra difficulty of course is having to work in negative, that is, layering the tips of the waves and surface first. I used some oil paints to tint the resin, browns, blues, blacks... mostly subtle tints of colours. The trick I used to do the big wave and also some of the smaller ones near the Crusader, was to pour some strong white- tinted resin over a heavy transparent blue-green coat and then shaping the waves with a brush leaving both layers to dry together creating a realistic blend of fluid colours.
all at sea...
32
Now for the water. The first task was to create the sea surface. This was done by using some very hard plasticine I found in an art shop, this needs a hairdryer or a heat gun to allow it to be manipulated. The plasticine was applied to a wooden base and all the recesses and peaks with a modelling knife, using my fingers and everything at my disposal to create the smaller waves and using the heat gun to correct areas as I progressed. Once happy with the form of the water, I greased one of the 2 halves of my yet unbuilt Crusader and pressed it in the still warm plasticine. I built a box around the wooden base, using some Tamiya masking
I finally had my resin ocean ready. The first job was to embed the wing into it which I did using frankly, brute force (ripping the
cups which was left to dry for a good dozen hours so that the mix got very sticky and thick, perfect for blending the joints
ripples which I did by tinting some Acrylic gel (Vallejo Water Effects) with various AMMO & Vallejo acrylics to make some
decal in the process). Then it was time for embedding the fuselage which went well. I subsequently prepared some different coloured resin quantities in small coffee
between the Crusader and the sea.
variations around the white colour of the foam. I applied a stronger white at the tips of the wave crests with a smaller brush.
When the resin was thoroughly dried it was the time to take care of the foam and
33
34
Finally some subtle adjustment was needed
getting the figure right, although very small
around the aircraft and this is where the Alclads were again used. In reality the
he is really the focal point of the whole scene.
colours from the sea reflect back onto the fuselage and I replicated the effect with the
This was my first aircraft model and
transparent Alclad colours by spraying
diorama in more than 25 years, I found the
various mixes of green, blue and smoke tints so as to make the transition between
whole affair expensive (about 140€ in materials, kit and accessories), tedious at
sea and aircraft smoother.
times (having to correct the panel lines after joining the halves of the fuselage is
It was then the time to correct a few details and areas that unfortunately got damaged
something we expect from older kits) and complicated (1:72 is a very small scale
during the previous operations, fix the wheels, the glass cockpit, the seat etc. For the figure I modified one of the CMK
indeed) but in the end it makes a nice ‘flat’ diorama. I devised a unique way of displaying the diorama using a deep (kind of
Vietnam era pilots by repositioning almost every joint so that he would still have one foot inside the plane and one hand raised. I thought it important to spend some time
reversed) picture frame complete with glass. The completed scene can then be wall-mounted as any regular framed picture would be.
The completed framed diorama ready for wall mounting
35
38
HU.5 T
his iconic British helicopter was initially produced for the
Royal Navy and later for the Royal Air Force and even used to transport of the British Royal family. The Wessex entered
operational service in 1961 and had a service life in excess of forty years before being retired in Britain. I seemed to have to wait a long time for the Italeri Wessex to hit the shelves, and when it did, I just couldn’t resist building it as soon as possible. The Italeri offering looks really nice built from the box, details are crisp, decal sheet is extensive (although the markings are a touch small) and it even includes a PE fret and plastic mesh for the grilles. Larger parts do have a strange texture on plastic, they are not super smooth and the rivets are too deep, but thats never a problem after you lay down couple of layers of primer. For good measure, (and after measuring my display cabinet !), I decided to add some extra details – well, an entire Wessex PE offering from Eduard and rotor fold set from Scalewarship.
39
cockpit and interior
Starting with the cockpit and crew
Westland Wessex book) there were a
Eduard pre-painted self adhesive photo
compartment there is some work involved with removing the original moulded parts
couple of missing parts in the cabin that would be visible when model is complete,
etched parts were installed. For washes I mostly use Ammo ready-made washes,
and replacing them with PE parts from Eduard (although the kit itself is really,
so I had to make them from scratch using bits of styrene, copper wire and some lead
this time I used blue black wash followed by some light grey dry brushing and some
really nice). Working with Eduard’s
foil. To be honest, I didn’t pay too much
dust coloured pigment. Just before final
photoetch was a straightforward job, except for the seats – far too complicated
attention to the crew compartment as it is almost invisible when closed. So after
marriage of the fuselage halves, side windows of the crew compartment were
in my opinion, but well worth almost losing my mind as they really look fantastic. After
initial coat of Mr. Surfacer primer, GSi H322 light aircraft grey colour was sprayed and
glued in place and it was time to turn my attentions to the exterior.
going through my references (I really recommend the 4+ Publications No.8
details were hand brushed with Vallejo paints. After basic painting, all of the
Eduard provide lots of photoetch detail for the cabin.
Eduard’s pre-coloured photoetch instument facia
Eduard’s photoetch seats proved challenging!
40
exterior I really thought that the new tooling from Italeri would save me from filling and sanding the seams when fuselage was glued together, but there are some areas (especially the nose section) on the kit that need some attention. I re-scribed all the panel lines with a CMK saw and removed all the details that were later replaced with PE parts. The windscreen was next on the list, and there are some fit issues there also, especially the front section which didn’t fit at all. Milliput was used to fill the gaps between windscreen and nose; the
glazing was masked with Eduard masks (EX370). At this point I’d decided to make the HU.5 version of the Wessex with all the exterior piping, so I tackled that using different sized lead wire, strips of masking tape and some Albion Alloys tubing for the connectors. Next all the Eduard PE parts were placed in position making the model very fragile at this stage, so I made a simple stand saving damage to the small parts I’d just installed. Rotor assembly followed. The rotor blades from the kit have
best way to smooth it out and remove excess is with a wet cotton swab. The
a nice sag, but if you want to present them folded (thus saving valuable space in your
The photoetched parts certainly enhance the detail of the airframe. Be prepared for some filling and re-scribing around the nose.
display cabinet!), they have to be straightened up. Dipping the blades into hot (not boiling) water for a couple of seconds, straightening them by hand and cooling them off with cold water does the job. The Scalewarship rotor fold set contains lovely PE blade holders, fuselage support frame, 3D printed plastic parts and rotor heads. Assembly was a bit tricky though, as it is necessary to cut of the rotor and blade heads and glue the printed parts the right way in order to fold them perfectly at the end.
41
Mr Surfacer provides an excellent primer coat.
The bright bands on the blades were first sprayed and then masked finishing with satin black.
Rotor fold from Scalewarship
42
Gunze H330 provides a soft sheen surface.
After priming the entire model with GSi
to use kit ones, which are too big (and
some parts from the spares box and
Mr.Surfacer 1000 primer, it was time for the
sometimes with spelling errors).
various Evergreen profiles to add some
base colour. Thin coats of GSi H330 Dark
After another coat of clear; this time
interest to my small base. All that was left
green followed by very dilute H330
semigloss, it was time for weathering.
to do was to glue a pair of brass tubes into
lightened with tan for the top surfaces and
According to the photos of the actual
pre-drilled holes on the bottom of the
centre of panels to break up the uniformity
subject (XT479/W-X), this was a well
wheels and match them with holes
of colour. Darkened mixes of the base
maintained machine, so weathering was
previously drilled into the base and place
colour were applied next to the lower
kept to a minimum. I did use a brown-
my finished Wessex on it.
surfaces and everything was then sealed
green filter to begin with, just to disrupt the
with Mr. Color Gloss Clear and the model
monotony of the paint, followed by different
I really enjoyed building my first ever
was ready for decals. After some
Ammo panel line washes. After a final
helicopter and it certainly won’t be the last
researching I decided not to use kit decals
semigloss varnish, and attaching all the
one. Although it did test my modelling skills
(it’s been noted the markings appear
small parts, it was finally done.
every now and then I enjoy a challenge in
small), so Xtradecals X48111 sheet came
As with all my models, a simple base was
our hobby. I would certainly build another
in handy. Perfectly printed and in register,
built using balsa wood, some styrofoam
version of the Italeri Wessex, an enjoyable
they settled down nicely with a little help of
and printed concrete weathered with
project I’d recommend.
microset/sol combination. It is a shame as
pigments. I also decided to make a fire
there aren’t any stencils included, so I had
extinguisher on a trolley from scratch using
Xtradecals provide the main markings while I had to rely on the kit markings for stenciling which is a touch oversized.
43
References and materials used: Books: 4+ Publications No.08 Westland Wessex Acessories: Eduard 48754 exterior Eduard 49622 interior Eduard EX370 masks Xtradecal X48111 Scalewarship Wessex blade fold detail set
44
Paints: GSi H332, H330, C181, C46, Vallejo paints (various shades) Washes: AK045, Ammo1615, 1612,1619
45
new releases
Revell 1:72 Halifax B Mk.III
48
It is great to see Revell follow up on their previous Halifax kit with this new version powered by the Bristol Hercules radial engines and as you therefore expect large parts of the kit are common to the original kit. Surface detail is excellent with fine panel lines that are in keeping with the scale. There is some minor sinkage around the cockpit caused by internal details but it is very minor. A remarkably complete interior is supplied with moulded main spars forming the fuselage floor for maximum strength when fitting the wings. The level of internal detail is certainly good inough to be built from the box considering what will be visible through the glazing but moulded on seatbelts cry out to be replaced. The new engines are again well handled with two piece cylinders and a level of detail that is better than you might expect for this scale. Undercarriage offers a choice of main struts to allow you to build a Mk.III or Mk.V but it does look like the height of the undercarriage is modelled in its unloaded configuration making
the aircraft sit too high ? The bombay is partially detailed and can be modelled open of closed and comes with a bomb load too. The glazing parts are carried over from the previous kit and you have a choice of nose for MkIII and MKIV with the Z type nose fairing. The gun turrets are quite basic with not much internal detail although the guns are very well handled and finely moulded. The kit comes with a choice of two schemes, one of which is featured on the box art. The compact decal sheet features some very fine printing for the stencils but the decals supplied for the instrument panels are fairly simplified. Overall this is a really nice rendition of the Halifax and certainly the best option in this scale. Some limited detailing work may be required but the excellent surface detail make this a winner. Revell model kits are available from all good toy and model retailers. For details visit www.revell.de/en
Wingnut Wings 1:32 Bristol F.2b Fighter (Post War) I think I am correct when I say that the Bristol Fighter was one the first four kits to be released by Wingnut Wings back in 2008 and it makes a welcome return now in its post war guise. The immediate visual change to the aircraft and shown on the box art is the silver doped finish which features on three of the marking schemes in the kit and which seems to suit the aircraft better than its drab wartime colours. Much of the original kit is of course carried over but there is a big new sprue with the update parts with include a choice of new exhaust manifolds, new engine cowlings, instrument panel, rudder and auxiliary radiator, along with other smaller parts. Wingnut Wings are still the producers of the finest kit instructions in the business with coloured diagrams used to guide you right through the process supported by great walkaround details from the real aircraft and vintage pictures of the aircraft in service. The fully detailed cockpit tub design that has become such a feature of these beautiful kits is of course included here and there is a photoetched fret which has the assorted seat belts, a set of fabric storage pockets which you
have to fold after annealing, (a clever design solution) and parts for the gun scarff ring. If you want to add the internal bracing wires and control lines there is a diagram in the instructions to guide you but as with all the rigging lines required for the kit these are not supplied with the kit. The Rolls Royce Falcon engine is fully replicated with great colour photos of the real engine so that there is no excuse for leaving off the separately moulded engine cowlings. As usual the kit comes with a choice of five different marking schemes and a massive high quality Cartograf decal sheet which fills the box. Along with the three silver dope schemes there is also a more traditional scheme for an aircraft operating in India in 1923 and a clear doped linen example operated by the Irish Free State Air Corps. The decal sheet also provides all the assorted stencils, manufacturer’s logos and markings for the bombs, everything that you need in fact. Top marks again for this kit which continues everything which we love about these superb kits which are always perfectly 49 engineered and presented.
Italeri 1:32 Mirage IIIc
50
Here is one that many modellers have been waiting to see and it is indeed great to see aircraft like the Mirage getting the modern treatment from the kit manufacturers so well done Italeri! First impressions are certainly good with some excellent surface detail on the wings and tail fin assembly but as with other Italeri kits this varies across the kit with rather heavier panel lines in parts of the main fuselage halves. The fuselage belly panel is another stunning piece of moulding that will paint up superbly. Finer cockpit detail also looks good with a multi-part seat with good textures and separate photoetched belts. Certainly a pretty respectable seat straight from the box and the rest of the cockpit tub is also good with a three dimensional instrument panel rather than a flat photoetch version. Moulded cabling on the cockpit coving and the panel behind the pilot have moulded on cabling which some may want to replace but with some careful painting this should good. Its a similar story with the wheel wells which moulded cables and ducts ripe for the aftermarket resin upgrade sets but not bad
considering the limitations of the injection moulded kit. A detailed engine is provided and this can be displayed on a maintenance trolley that is also provided in the kit. The engine suffers from the limitations of trying to mould wires and cables onto a tubular part but if you want to spend time in superdetailing it is a good starting point. Weighted tires are provided although I thought that the nosewheel tire looked under inflated? Underwing stores include a choice of fuel tanks as well as Sidewinder, Matra R530 and JL 100R pods and there is a guide to the different loading configurations along with some great colour diagrams showing the markings for the weapons and pylons. Photoetched details like mirrors are included for the canopy and its great to see a set of crew ladders provided too! Two big Cartogarf decal sheets provide a generous choice of six different schemes, three camouflaged and three in bare metal. As you would expect the decals are superb with some extremely fine printwork for some of the stencil details.
Zvezda 1:48 Petlyakov PE-2 We've been mightily impressed with Zvezda's new-tooled kits of late and the sleek PE-2 will be most welcomed by Soviet aircraft fans. A flimsy printed sleeve covers a stout corrugated carton which is reassuring if you mail-order kits, believe us, you wouldn't want any of these parts damaged- Zvezda have turned out a real stunner here! The first of the ten sprues we lifted from the box are the upper and lower wings featuring some of the best surface detail you're likely to see, this extended to the rest of the parts on inspection, some beautiful sharp and fine moulding which is every bit as good as the bigger kit manufacturers. It's not only the detail and moulding finesse that impress with this kit, it's the depth of which Zvezda have gone to with full interior and engine detail offering the option of leaving the engine(s) un-cowled or even removed as detailed bulkheads and plumbing is included. It's going
to be a shame to close the fuselage up as the interior detail is very comprehensive and beautifully done with fully detailed defensive MGs, bomb payload and bay. Landing gear and wheel well have the same levels of detail and the control surfaces are fully posable. A small detail, but testament to the effort that has gone into the design of this kit, are the quality multi-part crew figures which come with optional heads wearing goggles should you choose the in flight display (stand is available separately). Zvezda have had criticism in the past for the quality of their clear parts and decals, we're pleased to say the clear parts are excellent with sharp frame detail and the decals are better than we've seen in the past. If this kit builds as good as it looks it's set to be a classic, even if you paid twice the asking price it would still be good value…best pick 51 up a couple then…
F-16 Fighting Falcon Viper Under The Skin Ioannis Lekkas and Ilias Gkonis Published by Eagle Aviation Softback, 100 pages ISBN 978-618-81376-4-6 www.eagleaviation.gr
52
Fighter Weapons School, HAF Supreme Training Unit 1975 2015 Ioannis K. Lekkas Published by Eagle Aviation Hardback, 115 pages, Greek / English text ISBN 978 618 81376 3 9 www.eagleaviation.gr
As if the warm welcome to the IPMS Greek Nationals in Athens wasn't enough the Editor left with some splendid samples from Greek publisher Eagle Aviation. The first up is this superb out-and-out modelling reference photo book dedicated to the latest F-16s operated by the HAF. You would be seriously hard pushed to create a more comprehensive and compact reference with every element of the aircraft covered with high quality photography at suitable sizes to carry out endless amounts of detailing. Block
52+,52M, 30 and Block 50 aircraft are featured and helpfully captioned with handy side-by-side images of the subtle differences with fantastic references of surface finishes for the modeller to try and replicate. The coverage of the ordnance and avionics is stunning and will lend itself perfectly to one of the 1:32 F-16s and the Hellenic schemes may not be the most obvious choices for many modellers but some of the grubby schemes here are guaranteed to get you excited. An absolute must for the F-16 enthusiast.
The beautifully presented visual book celebrates forty years of the Hellenic Air Force training and the aircraft which have served from 1975. There's some fantastic images of the more modern aircraft in flight (including F-16s and Phantoms) and great studies of the crews. From earlier archives are F-5As, Mirage and F-7 and a good selection of combat and rescue helicopters
featured. Text throughout (duel language) is quite brief but for modellers the images are certainly the main focus, a nice touch is some original advertising features from Dassault, Lockheed Martin and other equipment suppliers. This book is sure to be popular with HAF fans and any enthusiast of high quality aviation photography.
RB Productions Wingnut Wings kits have been a saviour to Great War aircraft modellers for a good few years now, updates and detail sets have been quite limited (no doubt due to the kits being just so good!). RB Productions have produced some lovely quality and very worthy aftermarket parts for the 1:32 kits, this may well be the most challenging and spectacular to date. RB-32032 is a set of skeleton wings and tail for the Eindecker E.II, E.III and E.IV entirely from photoetch! This will certainly sort the men from the boys and test your soldering skills to the maximum, this would make a stunning display piece although you might be relieved at some point that you're not working on a bi-plane! Instructions and reference are supplied as downloads.
1:32 Yokosuka MXY-7 Ohka Type 22 This is a beautiful little kit of the Japanese piloted bomb which measures in at around 200mm in 1:32. The majority of the kit is very finely cast in resin which looks like it will prove a simple project. The two fuselage halves align perfectly and include cockpit wall detail with a comprehensive photoetch fret forming the majority of the cockpit with a set of RB's seat harnesses included. The canopy is moulded in clear resin and vac-formed clear styrene. our sample being nice and clean. A fully detailed ground trolly and boost rocket solves any display problems with great potential for a richly detailed vignette. Decals match the quality of the rest of the kit although are very minimal. Superb quality throughout, go to www.radub.com and www.radubstore.com for more details and secure shopping.
AMMO of Mig Jimenez Paint Sets More metallics, this time the old favourite Alclad II which will be widely available re-packaged by the AMMO brand in the familiar 30ml bottles and familiar colours of Aluminium, Duraluminium, Dark Aluminium, Chrome and Jet Exhaust. An important part of the metal finishing (and any painting it has to be said) is the base and primer finish, Black Microfiller is available in the same 30ml jars to
provide the best base coat. www.migjiminez.com and www.alclad2.com have more details. Number 11 in AMMO's Air Weathering Sets provides a handy compilation of three panel line washes for desert camo aircraft. These ready to use washes are constant and convenient to use. Visit www.migjiminez.com for the full range of finishing products.
53
DEF Model 1:32 F-4 Phantom Upgrades An aftermarket producer from Korea, DEF, are held in very high regard by armour modellers for their superbly designed and cast resin detailing and conversion sets. Turning their skills to aircraft now, namely the Revell 1:32 Phantom II F-4 E/F is set DS32008 of FOD covers (in resin) and a dozen RBF tags in photoetch including
decals to suit. For the same kit is DS32007 consisting of a full set of sagged / weighted wheels which are beautifully detailed with the bonus of ready-cut painting masks. DEF can be found at www.defmodel.com which has a list of Worldwide distributors.
AK Interactive
54
AK's Extreme Metal range is expanding at a pace, these ultra-fine pigment effects spray beautifully with some stunning results. AK472 Gold ,AK474 Bronze, AK476 Steel, Ak483 Gun Metal, AK 488 Matt Aluminium, AK 478 White Aluminium, AK669 Titanium, AK670 Stainless Steel, AK671 Smoke, AK672 Pale Brass and AK 674 Metallic Purple. Another medium to achieve realistic metallic effects are AK's 'True Metal' wax / pastes which are applied from the tube and buffed to the desired effect, blue and purple are two new colours which could work well on jet exhausts.www.akinteractive.com
Sticking with metallics we have a new book devoted to working with them. The book starts by looking at the paint science behind the colours, the different brands and types of paint on the market and a look at the different types of metal finishes. There are then a series of different modelling projects using different products to get different effects with step by step photos. These cover various modelling subjects with several aircraft examples as well as cars and Sci-fi subjects. This is a really useful guide and ideal for the metallic novice or the experienced user looking to improve or diversify. The fact that is deals with all brands of paints is also very welcome.
Spitfire in my Workshop By David Glen Published by Brown and Brown Books Hardback, 191 pages ISBN 9780952690726 www.brownandbrown.co.uk www.spitfireinmyworkshop.net
The subject of this large and impressive book steps away from our usual modelling format of kit based modelling and into the realms of model engineering. Nevertheless, anyone with an interest in scale miniatures cannot fail to be impressed by this staggering replica 1:5 Spitfire. Eleven years of work have gone into this completely scratch-built masterpiece which sits proudly in a glass case at the RAF museum for all to see. The book is packed with superb images of the finished model, we pity the photographer shooting all of that polished bare metal (which is in fact printing litho plate applied panel by panel as the actual
Mk.I). The author and modeller has applied a very light and humorous approach to the text sharing his ups and downs of such a massive undertaking to create a rivet-byrivet accurate miniature, the depth of research offers any modeller of the Spitfire some superb reference with both inprogress images and original drawings. This is a real 'Coffee Table' book which any aircraft modeller will be hugely impressed by and a real wealth of information for Spitfire fans with the bonus of being able to view the iconic model at RAF Hendon. Our thanks to the publishers for the sample copy.
32101
32100 72111
32099
72113
72110
48290
48289
72114
Scale Aircraft Conversions We have plenty more replacement white metal undercarriage legs from Scale Aircraft Conversions and starting with 1:32 we have 32099 for the new Tamiya De Havilland Mosquito, 32100 for the Wingnut Wings Albatross D.V/Va and 32101 for the Kitty Hawk P39 Airacobra. In 1:48 there are two sets, 48289 for the F-86D/K Sabre from Special Hobby and 48290 for the Special Hobby AF-2
Guardian. In 1:72 scale 72110 is for the Airfix Boulton Paul Defiant, 72111 is for the Academy F-8E Crusader, 72113 is for the Revell C-54 Skymaster and 72114 to fit the Airfix Bristol Beaufighter. www.scaleaircraftconverions.com for details of these and the rest of the extensive SAC range.
55
IPMS HELLAS 2015
The Editor giving a talk at the show and trying to look like he knows what he is talking about.
56
The Editor had the great pleasure of attending the Greek IPMS National competition held in Athens at the beginning of October. It was held in a former aircraft hanger designed to accommodate a Boeing 747, making it the biggest venue I have ever seen! It was a real pleasure to meet so many enthusiastic and friendly modellers and to be able to study the World class models displayed over the weekend. This small selection of images will I hope give an indication of the superbly high standard of work on the tables. My thanks to all the IPMS Hellas team for the wonderfully warm hospitality and great weekend!
57
F-5E Tiger II Modelled and described by Luc Van den Ende
1:32
58
The story of this Tiger II started several years ago, when my good friend Luc Janssen challenged me to build a 1:32 scale model for once instead of yet another in my preferred 1:48 scale. He suggested “a couple of those beautiful aggressor F-5Es Tiger II”, using the Twobobs 32-004 decal sheet. I chose the #05 Blue/Grey Saints, Luc choosing one of the Desert Cats. Both aircraft served in VFC-13 ‘Fighting Saints’. In the end, Luc lost interest but I decided to soldier on. At first considerable time was spent researching my topic in my and my friends’ libraries and scouring the web. This made me realize just how inaccurate Hasegawa’s vintage model really is, quite unacceptable for this large scale. On the other hand it is the only F-5E in 1:32 scale. I decided to upgrade the kit to today’s standards, knowing this would mean a great deal of scratch-built items and a lot of additional research. But I was determined to transform this kit 59
60
into a masterpiece.
kit parts were however not acceptable to
(www.primeportal.net). Bill Spindle shared
Two of the most noticeable problems with
me. I bought the aftermarket set from
his report on F-5E #13 BuNo 74-1558
the Hasegawa kit are the intake and the
Black Box but in the end I decided to
restored by the OV-10 Bronco Association.
exhaust designs. In fact there were no
simply use the heavy cockpit tub as a
Walk Arounds like this are a modeller’s
intakes or exhaust pipes to speak of... I
weight to keep the model on its nose
dream. Needless to say, I spent a lot of
decided to go the hard way, instead of
wheel. I scratch-built a complete ejection
effort in realizing in plastic some of the
simply covering-up both problem areas. I
seat as well as the complex mechanism
highly detailed shots found on Prime Portal.
carved a mould from beech wood to
behind it to operate the canopy. In the F-
The next items to receive the scratchbuild
vacuform two halves for each intake. Today
5E this device is quite similar to the one
treatment were
I clearly remember the trouble I had
used in the Northrop T-38 Talon. There is
the main and
getting a proper fit between the kit’s
no better guide than Daco’s ‘Uncovering
nose
fuselage halves. After that, creating the
Series’ on the topic, photographed by Willy
landing
first stage fan blades was relatively easy!
Peeters. Another important source for
gears,
Eye-catchers in this large scale are of
detailed photographs proved to be the
complete with
course the cockpit and ejection seat. The
Prime Portal site on the web
wells and doors. In
front of the main landing gear are two
invisible undersides on a model airplane is
speed brakes, which also needed close
really only just for fun.
attention. I used Plastruct rod as a base for
It almost proved a never-ending story, as I
the landing gear struts and built them as
decided the following kit parts would never
accurately as possible, constantly referring
be used on my F-5E Tiger. In view of the
to the photographs. For the oleos I used
work already accomplished, Hasegawa’s
polished stainless steel, as I always do
representation of the arrestor hook, the
because of the ultra realistic look of this
centerline pylon, the wingtip missile
material. The wheel well doors and speed
rails and the large hinge under the
brakes were made from styrene plastic
flaps is just not acceptable, so
card. Copper wire of various thicknesses
more work had to be spent on
was used to simulate hydraulic lines to
those items. Accuracy and
complete the wheel wells. As everybody
refinement were needed to
knows, detailing to this extent those
replace all these kit parts.
61
62
Engraving the panel lines was no big deal
scratchbuilt from styrene tube using a
of a solid bar. After determining the
and to simulate the many rivets I
small lathe. Additional parts to complete
dimensions from photographs I build up
fabricated a couple of templates from
my model were also scratch-built. Photos
this type of chocks with pieces of styrene.
brass strip. Ordinary tape fixated these
taken at NAS Fallon showed safety
The angles of each tiny rhomboid were
templates on the model while I ticked off
containers for fuel draining underneath
rounded off between sharp pointed
the rivets using a 0.3 mm drill. Simply
more than one parked F-5E. I made this
tweezers with a very fine stick of sanding
perforating the tape was an easy method
tiny item from styrene and a lot of
paper and glued in the right pattern on top
to distinguish between already and not yet
patience. Very fine capillary tubes proved
of the wheel chocks. A rope connected the
done. The results of this job will show to full
very useful to connect the fuel draining
chocks after painting.
advantage after painting and weathering.
pipes to the red safety container.
The left wingtip rail was decorated with a
The rivets on the exhaust were added one
I also noticed from pictures that the NWC-
bright coloured Air Combat Manoeuvring
by one with a 0.3 mm diameter
4 polyurethane wheel chocks were often in
(ACMI) Pod. This instrument is used to
homemade Punch & Die. Several layers of
the vicinity of an F-5E aircraft operating
monitor air combat training for later
Alclad II were airbrushed on the tail pipes
from land bases, the very same as used
analysis and to provide a detailed report
and after fuselage to simulate the various
on USS aircraft carriers but with the
for crew and instructors on performances
tones of heated metal. The exhausts were
chocks interconnected by a rope instead
during air combat. Plastruct rod was used
for its construction, while hypodermic needles simulated the Air Data Sensor Antenna. Thanks to the tiny hangers, made from styrene, no glue was needed to connect the pod to the rail. The kit’s four-piece boarding ladder is not really satisfying, so a new one was constructed using brass rod and plate. Instead of the usual superglue a simple soldering iron was used for a much stronger connection. Painting my model, I used Model Master enamels, following the instructions of the Twobobs decals. Let’s hope Bob and Teri Sanchez did their
63
panel lines were defined with a very diluted
the airbrush and really had no intention to
medium grey mixture of oils. I also used
mess up the whole project at this stage, I
different shades of pastels as finishing
Without the goodwill of some people this
used masks for the camouflage pattern.
touch, a hint from my friend Luc Janssen.
model could never be what is it now. Thank you, Bill Spindle and Luc Colin, for
After enlarging the drawings of the
64
Airport, Minnesota.
homework... Because I am not a hero with
Twobobs instructions to 1:32, I glued each
Building this old (and very basic)
sharing your excellent Walk Arounds. They
pattern on stiff aluminium sheet. These
Hasegawa kit brought about a lot of
were very useful. Thanks Twobobs for
patterns could easily be attached to the
frustrations and proved to be a real test of
sending additional photographs. Thanks
model, millimeters from the surface, to
patience, although in the end it was very
Thomas Twedt from NAS Fallon for
create a realistic soft line between the
enjoyable and awakened a real love for the
providing information on colours for the
different tones. Then came a coat of gloss
beautiful shapes of the Northrop F-5E Tiger
intakes and landing gears. Thanks Danny
varnish to prepare for decaling.
II. Researching on the web, I found a link to
Coremans and Peter Gordts for your help
Note the small rasters just in front of the
the final destination of this particular
and assistance. And finally, thanks Luc
air intakes. These were created by my
aircraft. #05 was saved from the scrap
Janssen, good friend from the early days,
good friend Danny Coremans on his
yard and was restored for display in the
always ready to help with constructive
computer and printed on decal film. All
American Air Wing Museum, Blaine
ideas and discussions.
65