AIR 59 cover_Layout 1 10/03/2015 15:18 Page 1
59 APRIL/MAY 2015 • £6.50 UK $15.99
MENG AIR MODELLER
APRIL / MAY 2015
www.mengafvmodeller.com
DORNIER’S ARROW
Kevin Futter builds the new HK Models 1:32 Dornier Do 335 B-2
AIR 59 April-May 2015_AFV/26 Jan/Feb 06 11/03/2015 09:50 Page 222
AIR 59 April-May 2015_AFV/26 Jan/Feb 06 11/03/2015 14:10 Page 1
CONTENTS 2
Coming or Going? Kevin Futter gets to grips with a test shot of the new 1:32 Dornier Do 335 B-2 from HK Models.
10
Bristol Beaufighter Mk.1c Jamie Pastor models a heavily weathered RAAF aircraft based on the 1:48 Tamiya kit
18
P-38 J Lightning ‘Master of Metallics’, Michel Gruson tackles the Eduard special edition 1:48 kit.
26
Finnish MiG-21 BIS Armour modeller Jari Hemila trys his hand at something with wings.
36
Big Bird B-17, Part 10 The Editor continues his build of HK Models spectacular 1:32 Flying Fortress.
44
Air Born New releases.
58
Big-Buck Buccaneer Part 2 Andrea Vignocchi describes the painting techniques used on his 1:72 superdetailed Buccaneer.
Meng AIR Modeller is published Bimonthly by AFV Modeller ltd Old Stables East Moor Stannington Northumberland NE61 6ES Tel: 01670 823648 Fax: 01670 820274 email:
[email protected] Editor and Designer: David Parker Deputy Editor: Mark Neville Sales Director: Keith Smith
We are now on Facebook, ‘Like’ us to follow what we are doing and follow our build projects.
Meng AIR Modeller welcomes contributions from interested parties, but cannot accept any responsibility for unsolicited material. The contents of this publication including all articles, drawings and photographs originated by AFV Modeller ltd become the publishers copyright under copyright law. Reproduction in any form requires the written consent of the publisher. Whilst every care is taken to avoid mistakes AFV
ISSN 1747-177X
Modeller ltd. cannot be liable in any way for errors or ommissions.
1
AIR 59 April-May 2015_AFV/26 Jan/Feb 06 10/03/2015 14:58 Page 2
Coming or going ? Kevin Futter builds a test shot of the new HK Models monster Dornier
Do 335B-2
2
The Dornier Do 335 was unique in the annals of military aviation, being a twin-
The HK Models kit represents the heavilyarmed Do 335B-2 “Zerstörer” version of
as the roof of the nose wheel bay, feature an amazing level of moulded-in detail, and
engine aircraft of unusual push/pull configuration. Featuring an elongated fuselage with an engine at each end, it was also one of the fastest piston-engine
the aircraft, which featured a 30mm MK103 cannon in each wing, housed in large, protruding fairings that were characteristic of this variant. A third MK103
require careful painting to do them justice. The kit is also designed in a modular fashion to accommodate other versions. For example, the fuselage spine is a single,
fighters of WW2. It was conceived and designed to fulfil a number of roles, including fighter, fighter-bomber, heavy
was mounted within the forward engine block, firing through the spinner. When combined with the two MG 151/20 20mm
separate piece, which can be swapped out for the two-seat spine. Similarly, the large cannon fairings for the wings are supplied
fighter (Zerstörer), and extending to twoseat night fighter and trainer roles. Only 70 examples of all types were completed by war’s end, with none entering squadron service.
cannon mounted atop the forward fuselage, the resulting firepower truly earned the description “heavily armed”! The kit itself is something of a beast, being large and highly detailed. Some parts, such
as complete, single-piece inserts for the wing leading edges. As we will see, this approach caused me a few fit issues during the build, though some of these issues were definitely self-inflicted!
AIR 59 April-May 2015_AFV/26 Jan/Feb 06 10/03/2015 14:58 Page 3
This kit was an early test shot from HK Models, and arrived without instructions, decals, photoetched parts and nose weights. It was also pulled from moulds that were not 100% complete or finalised, so I had a few challenges at the outset. During the early phases of the build, I was able to obtain some of the missing elements, and later still, an example of the production kit, from which I borrowed a few parts.
3
AIR 59 April-May 2015_AFV/26 Jan/Feb 06 10/03/2015 14:58 Page 4
On with the build My twin goals for this build were to stick as close to out-of-box as practical, and to showcase as much of that lovely internal detail as possible. Working from an early
It’s fine enough to do the job, but no so sharp that you risk digging it to the base paint layer. As an aside, I also use this tool for placing CA glue.
Luftwaffe belts. This turned out to be fortuitous, as they are vastly superior to the kit offerings, and are a real focal point in the cockpit.
draft of the instructions, I started by building up and painting the internal structure for the fuselage. I mainly used Mr. Metal Color for the wiring and plumbing, as it brush-paints
The next phase involved the cockpit, which by Luftwaffe standards was relatively spacious and highly visible, so I was keen bring out its best. I started with the seat,
I took a relatively austere approach with the main cockpit tub, beginning with a base coat of Mr. Paint RLM 66. This turned out to be too dark, and lacks the characteristic
very nicely, and can be polished with a cotton bud for a more metallic effect. Better still, stray brush strokes can be cleaned up
which itself is made up of several components, and it was here that I had my first deviation from a strict out-of-box
blue tint of the real paint. To compensate, I gave it an unusually heavy dry-brush with Vallejo’s Model Color White. I would
with a pointed implement. In my case, I use the eye-end of a sewing needle, where the end of the eye has been cut down to form a lopsided ‘U’ shape.
approach. The production kit comes with some photo-etched harnesses, but I had yet to receive them at this stage of the build, so I elected for a set of HGW generic
normally dry-brush a dark base colour with RLM 75, which produces some nicely subtle highlighting, and is quite difficult to overdo. The extra contrast afforded by the white worked very well in this instance though, and really helped lift an otherwise drab cockpit tub. Details were picked out with various shades of Vallejo acrylics. The final touches were a couple of cockpit placards from airscale’s AS32 SCH set. The next task was to tackle the rear engine, as it needs to be installed prior to the fuselage spine being fitted. The two engines are largely identical, and can actually be assembled and painted at the same time. The engines are highly detailed, and I elected not to add anything to them, other than some airscale placards on the coolant tanks. With the engine completed, I was able to combine all the sub-assemblies that comprise the main internal structure, and then begin working on the remaining fuselage internals. This consisted mainly of the rear ducting, rear bulkheads, and the rear propeller drive shaft.
The level of moulded-on detail is amazing! The internal structure and details for the fuselage coming together. Mr. Paint’s RLM 02 has been used throughout. The completed cockpit tub, mounted atop the nose wheel bay.
The assembled rear engine. Each engine is made up of around 20 or so parts.
The main internal structure completed, and test-fitted into the port fuselage half. The JH Models jig is very handy for these situations!
The red bands on the blue cylinders are from some spare red decals.
4
AIR 59 April-May 2015_AFV/26 Jan/Feb 06 10/03/2015 14:59 Page 5
More fantastic moulded-on detail, this time on the rear engine firewall.
The internal nose weight fitted into one half of the forward engine.
Painting the engine block started with a primer coat of Mr. Surfacer 1200, followed by a base coat of Mr. Paint Base Black. This was highlighted with Mr. Paint RLM 66, then a wash with Paynes Grey oil paint, and finally a very light dry-brushing with Mr. Metal Color Aluminium (aluminium). Details and moulded-on pipework were picked out using Mr. Metal Color Aluminium, with the coolant tanks and additional piping airbrushed with Tamiya AS-12. Straps and fasteners were painted with Mr. Metal Color Dark Iron.
The backing part for the instrument panel was missing from my test shot, so I cut the supplied decal into three parts, ready to be inserted into the rear of the panel. This is what it looks like from the rear. Note that the decals remain on their backing sheet! I fabricated a rough backing sheet for the panel, and added instrument bodies from styrene rod and tube.
Aside from the seat harnesses, the only other part on the photo-etch fret is a small grill for the rear ducting, and it was at this point that I decided to put the build aside and wait for this part. I believe that this was ultimately a mistake, as I suspect this grill in part caused my subsequent fit issues, being around 1mm too tall. I eventually dealt with this by removing as much material as I could from the internal bulkheads, so that I could push the fuselage spine more-or-less
be too heavy for the tiny mounting lugs to keep it attached to the firewall, but testfitting proved my fears to be unfounded. My test shot was missing the backing piece for the instrument panel, to which is applied the instrument decal, so I had to improvise. Rather than fabricate a replacement backing piece and risk getting the decal out of alignment, I decided to cut the decal up into its constituent panels, and fix them directly into the rear of the instrument panel.
due to the preliminary nature of my kit was the rear propeller spinner. It was malformed at the tip in my test shot, and needed some remedial work. I used the part from the production kit as an exemplar to work from. The annular radiator face in the forward engine cowl is devoid of any detail, so I decided to stray yet further from the out-ofbox path and spice it up. I cut some templates for the curved shapes using Tamiya masking tape, and then laid them
into place. Next time I’ll either reduce the photo-etch grill, or leave it out altogether! Once the delayed nose weights had arrived, I proceeded to assemble and finish the forward engine, which offered no surprises.
I then fabricated a rough backing sheet for the panel, and added instrument bodies from styrene rod and tube. Lastly I added some wiring to the rear of the instrument bodies, as they are visible through the
over some Tasman stainless steel mesh (Super Fine), and carefully cut them out. They were applied to the model with CA glue, which is unfortunately visible in a couple of spots. It still looks much better
With the internal weight fitted, I was a bit concerned that the engine assembly would
windscreen on the finished model. Another area that required some extra work
than the bare plastic however!
I decided to add some MDC manufacturer’s stamp decals to the insides of the open cowl panels.
5
AIR 59 April-May 2015_AFV/26 Jan/Feb 06 10/03/2015 14:59 Page 6
Some judicious shortening of the internal bulkheads, plus a little bit of shimming, sees the fuselage spine sitting as intended.
The wing roots needed shimming in a couple of areas too. The fine surface detail is evedent in this shot and features throughout the kit.
The wing leading edge inserts required some shimming with styrene strip to achieve a gap-free fit. Note again the delicate rivets. fasteners and panel lines.
Realistic RAL Colours Moving on to the wings, I was pleased to find that assembly was largely straightforward and trouble-free. I did
I took the opportunity with this build to test the relatively new Mr. Paint range, and ordered their RLM 65, 70, 76, 81 & 82
The rest of the paint job consisted of a standard late-war scheme of an 81/82 splinter camouflage on the upper surfaces,
discover though, that the leading edge inserts required some shimming to obtain a gap-free fit. I found some Evergreen styrene strip that was perfect for the job. I
colours. I decided I would choose between RLM 65 & 76 for the lower surfaces once I’d seen each colour applied to the model. The Mr. Paint RLM 76 seems to represent
and RLM 65 on the lower surfaces. I’m not a big fan of pre-shading, and rarely use it these days, preferring to find more organic ways of breaking up the finish. I’m still on
had to perform a similar shimming job in a couple of areas at the wing roots too. Early on I had decided to build the M13 airframe with the extended wing tips, so these were fitted at this stage as well. Once the rear empennage was installed, I gave the model a couple of light primer coats with Mr. Surfacer 1200, and repaired the inevitable blemishes.
the less-common, late-war “sky green” version of the colour, and feeling that this wasn’t appropriate for a Do 335, I elected to use their RLM 65 instead. While planning the paint job, a friend brought to my attention the fact that the undersides extended wing tips on M13 were actually left unpainted, with the panel and rivet lines puttied over. I went with the bare metal, but decided against replicating the puttied lines – mainly out of laziness!
this journey, so I kept things pretty simple with this build. The next phase started with an airbrushed coat of Flory’s Dark Dirt wash. Removing the excess left the exquisite surface detail nicely highlighted. This was followed by a couple of light coats of Future floor polish in preparation for decalling. The kit decals are by Cartograf, and are excellent. I did have some minor silvering due to inadequate surface preparation, but I really can’t fault the decals themselves. I sealed the decals with a couple of light coats of Tamiya X-22 Gloss Clear, in readiness for the next stage: oil dot filtering!
The distinctive teardrop in the canopy is well moulded as are the frames and rivet detail making for an easy masking job.
6
AIR 59 April-May 2015_AFV/26 Jan/Feb 06 10/03/2015 14:59 Page 7
Mr. Paint RLM 65 applied to the undersides, with the wing tips in natural metal – Tamiya AS-12 in this case. The upper surfaces received the standard late-war splinter camouflage of RLM 81 & RLM 82, again using the Mr. Paint colours I decided to trial the relatively new Mr. Paint range of colours for this build.
Oil dot filtering is a method of breaking up the monotone nature of a paint finish, and involves adding ‘dots’ of artists’ oil paints to the surface, which are then blended in to create a subtly variegated patina. I made the mistake this time though, of experimenting with Crimson; it turned out to be much too strong, even after blending, and I had to remove most of it. This left the effect so subtle that it’s barely noticeable, but this is preferable to one that looks overdone. After a flat coat, I added some strategic paint chipping with a silver pencil, but kept it pretty light, as my aim was to create a used-but-notabused look.
Spotty! This is called ‘oil dot filtering’, and looks quite ridiculous prior to being blended.
Midway through the process of blending the oil paint dots. It looks like a Monet painting at this stage!
The finished result, fully blended. Due to the dominant effect of the Crimson, I had to remove most of it unfortunately. Even so, it has still created subtle variations in the finish.
7
AIR 59 April-May 2015_AFV/26 Jan/Feb 06 10/03/2015 14:59 Page 8
All that remained was to add all the small components, and fix all the separate panels in their open positions. This turned out to be trickier than I imagined for the front engine panels, as I couldn’t get the support arms to meet their respective mount points at both ends, and ultimately had to fake it. This is the only part of the kit that I was dissatisfied with, and next time I’d replace the support arms with aluminium tubing.
8
AIR 59 April-May 2015_AFV/26 Jan/Feb 06 10/03/2015 14:59 Page 9
Conclusion Overall I thoroughly enjoyed this kit and look forward to building subsequent versions. The high parts-count and high level of detail make for a demanding build in places, but the finished model has a substantial presence. Now, where to put it?
9
AIR 59 April-May 2015_AFV/26 Jan/Feb 06 10/03/2015 14:56 Page 10
T
he extreme weather conditions in Port Moresby, mostly the sun and the tropical rains, and the numerous raids undertaken by
these aircrafts meant that they had a very worn appearance. The upper camouflage turned quickly, and in a few weeks it was heavily faded. The aircraft which I have built in this article - serial number A19-34 - was delivered to New Guinea in its original RAF colours of Dark Green, Dark Earth and Sky Type S. Once there, it was allocated with the letter “J” which was painted over the original code letter. This Beaufighter, belonged to 30 Squadron, operated in New Guinea from 1942 to 1944. The climate, heavy use and the lack of replacement parts meant many repairs were required in the case of this aircraft, four times before the moment that I have represented, just before having a forced landing on March 22, 1943. After this new repair, it was repainted using the Australian Foliage Green and it received a new code letter: LY-D.
The kit To build the Mk.Ic version in 1:48th scale the best option is to adapt the Tamiya Mk.VI. The quality of the kit is excellent, but it lacks interior detail and the some details for the undercarriage and wheel wells. This is not a problem but an incentive to build and improve them from scratch. It is important to have drawings and scale plans to show the Mk.I features, because there are several variants according to the variations in armament and the series production. 10
Modelled by Jaime Pastor
AIR 59 April-May 2015_AFV/26 Jan/Feb 06 10/03/2015 14:56 Page 11
A19-34/J, 30 Sqn RAAF, Port Moresby (New Guinea), March 1943
Bristol Beaufighter Mk.Ic
11
AIR 59 April-May 2015_AFV/26 Jan/Feb 06 10/03/2015 14:56 Page 12
After reviewing photos and drawings I chose to rebuild some cockpit parts such as the radio operator’s seat and its structure using plastic sheet and rods.
The main cockpit has added a pair of details which will be visible through the transparent parts: a small lamp and the open/close mechanism for the lateral window.
12
It is important to thin the seats with sandpaper. A good idea is to add seat cushions - modelled using putty. The belts were made with paper and photoetched belt buckles by Extratech.
The radio operator’s dome was cut from the fuselage and I added the interior structure with plastic rod and the locks with metal plates. After that the transparent must be masked inside and out.
The kit viewfinder must be replaced, I built one with transparent acetate sheet.
Is worthwhile to improve the main undercarriage. I used plastic rod of different thickness and a lot of patience to place them in the right positions. This photomontage shows the four sides of the finished main undercarriage.
AIR 59 April-May 2015_AFV/26 Jan/Feb 06 10/03/2015 14:56 Page 13
I wanted more interior detail, it should be enhanced a little. However, with references and patience it is easy to do.
Both the copper wire and plastic rod are fundamental to detail the cockpit, you should choose them according to the situation.
There is a big gap in the rear fuselage wall at the wing root which would be visible. It is important to cover it. You can make the cable bundles by interlacing two or three thin copper wires.
There are a lot of instruments scattered around the cockpit. To make the circular rims I used thin cooper wire shaped around a rod of the specific diameter, then cut using a sharp blade.
Before the main interior colour I applied a generous black layer as primer. After that, the Interior Green must be airbrushed from the top so that the primer could to make the shadows and emphasize the interior structure.
After airbrushing the main colour, I brushed the small elements, such as boxes, dials, pipes and tubes with Vallejo Model Color mixed with Agama acrylics. To enhance the elements you can mark the edges with a light grey and the recesses with a thin line of black or apply a dark wash interchangeably. The instruments panel has been painted with different grey shades and the dials have a small drop of glossy varnish. Finally, a dry-brush emphasizes the elements.
13
AIR 59 April-May 2015_AFV/26 Jan/Feb 06 10/03/2015 14:57 Page 14
The main peculiarity of the Bristol Hercules engines is that the exhausts were oriented to the front and they are centralized in the cowling. I made the exhausts with plastic rod 0.75mm diameter.
First I applied a light coat of primer to show any flaws, then I airbrushed a black layer and using the dry-brush technique I painted the cylinders. Finally some weathering was added using pigments.
The Mk.Ic version had some differences from the kit, you must study the plans to correct the panel lines and the empty shell case chutes.
Another nice modification is to place the control surfaces in a different positions. Using a sharp blade you can separate them carefully in order not to damage the pieces. I used the Mk.VI horizontalstabilizers instead of buying an aftermarket. The Mk.Ic ones were shorter and completely horizontal.
The base colour for the undercarriage is a metallic-grey made by mixing aluminium and grey from Agama. I brushed the different elements, then a black wash to enhance the details and finally some mud splatters and paint chips.
To simulate the weighted effect on the tires I sanded the base and filled the sides out with putty.
The climate conditions mean that the tires were very worn, for that reason the tire colour should be lightened and heavily dirtied.
Despite the size of this model it is worth investing time to rivet it, the result is much more eyecatching.
I added some thick pipes to the wheel-wells using electical flex and a small circular cover. I applied the same painting techniques utilized in the cockpit, but keeping in mind the heavy weathering.
Some putty and sanding was required to join the main parts cleanly. Notice that the exhaust
14 collector were painted in bronze colour with Agama Metallic Paste.
The first painting step is one of the most important: the primer and the preshading. It should be slightly visible at the end of the process.
AIR 59 April-May 2015_AFV/26 Jan/Feb 06 10/03/2015 14:57 Page 15
This Beaufighter A19-34 was delivered in the RAF original colours Dark Green and Dark Earth for the uppersurfaces and Sky Type S. I airbrushed them freehand with Agama colours.
If you dilute the paint with around 90% of solvent you can airbrush several semi-transparent layers without hiding the pre-shading effect.
Before the markings I painted the both patches where the “J” letters have to be placed, this time in Australian colours Foliage Green and Earth Brown. The maskings were drawn in Tamiya tape and cut with a compass-cutter. I used a sharp brush to paint a lot of marks along the panel lines randomly, focusing the effect on the movable panels.
The base colour is ready, so a gloss varnish coat serves to place the decals, (only the serial numbers) and to mark the rivets and panel lines using black oil washes.
The undersurfaces have the same painting process. The matt varnish reveals the final colours, it is important to apply several thin layers in order not to flood the surfaces.
Finally the maskings of the transparent parts were removed, the engines, its covers and the main undercarriage placed in their final position. For gluing the transparent parts I use white glue which creates a flexible union without messy residues.
15
AIR 59 April-May 2015_AFV/26 Jan/Feb 06 10/03/2015 14:57 Page 16
Several photos show that the exhaust stains were very dark and they cover a large area. I added them by airbrushing different dark shades and using black pigments.
I airbrushed the engine cowlings with a semi-transparent layer of dark grey over the bronze coat in order to simulate the black colour as if it is heat damaged.
16
The Mk.Ic did not have the well known porcupine exhausts. I build the new ones with round tube and painted them as if they are rusted. Using AK effects I added some heavy fuel stains just on the starboard engine.
AIR 59 April-May 2015_AFV/26 Jan/Feb 06 10/03/2015 14:57 Page 17
Conclusions: I am very satisfied with the result that I have achieved on this aircraft, I think that the paint effects are appropriate, However I made a mistake with the cockades on the undersurfaces. I found a new photo of this aircraft showing them but too late for me to change them.
17
AIR 59 April-May 2015_AFV/26 Jan/Feb 06 10/03/2015 14:54 Page 18
Lightning
This limited edition kit by Eduard is basically the original Academy kit with the addition of Brassin resin parts, a photoetch set and a magnificent decal sheet to allow the modeller a couple of striking schemes, both in the European Theatre of Operations. My choice was the P-38J-25 serial n° 44-23677, "Little Buckaroo", mount of Major C "Buck" Rogers who commanded the 392nd FS and who gained five kills in a single mission when he destroyed Junkers 52s while on a straffing operation. The natural metal airframe was achieved with my tried and tested ‘Rub’n’Buff’ method producing realistic and pleasing results with subtle shading and weathering.
18
AIR 59 April-May 2015_AFV/26 Jan/Feb 06 10/03/2015 14:54 Page 19
1:48
Michel Gruson
19
AIR 59 April-May 2015_AFV/26 Jan/Feb 06 10/03/2015 14:54 Page 20
The cockpit is composed of many delicate resin parts and is a pure joy to assemble. Interior green, Gunze H-58 is the dominant colour, some dark washes are used to create shadows and the final touch is a dry brush with Naples yellow oil colour to make all the details stand out. The cockpit does
not fit very well and a lot of trial fits and sanding are necessary to get the proper alignment. Similar difficulties are to be found around the wing roots and the nose, and, once again, the goal being to use a minimum of filler. The wing joints are improved with many
Lots of dry-fits and sanding are required to get the cockpit to fit, only then can you enjoy painting all of that detail.
Thin metal foil is better suited than rigid photoetch to detail the area around the superchargers, rivets can be added after the piece is in place.
20
coats of Mr.Surfacer after masking the surrounding areas to avoid filling in and rescribing any surface detail. Assembling the booms went pretty well, I choose to replace the photoetch parts from Eduard around the superchargers with aluminium foil, riveted once in place.
AIR 59 April-May 2015_AFV/26 Jan/Feb 06 10/03/2015 14:54 Page 21
The Academy kit lacks finesse in some areas, like for instance the moveable parts of the boom radiators. It is not difficult to remove the kit parts and to built new ones using aluminium from a drink can. Each radiator flap is equiped with the moveable arm made from streched sprue. Once in place, a coat of Mr Surfacer allows and final prep to be made and provides a safe key for subsequent colours. The photoetch grilles are easily put in place and the numerous scoops on the front part of the engines are hollowed out and detailed.
Eduard’s decals were applied straight to the buffed metallic finish with the aid of some Micro-Sol setting solution. Weathering and shading was mostly achieved with pigment powders.
The front undercarriage leg is a bit basic and is crying out for more details. The double "U" is made from copper wire, the flat photo etch parts being useless. The retraction arms are replaced with streched sprue. Not too much work is necessary on the main landing gear but brake lines and clips bring detail to another level. Brassin resin wheels come with a separate hub and makes the painting process a real pleasure. The wheel bays are equiped with their photo etch parts and more tubing and wiring is added to simulate the numerous hydraulic lines before spraying the whole area with Interior green. Some oil washes give the ‘bays the worn look found on operational aircraft. 21
AIR 59 April-May 2015_AFV/26 Jan/Feb 06 10/03/2015 14:54 Page 22
The whole kit is covered with Rub 'n’ Buff using a finger for the large surfaces and brush for the hard to reach places. Then using a soft cotton cloth, the whole model is polished to give the realistic Aluminium shine. Anti glare panels are painted after masking with many light sprayed coats of olive drab, first heavily tinted with yellow until we get to pure OD. Decals are put in place direct onto the buffed finish and fixed using Micro-sol. To break the monotony of the aluminium finish, some panels are masked and lightly sprayed with Tamiya X-19 to darken the metal shine.
Prop blades are first painted gloss black to make the decal process easy, tips are sprayed X-19 from Tamiya.
22
An aluminium dry brush and some dark pigments are followed by a Matt varnish spray. Following a colour photo of the plane the spinners are different colours: Black and Yellow for the right one, natural metal for the left one.
AIR 59 April-May 2015_AFV/26 Jan/Feb 06 10/03/2015 14:54 Page 23
Now comes the hardest part of the process: Rub'n'Buff does not like turpentine washes, so my only option was to use dry pigments from CMK, removing the surplus with a soft rag. Light and dark tones are then sprayed without being systematic. The areas closest to the ground receive more attention. Once the compressors were painted and weathered they were put in place and the long trails of exhaust staining duplicated with Tamiya X-19 and light beige. Around the engines some fluid stains are simulated with a fine brush and some water diluted pigments. To add further realism some matt varnish was airbrushed in some selected places to break the monochromic effect of the aluminium.
The lateral canopy glass was replaced with some thinner clear acetate, the right side being fully open while left side is only half open. Landing gear check mirrors are made using chrome ink with the MGs replaced by the turned brass set from ‘Master’ and a piece of tube used for the cannon. The final finishing touches such as landing gear doors, the antenna and the canopy roof were all put in place bringing another enjoyable project to a close and the unique P38 added to the collection.
Fuel and exhaust stains give a realistic and used appearance to the Lightning. Pigment powders help enhance the panel lines and surface details. The anti-glare panels were airbrushed in gradual layers.
23
AIR 59 April-May 2015_AFV/26 Jan/Feb 06 10/03/2015 14:54 Page 24
Lightning
24
AIR 59 April-May 2015_AFV/26 Jan/Feb 06 10/03/2015 14:54 Page 25
25
AIR 59 April-May 2015_AFV/26 Jan/Feb 06 10/03/2015 14:52 Page 26
BIS MG-138 26
AIR 59 April-May 2015_AFV/26 Jan/Feb 06 10/03/2015 14:52 Page 27
Jari Hemila takes a break from modelling armour and enjoys his first aircraft project since his childhood The last flight by a Finnish Air force MiG-21 BIS was flown by flight commander Yrjö “Ylli” Rantamäki on 7th March 1998 with MG138. For this last flight Mr Rantamaki’s nickname “Ylli” was marked on side of his plane with day-glo orange tape. The MiG is now part of exhibition at the Military Aviation Museum in Tikkakoski, Jyväskylä.
My friend who works at the Military Aviation Museum, asked me to make a model of their MiG-21 BIS. At first I took it as a joke, but then after few days I decided to take the challenge and build an aircraft, the first one since I was a child! The modern plastic kits are amazingly good, and Eduard’s MiG-21BIS is no exception. For example, fit is so good that you can put parts together and then add some liquid glue, no clamps were needed like in the past! Anyway, I moved out of my comfort zone and this is a short story about how I did it my way, as an armour modeller.
27
AIR 59 April-May 2015_AFV/26 Jan/Feb 06 10/03/2015 14:52 Page 28
cockpit and preparation
28
As always, aircraft model painting starts early with painting the cockpit. I used a very light grey mixture of Tamiya paints diluted with lacquer thinner. This light grey paint dries quickly and works as primer for the cockpit and it is also base colour for wheel wells. The details were picked up with different colours as per kit instructions. The weird looking Soviet cockpit colour
came from Russian company Akan. This colour matches quite nicely to pre-painted Eduard photoetch parts. Akan acrylics can be both brushed and airbrushed even without diluting them. I painted two or three thin layers and got a nice, satin shiny surface. Next step was to give a dark general wash and for this purpose I used AK’s dark
brown Nato wash diluted with some turpentine. The weathering was completed with chipping. With a small paintbrush and tapping motion, Tamiya aluminium did the job well. After taking some pictures, the fuselage halves were glued together with the subassemblies in between, and with a satisfactory fit.
The paintwork started with different precolours. At first I painted green avionics panels and antennas with Tamiya Flat green. Next I mixed some yellow with green and with this mixture airbrushed some highlights on antennas. Lacquer thinner diluted paints dry quickly so I
masked green areas at wings just after I cleaned my airbrush. The next step was to primer paint all bare metal areas with Alclad Gloss black base. This heavily thinned primer is ready to use in your airbrush and it dries quickly. After cleaning my Iwata, I continued right away
with Airframe aluminium. The metal effect is amazing and so realistic!! I work normally only with matt colours on vehicles but these attractive metal colours make me want to use them again!
AIR 59 April-May 2015_AFV/26 Jan/Feb 06 10/03/2015 14:52 Page 29
under-covering
The underside base colour was a 50/50 mixture of Tamiya Sky Grey and Matt White. Paint was diluted with the yellow cap lacquer thinner about 50/50 and then airbrushed on the bottom and sides. I prefer to use “Yellow Cap” because you don’t need to paint your model with separate primer paint, the solvent has a good ‘bite’. Next step was to paint highlights. I added few drops of the base colour to white diluted heavily, (90% thinner) and lightened the panels one by one. After the highlights it was time for shadows. Light grey was easily shaded with XF-24 Dark grey straight from the jar but again heavily diluted. Using some paper masks, masking tape and freehand airbrushing, shading was applied completing the dimensional appearance of the underside of the MiG.
Looking at my references, the exhaust takes on a warmer yellow tone. I found Pale gold good for this effect. More contrast will be added during later weathering stages.
29
AIR 59 April-May 2015_AFV/26 Jan/Feb 06 10/03/2015 14:52 Page 30
top-side Upper surfaces still required some preparation. First, a soft edged border between the light grey and green was made with Blu Tac rolled and pressed softly to the surfaces. The chipping effect on top of the fuel tank was done with the ‘Hairspray’ technique. I decanted some hairspray into the cup of the airbrush and then sprayed it over areas painted with airframe aluminium. Airbrushing is much more controlled way to use hair-spray than the spray can. The faded green base colour was a 50/50 mixture of Flat green and Khaki from Tamiya. For highlights 50% Desert yellow was mixed with 50% base colour and then diluted heavily. Highlights were painted like the under side, panel by panel.
30
The right wing is in original Soviet green/ black camouflage. To produce this, at first the fuselage was covered with masking tape and then the black camouflage areas were masked with rolls of Blu Tac. Wingtip areas were painted without any masking. Highlights were applied as in earlier steps and after the paint dried, the right wing was masked for protection. Brown camouflage areas were masked again with Blu Tac rolls. The root of the left wing required a harder edge so it was masked with masking tape. Brown areas were painted with XF-10 which I found just perfect for the base colour. The base colour was lightened by mixing 50/50 base colour and Desert Yellow. This mixture was thinned heavily
with 90% thinner and all panel centres were then highlighted with this mixture. The brown colour required more lightening so I thinned Desert yellow with 90% thinner and airbrushed some panels even more. After masks were removed, I made one more round and lightened some green and brown panels until the faded and aged look was to my liking. Painting was completed with shading. I made mixtures of XF-10 75% and XF-1 25% and thinned it heavily. With this mixture, I painted panel borders and seams, some areas were painted freehand but mainly I used tape or paper masks. This step made paintwork lively and really gave a lot of interest and depth.
AIR 59 April-May 2015_AFV/26 Jan/Feb 06 10/03/2015 14:52 Page 31
The canopy frames were masked and then painted with a light brown colour mixture. The anti-slip coating on the wing roots was made by painting with matt Nato Black masked with Tamiya masking tape. I used high pressure & dilution to get some structure and shading, avoiding an unrealistic flat colour. The Nato black base colour areas were lightened with XF-24 concentrating in middle of the black painted areas. The fuel tank area at the roof was chipped now using warm water and stiff bristled brushes, the top coat lifts in random patches from the coating of hairspray. Once dry the whole model was airbrushed with satin varnish ready for decals.
Detail painting was done both with airbrush and paintbrush. Navigation lights were first painted with Citadel’s ‘Bolt Gun’ silver and then colorised with Tamiya clear paints. White RWR antennas were painted with an off white tone. ‘Ylli’ has low-visibility markings and because there aren’t any available for the Finnish Mig-21 Bis, they need to be made.
My friend Ville helped me out and produced the markings. These markings consist of finnish blue-white cockades on six positions and registration numbers. The lynx emblem earlier had a white cloud background but the white was overpainted when new low-vis markings were applied, at the same time the lynx lost his eye! I used Eduard’s lynx and cut the white cloud
away. Decals were applied with the help of Tamiya decal solution. The day-glo orange “Ylli” text was made up from parts of a Midnight hawk decal sheet.
31
AIR 59 April-May 2015_AFV/26 Jan/Feb 06 10/03/2015 14:52 Page 32
extreme weather
Some controlled paint chipping was still needed. This was done traditionally with #000 paintbrush by tapping motion. The detail painting was sealed with overall layer of satin varnish to prepare model for weathering stages.
The fibreglass nose cover is from modified kit part D80. I shortened and sanded it to cone and then glued it onto plastic disc. The part was next covered with Mr Surfacer 500 with a tapping motion giving some rough fibreglass texture to it. Locking handles are made of copper wire. The cover was painted brown with a couple of hairspray layers followed by dirty brown and
The upper side cockades and nick-name text are very sunburned and faded. This effect was achieved by fading blue and orange areas with Vallejo Model colour white washes. It took few attempts before results were good enough. Underside markings appear nearly new and the blue is much more brighter so no white wash was needed.
32
green acrylic paint layers. After the paint was dry, I made several scratches with the tip of some tweezers and moistened the cover with warm water and made chips with hard bristled paintbrushes. Before the cover was superglued to fuselage, I put an RK 62 7.62mm bullet inside , it works perfect as a nose weight!
AIR 59 April-May 2015_AFV/26 Jan/Feb 06 10/03/2015 14:52 Page 33
The weathering started with a dark brown general wash. I thinned Wilder Deep Shadow wash and applied it quite heavily on detail and panel lines, then let it dry for few minutes. With soft round paintbrush moistened with clean turpentine, I removed the excess. On horizontal surfaces this was done in the direction of airflow and on vertical surfaces streaked downwards.
The process was repeated with an even darker wash. When making streaks on the sides, you need to move you paintbrush up and down otherwise you will clean everything away. I repeated this process several times, until I was satisfied with the effect. To add even more dirt and interest to paintwork I used Adam Wilder’s ‘speckle’ technique. You load a stiff bristled paintbrush with heavily thinned paint and spray colour by flicking a finger over the bristles. It works nicely on dirty AFVs but it can also work on aircraft with more subtle tones. I thinned washes further flicking these thin mixtures to the model surfaces starting with Deep shadow and following with Dark rainmark wash.
There were some out-of-scale drops during these steps but they were easily removed or faded with another softer, clean turpentine moistened paintbrush. This technique gives a lot of extra interest to the paintwork and softens previous paint layers and gives a realistic appearance of dirty surfaces. You have to remember that drop size is the key, they have to be like a mist. Test the viscosity of the diluted paint before speckling it on your masterpiece’s visible surfaces! One of the final touches was to add some chipping in middle panel of the left wing. The area was masked and chipping was done with both sponge and paintbrush . This area was retreated with the speckling technique to fade it to a more natural look.
33
AIR 59 April-May 2015_AFV/26 Jan/Feb 06 10/03/2015 14:52 Page 34
All I needed now was to make some detail touches like adding oil and grease stains to the landing gear struts and adding final parts like the pitot tube and canopy in their places. My first aircraft model was done! I’m happy with results but there are still some issues! Anyway, I enjoyed the project, it was nice to do something different to AFVs, even if I used techniques I’m familiar with and which maybe are not so well used among aircraft modellers. Maybe someday I’ll build another one, until then, happy aircraft modelling!
34
AIR 59 April-May 2015_AFV/26 Jan/Feb 06 10/03/2015 14:52 Page 35
35
AIR 59 April-May 2015_AFV/26 Jan/Feb 06 10/03/2015 14:48 Page 36
As the project nears the end now I moved on to some of the more fun weathering aspects of the project, with the distinctive wing stains and the weathered finish for the exhaust system and at last Little Miss Mischief had her undercarriage installed.
I could not find any accurate decals for the fuel filler markings or the walkway markings so I drew my own markings on my computer and printed them onto decal paper. I tested the size of the markings on paper first as seen here.
I had to cut out the individual decals to apply them but they worked well applied directly to the True Metal finish. Boeing and Vega built B-17s painted ‘Walkway’ stencils rather than the black lines along the wings.
The advantage of designing your own decals is that I was able to fade them rather than having pure black lettering the faded grey and red was less stark on the expansive wings.
Before moving on to the exhaust stains I applied a dark oil wash to the olive drab areas of the nacelles.
36
AIR 59 April-May 2015_AFV/26 Jan/Feb 06 10/03/2015 14:48 Page 37
I began work on the exhaust stains on the undersides of the wings. Working from archive photos I used a thinned mixture of Gunze H343 ‘Soot’ mixed with a little brown to start building up the stains.
Greys and browns were then worked over these to give the more opaque finish of the exhaust stains.
A common modelling error is to have exhaust stains flowing from the air vents on the wings, whereas in reality the clean air flow from these disrupts the dirty stains from the engines leaving these strips clean. I began by cutting strips of blu tack to mask these areas.
In fact once I started spraying with the same Gunze Soot mixture I found it easier to remove the masking and worked freehand. I was using an Iwata Custom Micron airbrush which allowed me to have pencil line control of the sooty stains. I gradually built up the intensity but I decided against the really filthy finish seen on some B-17s and I copied the pattern from an archive photo. Left I also dirtied the front of the nacelles under the cooling flaps and the vents running around the nacelles.
The finished stains on the left hand wing showing the clean strips behind the wing vents.
Another feature of the B-17 is the flow of the stains on the right wing which are disrupted by the propeller wash and are bent inwards towards the fuselage. I used the same techniques to replicate this working again from archive photos to get the distortion and the density of the stains correct.
37
AIR 59 April-May 2015_AFV/26 Jan/Feb 06 10/03/2015 14:48 Page 38
Time for a quick test fit of the wings with the fuselage and the kits clever interlocking system provides a good snug fit, allowing you to keep working on the wings as individual pieces which is vital given their size. Even as separate parts they are quite a handful on the bench!
Left I also applied staining to the underside of the horizontal stabilizers, the position of these means that it is only the undersides that are discoloured. Right The exhaust system incorporating the superchargers was the next job and I began by spraying them with a dark grey / brown mix.
A light dust of a sand shade was sprayed over the base colours and I then started applying washes of Lifecolor acrylics over the base and using a big brush to lift off the colour wash in certain areas to give a mottled finish. I restricted the colours to greys, browns and pinks to match pictures of the real things.
38
The washes were built up until I was happy with the look and then I added some selective dark oil washes to pick out the details and some small spots of rust on the manifolds which were blended and softened using a brush moistened with thinners. Black pigments were used to add the sooty finish around the exhaust and supercharger outlets.
AIR 59 April-May 2015_AFV/26 Jan/Feb 06 10/03/2015 14:48 Page 39
Test fitting the exhaust parts into their locations allows you to gauge the suitability of the finish.
I was really pleased with the look of these parts with the heat damaged finish contrasting with the polished finish of the surrounding areas.
I did not install the exhausts yet as I still needed to work on the nacelles with oil streaks and stains.
At this stage I was also working on the propellers, beginning by spraying the yellow tips on top of a quick base coat of white.
The tips were then masked and the rest of the propellers were sprayed with Gunze gloss black and the Kitsworld propeller decals were applied.
Just like the rest of the aircraft the propellers were a mix of colours with a polished metal and red boss as well as black. I sprayed a matt varnish and applied an oil wash to give a weathered look to the propellers.
I couldn’t resist dropping the finished blades into position on the engines to see how they looked. You can see the polished metal effect on the leading edges of the blades with was brushed on using Uschi van der Rosten polishing powders.
Disaster strikes! In handling the huge wings and despite working on a cushioned surface I managed to scuff the exhaust stains on the left wing. This will have to be repaired and blended in later.
39
AIR 59 April-May 2015_AFV/26 Jan/Feb 06 10/03/2015 14:48 Page 40
I started to add various oil streaks and stains around the nacelles using a mix of Lifecolor Tensocrom Oil and Smoke. These are semi-transparent colours and can be blended or feathered with water without harming the metal finish.
I used a broad flat brush to feather the stains from the vents on the nacelles, taking into account the airflow over the wing when doing so.
The buildup of different densities of streaking all adds to the realism of the finish.
40
In preparation for fitting the engines I applied an oil wash of ‘Engine Oil’ (if that makes sense) to the radial engines and finally glued the cowlings in place. Just as with the nacelles I added some dirty streaks and stains to the cowlings too.
Oil streaks can be built up with several layers if required and I also mixed in some regular Lifecolor paint to increase the opacity or colour tone where required.
The same colours were used to outline the details on the nacelles and to add streaks and stains around features like the teardrop-shaped fuel tank sump fairings.
The same effects can be seen on the upper surfaces of the nacelles and the effect of the airflow can be seen here.
The engines and cowlings were finally glued into place - I was glad to have numbered each of them to avoid any mix ups between the almost identical parts.
AIR 59 April-May 2015_AFV/26 Jan/Feb 06 10/03/2015 14:48 Page 41
Even at this late stage in the project I found myself adding some missing details, in this case the three identification lights situated under the fuselage behind the ball turret. They are mounted offset from the centreline and I marked their position in pencil before drilling some 3mm diameter holes. I was careful to avoid
drilling right through the fuselage so that debris would not fall inside. I used a punch and die to make 3mm discs from 10 thou plastic which were glued in place, and slightly recessed in the fuselage.
I painted the discs with an aluminium colour before adding transparent orange, green and red over this for this finished effect.
Time at last to fit the undercarriage which was of course all pre-painted and simply needed to be fitted. I had to adjust the massive peg of the undercarriage main wheel strut as it was a very snug fit, but thats what you want to support this enormous model.
The wheels were glued in place and allowed to dry with the aircraft sitting in position to ensure that the flat spots on the tires were correctly positioned.
Once the wheels were fixed I was able to connect the brake cables from the leg to the wheel hub.
41
The Project continues in the next Issue
AIR 59 April-May 2015_AFV/26 Jan/Feb 06 10/03/2015 17:03 Page 42
AIR 59 April-May 2015_AFV/26 Jan/Feb 06 10/03/2015 17:03 Page 43
AIR 59 April-May 2015_AFV/26 Jan/Feb 06 11/03/2015 10:41 Page 44
new releases WMF 48026
WMF 48028
WMF 48029 WMF 48022
Wingman
WMF 32006
New releases from Germany's Wingman Models 'Fix It' range of resin and photoetch detail and conversion sets. Starting with 1:48 WMF 48026 is a set of wheels for the Fouga Magister, WMF 48028 is a big set to tool-up an Israeli project with Kfir and Nesher air to ground arms with bombs, racks and pylons and the same six 500lb. Mk.82 bombs in set WMF 48029. WMF 48022 is a set of four beautifully detailed Cluster Bomb Units, decals are included as common with the other sets as are detailed instructions. In 1:32 the same design of Cluster Bomb Unit is offered as a pair in WMF 32006 and a tasty conversion for the big Tamiya F-4E providing the slatted wing sections and actuators for later versions of the F/G Phantom II. Casting and detail is first rate in the range with good reference and clear instructions. www.wingmanmodels.com
AMMO of Mig Some new sets from AMMO grouping popular subjects in sets of four commonly used airframe colours in 17ml plastic bottles with internal agitator ball to aid mixing. Thin for airbrushing or brush straight from the container, acrylic colours have now gained a massive following. 7201 is U.S. Navy Colours (or lack of colour with four shades of grey!) and more greys with 7202 to suit U.S.A.F. aircraft of the modern era. 7203 is four 'UK' colours to suit British subjects from 1950s to present and 7204 for the Russian MiGs and SU aircraft. A great rage of acrylic colours and weathering products specific to aircraft are over at www.migjimenez.com. 44
AIR 59 April-May 2015_AFV/26 Jan/Feb 06 11/03/2015 10:41 Page 45
Wingman 1:48 Israeli Air Force KFIR TC2 Trainer Another addition to Wingman's 'Superkit ' series, and super they indeed are with the basic sprues provided by Kinetic and a huge amount of resin upgrade and conversion parts offering superb detail, turned metal parts by 'Master', pre-cut canopy masks and a huge decal sheet by Cartograf; what's not to like about these combination kits? The Mirage based conversion gets a whole new 2 seat cockpit section (complete with Mk10 ejector seats and instrument facias), front wheel well, pronounced nose, exhaust, supersonic wing tanks, LAU-7 missile rails…basically everything you'll need straight from the one box. Kenetic's kit still looks nice
and will require some major surgery and competent modelling to let the resin into place, excellent instructions are included with clear drawings and detailed text for every step of the build. A nice touch is the inclusion of a spare vac-formed clear canopy to compensate for any frustrating mishaps (we've all been there…) The decal sheet covers every Israeli Squadron that operated the aircraft until the early '90s, a fitting finishing touch to an excellent production from Wingman, www.wingmanmodels.com has plenty to tempt the serious modeller!
45
AIR 59 April-May 2015_AFV/26 Jan/Feb 06 11/03/2015 10:54 Page 46
KA Models 1:48 Messerschmitt Bf 109 G-6 & G-10 Renowned for their upgrades and accessories, Korea's KA Models have brought to market a couple of 1:48 full kits in the form of the ever popular Bf 109. Although these two kits are considered new they are in fact the Fujimi offerings from the 1990s which carry a decent reputation. Kit 001 is a G-6 specifically ' Red Tulip' from 1943 and kit 002 is the G-10 'Rita' from '44, both kits do also include an alternative set of markings. The tooling may have been refreshed as moulding is very clean throughout, these kits always
The Second World War in the Air in Photographs Louis Archard Published by Amberley Publishing Softback, 128 pages each volume www.amberley-books.com
46
This series started a few months back and continues to release chronologically the story of WWII air warfare illustrated by period photographs. A really interesting selection of images have been chosen and are complete with captions providing a good generic overview month-by-month as the war unfolds throughout the World. Of particular note are the colour image sections (around thirty in each volume) some are familiar but others new to us. Many of the photographs show the devastation caused by aircraft on the ground with propaganda images of the time. Very little in the way of modelling reference but a good collection of historical images.
look to be very simple builds with good detail, maybe not as crisp as perhaps Zvezda's 109s in this scale but nice nevertheless. A small etched fret and turned brass antennae are nice additions and the attractive presentation with low cost should make these popular additions to the project pile. A good solid base kit for the wealth of aftermarket parts available for the original Fujimi release. www.ka-models.com
AIR 59 April-May 2015_AFV/26 Jan/Feb 06 11/03/2015 10:54 Page 47
MA 32010
MA 24001
MA 32009
MK1 Design Upgrade Sets Mk1 Design are a range of upgrade sets from KA Models with a few new releases to tempt you. These sets are really comprehensive and beautifully presented featuring photo etched frets (including pre-coloured instrument panels) turned brass parts, white metal parts and resin upgrade parts. In 1:32 MA32009 is for Hasegawa's P-47 and MA-32010 for another popular
U.S. subject, Tamiya's Corsair. If you were tempted by our recent feature on Airfix's giant 1:24 Typhoon, what about this fantastic set featuring turned brass rockets, individual ammo, gun barrels and, unusually, white metal propeller blades amongst all of the photoetch and resin. Very high quality upgrades, check out www.ka-models.com
The Israeli Airforce in the Yom Kippur WarFact and Figures Ra'anan Weiss Published by IsraDecal Publications / Wingman Models Softback 192 pages ISBN 9783935 687997 www.wingmanmodels.com A seven year labour of love has certainly payed off for the author here with this incredibly detailed study of the War that is a major part of Israel's history. A day-by-day study of every major operation including tables of aircraft involved, time and squadron along with losses and the fate of the crews involved. Hundreds of photographs are very specific to the actual aircraft involved that day. To allow the amount of images most shots are small format but enough to provide modelling reference as the quality of all are
very good with the bonus of some nice colour images and dozens of colour profiles. Each image has an in-depth caption allowing modellers to date and place a specific project aircraft should they wish. This in-depth study is a must to any enthusiast of the IAF, not just a selection of images but an insight to every squadron's action backed with tables, lists and maps offering a comprehensive knowledge very nicely presented. Highly recommended.
47
AIR 59 April-May 2015_AFV/26 Jan/Feb 06 11/03/2015 11:07 Page 48
Italeri 1:48 Harvard Mk.IIa A re-box of the pretty T-6 Texan (French companies Ocidental and Heller originally releasing this kit if we're not mistaken) with a fantastic selection of finishing options. The kit itself stands up well against more modern tooling with some very decent detail throughout and little clean-up before the simple assembly. Nice touches are the detail on the R-1340 Wasp radial and a plug-in cockpit area featuring sidewall frame and control detail. The multipart large canopy lends itself well to adding some detail to the
cockpit which will be easily viewed on the finished model. The beautiful large Cartograf decal sheet is the star of the show offering six schemes from six different countries with RAF and RCAF in their striking signal yellow with more attractive colourful finishes for Italian, Swedish, Belgian and Dutch aircraft. Even if you already have this kit to build from it's earlier releases it's worth picking up this boxing for the decals alone.
On The Wings Of History, The Vintage Aviator Collection, Revised Second Edition Allan Udy and Alex Mitchel Published by The Historical Aviation Film Unit Softback A5 format, 193 pages ISBN 9780473 255916 www.aviationfilm.com www.thevintageaviator.com
48
It's no secret we're massive Wingnut Wings fans (those who aren't, please leave the room…) and many Great War flying fans will be aware of the Kiwi connections between WnW and the restoration / manufacture of the machines by The Vintage Aviator. It's staggering to see the work that goes into these aircraft, to see them live in flight must be really something else, but if you have to settle for second best, video footage and photography against a backdrop of the stunning New Zealand landscape is certainly something to savour! The book
covers all of the present aircraft from the collection in their latest colour schemes, the majority of which are available as Wingnut kits. Along with some stunning in-flight images and static displays there's some great information and close-up details along with some very attractive colour schemes to help you make your mind up for the finish on that next project.This little book is really packed to the gills with beautiful images and information, my only gripe? if only it was in a larger format, highly recommended nevertheless.
AIR 59 April-May 2015_AFV/26 Jan/Feb 06 11/03/2015 11:07 Page 49
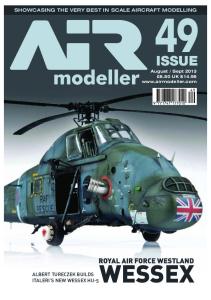
Italeri 1:48 Wessex HAS.1 It seemed an obvious move for Italeri to release the HAS.1 version of their well received Wessex. We first took a look at this kit in it's HU-5 guise back in issue 49 and it's been nice to see plenty built around the shows and on-line since, it's certainly a great looking model in 1:48. The immediate differences are of course present on the HAS.1, mainly around the nose and exhausts (be prepared for a little sanding and filling around the nose sections, no big deal). We're reminded what a great out-of-the-box build this is,
really nice detail and a simple construction, a great kit if rotor aircraft isn't your usual thing and you fancy a change. A photo etched fret provides a worthwhile lift in finesse with instrument facia, seat belts and various grilles and you could really go to town on the cabin interior and cockpit. Decals cover four RAF versions with schemes as diverse as dayglo orange and Navy blue to a sand and green camo from HMS Bulwark, Borneo 1962. Another welcome version which is sure to be popular, very nice kit indeed.
Italeri 1:72 MC.202 Folgore A straight-forward re-release here from Italeri, nothing new and exciting to report except this is still a very nice kit of this beautiful Maachi fighter, certainly designed with Italian flair but unfortunately more FIAT than Ferrarri in combat performance. As one would expect from a fighter in 1:72 there’s very few parts involved and assembly out of the box is a simple affair, what parts there are have been well tooled and moulded by Italeri although there are some very slight sink marks which may or may not show post-
paint. Surface detail is nice and fine providing a worthy basis for some extra detail work or aftermarket parts. If your eyes are still up to the task there’s the stylish Italian camo patterns to tackle; a real challenge to get right in this scale. Two marking options are offered (85a and 356a Squadriglia) the decals being nicely printed. Our thanks to The Hobby Company for keeping us up to date with Italeri’s new kits to the market.
49
AIR 59 April-May 2015_AFV/26 Jan/Feb 06 11/03/2015 11:48 Page 50
Blackburn Buccaneer Willy Peeters, Glen Sands and Andreas Klein Published by Double Ugly / Wingman Models Softback 65 pages, English and German text ISBN 9783935 687317 www.wingmanmodels.com
If you've been inspired by our beautiful Buccaneer feature this new release is in good time, and what a cracker it is! Branded as 'Fox Two Modelers' Essentials' this is an out-and-out modelling reference with the majority of the pages providing detailed walkaround photographs of exactly what you'd want to see with unprecedented access to two aircraft preserved in a 'fast taxi'
condition by the Buccaneer Aviation Group of volunteers. Along with the reference detail there is a gallery of images of the aircraft in service and some historical background. The quality of the photography throughout is excellent, this is one of the best presented books of it's type we've seen in a while, all we need now is a new kit in 1:32! Highly recommended.
Kawasaki KI-61 Hien / KI-100 Leszek A. Wieliczko Published by Kagero Softback, 116 pages ISBN 9788364596 155 www.casematepublishing.co.uk
50
Kagero's Monograph series presents modeller's with excellent reference, this is number 58 and there's more of the same on offer for fans of the radial and piston engined Kawasaki. A welcome addition are two pull-out A2 sheets of very comprehensive plans of both aircraft in 1:32 with superb detail. The book takes the reader through design and development, the operational history, colours and markings and data tables of production all illustrated with period photographs. Most of the
black and white photography is of 'full' aircraft although there is a handful of close-ups providing visual reference for detailing. A full selection of plans in 1:72 and 1:48 details production changes and a grande finale are the eight pages of colour profiles which Kagero produce just some of the best illustrations in the business. Another one-stop affordable reference, those large format plans and the quality of the profiles make this a must for Japanese fighter fans.
AIR 59 April-May 2015_AFV/26 Jan/Feb 06 11/03/2015 11:48 Page 51
14418 24009
72102
32093 48279
48280 Scale Aircraft Conversions New releases from SAC starting small in 1:144 is set 14418 for the Great Wall Victor, in 1:72 is 72102 designed for the Special Hobby Vautour. Two sets in 1:48, 48279 for Hasegawa’s P-40 and 48280 for Trumpeter’s Westland Whirlwind with improved main gear detail. In 1:32 32093 is designed for Kitty Hawk’s OV-10 Bronco and in
1:24 Airfix’s huge Hurricane gets a sturdy set of legs with set 24009 The parts are all cast in soft white metal allowing fine positional tuning and detail is enhanced and corrected where neccessary. www.scaleaircraftconversions.com has details of the enormous range. www.scaleaircraftconversions.com
Revell 1:72 MiG-21 F-13 Fishbed C Another outing for the beautiful little Fishbed C from Revell, a simple but superbly detailed kit which makes a great small-scale ‘out of the box’ build. Rivet detail in seventy-second is a tall order indeed but Revell are at their best here with as good an attempt as any manufacturer could make, add this to the fine panel lines and we’ve top marks for surface detail. The build starts with the multi-part ejector seat and well detailed cockpit with some nice inserts for the wheel wells. Exhaust petals could benefit by some thinning or aftermarket resin. Lots of fuselage detail and some
excellent landing gear has some demanding small components but the pay-off of course is some great finesse. A good choice of ordnance and belly tank make for a busy underside, again, rich in detail. More detail with the small decal sheet offering two options, USSR Air Defence Garde Rgt. 1961 and the aircraft flown by Germany’s first cosmonaut Sigmund Jähn. Great kit, even better value. Revell model kits are available from all good toy and model retailers. For details visit www.revell.de/en
51
AIR 59 April-May 2015_AFV/26 Jan/Feb 06 11/03/2015 12:00 Page 52
Polish Wings 18 Bartlomiej Belcarz Published by Stratus /Mushroom Model Publications Softback, 72 pages ISBN 978836 3678142 www.mmpbooks.biz The Polish Wings continue with number 18 focussing on betweenthe-wars French aircraft Breguet 19 and Farman F68 Goliath. As usual we're presented with plenty of previously unpublished photographs of the subjects with high quality colour profile illustrations along-side with detailed captions and excellent research. There's some inspirational geometric schemes shown on the Breguet which would make beautiful models but may try your
patience with the masking tape (especially in 1:72!) The Breguet is the main focus of the book with around fifty pages of history, period images and profiles (including the epic Warsaw-Tokyo flight) while the Goliath takes up around fifteen pages. The Amiot 123 also gets a look-in with some Atlantic record attempts by the Poles in a very fetching blue on white livery. If you're collecting this series this is an obvious must-have, excellent value from MMP.
Crickets against Rats: Regia Aeronautica in the Spanish Civil War 1936-1937 vol. I Marek Sobski Published by Kagero Softback, 78 pages ISBN 97883 64596162 www.casematepublishing.co.uk
52
Number 22 in Kagero's Air Battles tells the tale of the involvement of El Duce's Regia Aeronautica in the Spanish Civil War up to 1937 (presuming the next volume deals with the remainder of the conflict). Admittedly a subject I know nothing about, this is a very easily accessed history clearly explaining the main actions and the aircraft involved with some great period images, many from private family archives and presumably unseen. Kagero are
masters of colour profiles and any fans of the Italian CR.32 are in for a treat with five pages of illustrations of the famous FIAT fighter in some beautiful schemes. Another nicely presented affordable historical read from Kagero which doesn't go too deep politically and become confusing to a novice on the subject. Our thanks to Casemate for our Kagero samples www.casematepublishing.co.uk
AIR 59 April-May 2015_AFV/26 Jan/Feb 06 11/03/2015 12:00 Page 53
Wings over Ogaden: The Ethiopian-Somali War 1978-79 Tom Cooper Published by Helion and Co. / 30 degrees South Softback, 64 pages ISBN 9781909 982383 This series can undoubtedly be considered niche, this is number 18 of the 'Africa at War' releases which has a leaning to the war in the air. The story unfolds of Somalia's switch from Soviet support to approaching the U.S. and Ethiopia's subsequent supply of arms from the USSR. Ethiopia successfully deployed it's new F-5Es against MiG-17 and MiG-21s almost destroying the Somalian Air Force in the short conflict. From a modelling perspective there's some great schemes on offer (mainly F-5Es and the MiGs)
illustrated with quality colour profiles and some excellent colour photographs of the period offering us some tasty options from the normal. We don't recall any aftermarket decals to suit (although we could be wrong!) but the markings don't look out of the question for some home made water-slides, if you want to get really obscure how about a Canberra in Ethiopian colours? This series is certainly worth tracking down if you have a thirst for knowledge of post-war African conflicts. Nicely presented with good quality production.
Revell 1:72 UH-60A The tried and tested transport workhorse ‘Blackhawk’ has been around in 1:72 for some time now jumping from Italeri to Revell boxes along the way but essentially the same base kit. This reboxing has a new decal sheet but the rest of the kit stays the same, the two grey sprues offering a simple enough build with relatively clean moulding. Detail and finesse is decent if not startling, a full cabin and cockpit look like they’d respond well to some careful painting and are built as a full sub-assembly to sit
within the fuselage halves, poseable cargo doors allowing all to be viewed on the finished model. Across the airframe the panel lines are moulded in relief, not something we’d expect from a modern tooling but that said, they are very fine. Options of rocket or MG armed aircraft are offered and the decals are of a Desert Storm Blackhawk or the 10th Mountain Division in Iraq, 2008. Revell model kits are available from all good toy and model retailers. For details visit www.revell.de/en 53
AIR 59 April-May 2015_AFV/26 Jan/Feb 06 11/03/2015 12:27 Page 54
Revell 1:32 Arado Ar196 B Revell bring us the ventral float initial test version of the Ar196, their excellent mainstream twin-float Arado seems to have been a big hit with large scale Luftwaffe modellers looking around the model shows in recent years, and rightly so! Much of the kit remains as per the A3 but we have new sprues for the large float and wing mounted floats, optional twin-bladed propellor and smaller details. Revell should be commended for the inclusion of a large circular base to stand the finished model. As the original aircraft, an (almost) complete tubular frame is constructed around the cockpit to be sandwiched between the fuselage halves providing very detailed and visible internals. Also highly visible is the detailed nine cylinder BMW aircooled radial engine which can be shown off a treat with separate cowling parts.
More showing off if you fancy displaying the wings folded, the instructions including call-outs for rigging wire in places which will really add to the finished piece. Talking of instructions, Revell have stepped up to a better quality paper here which helps with the clarity of the busy drawings. The new floats show some lovely fine surface detail which should look great with the bare metal finish required. Finishes are limited on these early test aircraft, Revell offer one set of markings and solid light olive upper surfaces. This is another superb Arado, our only niggle being our sample having some moulding flash here and there to remove; something easily overlooked considering the incredible value for money. Revell model kits are available from all good toy and model retailers. For details visit www.revell.de/en
Messerschmitt Bf 109 Jean-Claude Mermet & Christian-Jacques Ehrengardt Published by Caraktere Softback format, 191 pages, French text ISBN 9782916403069 www.caraktere.com French military publisher Caraktere release books and magazines at quite a pace with some now being available translated into English. Not the case here with this new release on the ‘109 which is in French throughout, just put that to one side though if you don’t have a grip on the French language, this is a visual feast for Luftwaffe enthusiasts taking us through the development and service of this most famous of fighters. Many of the period images are fresh to us, and there’s some superb photographs including o in original colour. Spread around the story are some original factory 54
diagrams and contemporary plans showing plumbing and wiring and the various production changes through to the last ‘specials’. Dozens of high quality colour profiles are used throughout with a good selection of schemes, some familiar and some more unusual. Tables of production and technical specifications make this a very fresh and comprehensive look at the ‘109 with one of the best collections of period images we’ve seen in some time, highly recommended even for the images alone which provide some excellent reference.
AIR 59 April-May 2015_AFV/26 Jan/Feb 06 11/03/2015 12:27 Page 55
French Aviation During the First World War Vital Ferry Published by Histoire et Collections Softback, 192 pages ISBN 9782352503 70 5 www.casematepublishing.co.uk The rapid rise of France's Air Force during the Great War is told in this heavily illustrated release from H&C from it's infancy with a few dozen aircraft to a force of 50,000 aircraft in the four year period. The content covers the French engaged in fighting over the continental homeland only. As usual from H&C, the book is very nicely presented and the very readable text is dispersed amongst the wealth of images. Along with period black and white
photography there's advertising and propaganda illustrations in full colour. The French aircraft that served throughout the conflict have their own detailed sections along with some typically flamboyant colour schemes shown as colour profile illustrations. Specific notable pilots and actions are included along with some excellent images, this is a real honey pot of a book for any French or WWI enthusiast, recommended reading and great modelling inspiration.
Revell 1:72 Victor K Mk.2 Dating back to the early eighties, this tooling originally produced kits of the Handley Page Victor under the Matchbox brand and this is one of those kits that certainly shows it’s age. Detail is clumsy and the raised panel lines will have many serious builders looking at a full smoothing and re-scribe of the airframe, not out of the question as this is still a very large model even in seventy-second. The Victor is undoubtedly a great looking aircraft and must have
been an incredible sight in the 1950s but to bring this kit up to contemporary standards be prepared for some extra work. What is up to modern standards are the decals, a fully detailed set of generic stencils and two options of RAF Victors, one being a 1991 Desert Storm aircraft of No.55 Squadron. Revell model kits are available from all good toy and model retailers. For details visit www.revell.de/en
55
AIR 59 April-May 2015_AFV/26 Jan/Feb 06 11/03/2015 13:57 Page 56
Wingnut Wings 1:32 AEG G.IV Late
56
It has been no secret that the impressive AEG G.IV bomber has been on the Wingnut Wings release schedule and now at last it has arrived. Available in a choice of Early or Late versions it is the Late version that we will examine. The substantial box is stuffed with sprues and five huge decal sheets along with the usual photoetched fret and the informative full colour instruction booklet. Moulding quality on this particular kit is especially impressive as it features some very finely moulded framework sections for the structure of the engine nacelles and the cockpit sidewalls. I also noticed that the external bomb racks are now moulded with the correct open lattice structure, something that was a solid moulding on the Gotha kit and its great to see these improvements being made! It comes as no surprise to see the exquisitely detailed cockpit and interior for the fuselage with bomb racks, radio equipment and MG ammunition racks all replicated. The big cushioned Pilot’s seat is a stunning piece of moulding and the kit comes with photoetched seatbelts to finish it off along with the chain-operated control column mechanism. Once it is completed the interior is designed to drop into the fuselage halves. As with all the Wingnut kits the pair engines is fully detailed and you have the choice to model them with or without
cowlings to show off this detail and many of the AEGs seem to have operated without cowls. The undercarriage offers a choice of flattened weighted wheels or fully round versions with both having the tire manufacturers name and designation moulded around the sidewalls. There is also a choice of bomb loads provided for the external bomb racks. For the size of aircraft the rigging is relatively simple and the instructions provide a clear guide to adding this although you will have to supply your own rigging line. The generous decal sheets provide a choice of five different schemes, all resplendent in the dark night lozenge camouflage. Four of the decal sheets are devoted to the assorted panels of lozenge that are required to cover the whole model - a bit of a test of everyone’s decalling skills I would think or of course you could paint them yourself. Surely this is another of those models that you cannot quite believe has been released and at this scale which is so ideally suited to these WW1 subjects. Wingnut Wings always manage to impress and to do it so much better than anyone else and this new kit is if anything their most impressive release to date. This kit and the entire range can be ordered direct from www.wingnutwings.com
AIR 59 April-May 2015_AFV/26 Jan/Feb 06 11/03/2015 12:29 Page 57
AIR 59 April-May 2015_AFV/26 Jan/Feb 06 10/03/2015 17:01 Page 58
58
AIR 59 April-May 2015_AFV/26 Jan/Feb 06 10/03/2015 17:01 Page 59
big-buck
1:72
Andrea Vignocchi describes the painting and display of his beautiful super-detailed Buccaneer.
59
AIR 59 April-May 2015_AFV/26 Jan/Feb 06 10/03/2015 17:01 Page 60
Paint Preparation
After masking the previously painted parts described in part one, I airbrushed some Alclad grey primer, my primer of choice. The primer was then treated with polishing cloths in order to obtain a smooth uniform surface. The metallic areas were painted with Alclad White Aluminum and subsequently masked. Using diluted black, I made a very precise preshading.
Camo Colours Now it’s time to paint the camouflage. Gunze produces the two original colours (green H330 and grey H331), but I don’t think they are very accurate, since the grey has a violet hue and the green almost looks like Olive Drab. After looking at some pictures of 16th Sqn machines, I decided to create my own grey with this mixture: 200 drops of grey H331, 80 drops of H67 (German RLM 65) and 20 drops of blue H322. In this way, I eliminated the violet hue and gave a cold and bluish tint to the
grey. Part of the mixture was then lightened with white and another part was darkened with matt black and used to enhance and shade panel lines. Finding the right tone for the green was much easier; I used H309 (equivalent to F.S. 34079) and part of it was lightened with white and darkened with black to make the mixtures that will be used for pre and post shading. I started by airbrushing the grey in light layers, allowing the preshading to show
In addition to my trusty Badger 100, I use an Iwata Custom Micron CM-B, a really extraordinary airbrush that, with due practice, will allow the modeller to literally ‘write’ with it! I wanted to make a camouflage with some barely noticeable soft edges, so I just had to follow the pencil lines, then fill up the empty spaces with green. The painting process was completed with some touch ups on the grey and some shading on the green, even in this case my Iwata CM-B proved to be a perfect tool. The final resulting effect is very convincing with soft blends between the two hues with a scale appearance.
60
through. After a day drying, I lightened the centre of the panels with the mixture I had previously prepared, making sure to heavily dilute the paint and spray it at low pressure in order not to create some evident ‘mottle’ on the panels. My airplane had the nose cone painted with a lighter grey. After enhancing some panel lines in an irregular way, I drew the camouflage contour with a soft pencil, in order not to damage the underlying paint.
AIR 59 April-May 2015_AFV/26 Jan/Feb 06 10/03/2015 17:01 Page 61
Markings and Decals
The model was coated with Aeromaster (now Polly Scale) gloss transparent airbrushed in light layers until I obtained a semi-matt finish. The reason for this is that I didn’t want to give the model too many layers of matt transparent that would cancel most of the shading I applied previously.
The Buccaneer was covered with red and yellow walkways which were painted on the model. After masking the area, I airbrushed white, then the yellow and the red. When I removed the mask, I realized I’d made a mistake since the walkways came up to be too bright, maybe if I hadn’t used a white base the poor covering power
of the red and yellow would have given me the faded effect I was after? Anyway, I painted many washes of dark grey oil colour over the walkways until I got the colours I was looking for with a more realistic muted finish.
For the markings I decided to use an Extradecal sheet relating to post-war British numbers and codes with all the excess carrier film carefully removed. Squadron badges came from the CMR resin kit, while the roundels came from the Extradecal sheet. While the Extradecal sheet is great quality, the same cannot be said of the CMR decals: even though they are perfectly printed, they are totally unaffected by decal setting solutions; luckily, I used only the squadron badges, limiting the problem to the minimum. The brightness of each roundel was toned down by applying some dark grey oil colour on the roundel itself and by removing it after letting it dry for a few minutes. Different strengths of washes bring out the detail of panel lines, diluted oil colours were used throughout the process.
61
AIR 59 April-May 2015_AFV/26 Jan/Feb 06 10/03/2015 17:01 Page 62
Weathering
62
One of the peculiarities of the Buccaneer was the blown wing, adopted in order to lower the approach speed during carrier landings, a series of small nozzles delivered a stream of compressed air onto the wing, leaving a trace of dirt with a curved direction…how could I reproduce such feature? I initially thought about using the airbrush, but the high number of traces would make it very difficult to ensure they would be perfectly parallel, so I decided to
draw an initial trace with a drybrushed oil colour, then, with my finger, I rubbed the paint following the air stream direction. The gloss surface made the operation fairly easy and if I wasn’t satisfied with the result, I just had to clean up with a cloth moistened with turpentine and start all over again.
Most of the time, when the matt varnish is airbrushed on the model, the shading previously made will be partially hidden or will totally disappear, the only choice is to work back over the shading with the usual heavily diluted colours. The extremely thin jet of the Iwata airbrush allowed me to work even between the decals. In order to better evaluate the final contrasts of the model, I removed the masking which allowed me to complete the shading work in a more balanced way. Looking at pictures of the real plane, I
noticed many scratches around the maintenance panels that were replicated on the model with a mixture made with Humbrol 56 Aluminum and Humbrol 127 Light Grey. This mixture allows me to paint scratches that are not too bright, since they should be barely noticeable on the matt finish and limited to the maintenance areas. The weathering was completed with some oil streaks on the engine’s upper doors, made with drybrushed oil colours. Allow me to share my thoughts on weathering: in order to obtain a nice and balanced effect, the weathering of a model should be lighter than the weathering of the real machine. Since the model is a scale replica, the light hitting it will behave
model and, also in this case, I used the Polly Scale acrylic matt transparent (which I consider it to be one of the best) and I applied it by mean of some very diluted and light layers. Since I didn’t want to give the model a very matt finish, I just had to add some drops of gloss transparent in order to obtain a semi-matt surface, similar to that of the real aircraft.
With the painting process complete it’s time to airbrush some matt varnish on the
differently compared to what it does on the real aircraft, so, for example, a big oil streak like the one we can see on a real plane, will appear oversized and out of place if we perfectly replicate it on the model; it’s a complex matter where the personal taste of the modeler plays a key role. I think the weathering should be a series of delicate steps, starting with some variation of the base color mainly due to the sunlight exposure add to this oil washes that simulate the dirty and lightly oiled look of the real parts and finishing it off with scratches and replaced parts of slightly different colors; in a word, there are many ways to weather a model, but the overall balance is essential in order to achieve a realistic result.
AIR 59 April-May 2015_AFV/26 Jan/Feb 06 10/03/2015 17:01 Page 63
Final Fitting
With the weathering complete, it’s time to attach the previously painted parts. I started with the undercarriage and in order to protect the upper part of the model during the installation of the weapons and the lower doors, I put the model on a cardboard jig. I then glued the pylons, the ECM pod, the laser designator, the undercarriage and the engine’s doors. The probe under the right wing has an awful fit and I solved the problem by applying some diluted white glue around its base, in this way, I didn’t have to sand on the painted surface and I just had to apply some touches with the base paint. Even though I had the CMR canopy, I decided to use the Airfix part since the windscreen had a better fit and the canopy sported a more correct shape. In addition to that, one
should consider that a modern jet canopy is definitely thicker than a WWII plane’s canopy, so the vacformed parts sometimes look too thin and out of scale. The canopy was carefully polished then I glued (with some difficulty…) the explosive chord on the inside, using Future applied with a very fine brush; after masking, the canopy was initially painted in black, then I applied the camouflage colours, followed by decal application and some light layers of matt varnish. I then glued the engine doors and the inflight refueling probe, most of the time the probe was missing on the Buccaneers deployed in Germany because the short range mission they flew didn’t require refueling, but reference pictures showed
me it was present on my plane. The many antennas on the model were glued with cyano; some of them came from an Eduard photoetch set, while the others were made with 0.13mm plasticard, paying close attention to the pictures, since the antennas arrangement varied greatly within the many versions. Finally, I reached the end of the assembly process and I was very satisfied with the result having been able to give the model the sulky and powerful look of the real machine; the grey/green wraparound camouflage contributed to the final look of the model and enhanced the open engine bay.
63
AIR 59 April-May 2015_AFV/26 Jan/Feb 06 10/03/2015 17:01 Page 64
Diorama The main problem of aeronautical dioramas is their repetitiveness, as a matter of fact, a plane can only be displayed on the apron, in an hangar or in flight (unless the modeller wants to represent a wreck). For this reason, I made the usual portion of apron with plasticard, with the panel lines engraved with the Tamiya engraving tool. Using a wide brush moistened with nitro thinner, I brushed the base thus recreating the coarse texture of the tarmac. In order to represent the scene I had in mind, I needed an engine starting unit, but unfortunately there’s no such item on the
Now it was time to paint the small details. The exhaust area remains visible enough inside the unit and the instrument panel is carefully painted according to reference pictures. The instruction plates were made from old USAF stencils, the yellow bars and a light weathering completed the painting phase of the starter. The other details were painted and put aside, waiting for the final assembly of the scene. I decided to make a drainage grid and in this case I made
64
market, so I had to scratchbuild it. After finding some good pictures on the ‘net, I started the job using, as a base, the chassis and the wheels off an old Hasegawa USAF cart. The chassis was lengthened at its central point, calculating its final length by making a comparison between a technician standing beside the cart on a picture and a 1:72nd figure. The mesh was made with an Eduard item the inner detail was initially very visible, but the dark green colour made it disappear… unfortunately…! The starting unit was completed in different subassemblies in order to expedite the painting phase. The long cages housing
good use of the possibility to have some custom-made photoetch. The grid was painted with Agama track colour and lightly drybrushed with silver. The final result is quite realistic and creates a highlight in an otherwise empty area of the diorama. The ladder and red air intake covers perk up the corner close to the grass, which was made with the usual static grass products applied in a natural, random way.
the flexible pipes located on the side of the unit were built with 0.3mm Plastruct square profile using a picture that shows a disassembled unit. I built the exhaust area of the internal compressor and the rear sliding door, the flexible pipe was taken from the Hasegawa kit. The scene was completed with a tow bar and the wheel chocks that came from a Flightpath set. The engine intake cover came from the Eduard fret, while the ladders, the fire extinguisher and the tool box were scratchbuilt.
The tow bar and the typical RAF fire extinguisher cart add to recreating a realistic scene, after the diorama accessories (wheel chocks, starting unit etc.) were glued to the base with Citadel cyano glue, I eliminated the residual gloss traces with airbrushed matt varnish. I suggest doing it at this time, since many spots won’t be accessible with the Buccaneer fixed in place.
AIR 59 April-May 2015_AFV/26 Jan/Feb 06 10/03/2015 16:59 Page 65
Figures Thanks to my talented friend Stefano de Rensis, I obtained three figures specially designed for this scene. The limit of mainstream figures lies sometimes in the rigidness of their posture and the resultant difficulty in adjusting them to fit the scene we’re recreating; custom-made figures, on the other hand, can blend in with the scene in a much more realistic way. Some details, like the cloths sticking out of the pockets of the technician’s trousers or the slightly overweight officer with its tie flapping in the breeze, helped me creating the right atmosphere. Figures painting was carried out with Vallejo acrylics and, even though I’m not a figure painter, I’m pretty satisfied with the final result.
Final thoughts Making the Buccaneer proved to be a very challenging task; it almost took me a year and a half to complete the model, but it was worth it. I tested new techniques to build an entire engine from scratch and painted it in such a way that would allow me to correctly represent the weathering caused by the high temperatures; making such a big number of details from scratch has been a further step forward in my modeling experience and I would say that this is my best model so far, since it turned out to be just as I imagined it…and that doesn’t happen too many times…
65
AIR 59 April-May 2015_AFV/26 Jan/Feb 06 10/03/2015 16:17 Page 66