modeller £6.50 - Sept’14 (issue 041)
HK Models B-17G Flying Fortress • Kitty Hawk Eurocopter Panther • Airfix Typhoon • Italeri F-104 Pt.1 • Airfix Brisol Blenheim • and more…
military illustrated
p01 Cover 041.indd 1
9 770268 832071
Revell 1:48 Harrier GR.7/9
09
THE HARRIER BOWS OUT
aircraft edition
www.militaryillustratedmodeller.com
31/07/2014 10:13
NEW in the ‘HOW TO BUILD...’ series ORDER NOW HOW TO BUILD THE AIRFIX 1:24 HAWKER TYPHOON MK.IB The latest addition to this popular series of modelling titles offers the enthusiast plenty of inspirational modelling hints, tips and techniques to enjoy. The complete guide to building the amazing Airfix 1:24 scale Hawker Typhoon, written by Brett Green of HyperScale and Model Military fame. This new book features an exhaustive step-by-step guide to construction with modelling contributions by Brett, Marcus Nicholls and Chris Wauchop. Detailed analysis of the 1:72 Airfix Typhoon and 1:48 scale kits on the market is also included. Hundreds of construction photos, reference images, a museum walk around, and how to get the very best from your big Typhoon kit – a must have before you build the model!
Only
£12.95 plus p&p
ALSO AVAILABLE Visit adhbooks.com for details PLACE YOUR ORDER NOW ON TEL: 01525 222573 FAX: 01525 222574
✁
Airfix 1:24 Typhoon book HOW TO BUILD... TYPHOON Name ..................................................................................................................... Address................................................................................................................ ...................................................................................................................................
Please debit my credit/debit card for £ ....................................... Visa
Mastercard
Maestro
P&P: UK; £2.00 Europe; £4.00 World-Wide airmail; £6.00 Cheques payable to: ADH Publishing Ltd.
other .............................
Card No. .................................................................................................... Expiry date................................. Start date ........................................
...................................................................................................................................
Security Number (last 3 digits on signature strip) ............................
Post/zip code ...................................................................................................
Issue No (if applicable) ........................................................................... Date ............................................................................................... Please mail this form to; ADH Publishing, Doolittle Mill, Doolittle Lane, Totternhoe, Bedfordshire, LU6 1QX, United Kingdom Tel; +44(0)1525 222573 Fax; +44(0)1525 222574 Online; www.adhbooks.com (Photocopies of this form are acceptable)
Country ................................................................................................................ Telephone Number.......................................................................................
Signature .....................................................................................
www.adhbooks.comwww.adhbooks.comwww.adhbooks.com p 02 Typhoon Book 041.indd 8
01/08/2014 14:23
Contents
modeller military illustrated
ISSUE No.041 September 2014
4 6
NEWS
What’s happening in modelling and aviation
THE HARRIER BOWS OUT Revell’s 1:48 scale Harrier GR.7/9 by Spencer Pollard
18 PREVIEW
Sword 1:72 Skyknights
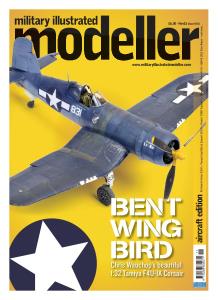
20 B-17 FLYING FORTRESS CLOSE UP Photo Reference from Zack Sex
22 ENDURANCE TEST
HK Models’ impressive 1:32 B-17G Flying Fortress by Leo Stevenson
28 EURO CHOPPER
Kitty Hawk 1:48 Eurocopter AS565 SA Panther by Kamil Feliks Sztarbala
20
40 PREVIEW
Attack Squadron 1:72 Bearcat
56
42 AIRFIX 1:24 TYPHOON EXTENDED PREVIEW by Brett Green
46 LOCKHEED’S FLYING COFFIN
Italeri 1:32 F-104G Part One by Marcus Nicholls
56 EARLY WAR BOMBER
Airfix 1:72 Brisol Blenheim by Brett Green
65 NEXT ISSUES
What’s coming up in the next issues of Military Illustrated Modeller
66 TAILPIECE
Azur FRROM 1:32 IAR-81C
28
46 Aircraft Edition
p03 Contents 041.indd 3
3
31/07/2014 15:16
News THE FIRST WORLD WAR AT IMPERIAL WAR MUSEUM DUXFORD
F
rom Saturday 26 July to Wednesday 3 September, Imperial War Museum Duxford explores the First World War, involving families in lively learning about the progress of the war and trench warfare. Find out how and why the First World War started as our costumed interpreter explains which countries were involved and who was on whose side. Using our large interactive map, we’ll be asking you to represent troops from different nationalities and actively demonstrate how far they had advanced in the conflict. From 11.30am to 3.30pm, between the Flying Aircraft and the Air and Sea exhibitions, discover what trench life was really like and how trenches changed and developed over the four years of the Great War. Explore our small replica trench; see how it would have looked at the beginning of the First World War in 1914. Moving through, you’ll see how different the trench experience was by the end of the war, in 1918. As you travel through the trench, you can handle objects that would have been used by the Tommies, including replica respirators. You’ll also be able to try on mini replica First World War uniforms, webbing and head
dresses. Look through the periscope to spy on what’s happening in No Man’s Land. A costumed interpreter, representing a First World War infantryman, will give timed talks throughout the day and will answer questions about life in the trenches. He’ll explain the European political issues that led to the outbreak of war. The display also looks at how outdated military strategies versus the development of new technology led to the emergence of trench warfare. Discover what life was like in the trenches as we find out about the daily duties undertaken by the men and how they endured the cold, the rain, the smells and the problems caused by pests such as lice and rats. Find out what the troops ate and how they entertained themselves during the long hours between battles. Also explored are the legacy of the First World War and how new military tactics and technological advancements changed warfare forever. This included the first use of aircraft for reconnaissance duties (including dropping messages directly into dug outs from the air) and aerial attack. It also included the introduction of tanks and a return to mobile warfare.
AIRFIX AT IWM DUXFORD FORTHCOMING REVELL 1:72 F4U-1 CORSAIR
Y
ou can also get creative by making and painting Airfix models of First World War aircraft in IWM Duxford’s AirSpace exhibition between 10.30am and 2.30pm. Airfix is running a new competition at IWM Duxford during the summer holidays. Creatively colour in the Airfix model box design on our template sheet. Let your imagination run wild and make your design as colourful and vibrant as you like. There are two categories for entries: aged eight and above and under the age of eight. The prize in each category is a family ticket (two adults, two children) for a return visit to IWM Duxford and a hamper of Airfix goodies. The competition will be judged at the end of the summer holidays. We look forward to seeing lots of wonderful artistic designs. Summer holiday family activities are included in general admission to IWM Duxford*. Visitors aged 15 and under enjoy free admission to the museum and to our summer holiday activities. Airfix Make and Paint is suitable for ages eight and above.
4
T
his is Diedrich Wiegmann’s test shot build of the forthcoming Revell 1/72 scale Chance Vought F4U-1 Corsair. The box art marking option is “86” Lucybelle of “Pappy” Boyington. The kit features a high level of detail and fine recessed panel lines. We will have more information on this kit when it is released in the coming weeks. Revell model kits are available from all good toy and model retailers. For details visit www.revell.de/en, @RevellGermany or facebook.com/Revell
Military Illustrated Modeller - September 2014
p4 News 041.indd 4
31/07/2014 15:19
Saturday 8 th & Sunday 9 th November
2014
The World’s Greatest Model Show! Presented by
Open: Saturday 8th 10.00am to 6.00pm Sunday 9th 10.00am to 4.00pm Admission: IPMS Members FREE Adults £10.00 each day 2 Day Pass £15.00 Concessions £7.00 per day Children under 16 FREE
Venue: The International Centre Telford Shropshire TF1 4JH SMW Ad 2014NewA.indd 1 p 05 IPMS 041.indd 8
IPMS(UK) 08/07/2014 22:31:09 01/08/2014 14:23
FEATURE ARTICLE: REVELL 1:48 HARRIER GR.7/9 • KIT NO. 04581
6
Military Illustrated Modeller - September 2014
p6-17 feature article - harrier gr 9 041.indd 6
01/08/2014 09:46
THE HARRIER T BOWS OUT Spencer Pollard takes an emotional journey as he finally builds a 1:48 model of his favourite aircraft, the now retired BAe Systems Harrier GR.9A
he first time I had the pleasure of seeing a Harrier, I must have been no more than ten years of age, but the impression that it left on me resulted in an abiding love affair that has persisted to this day. Over the intervening years I’ve built many models of this aircraft, from Airfix’ Superkit 1:24 GR.1 through to an odd little Crown kit in 1:144. I must have built dozens, most of which have ended up in the bin, given away, or stored in boxes in the loft. Several years ago, Airfix released the first of what was to be a series of Harriers, offering the modelling world a couple of Sea Harriers (FRS.1 and FA.2), before tackling the GR.7/9. A very fine kit, this finally allowed me to add this second generation Harrier to my collection and once completed, the decision was made to build the same aircraft for an expanding group of 1:48 modern jets, this time using Revell’s reboxed and carefully reworked, Harrier GR.7.
INITIAL PLANS…
Revell’s kit replicates the GR.7 and as such, offers decals for three aircraft, two from No.41 Squadron and one from No.4 Squadron. Though these options were interesting, it was decided that something a little different would be more fun and so we chose a Harrier GR.9 fitted with a 100% LERX (the kit offers only the 65% LERX panel) and as many modern fittings such as Sniper and DJRP as we could find, along with some additional weapons which would be decided upon as the build progressed. Along the way, the kit would also be detailed, corrected and improved to create a more representative replica. This included dealing with the now famous kink that Hasegawa included in their wings, the seat, cockpit detail, undercarriage loading and the minor modifications needed to produce an RAF aircraft. Here is a list of the jobs that needed to be completed: Deal with the kinked wing. Though the Harrier’s wings are kinked, it’s a subtle shift in shape, whereas Hasegawa added almost a gullwinged shape to their pieces. Wings therefore needed to be carefully flattened out to produce a more subtle effect. Replace the ejector seat. The kit supplies an American seat, whereas the GR.7/9 was fitted with a Martin Baker Mk.12 seat. Aires produce this seat in resin, allowing a straight swap. The nose leg is over-extended, resulting in a model that shows no evidence of load. The leg therefore needs to be altered to look more compressed.
Aircraft Edition
p6-17 feature article - harrier gr 9 041.indd 7
7
01/08/2014 09:46
FEATURE ARTICLE: REVELL 1:48 HARRIER GR.7/9 • KIT NO. 04581
Harriers often have the nose gear doors open on the ground so they need to be removed and a bay interior built up from plasticard, rod and strip. Add strengthening strips to rear fuselage just behind rear jet pipes. Replace 65% LERX panel with 100% LERX from spare Hasegawa AV-8B II Plus, or with an aftermarket part (Alley cat). Fill in the hole in the rear fuselage side. Remove square block on upper fuselage. Add a circular GPS panel. Detail the cockpit with rod and Strip. Rework the wing tips to better replicate the lights, sensors and fuel-dump pipes. Replace wing fences with thin plasticard. Scratchbuild the extended in-flight refuelling probe using the reworked kit part, strip, rod and brass tubing. Drill out the airscoops on upper fuselage and scissor links on the outriggers. Scratchbuild a DJRP for the centreline pylon. Use an aftermarket Sniper Pod and pylon – in this case a pylon from Wolfpack and Sniper pod from Hasegawa. Build two Paveway II LGBs from Hasegawa parts – aft-body from one weapon, nose from the other, to create RAF pattern weapons. Replace the two-part jet pipes – front and back – with Aires resin parts. Create intake covers from casting resin (to cover the poorly modelled intake interiors supplied in the kit). Choose suitable markings – either from the aftermarket or created from multiple sets from the spares’ box.
Work begins around the rear fuselage and wings. Large sub-assemblies are created to check for fit and alignment – an absolute necessity in this kit! Careful study of the instructions will provide a guide as to the best method of construction, it being easier to create large sections to be joined, rather than smaller pieces.
A comparison shot showing how overblown the kink is in the wings when built from the box. The lower wings have been scored on their inner faces - from the wing fence to the outrigger fairing - and then flattened out, before being glued together and held in place with clamps. The difference between the kit parts and the reworked wings is stark as a result, the lower wings being far more realistic.
THIS MONTH’S FEATURE
As this kit is far from new, creating a feature in which we review the parts and accuracy of the model seemed somewhat redundant. I therefore decided that the best way to tell the story of this model was through a series of captioned images that guide you through what was carried out to complete this quarter-scale Harrier GR.9. Though we have not photographed every step, you’ll find enough to introduce you to some new ideas, as well as showing how with a little scratchbuilding and access to the aftermarket, you can take a basic kit and turn it into something unique. This then is Revell’s Harrier GR.9A – we hope you like it! •
Originally, I wanted to build an aircraft with 65% LERX and so the wings were built from the box. When the kinked wing issue became too much to accept, I changed plans and built new wings from a spare kit to correct the kink. As I had now used my 65% LERX part, I was now forced to build an aircraft with larger 100% panel – no big deal as there were still plenty of aircraft to build with this feature.
8
Whilst building the kit, any areas needing work were delineated with an orange marker, everything being highlighted at the same time, so that I didn’t lose track of progress. This was found to work really well, areas to be filled, removed, or reworked, being visible without constant referral to either the instructions, or reference photos.
Military Illustrated Modeller - September 2014
p6-17 feature article - harrier gr 9 041.indd 8
01/08/2014 09:46
Compare and contrast. The first wing has been completed with a 65% LERX panel and here it sits alongside the larger, 100% part. Whilst assembling the wings, small clamps were needed to hold everything in place whilst the glue set. As with many of the models that cross my workbench these days, this one was predominantly assembled with Gunze Sangyo Mr Cement S, which is a fast setting glue, that allows joints to be sanded extremely quickly, usually within an hour.
In order to show progress on the cleaning up of the kit’s joint lines, each was highlighted with a day-glo marker pen. Once sanded, if all of the orange disappeared, I knew that the seam had gone too. Easy eh?! Oh and thanks to Tom Morgan for the tip and the pen!
The rear fuselage and upper wings have been joined. The fit here is very good, little in the way of filler being needed, especially, if as done here, the instructions are ignored and the LERX panel glued to the upper wing before the wing is fixed in place.
Sanding sponges of varying grades were used to remove the joint lines around the model, their delicate abrasive surfaces allowing this to be done with little evidence of scratches and damage on the surface of the model, once complete.
Test-fitting the nose. Again the tolerance between the various pieces is precise, needing little in the way of adjustment or filler.
Aircraft Edition
p6-17 feature article - harrier gr 9 041.indd 9
9
01/08/2014 09:46
FEATURE ARTICLE: REVELL 1:48 HARRIER GR.7/9 • KIT NO. 04581
A decision was made to have the undercarriage doors lowered under the nose, so each door was removed from the nose halves using a fine razor saw, the opening being cleaned up with sanding sticks and wet & dry, the now removed doors being cleaned up to be used later on. Happy that the openings were neat and tidy, a profile gauge was used to create plasticard bulkheads that were detailed with Evergreen rod and strip and some parts from the spares’ box, to create a suitably busy looking bay.
The inner walls of the fuselage were detailed with rod and strip and then covered over with a layer of plumber’s aluminium tape. A riveting tool was used to add further detail. Note the lead wire cabling inside the bay.
With the nose halves joined, the appearance of our scratchbuilt undercarriage bay is there for all to see. The detail inside this part of the model is not accurate, ‘gizmology’ being used to create the illusion of reality, rather than a picture perfect replica of the real thing.
“Although we have not photographed every step, you’ll find enough to introduce you to some new ideas.” With the wings in place, some small gaps appeared under the LERX panels, a little filler and Mr Surfacer being needed to fill these in before painting.
10
Military Illustrated Modeller - September 2014
p6-17 feature article - harrier gr 9 041.indd 10
01/08/2014 09:46
The cockpit is reasonably well detailed from the box, offering some neatly captured console and instrument panel detail. The seat is of course inappropriate for the RAF aircraft and so was replaced with this stunning Aires seat. The detail is exquisite and it concert with some additional detail around the real cockpit wall and fuselage insides, helps create a very pleasing sub-assembly.
Test fitting the cockpit and undercarriage bay sub-assembly. Happy that this was neat and tidy, the interior was ready to paint.
The two 1000lb Paveway II LGBs were built from Hasegawa weapons, the nose of one weapon being grafted on to the body and tail fins of another. Reference to Andy Evans RAF Harrier book ensured that the weapons were as detailed as possible. The smaller item in this shot is a Thales Digital Joint Reconnaissance Pod (DJRP). As far as I know, this isn’t available as an aftermarket piece and so was scratchbuilt using parts from the spares box (a bomb of some sort) together with some plastic strip and plumber’s tape to create the detail seen here. The DJRP is mounted onto the underfuselage pylon supplied in the kit.
From the off, I knew that an extended refuelling probe would look good on the model. This was made using the kit’s stowed probe, the tip being removed, before carving away the tubing and reaming out the fairing with dental burrs fixed in my Dremel. This needed to be done carefully so as not to damage the delicate walls, files and the tip of a modeller’s chisel being used to further clean up the interior until a sharp finish was obtained. The probe and actuator could then be assembled from Albion Alloys’ brass tubing, Evergreen rod and strip and some rivets cut from stretched sprue, completing the picture. This was a fun part of the model!
Hasegawa’s jet pipes are moulded in two halves and are a bear to clean up. That being the case, they were replaced with these stunning Aires jet pipes. Moulded in one piece each, they simply needed to have some flash removed and then painted with Alclad Steel, before being washed with Humbrol Matt Black. A little drybrushing with Citadel Miniatures Boltgun Metal, added the final sparkle.
The real cockpit is painted in dark Admiralty Grey, a colour that is very close to Dark Sea Grey. As I had none of the former and plenty of the latter, I used DSG instead. Washes and drybrushing brought out the finer details, as did the application of some Vallejo acrylics around the consoles and finer structural features.
p6-17 feature article - harrier gr 9 041.indd 11
Aircraft Edition
11
01/08/2014 09:47
FEATURE ARTICLE: REVELL 1:48 HARRIER GR.7/9 • KIT NO. 04581
With the rear fuselage and wing assembly now fully dry and cleaned up, it was sprayed with several layers of Tamiya Fine Primer. Once dry, it was sanded further until its finish was perfectly smooth. This is important because the second-generation Harriers are very smooth aircraft and that needs to be replicated in miniature if the illusion of reality is to be maintained.
The interior of the intake features a huge fan. After painting the inner walls white, they were masked off and the fan sprayed with several layers of Alclad II Steel. Tamiya masking tape proved invaluable during this step.
Whilst dealing with the priming of the airframe, the internal sections were painted in matt white, ready to be heavily weathered later on.
Though looking smooth, the upper wings are in reality, delicately riveted. Here, that is being replicated using a Rivet-R riveting tool fitted with a 0.65mm wheel. The lines of rivets were first marked out with a pencil and then worked over with the tool, the disk easily following the pathways, even when used freehand.
Though subsequently not visible in the completed model, the intakes were fully masked ready to be painted. As it turned out, the inaccuracy of the intakes and their misshapen interiors forced me to create blanks to cover them up…
The airframe is complete and all cleaning up carried out. The complex nature of this aircraft forces you to be careful during assembly in order to ensure that the results are clean and smooth.
12
Military Illustrated Modeller - September 2014
p6-17 feature article - harrier gr 9 041.indd 12
01/08/2014 09:47
Having sprayed the model with another layer of primer, the model could be sprayed in its final colours. This began with several coats of Xtracrylix Dark Camouflage Grey, the underlying primer allowing this fragile paint to adhere to the model without fear of it lifting during the complex masking to come.
The Harrier that was chosen for this build – ZG504 of the Naval Strike Wing – was painted in a threetone grey scheme comprising Dark Camouflage Grey undersides, Dark Sea Grey upper surfaces and Medium Sea Grey panels and control surfaces. Each of these colours had to be defined with masking tape, beginning as we can see with the rear fuselage. Thin strips are first used to mark out the demarcations.
The edges of the strips are then burnished into place using a Tamiya Cotton Swab. Once happy that the strips are in place, the surrounding surfaces can be covered with larger pieces of tape.
Before spraying the next colour on, check the model to see if there are any small areas that you have missed. If there are any, cover them with small strips of tape as seen here on the rear fuselage.
Aircraft Edition
p6-17 feature article - harrier gr 9 041.indd 13
13
01/08/2014 09:47
FEATURE ARTICLE: REVELL 1:48 HARRIER GR.7/9 • KIT NO. 04581
And this is what the model looks like once liberally covered in tape – three hours work for two minutes of spraying! Who says modelling isn’t fun?!
The Dark Sea Grey has been sprayed on in several thin layers and then left to dry for a few hours. The tape can now be removed. To do this I use a pair of fine tweezers to gently lift up the edges and pull each strip away piece by piece.
Happy that the masking is complete, the open areas of model are gently sanded smooth and then checked for any blemishes. Once done, the upper surface Dark Sea Grey could be sprayed on using in this case, Gunze Sangyo Dark Sea Grey thinned with Mr Color Thinner.
When removing the tape, never simply drag it off; carefully peel it away by pulling it back in order to reduce the chance of removing the paint with the tape.
And here’s the fully painted model, resplendent in its three-tone grey finish.
The route to the successful application of decals is to have a perfectly smooth finish onto which the designs can be applied. Lately I’ve been using Tamiya’s X-22 Clear thinned with Gunze Sangyo Mr Color Leveling Thinner, several thin coats being enough to ensure a perfectly smooth finish. Once sprayed, the model is left to dry overnight in preparation for the decals.
14
Military Illustrated Modeller - September 2014
p6-17 feature article - harrier gr 9 041.indd 14
01/08/2014 09:47
MODELSPEC Revell 1:48 Harrier GR.7/9.
Kit No. 04581
AFTERMARKET ITEMS USED: Aires 1:48 Martin-Baker Mk.12/A ejection seat, AIRE419 Aires 1:48 BAe Harrier GR.5/GR.7 exhaust nozzles Hasegawa 1:48 Weapons Set D (HAX4808) - US missiles,Bombs & Launchers Hasegawa 1:48 Weapons Set E (HAX4817) - AIM-9X, AIM-120C, GBU-31(V)3, GBU-38, AN/AAQ-28, AN/AAQ-33, AN/ALQ-184, AN/ ALQ-188,LAU-115C/A. Airframe Decals – UK Air Arm Update Harrier Retirement Nov 1960Dec 2010 The kit sheet is well printed and comprehensive. Here it is with the solutions needed to successfully apply the markings onto the model.
Initially I had planned to build a more colourful model, but the decision to build an aircraft seen during last days of the Harrier’s service with the RAF, was too much to bear. Instead, I used markings from the Model Alliance sheet to build a standard, Naval Strike Wing GR.9.
MATERIALS USED: Gunze Sangyo Mr Cement S Superglue Tamiya acrylic paints Humbrol Model Filler Swann Morton No.10A scalpel blades Daco decal setting solutions Tamiya Masking Tape AIRBRUSH USED: Iwata HP-CH For UK distribution and availability visit www.airbrushes.com PAINTS USED:
Both the MA and Revell decals were superb, laying down perfectly over the glossed camouflage. Even when applied over open vents – such as seen here – the decals worked flawlessly, Daco’s Strong setting solution helping them to snuggle down of these small features, with ease.
A close-up of the upper wing and engine access panels reveals the amount of different colours on the model. In this shot the deals have been sealed in with Vallejo Flat Varnish. Time for some dirt…
“Once painted, the Aires ejector seat looks amazing.”
Tamiya thinned with Gunze Sangyo Mr Color Thinner; Gunze Sangyo thinned with Mr Color Thinner; Xtracrylix thinned with distilled water. H53 Neutral Grey H332 Light Aircraft Grey BS381C/627 H335 Medium Sea Grey BS381C/637 H331 Dark Sea Grey BS381C/638 H330 Dark Green BS381C/641 Mr Metal Color Chrome Silver 211 XF-1 Flat Black XF-2 Flat White XF-69 NATO Black XF-85 Rubber Black XF-63 German Grey XF-19 Sky Grey XF-61 Olive Green XF-67 NATO Green X-22 Clear X-27 Clear Red X-23 Clear Blue X-24 Clear Yellow Alclad II, Steel ALC-112, Duralumin. Games Workshop Purity Seal, Boltgun Metal Vallejo Flat Varnish, Black, Dark Rubber, Leather, London Grey, Flat Red
Crisp surface textures; good level of detail; interesting subject Some corrections and improvements required. A wash was mixed from Winsor & Newton Raw Umber oil paint, Humbrol Matt Black and German Grey and white spirit and then applied to the panel lines with a fine brush. Any excess paint was worked away using a soft cotton cloth, cotton buds and a flat brush moistened with a little Mig Productions Thinner For Washes.
The sooty rear fuselage was replicated with delicately sprayed layers of Humbrol Matt Black diluted with their own thinners. This was sprayed on in thin layers and then partially removed with a cotton cloth. The small fingerprint has now thankfully, been removed!
RATING: 7.5 out of 10 Revell model kits are available from all good toy and model retailers. For details visit www.revell.de/en, @RevellGermany or facebook.com/Revell
Aircraft Edition
p6-17 feature article - harrier gr 9 041.indd 15
15
01/08/2014 09:48
FEATURE ARTICLE: REVELL 1:48 HARRIER GR.7/9 • KIT NO. 04581
The model has now been completely weathered. The effect of the washes is subtle enough to be seen and not too heavy to be obvious – just as it is on the real aircraft.
The nose gear as supplied in the kit has a number of issues. Firstly, it is moulded as if in flight and so shows no evidence of load. This is fixed by removed a section of the damper so that the yoke can be fixed at a shallower angle in relation to the upper leg. The second problem is that Hasegawa would have you fix the leg to the underside of the fuselage so that it cants forward at too great an angle. Removing a section of the tab that holds it behind the wheel bay, allows the angle to be changed and the leg pulled back towards the rear of the aircraft. In combination, this allows the nose to drop and the model to look as though heavy, rather than looking as if on tip-toes, as supplied.
Drop tanks look great on a model aircraft and they are such a recognition feature on the Harrier, they had to be used here too. Being large, careful assembly and cleaning up of their seam lines needs to be carried out if they are to appear realistically smooth. As with the rest of the model, the tanks were carefully weathered with thin layers of the wash used to define the panel lines, though this time, sprayed on to create areas of ingrained dirt. Once in place, the paint was worked with cotton buds, brushes and a finger, to create the random patterns and trails of grime seen in this shot.
Painting weapons is always fun and these were no different. Though it would have been easier to paint them all in single colours, the fact that they are important aspects of this model forced me to take a more time consuming route. The LGBs were first painted in NATO Green and then masked so that the tails could be sprayed with RAF Dark Green and their noses in Light Aircraft Grey – the same colour used for the bodies of the AIM-9 Sidewinders. The noses of the ‘Winders were sprayed with Alclad II Steel, the Sniper and DJRP being sprayed with Dark Camouflage Grey. Washes and detail painting brought out the finer features, decals being used for the coloured bands on the Sidewinders.
16
Once painted, the Aires ejector seat looks amazing! Careful painting and dry brushing brings out the best in the aftermarket part, Tamiya Flat Black dry brush with Humbrol Dark grey being the predominant colours. Note the etched seat straps, painted in Tamiya Dark Yellow to match references, with silver buckles the final touch.
Military Illustrated Modeller - September 2014
p6-17 feature article - harrier gr 9 041.indd 16
01/08/2014 09:48
The HUD is moulded solid, but with some careful painting, can be made to look a little more realistic. The cockpit interior looks nice and busy in this shot, thanks in no small part to that amazing seat!
The intake blanks were made in the following way. Using a spare kit, I glued the intakes to the nose and then masked off their openings with masking tape. Using a pencil, ripples were incorporated into the tape and then the nose held vertically so that the intakes could be partially filled with casting resin. This was then left to set (around five minutes) before breaking away the intakes and now set, blanks, the results being perfectly fitting pieces that could be painted red, decaled and then slipped into place inside the intakes of our now completed model.
Careful painting brought out the small details around the wingtips. The warning stripes are misshapen on the Revell decal sheet and so were replaced with some decals from an old Microscale sheet.
The leading edges of the wings are protected with a clear tape that can range in colour from glossy yellow through to a dull green. In this case, these stripes were painted with a layer of Tamiya Clear Yellow mixed with Dark Yellow, the gloss finish contrasting nicely with the matt finish of the surrounding camouflage. Far Left: The results of all of that careful painting, weapons that are a real highlight of the completed model. Note the orange seeker head on the Paveway II, added by dipping the tip of the part into a small pool of Clear Orange. Left: There are a lot of little details around the tail that need to be masked and painted – much like the rest of the model!
Aircraft Edition
p6-17 feature article - harrier gr 9 041.indd 17
17
01/08/2014 09:49
KIT PREVIEW: Sword 1:72 SW72074 F3D2 Skyknight and Kit No. SW72075 EF-10B Skyknight
KOREAN KNIGHTS Mark Davies reviews Sword’s new 1:72
F
irst flown in March 1948, the F3D Skyknight was a jet night & all-weather fighter capable of operating from aircraft carriers; it would remain in service until mid-1970. Like many early straight wing jets, its performance was soon to be outclassed and superseded by more advanced designs. However, it was still responsible for downing more enemy aircraft in the Korean War than any other US Navy type. Sword’s 1/72 scale Skyknight kits, which share the same sprues, come in typically Czech endopening boxes with digital artwork on their front. The plastic parts and decals come in a zip-lock bag, with the clear parts further enclosed in a small bag of their own. This is a typical Sword kit in that the cleanly moulded parts have very fine surface detail, and the sprue gates are narrow. There is just a little flash in places, but this is easy to deal with. There are no resin parts, unlike many earlier Sword kits. Parts break down is largely conventional for the type. Cockpit detail is a huge advance on the old Matchbox kit, and is quite comprehensive for an allstyrene effort. The seats have no harnesses moulded with them, but it is worth adding homemade or PE belts to dress things up some more. The airframe is a very straightforward affair, and I envisage these kits being quite quick to assemble. The integral engine nacelles are moulded separately from the main fuselage halves, and have internal intake and exhaust ducts included, along with their respective compressor and turbine faces. The engine nacelles fit into deep rebates in the fuselage halves, which I think should make for filler-free joins along their length. However, I suspect that some filler and sanding will be needed to blend the inlets and their ducting. This job is the only “pain”, and a slight one at that, that I can foresee. The undercarriage is nicely done and quite adequate for the scale, and is much better than the Matchbox kit’s, with crisper moulding and more detail on the inside faces of the undercarriage doors. Two drop-tanks and their pylons are the only external stores provided, and will suffice for most options. The instructions show the pylons drawn with sway-braces, whereas
the actual kit pylons only have small stubs where the sway-braces should be. The canopy is a three-piece affair to enable the bulged sides to be moulded, so care will be needed when joining these to the curved centre-section. The canopy is clear and quite thin, with crisply moulded framing that is much better than the heavier style of the Matchbox kit. I should think that this kit should be a simple and enjoyable one to build. The decals are printed by Eduard, and well registered and appear to have good opacity. I am sure they will prove to be excellent to apply based on my experience of this brand. They include quite a few stencil markings, whose locations are detailed in a separate page of the instructions. The subjects covered are: Box # SW72074: • F3D-2, 124620, VMF(N)513, USMC, Pyon Taek AB, Korea, 1953. • F3D-2, VMF(N)-513, USMC, Pyon Taek AB, Korea, 1953. • F3D-2, 124615, VMF(N)-513, USMC, K-6 AB, Korea, 1955. • F3D-2, 127022, VC-4, “Nightcappers”CVA-42 USS Franklin D. Roosevelt, 1952. • F3D-2, 127072, VF-14, Air Task Group 201, CVA-11 USS Intrepid, Autumn 1954.
These are good quality kits with nice surface and interior detail. Paint colour information is generic, and the shaded diagrams do not mention the main airframe colours. Most modellers will know which colours to use, but Sword is behind its competitors in this respect. These are nicely engineered kits produced to high standards. They look to be very straightforward to build, with the potential to produce attractive and interesting models. Detail levels are good all-round; they appear to be a real advance over the old Matchbox kit in all respects. Definitely Recommended. Thanks to Sword Models for this review sample www.swordmodels.cz • F3D-2 Skyknight colour schemes.
Box # SW72075: • EF-10B, 124619, VMCJ-1, 1969. • EF-10B, 125849, VMCJ-1, Da Nang, Vietnam, 1965. • EF-10B, 125849, VMCJ-1, 1969. • F3D-2T2, 125873, VMFT(N)-20, FAWTULANT Boca Chica Air Base, Key West, Florida, 1959. • EF-10B, 125807, China Lake Weapons Test Centre, 1961. The kit features fine surface detail.
Box art for the EF-10B.
18
Some flash is present, but detail is well done.
The wings are split into upper and lower halves.
Military Illustrated Modeller - September 2014
p18 preview - sword skyknights 041.indd 18
05/08/2014 12:16
s LSA Models t s i l a i c e p s d r a u d the E
n-Sat 9.30am-5.30pm Retail Shop Open MoWed nesdays) (Closed
www.lsamodels.co.uk
Telephone: 01273 705420 Mobile: 07973 551470
EDUARD RELEASES JULY 2014 BRASSIN 648157 Bf 109G radio comp 1/48................................ Edu £7.50 648154 Bf 109G legs BRONZE 1/48...........................Edu £11.25 672035 Mk.44 torpedo 1/72................................................ £5.00 648158 Bf 109G-10 wheels 1/48.................................. Edu £4.00 672036 AIM-9B Sidewinder 1/72........................................ £5.00 648155 GBU-12 bomb 1/48................................................. £7.50 648160 Kh-25ML missile 1/48............................................ £6.75 648161 SC 250 German bombs 1/48.................................. £6.75 648162 SC 500 German bombs 1/48.................................. £6.75 BIGSIN SIN67204 Il-2m3 1/72................................................... Tam £24.00 PE-SETS 00036 Stripes 0.2 to 1 mm................................................ £5.00 32354 T-6 exterior/ landing flaps 1/32....................Kitty £15.75 32358 Gloster Meteor F.4 ext 1/32............................ HK £14.50 32804 Gloster Meteor F.4 int S.A. 1/32..................... HK £13.00 32809 A-6A seatbelts 1/32........................................Tru £12.00 32810 T-6G int S.A. 1/32..........................................Kitty £16.75 32813 A-6A int S.A. 1/32...........................................Tru £14.50 32816 Meteor seatbelts 1/32........................................HK £7.50 36271 T-90 1/35........................................................ Zve £15.75 36272 Jagdpanther G2 1/35..................................... Dra £15.75 36273 Tiger I Mid prod 1/35............................Dra 6700 £14.50 36276 Tiger I Mid prod fenders 1/35..............Dra 6700 £13.00 49682 MiG-29 9-12 early int S.A. 1/48..................GWH £12.00 72576 PBM-5/PBM-5A ext 1/72..............................Mini £15.75 72581 PBM-5/PBM-5A bomb bay 1/72...................Mini £15.75 72582 Lancaster B Mk.III ext 1/72.................Air 08013 £15.75 73499 PBM-5/PBM-5A int S.A. 1/72.......................Mini £16.75 73504 PBM-5/PBM-5A seatbelts 1/72......................Mini £5.00 73508 F-16CJ block 50 S.A. 1/72............................ Tam £12.00 ZOOMS 33134 A-6A int S.A. 1/32...........................................Tru £13.25 33137 T-6G int S.A. 1/32..........................................Kitty £12.50 Meteor F.4 int S.A. 1/32................................. HK £13.25 33139 FE682 MiG-29 9-12 early int S.A. 1/48....................GWH £7.50 SS499 PBM-5/PBM-5A int S.A. 1/72.........................Mini £9.75 SS508 F-16CJ block 50 S.A. 1/72...............................Tam £7.50
p 19 ADs Collated 041.indd 8
MASKS CX389 Vampire F.20 1/72.....................................Cyb Hob £4.25 CX390 Hurricane Mk.I 1/72................................. Air 1010 £4.25 CX391 Il-2 1/72...................................................Zve 7279 £5.00 CX392 Su-27SM Flanker B 1/72........................Zve 7295 £5.00 CX393 Su-27 Flanker B 1/72........................................ Tru £5.00 CX394 F-16CJ block 50 1/72......................................Tam £5.00 EX427 A-6A 1/48................................................Hob Boss £5.50 EX429 Alpha Jet 1/48...................................................Kin £7.50 EX431 AS.365F/SA.565 1/48.....................................Kitty £7.50 BIG-ED SETS BIG5323 USS ARIZONA - PART I. 1/200.......................Tru £79.00 BIG5324 USS ARIZONA - PART II. 1/200......................Tru £57.00 BIG49104 Merlin HC.3 1/48..............................................Air £42.00 BIG49105 A3D-2 1/48......................................................Tru £69.00 BIG49106 F-35B 1/48....................................................Kitty £27.50 BIG7286 Lancaster B Mk.III 1/72...................................Air £50.00 KITS R0009 Bf-109G Ltd 1/48........................................Royal £65.00 7424 MiG-15bis 1/72............................................W/end £8.50 EDUARD AUGUST RELEASES 2014 BRASSIN 632040 Bf 109G-10 wheels 1/32..................................Rev £7.50 632041 Meteor F.4 wheels 1/32.....................................HK £7.50 648150 Fw 190 wheels late 1/48................................. Edu £4.25 648156 AIM-9D Sidewinder 1/48........................................ £6.75 648159 Tornado IDS wheels 1/48.................................Rev £4.25 672037 AIM-9M/L Sidewinder 1/72.................................... £5.00 672038 US 250lb bombs 1/72............................................. £6.75 672039 US 500lb bombs 1/72............................................. £6.75 672040 F-16CJ Block 50 wheels 1/72..........................Tam £4.25 BIGSIN SIN64812 F-4 Weapons Set 1/48.......................................... £27.00 SIN64813 Russian Mod Aircraft Missiles 1/48..................... £35.00 PE-SETS 32353 A-6A exterior 1/32..........................................Tru £17.00 A-1H exterior 1/32..........................................Tru £21.50 32356
32357 32359 32812 36266 36277 48807 48809 48812 49681 49683 49686 49687 49688 53113 53114 53117 53118 53120 72583 72584 72585 72586 73022 73023 73025 73503 73509 73510 ZOOMS 33133 FE681 FE683 FE686 SS509 SS510 MASKS CX395 CX396 EX428 EX432 EX433
A-1H engine 1/32............................................Tru £12.50 A-6A undercarriage 1/32................................Tru £15.00 A-1H interior S.A. 1/32...................................Tru £15.00 Nashorn 1/35..................................................... Tam TBA Nashorn floor plates/ammo box 1/35............... Tam TBA A-6A exterior 1/48.........................................Hob £18.00 F-101A/C ext 1/48.........................................Kitty £18.00 Tornado IDS ext 1/48.....................................Rev £18.00 F-101A/C int S.A. 1/48..................................Kitty £18.00 A-6A int S.A. 1/48..........................................Hob £18.00 Tornado IDS int S.A 1/48...............................Rev £15.00 Tornado IDS u/c 1/48.....................................Rev £15.00 Tornado IDS seatbelts 1/48.............................Rev £7.50 Missouri pt1 AA guns Oerlikon 1/200............Tru £18.00 SMS Emden part 1 1/350..............................Rev £18.00 Missouri pt 2 Bofors 40 quad 1/200..............Tru £28.50 Missouri pt 3 crane/catapults 1/200..............Tru £18.00 SMS Emden part 2 1/350..............................Rev £20.50 Sunderland Mk.III bomb racks 1/72................Ita £18.00 Sunderland surface panels 1/72.....................Ita £17.00 Sunderland Mk.III ext 1/72..............................Ita £12.50 Sunderland main platforms 1/72....................Ita £31.50 Seatbelts Luft fighters 1/72.................................... £3.50 Seatbelts USAAF & USN WWII 1/72...................... £3.50 Seatbelts RAF early 1/72........................................ £3.50 F-35A S.A. 1/72..............................................Aca £11.25 Su-27SM Flanker B S.A. 1/72....................... Zve £12.50 Sunderland Mk.III int S.A. 1/72.......................Ita £15.00 A-1H int S.A. 1/32...........................................Tru £12.50 F-101A/C int S.A. 1/48..................................Kitty £12.50 A-6A int S.A. 1/48..........................................Hob £12.50 Tornado IDS int S.A. 1/48..............................Rev £12.50 Su-27SM Flanker B int S.A. 1/72.....................Zve £7.50 Sunderland Mk.III int S.A. 1/72.......................Ita £10.00 Su-35 1/72........................................................Zve £5.00 Sunderland Mk.III 1/72......................................Ita £8.50 Tornado IDS 1/48.............................................Rev £7.50 F-101A/C 1/48.................................................Kitty £5.50 Jaguar T.2/T.4 1/48.........................................Kitty £7.50
JX167 T-2 Buckeye 1/32...........................................Spec £7.50 JX170 A-1H 1/32.......................................................... Tru £6.75 BIG-ED SETS BIG3581 D9R Doobi 1/35...........................................Meng £39.75 BIG49107 MiG-25PD/PDS Foxbat 1/48........................Kitty £55.50 BIG49108 Su-2 1/48....................................................... Zve £44.00 BIG49109 Mirage F.1B 1/48...........................................Kitty £39.75 KITS 4431 8177 8221 84123
Ju 87B Dual Combo 1/144.................................. £10.00 Fw 190A Nightfighter 1/48...........................Profi £28.50 F6F-3 1/48.....................................................Profi £17.00 Mig-21R 1/48.............................................W/end £21.50
AIRFIX (DUE JULY) AI19002 Hawker Typhoon 1/24th........................................ £99.99 ACADEMY 1:48 Scale TW12300 F-4D Phantom “ROKAF”....................................... £39.99 TRUMPETER TM01638 FW-200 C4 ..............................................................£TBA TM02850 Supermarine Spiteful Mk XIV..................................£TBA TM02867 Attacker FB.2......................................................... £23.99 TM02890 Westland Whirlwind.............................................. £29.99 TM02847 J-8F Finback.......................................................... £34.99 TM02888 A-37a Dragonfly 1/48th........................................ £27.99 TM02298 Bf-109 G-10 1/32nd.............................................. £32.99 Prices correct at time of going to print
Postage charges (within UK) Large Letter................................................................................. £1.50 Small Parcel 1kg......................................................................... £3.50 Small Parcel 2kg......................................................................... £5.00 Medium Parcel 1kg..................................................................... £6.50 Courier up to 25Kg...................................................................... £8.00
Retail Shop at:
151 Sackville Road, Hove, East Sussex BN33HD E-Mail:
[email protected] Web: www.lsamodels.co.uk Tel: 0044 (0)1273 705420
01/08/2014 14:36
FULL-SIZE REFERENCE: BOEING B-17 FLYING FORTRESS
BOEING B-17 FLYING FORTRESS CLOSE UP
Full length side profile of Memphis Belle starboard side showing to good effect the four main fuselage gun turrets housing twin 12.7 mm machine guns.
Zack Sex gets up and personal with a fullsized B-17G Flying Fortress, currently wearing the livery of the famous “Memphis Belle”.
P
rior to the advent of World War Two, the US Army Air Corps had decided that the United States required a multi-engined bomber. The Boeing Airplane Company responded by developing the 4-engined Flying Fortress. Up to this point, most bomber aircraft had been built with two engines. Originally powered with 750 horsepowered Whitney Hornet engines and unsuccessful landing gear, the Y-1 B17 was ordered with a small batch of 13 being built. They were powered by 930 horsepower Wright-Cyclone engines and flew over 10,000 hours with the second Bombardment group based in Langley Field with no major problems. The B-17 was to see further improvements with the inclusion of on-board electricals and the addition of engine cowl cooling grills. With these additions, the B-17D entered service in 1940, a number of these new aircraft being destroyed by the Japanese surprise attack at Pearl Harbour in 1941. Further models such as the B-17E and F were to serve with the United States 8th Air Force based in England and
20
were responsible for the massive 3-year bombing campaign over Germany that saw more than 640,000 tonnes of bombs dropped on the Reich during these daylight bombing missions. As a result of the combat experience gained during these bombing missions the B-17G was produced, which introduced the iconic chin-turret with its twin 12.7mm machine guns Boeing built more than 4,000 B-17Gs and Douglas and Vega built more than 4,500 between them. Numbers of these B-17Gs were also used by the RAF for Coastal Command duties, some being modified to carry radar for the hunt of surfaced U-boats. While the B-17 is one of the classic USAF bombers of WWII, for those of a more esoteric bent, it is worth remembering that small numbers of these aircraft went onto serve with such forces as Taiwan and Israel, the last of which bears mentioning, as three Israeli B-17Gs that had all their gun turrets removed and openings covered with wood and plaster sealing had the audacity to bomb Cairo on the delivery flight home to Israel! •
Detail study of the B-17 tail fin, rudder and rear gunner’s position.
Military Illustrated Modeller - September 2014
p20-21 reference - b-17 041.indd 20
01/08/2014 09:54
Detail shot of the rear gunner’s twin machine gun position, vital for guarding against rear attack from Messerschmitts and Focke-Wulfs.
A life size modeller’s work in progress - a B-17 stripped down to its aluminium skin and disassembled awaiting reconstruction and perhaps flight once more.
Wing vents and fuselage details may be seen here.
Close up of the Memphis Belle’s starboard elevator.
Close up of one of the main undercarriage wheels.
Detail study of the Memphis Belle nose section with Plexiglas nose and chin turret introduced with the B-17E model.
Right: An overall view of the port fuselage side.
p20-21 reference - b-17 041.indd 21
Aircraft Edition
21
01/08/2014 09:54
FEATURE ARTICLE: HONG KONG MODELS 1:32 B-17G FLYING FORTRESS • Kit No. 01E04
ENDURANCE TEST Leo Stevenson tests the strength of his marriage and his grand piano when he builds Hong Kong Models’ 1:32 scale B-17G Flying Fortress.
22
Military Illustrated Modeller - September 2014
p22-27 feature article - hk models b-17 041.indd 22
01/08/2014 09:58
A
few years ago I bought a Victorian grand piano. It seemed like a good idea at the time because it was being sold at a bargain price but later the cost of having it restored made me wonder about the wisdom of this ‘bargain’. Life’s full of lessons. Worse still, I usually play wind instruments and my skills as a musician aren’t that good - as my neighbours will tell you - so this lovely piano has been neglected and so far has only been used with its lid down as a good place for putting Christmas cards on. Then, along came the giant 1:32 B-17G kit from Hong Kong Models, and I found another use for it! I bought this kit as a reference for a painting that I had been commissioned to paint, so it
seemed like a good investment as well as a change from my usual World War One models. Boy, what a change! Apart from the sheer cost of this expensive kit, this model has a wingspan of over a yard meaning that the box it came in was accordingly big, so when it first arrived my wife called it “a divorce in a box” – but she’s very sweet and was only joking. If you don’t have a horizontal surface free to put it on then you have two other options – you can hang it from the ceiling, or use a special support that comes with the kit to hang it on the wall. This support plugs into the bomb bay, and it is a neat solution to displaying it, although if you do this you’ll not be able to see into the open bomb bay.
Making fine models is a test of endurance as well as patience. This kit requires a large investment in time, because there are many components, not least because of all those guns and engines. I ended up spending roughly 250 hours on this model spread over about five months. This included making quite a lot of improvements to the kit with the aid of a range of after-market accessories because, annoyingly, the quality and level of detail in many areas of this kit is sadly not as good as I expected for the price tag. I know that this kit has to cost a lot because of the number and size of the parts and the large and heavy box it comes in etc., but the actual quality in proportion to the cost means that I do
Aircraft Edition
p22-27 feature article - hk models b-17 041.indd 23
23
01/08/2014 09:58
FEATURE ARTICLE: Hong Kong Models 1:32 B-17G Flying Fortress • Kit No. 01E04
“Making fine models is a test of endurance as well as patience.”
Considering its large size, the interior is quite sparse and simplified.
A lot of the interior was built and painted in a perfunctory manner. It will be almost invisible when the fuselage halves are sealed. Far Left: With those bombs stacked vertically and closely together it’s very hard to see what’s going on in there.
Left: The cockpit benefited from a number of aftermarket accessories.
The Eduard colour photo-etched instrument panel is a massive improvement on the kit parts. The harness straps make a big difference too.
not think this kit represents good value. However, I am not saying don’t buy this kit, because it can be made into a very fine representation of this beautiful aircraft; it’s just that if you like to see detail and make it ooze the kind of quality that such a large showpiece deserves, you just have to be prepared to spend yet more money and time on it than just making it ‘OOB’. Having said that, if you want to improve it, be careful what accessories you buy for it because I found out that some improvements just can’t be seen or appreciated unless, for example, you choose to expose the inside of the fuselage.
In the Box
So once you’ve committed your hard-earned money to it, what do you get? It’s very amusing to me that one of the selling points that the kit boasts on the box is that it has “over 800,000 rivets”. Well, leaving aside the fact that I didn’t find one rivet in the box and had to glue it all together (!), seriously, these rivets are symptomatic of what is generally wrong with the kit, because they are not good representations of rivets, they are simply rows of little
24
indentations. I expected better. Okay, superficially these look like rivets when it’s painted, but they’re not as realistic as the rivets on better kits, for example on the latest Eduard and Tamiya kits. Some of the surface details are also too pronounced and unsubtle, such as the plated joins between the various sections of the wings, or the slab-like panels on either side of the fuselage just below the cockpit. Furthermore, some of the surface details are missing, such as grilles near the wing fillets or the over-simplified hinged access points for the fuel tanks on the top of the wings (ten in all). All is not lost though; these are the kinds of details that are easily improved, particularly with the surprisingly large range of photo-etched items made by Eduard for this kit. You’ll be relieved to know that this kit does have a lot of merits. For a start, the sheer bravery of doing a B-17 in 1:32 scale is to be commended. I am not sure of the history of this kit or Hong Kong Models as a company, but I seem to remember that part of the credit for this bravery ought to go to a small company in the Netherlands that started the initial work on this model before HKM took over.
Another plus point is that this model does seem to be accurate in terms of its dimensions and measurements according to the books I have, and hence it nicely demonstrates the smooth and resolute form of this strangely aesthetic bomber. The design seems to be a strong pre-echo of the civil airliners that Boeing would make in later years, particularly when seen ‘naked’ with a bare metal finish. A further pleasing aspect of this model – one that is down to Hong Kong Models, and not Boeing - is that nearly all the components fit very well together. I was particularly grateful for this with the hefty wings in particular, because the thought of having to do any major surgery on those chunky and long wing fillets had all the potential entertainment value of a procession of medieval flagellants. Luckily, they went together beautifully, phew. As I said, be warned that on the finished model you can’t see too much inside unless you get in up-close and personal with a penlight, notwithstanding the fact that it does have a lot of windows. Before I bought the kit I thought that the
Military Illustrated Modeller - September 2014
p22-27 feature article - hk models b-17 041.indd 24
01/08/2014 09:58
Eduard’s Item No. 32 775, “B-17G Front Interior” has a big impact on this highly visible area too.
Rivets were added to the cowl flaps.
The base Aluminium coat is Alclad.
A 60/40 mixture of Alclad ‘Chrome’ and ‘Polished Aluminium’ was used.
interior would be more visible than it turned out to be, which is why I spent so much on the aftermarket items. On the finished model even looking directly into the front bombardier’s position it is still hard to see much without that penlight; this is not a Ju-88 or He-111. Being generous, I could say that HKM anticipated the above scenario because the interior detail is mostly very sparse and simplified. If I’m not in a generous mood, I’d say that they were mean and skimped too much on the interior.
Assembly
As the kit came together I began to regret spending so much on these extras, particularly in the bomb bay. With those bombs stacked vertically and closely together it’s very hard to see what’s going on in there. As the construction of the kit progressed I realised how much effort I might waste on the (largely) unseen parts of the interior, and so a lot of it ended up being finished in a perfunctory manner, for example in the radio room, which is almost impossible to see once the fuselage halves come together, despite the two
Looking forward into the bombardier’s compartment.
The chin turret was reshaped and detailed.
The key thing is preparation. A perfectly smooth finish is required, and the only way to do this is to carefully and thoroughly use the consecutive grades of Alclad’s Micromesh polishing cloths.
Bomb bay doors were posed open to display the ordnance.
small windows on either side. The exterior is where I like to spend most of my effort. For example, one of the things that never seems quite right when looking at the surface of most WW2 models, compared with the real aircraft in period photos or in museums (if they haven’t been over-restored), is that the surfaces of most models are too smooth compared with the real thing. I’m not talking about the quantity or quality of rivets or panel lines etc., but the contours of the surface, especially after the airframe has been exposed to the stresses of combat and continuous use. Surfaces become rippled, distorted and dented, and the panels flatten or buckle as they strain against the rivets holding them to the airframe. I decided to simulate these deformities between some riveted areas by subtly scraping out hollows and troughs or building up creased ridges with epoxy putty, and then re-applying rows of rivets where they had been accidentally eliminated in these processes. I only made these changes to a few areas because I quickly realised that to do this over such a large surface area would literally
take months of painstaking work - particularly because the preparation for a bare metal finish would have to be done much more carefully than it would under a dull olive drab finish. In the end I confined most of these ‘over-stressed skin’ effects to the fuselage, which happens to be where they occurred the most on the real thing. Although I am not totally pleased with what I did I think it is more realistic than the bland and uniform surface that the kit offers if unaltered. Others with more time and patience than me will be able to do more and better effects of this kind. The undercarriage and engines are areas that benefit from after-market items to improve them, and I’m happy with the result they gave. I particularly like the Eduard Brassin wheels, which have a crisp presence to them that is so much better than the flabbily detailed kit parts. Other improvements include carefully carving and reshaping the kit’s chin turret so that it better represents the zippered gun channels, and also adding rivets to the cowl flaps and inserting thin wedge-shaped slithers plasticard in between them to simulate the sliding joints on the real thing.
p22-27 feature article - hk models b-17 041.indd 25
Aircraft Edition
25
01/08/2014 09:59
FEATURE ARTICLE: Hong Kong Models 1:32 B-17G Flying Fortress • Kit No. 01E04
The ultimate finish that you see in these photographs was achieved by the surface with a slightly dulled gloss acrylic varnish.
The turrets and the interior are over-simplified and sparse.
Tamiya acrylics were used for the other colours.
Humbrol 113 ‘rust’ enamel paint was employed for the exhausts and superchargers.
Berkshire Junction’s thin charcoal ‘E Z Line’ was used for the aerial wires.
Improvements were added to the prominent engines.
‘This model has a wingspan of over a yard meaning that the box it came in was accordingly big, so when it first arrived my wife called it “a divorce in a box”’. Profimodeller machine guns and flash suppressors replaced the kit’s plastic parts.
I also made my own insulated lead-ins for the aerial wires, which later had aerials made from ‘EZ-line’ attached to them, complete with tensioning and insulating parts at the tail end of these wires.
Decisions, Decisions…
One of the most satisfying decisions a modeller has to make is which aircraft to represent from the options available. The kit’s decals offers only one option (‘Milk Wagon’, of the 447th Bomb Group), which is a bit mean, but thankfully there are now an increasingly large number of alternatives out there. I chose one of the most colourful B-17’s of the war – ‘D-Day Doll’, also from the 447th Bomb Group, courtesy of Zotz decals. These excellent decals turned out to be a good choice, but in the end I didn’t use their stars-and-bars decals or the kit’s own ones because I didn’t want to take the risk of obscuring any of the fine “800,000 rivets”, and masked and sprayed my own stars-and-bars. The kit’s decals in particular looked too thick to ever be able to float down into such fine surface detail.
Bare Metal – Lots Of It
The decision to represent a mostly bare metal aircraft created one of the most difficult challenges
26
a modeller can face. I knew that over such a large surface area it had to be good. I thought an obvious solution for ultimate realism would be to use Bare-Metal aluminium foil, which is usually an excellent and reliable product. I calculated it’d need eighteen sheets and I promptly bought them. This turned out to be a rash thing to do, because when I experimented with it I found out that it wasn’t suitable at all. The problem is that a realistic finish requires a super-smooth surface, yet however smoothly you prepare the surface of your model this product does not appear smooth over large areas because the manufacturing process used to make it employs rollers to apply the glue to the back of it, and this creates very fine ripples in the glue that show up in the outer surface over large areas that are impossible to burnish out. Normally these fine ripples aren’t visible on most models when the foil is applied to relatively small areas (car bumpers, oleo struts etc.), but on this kit’s vast surface they are, sadly. I used a couple of whole sheets experimentally trying but failing to overcome this problem - an expensive lesson to learn. I now have enough Bare-Metal aluminium foil to last me a lifetime! The only way forward was to use paint, and so for me the obvious choice was Alclad II. I love
these paints, but they are not easy to use well. The key thing is preparation. A perfectly smooth finish is required, and the only way to do this is to carefully and thoroughly use the consecutive grades of Alclad’s Micromesh polishing cloths, making sure that you methodically cover every inch of the surface. Note – you have to be very thorough and bold in using this product, but don’t worry about polishing any significant amount of the surface detail away because even the coarsest grade of these fine abrasive cloths will not remove too much of the surface unless you go crazy with it. The main benefit with using this product is simply to microscopically smooth out the natural but almost imperceptible rough texture that most injection-moulded plastic has – an essential flaw to correct when using most metalizing paint finishes; this does matter. Then, when this abrading and polishing was done, I had to keep that huge surface free of dust and grease (not easy!) and spray on a few coats of Alclad’s Gloss Black Base, checking for – and correcting – any imperfections in between coats. Any flaws are mercilessly shown up with this process, so patience and tenacity are strict requirements for a good finish. Then, it’s time for the metalizing paint itself. One shade of metal has to dominate the aircraft’s finish,
Military Illustrated Modeller - September 2014
p22-27 feature article - hk models b-17 041.indd 26
01/08/2014 09:59
MODELSPEC Hong Kong Models 1:32 B-17G Flying Fortress.
Kit No. 01E04
Accessories Used:
Above: Exhaust stains were sprayed on after the paint and decals were complete.
Profimodeller – B-17G gun barrels (brass, set number 32150 ) Profimodeller – B-17G two flash hiders (brass, for the chin turret guns) Profimodeller – B-17 legs (set number 32160. Only the metal components used, the resin hubs were not used) Eduard Brassin – B-17G Wheels (resin, number 632 017) Eduard – B-17G Engines (photo-etched parts, number 32 338) Eduard – B-17G Exterior (photo-etched parts, number 32 340) Eduard – B-17G Bomb bay (photo-etched parts, number 32 336) Eduard – B-17G Interior (photo-etched parts, number 33 125) Eduard – B-17G Front Interior (photo-etched parts, number 32 775) Eduard – B-17G seatbelts (photo-etched parts, number 32 764) Modelling Products Used:
A lot of improvements to the kit were made with a range of after-market accessories because the quality and level of detail was not as good as I had expected.
Eduard – B-17G die-cut masks for masking (number JX 155) Zap – ‘Slo-zap’ cyanoacrylate glue Gator’s Grip – ‘Acrylic Hobby Glue’ Revell – Contacta Professional glue Microscale Industries – ‘Micro Krystal Klear’ Humbrol – ‘Maskol’ masking fluid Tamiya – 6, 10 & 18mm masking tapes Berkshire Junction – thin charcoal ‘E Z Line’ (for the aerial wires) Alclad II – ‘Micromesh Polishing Cloth set #301’ + a variety of abrasive sticks and papers. Paints & Finishing Products Used:
The finished model does look stunning!
however many other variations on this shade are also applied, for example to simulate panels replaced after battle damage. Seemingly, the obvious choice for this overall shade would be either Alclad’s ‘Polished Aluminium’ (for a new looking finish), or one of the many other shades of aluminium that Alclad make, but I found that with experimentation that, as an overall colour, these turned out to look wrong to my eyes – mostly looking too cool, grey and unconvincing. Ultimately I found a mixture that worked, which was a 60/40 mixture of ‘Chrome’ and ‘Polished aluminium’. The Alclad ‘Chrome’ is the key ingredient, being ‘warmer’ in tone than any of the aluminium shades on their own, although ‘Chrome’ on its own also looked wrong. You might be thinking that this would result in a very over-polished glitzy looking unrealistic finish, and you’d be right, but hang on, there’s another stage to go, because the ultimate finish you see in these photographs was achieved by later spraying the whole thing (post decal application) with a slightly dulled gloss acrylic varnish; for this I used Alclad’s acrylic ‘Aqua gloss’ with a tiny bit of Tamiya’s ‘Flat Base’ stirred into it. I feel that this two-stage process gives a better finish than using Alclad metalizing paints alone for the final finish. By the way, don’t think you’ve got to buy
buckets of Alclad paints to cover this model; I was pleasantly surprised to find that I needed very little paint to cover the whole thing. If all the shades of the Alclad paints I used on this model were added together it amounted to only about one of their standard little bottles worth of paint.
CONCLUSION
Overall, I am pleased with what I have made. I regretted buying some after-market items for it that, in the end, didn’t add any visible value to it, but there are several items that do make a nice difference, particularly regarding the engines and undercarriage. The finished model looks stunning and, at the time of writing this, I remain married! It makes me look forward to HKM’s 1:32 Lancaster kit very much – as long as they ‘raise their game’ more with the quality and, if possible, the value for money ratio. However, despite my misgivings about some aspects of this B-17G kit, I’d still recommend it. If you can afford it, if you have space for it, and if are willing and able to put in a lot of extra work into it, then this can be made into a very fine model indeed. Buying a grand piano is optional. •
Sylmasta – ‘A+B modelling epoxy putty’ Squadron – ‘White Putty’ filler Mr Hobby – ‘Mr Dissolved putty’ Mr Hobby – ‘Mr Surfacer 1200’ Tamiya - a wide range of their acrylic paints Tamiya – ‘Flat Base’ Humbrol – 113 ‘rust’ enamel paint (for the exhausts and superchargers) Revell – ‘matt 85’ enamel paint ( “ “ ) Alclad II - ‘Aqua Gloss’ Alclad II – ‘Grey primer and microfiller’ Alclad II – Gloss Black Base Alclad II - ‘Chrome’, ‘Polished Aluminium’, ‘Aluminium’, ‘Semi-matt aluminium’, ‘Dark Aluminium’, ‘Steel’, ‘Gunmetal’, ‘Burnt Metal’ Michael Harding oil paints – ‘Raw umber’ and ‘Burnt umber’ Promodeller – ‘light dirt’ and ‘dark dirt’ weathering washes + a variety of solvents and thinners Overall, this much-anticipated kit is a good representation of this iconic aircraft; the fit of most of the components is good; having the option of a special support included in the kit for attaching the model to a wall rather than standing it on a horizontal surface is a neat (but eccentric) solution to displaying this large model. This is an expensive kit that needs after-market items to improve it to the quality you’d have expected for the price. The turrets and the interior are over-simplified and sparse, and the surface detail is adequate but not outstanding; these things could and should have been better for little extra cost to the manufacturers; having the option to depict only one specific aircraft; the instruction booklet is physically large but many of the actual diagrams in it are puzzlingly printed very small within it; the instructions are wrong in a few too many places, with wrongly numbered parts, and confusingly drawn illustrations. RATING: 6 out of 10 Hong Kong Models kits are available from hobby shops worldwide including Hannants www.hannants.co.uk
Aircraft Edition
p22-27 feature article - hk models b-17 041.indd 27
27
01/08/2014 09:59
FEATURE ARTICLE: KITTY HAWK MODELS 1:48 EUROCOPTER AS565 SA PANTHER
eURO
CHOPPeR Kamil Feliks Sztarbala builds and improves Kitty Hawk Models’ 1:48 scale Eurocopter AS565 SA Panther.
28
Military Illustrated Modeller - September 2014
p28-39 feature article - kitty hawk eurocopter dauphin 041.indd 28
01/08/2014 10:05
I
must admit that I haven’t built any chopper kits previously, so building the new Kitty Hawk 1:48 scale Eurocopter Panther was going to be a new experience for me. Besides this, a careful study of the assembly guide revealed that this kit is quite unusually designed. Much to my surprise, I discovered that the fuselage is not split into halves as in case of most of the aircraft kits, but it has to be completed by adding various parts of the skin and glazing to some sort of a backbone. Certainly, this didn’t make the construction easy. This is also one of the reasons why I find this kit unsuitable for less experienced modellers. What’s more, during the construction I found out that the instructions are full of inaccuracies, whilst the kit itself requires some correction. Although I had to attend to a number of them, in my opinion they were quite essential. I would also suggest the study of some reference photos before starting the assembly, because the kit’s designer made some mistakes with the arrangement of some parts of the equipment. Let’s take the armament as an example. The kit includes a number of various weapon types. The assembly guide suggests to mount the torpedos only, but I didn’t find a single photo which would confirm their use in this chopper. The icing on the cake is the title of the kit. The manufacturer calls it Dauphin II, but in fact this is really the military version of this helicopter, which is known as ‘Panther’. All in all, on a scale of 1 to 10, I’d give this kit an 8, but only due to the high quality of the parts and decals. If considering the quality of the instructions, this rating should really go down. •
Aircraft Edition
p28-39 feature article - kitty hawk eurocopter dauphin 041.indd 29
29
01/08/2014 10:05
FEATURE ARTICLE: KITTY HAWK MODELS 1:48 EUROCOPTER AS565 SA PANTHER
INTERIOR
I started construction in accordance with the assembly guide. Unfortunately, at the very beginning, the carpet monster ate one of the control pedals. In fact, this worked out well for the accuracy of my model, because as a result of the loss I scratch built all the control pedals in a more correct form than offered in the kit.
The first nasty surprise came in the form of quite large gap that revealed itself whilst checking the fit of the rear wall to the cockpit floor.
I then broke the sequence of construction suggested by the manufacturer. At this stage I decided that it would be easier to join the cockpit floor to the bottom part of the fuselage. Before I actually did this, I had had to drill some holes in the latter. Although the apertures are marked on the surface of the kit’s part, the instructions don’t mention them.
I had to choose between filling it or adjusting the bottom of the rear wall slightly. The design of the kit didn’t allow me to dry-fit the fuselage in order to check which solution would be the best in this case. Counting on luck, I went for the second option.
A few scratch built details had to be added to the roof instrument panel.
I glued all the necessary parts to the instrument panel in one session. The assembly guide suggests to attach various parts, paint them and apply the decals with dials during a number of steps, giving the sequence in the wrong order.
…a problem emerged at the rear of the cabin. It was impossible to glue the seats in the correct position because their backs interfered with the detail moulded on the rear wall.
30
Next, I began mounting the seats. Although the front ones fitted well…
The solution was simple. I gently sanded the base of the seats in order to tilt their backs slightly forward. Since this resulted in the removal of the locator pins, I glued a simple guide made from pieces of styrene strut, to the floor. This allowed me to easily attach the seats in the proper position.
Military Illustrated Modeller - September 2014
p28-39 feature article - kitty hawk eurocopter dauphin 041.indd 30
01/08/2014 10:06
Once the seats had been dry-fitted, I could add the belts. Since the kit doesn’t provide any belts for the passenger seats, I had to make them myself from lengths of a narrow masking tape and photo etched buckles from my spare parts stash.
The front section of the cockpit also required some attention. Besides the fact that a lot of parts had wrong numbers in the instructions, the real problem was that the kit’s designer omitted some detail which would be quite visible through the side glazing. Therefore, I had to reproduce them on the basis of some reference photos.
Worth noting were the external panels which had to be glued to the largest frame. They were not only too long, but also their part numbers turned out to be incorrect in the instructions.
Due to the specific design of the kit, and problems that had emerged during the previous stages of the construction, from now on I was dry-fitting all subassemblies at each subsequent step. This was very important, since I left many of them separate in order to make painting easier.
At this stage I focused on adjoining the various sub-assembly stages so they were as complex as was possible, in order to have fewer sub-assemblies to fit together after painting. Therefore, I glued a section of the roof to the framework.
I also mounted most of the internal details to the roof of the cabin.
The interior was ready for painting.
Aircraft Edition
p28-39 feature article - kitty hawk eurocopter dauphin 041.indd 31
31
05/08/2014 12:18
FEATURE ARTICLE: KITTY HAWK MODELS 1:48 EUROCOPTER AS565 SA PANTHER
INTERIOR PAINTING
I began by applying an even coat of Tamiya XF-1 Flat Black over all inner surfaces.
Next, I airbrushed a layer of Mr.Color C334 Barley Gray and added some highlights here and there with strongly diluted Mr.Color C69 Off White. The decal for instrument panel required a lot of Microscale setting solution, but after a few hours it nicely conformed to the irregular surface.
Since I had made sure that all interior sub-assemblies fitted well during the previous stages of the construction, they all went together easily.
The seat upholstery and various details were brush painted with Vallejo acrylics.
I then applied a subtle wash, using AK-interactive’s AK 071 Blue for Panzer Grey Filter for this purpose.
FUSELAGE
I didn’t have any serious problems with completing the gearbox. Only two mounting holes had to be filled with pieces of styrene because they were too deep.
32
Even though the wheel bays wouldn’t be too visible in the finished kit, I thought that I should add some wiring inside them. I made this from lengths of tin wire of various thicknesses.
Instead of the simplified radar provided by Kitty Hawk, I decided to put some weight into the nose. The kit would probably end up being a tailsitter if I didn’t weigh down its front section. As usual, I used a few pieces of lead sheet.
Military Illustrated Modeller - September 2014
p28-39 feature article - kitty hawk eurocopter dauphin 041.indd 32
01/08/2014 10:08
I strongly recommend against using Tamiya Extra Thin Cement for gluing the front window. The space between the window and instrument panel cover is so small, that the cement may reach there easily and seriously damage the clear part.
Once I’d attached the nose to the fuselage, I started mating the glazing panels. Although it was pretty well designed, I had to sand some of the edges slightly of each of the components, in order to make the fit better.
The painted doors were put in their positions after some minor adjustment carried out with a file.
The inner structures of the cockpit doors were solid enough to paint. The remaining panels of glazing were to receive their inner colour applied as a first layer from the outside.
The latches on the fuselage sides were too simplified and wrongly placed, so I replaced them with better versions made from tin wire.
Since I had some problems with mating the fuel dump pipe to the fuselage, I took a closer look into my references. I then discovered that the kit’s part was the wrong shape.
The curved section of the pipe was made from a length of sprue. I bent it to the proper shape and roughly sanded with a file.
I therefore cut it into small sections and reassembled it, using as much as possible.
The whole pipe was then attached to the rear fuselage. The latter required the filling of two mounting holes that I had drilled previously, as they turned out to be unnecessary. Small pieces of styrene were also used to fill the mounting holes for the armament, which was not carried by the chopper I was recreating.
Next I gave it the correct profile and glued it to the remaining section of the pipe.
The connection between the fuel dump pipe and fuel tank was sculpted using Tamiya Putty White. I then added the remaining details to this area.
Aircraft Edition
p28-39 feature article - kitty hawk eurocopter dauphin 041.indd 33
33
01/08/2014 10:08
FEATURE ARTICLE: KITTY HAWK MODELS 1:48 EUROCOPTER AS565 SA PANTHER
TAIL
A study of kit’s design determined that the tail could be treated as a separate sub-assembly. I decided to connect it to the fuselage just before the painting stage. Therefore, the fit had to be perfect. Fortunately, the kit didn’t disappoint me in this case. Once I’d dry fitted the tail halves, I levelled the inner surface of the tail rotor housing with a scalpel blade…
…and sanded it with a rolled 3M polishing sponge.
Although the overall fit of the parts of the tail rotor housing was quite good, I had to use some clamps in order to properly glue them together.
Next, I attached the tail rotor housing to the tail beam and puttied all joint gaps. At this stage I also compared the whole section with the photos of the real thing. This revealed that the kit’s designer had reproduced the antennas and other devices typical for civilian models of the Eurocopter Dauphin.
Once I’d removed some redundant detail, I recreated the transmitter base on the rear part of the fan duct. Firstly, I drilled an aperture and glued a length of sprue within it.
The kit was also missing the tail fin light, thus I had to reproduce it myself. The last step was to add the horizontal stabilisers.
I then scratch built the details of the transmitter from pieces of styrene strut and lengths of thin plastic rod, made by stretching a piece of sprue over a candle flame.
34
Left: Although Kitty Hawk had provided the rear fuselage antenna mounts, they forgot about the antenna itself. I made it from lengths of thin rod and 0.25mm tin wire on the basis of photos of the real thing.
Military Illustrated Modeller - September 2014
p28-39 feature article - kitty hawk eurocopter dauphin 041.indd 34
01/08/2014 10:08
ENGINE COVERS
The assembly of the latter required the use of some putty and a file.
Since the idea of gluing the air ducts to the inner structure of gearbox, as suggested by the instructions, didn’t sound reasonable, I attached them to the intakes in the gearbox housing.
At this stage it turned out that the gearbox would be completely covered by its housing.
The engine covers fitted pretty well. To give them a more realistic look, I thinned down their rear edges.
I also added some details made from lengths of brass wire.
An attempt to dry-fit the whole sub-assembly didn’t reveal any problems.
Since I wanted to paint the engines separately, I had to test fit them now in order to avoid any problems with this after the painting stage. The manufacturer didn’t facilitate this. What’s more, if I worked in accordance with the instructions, the engines would be mounted at the wrong angle. Therefore, I had to modify them slightly.
The last major component to attach at this stage of the construction was the rescue hoist. To put it in the proper position, I used a piece of plasticine that worked as a temporary support.
Aircraft Edition
p28-39 feature article - kitty hawk eurocopter dauphin 041.indd 35
35
01/08/2014 10:09
FEATURE ARTICLE: KITTY HAWK MODELS 1:48 EUROCOPTER AS565 SA PANTHER
During the last inspection before the painting stage I noticed another detail that required correction. I had to cut out small apertures in the wheel arches and thin down their edges.
Next, I scratch built some missing hoist details from pieces of styrene and lengths of plastic rod and a guitar string.
Short lengths of styrene rod were also glued in front of the windscreen in order to reproduce the wiper mounts.
“...a careful study of the assembly guide revealed that this kit is quite unusually designed.”
The kit was now ready for painting.
36
Military Illustrated Modeller - September 2014
p28-39 feature article - kitty hawk eurocopter dauphin 041.indd 36
01/08/2014 10:08
PAINTWORK
MODELSPEC Kitty Hawk Models 1:48 scale S.A.365F/AS.565SA Dauphin II Kit No. 80108 Tools & Modelling Products Used: Tamiya Extra Thin Cement C.A. Glue Tamiya Putty White Styrene Strips Tin & Brass Wire 3M Polishing Sponges Tamiya Masking Tape Wamod Masking Fluid Plasticine Paints & Finishing Products Used:
The first step was to mask the glazing with Tamiya tape and temporarily glue pieces of cardboard into apertures next to the open doors, using a masking fluid as the adhesive. I then applied a priming coat of Mr.Color C8 Silver. This time I didn’t plan to recreate the chipping by scratching the camouflage paint layers in order to reveal the silver undercoat. In my opinion the colours look better if we apply transparent layers of paint over a silver undercoat. Next, I darkened the panel lines and detail demarcation with Mr.Color C40 German Grey. Rivet lines and some chosen panels were highlighted with strongly diluted Mr.Color C69 Off White. I also accentuated some recesses and other chosen areas with Mr.Color C72 Intermediate Blue.
A few transparent layers of strongly diluted Mr.Color C308 “FS36375 Gray” formed the lighter colour of the camouflage.
Paints: Mr.Hobby’s Mr.Color series Tamiya (acrylic) Vallejo Model Color Lifecolor Tensocrom Mr.Hobby Clear Varnishes Microscale Decal Solutions Tamiya Weathering Master Set D AK-interactive products: AK 011 White Spirit” AK 067 Streaking Grime for DAK vehicles AK 070 Brown Blue Wash for panzer grey vehicles AK 071 Blue for Panzer Grey Filter AK 093 Wash for Interior
High quality parts and decals. I then marked the colour demarcations by airbrushing thin lines with strongly diluted Mr.Color C305 “FS36118 Gray”, and then subsequently filled the areas between them with the same strongly diluted paint. Some areas received only one transparent coat of paint, whilst the others were given a few more layers in order to get an effect of multi-shade patchwork.
Many errors in the instructions and some kit inaccuracies. RATING: 8 out of 10 Kitty Hawk kits are available from specialist hobby stores including Hannants www.hannants.co.uk
The details and nose were brush painted with Vallejo acrylic paints. Next, I sprayed the kit with a clear gloss coat and applied the decals.
The rotor received its base colours with the aid of an airbrush, but the colour demarcations were later retouched using a brush.
Aircraft Edition
p28-39 feature article - kitty hawk eurocopter dauphin 041.indd 37
37
01/08/2014 10:09
FEATURE ARTICLE: KITTY HAWK MODELS 1:48 EUROCOPTER AS565 SA PANTHER
Airframe details were brought out with AK-interactive’s AK 070 “Brown Blue Wash for panzer grey vehicles”. I applied some dense enamel into the panel lines and other recesses…
...and soon removed the excess with cotton buds slightly dampened with white spirit.
The bright wheel wells were washed with AK 093 “Wash for Interior”.
The paintwork was secured with a layer of satin varnish.
…and added some discolouration by applying pastels from Tamiya’s “Weathering Master Set D”.
I then sprayed the engines with Mr.Color C104 Gun Chrome…
38
Military Illustrated Modeller - September 2014
p28-39 feature article - kitty hawk eurocopter dauphin 041.indd 38
01/08/2014 10:09
WEATHERING
The excess enamel was removed with a long bristle brush, dampened with white spirit. I used the brush by stroking it vertically in order to recreate the dirt washed off the surface by the flow of the rain or condensed dew.
The effect was reproduced in varying degrees on different areas.
The most difficult task during this stage was to find a number of good quality reference photos that would show some wear and tear on the Panthers. Fortunately, quite a lot of pictures taken during air shows revealed quite distinct, but not heavy rain marks. I reproduced them with AK-Interactive’s AK 067 “Streaking Grime for DAK vehicles”. I started by airbrushing a fine mist of the enamel over the chosen surface.
I then weathered the exhaust nozzles by applying transparent layers of Lifecolor’s “Tensocrom Smoke” and strongly diluted Vallejo Smoke, using a brush
The final touch was to airbrush a very fine mist of AK 067 “Streaking Grime for DAK vehicles” over the surface of the rear fuselage. This way I recreated wide exhaust stains aft of the engine
Aircraft Edition
p28-39 feature article - kitty hawk eurocopter dauphin 041.indd 39
39
05/08/2014 12:20
KIT PREVIEW: Attack Squadron 1:72 F8F-1 Bearcat. • Kit No. 2018
LATE TO THE PARTY Luke Pitt is impressed with Attack Squadron’s jewel-like 1:72 scale resin Bearcat.
T
he Grumman F8F Bearcat was a brutally efficient design, small, fast and highlymanoeuvrable. By all accounts the aircraft was also a pleasure to fly. The airframe mated to the magnificent Pratt & Whitney R-2800, arguably the best large reciprocating engine ever built, was to all intents and purposes the finest piston engine fighter Grumman ever produced. The Bearcat’s only action occurred over Indochina in the hands of the French and South Vietnamese air forces. It proved to be a rugged and efficient Gun platform. The Bearcat’s rugged good looks has meant that the plane has been kitted many times by various manufacturers over the years, but this new 1:72 scale kit from “Attack Squadron may be the best rendition I have seen in any scale thus far. The kit is presented in a stout white box with a fairly average looking illustration of the aircraft adorning the box to lid. When opening the box however, one is greeted with some 59 of most politely cast resin pieces I have ever seen in a 1:72 scale kit. The finely engraved panel lines for example, are both accurate in the location and rendered to a very high standard. The fuselage is broken down into four distinct pieces to facilitate the wealth of interior detail included but fits surprisingly together - so well, in fact, that it would be impossible to tell once glued together if it not for a slight variation in resin colour on the finished pieces. Anything that could be seen on an “unstripped” fuselage is included from a complete cockpit through to the rear of the water injection tank and wheel well bay to a complete engine. The interior of the cowling even has the stiffening ring fasteners included. The wings have the flaps and ailerons cast separately as are the tail plane, rudder and elevators. All the parts are beautifully cast and exhibit excellent detail. The only glitch in the wing assembly is that the induction air intakes lack any
The wing features wheel well and supercharger ducting detail cast in place.
real depth and would best be hollowed out to some degree. The undercarriage is rendered to a high standard with the main undercarriage doors being almost cast “in scale” in terms of width and thickness. The tyres even have a tread pattern. 28 photo etched parts include a number of items on the airframe and engine that would be impossible to cast thinly and cleanly in resin. A very clear and distortion free vacform canopy is included and really tops off an already impressive kit. An 8 page instruction sheet is included and is noteworthy as is both clear and easy to follow. 3 decal choices are provided for in gloss sea blue with two in French markings and one in US Navy service.
The rear fuselage section.
You know, I have a lot of Bearcat kits in my stash in various scales. All exhibit flaws of some kind or another, with some more serious than others. This kit, however, is almost vice free. A combination of cleaver engineering and unparalleled attention to detail push this kit to the very top of the pile in regard to straight “out of the box” builds ability. Granted, the kit is expensive but it is also very well done. I’d be tempted to say this may well be the best kit of the Bearcat available in any scale today. Highly Recommended. Thanks to Attack Squadron for the sample www.attacksquadron.com •
Smaller parts are beautifully cast too.
The engine cowling.
Far Left: The fuselage is broken down into four sections. Here are two of them. Centre: The vacform canopy. Left: A photo-etched fret is included.
Decals for a French and a US Navy option.
40
Military Illustrated Modeller - September 2014
p40 preview - attack squadron bearcat 041.indd 40
05/08/2014 12:22
NEW in the ‘HOW TO BUILD...’ series HOW TO BUILD... REVELL 1:32 SPITFIRE MK.IIA The name Spitfire has now become synonymous with an entire island people, and their battle to maintain their freedom in the shadow of the Nazi jackboot. The very shape and sound of the Spitfire seems to still invoke and embody the usually reserved pride of the British person. It is probably true to say that Reginald Mitchell’s beautiful aircraft design is one of the most easily recognised and much-loved shapes that ever took to the skies. When actual mass production of the Spitfire ceased in 1948, over 20,000 machines had been built, and operated by over thirty countries around the world. This iconic series saw service with the RAF right up until the mid-1950s. It also saw service with the Irish Air Corps as late as 1961; a full 26yrs after the flight of the prototype K5054. Revell has now released an all-new 1:32 scale Supermarine Spitfire Mk.IIa. With some minor modifications, this model may also be built as a Mk.I or a Mk.Va. Over the course of five Chapters, James Hatch examines the kit contents in detail, describes construction of the model with lavish illustrations, and points out the areas of the kit that may be improved and corrected. This new book features an exhaustive step-by-step guide to construction; plus a painting and weathering tutorial. A number of essential reference resources are also included. More than 200 photos, a reference guide, and photos of the kit sprues are all included - a must have before you build the model!
Only
£9.95
plus p&p
ALSO AVAILABLE Visit adhbooks.com for details PLACE YOUR ORDER NOW ON TEL: 01525 222573 FAX: 01525 222574
✁
Revell 1:32 Spitfire Mk.IIa book HOW TO BUILD... SPITFIRE Name ..................................................................................................................... Address................................................................................................................ ...................................................................................................................................
Please debit my credit/debit card for £ ....................................... Visa
Mastercard
Maestro
P&P: UK; £2.00 Europe; £4.00 World-Wide airmail; £6.00 Cheques payable to: ADH Publishing Ltd.
other .............................
Card No. .................................................................................................... Expiry date................................. Start date ........................................
...................................................................................................................................
Security Number (last 3 digits on signature strip) ............................
Post/zip code ...................................................................................................
Issue No (if applicable) ........................................................................... Date ............................................................................................... Please mail this form to; ADH Publishing, Doolittle Mill, Doolittle Lane, Totternhoe, Bedfordshire, LU6 1QX, United Kingdom Tel; +44(0)1525 222573 Fax; +44(0)1525 222574 Online; www.adhbooks.com (Photocopies of this form are acceptable)
Country ................................................................................................................ Telephone Number.......................................................................................
Signature .....................................................................................
www.adhbooks.comwww.adhbooks.comwww.adhbooks.com p 02 Spitfire Book 041.indd 8
01/08/2014 14:39
EXTENDED PREVIEW: Airfix 1:24 Hawker Typhoon Mk. IB. • Kit No. A19002
A MIGHTY
The Editor takes a detailed look at the brand new 1:24 scale Airfix Hawker Typhoon. Additional detail, including a fully illustrated build of the model, reference, a summary of Typhoon kits in other scales and much more, is offered in the newest book from ADH Publishing’s “How to Build” series, “Hawker Typhoon Mk.IB” by Brett Green, available now from ADH Books www.adhbooks.com
H
awker Aircraft was formed in 1920 and delivered a number of classic fighter and bomber designs for the RAF in the interwar period. These included the Nimrod, the Fury, Audax and Demon – all biplanes with fixed-pitch wooden propellers and nonretractable undercarriage. In 1935, Hawker Aircraft designed the first low-wing monoplane fighter to see service with the RAF – the Hawker Hurricane. Although the Hurricane was undoubtedly a great leap forward
42
compared to Hawker’s previous biplane fighters, it retained many of that earlier generations’ characteristics including box girder fuselage structure and fabric-covered formers and stringers. The earliest Hurricanes were even still fitted with two-bladed fixed pitch propellers and fabric covered wings. Hawkers were considering a more modern replacement for the Hurricane as early as 1937. Planned as a medium-altitude interceptor, the Hawker Typhoon was powered by the 24 cylinder
H-block Napier-Sabre engine and featured a thick inverted gull wing. The Typhoon was expected to achieve a top speed of 460 mph, but the drag induced by its thick wing limited this to just over 400 mph. Climb rate and general performance above 20,000 feet failed to meet expectations too. As if these shortcomings were not bad enough, the big Napier-Sabre engine was prone to catch fire as it started; and a number of early Typhoons suffered from catastrophic airframe failure when the entire tail unit separated from the fuselage
Military Illustrated Modeller - September 2014
p42-45 extended preview - airfix typhoon 041.indd 42
01/08/2014 10:14
WIND The oilcaning effect may be seen here on the tail.
Two of the three spinner cap styles.
Cuckoo doors are offered as an option. These were fitted to counter the dust and dirt of unmade airfields.
in flight. The former problem was addressed by having ground crew with a fire extinguisher standing by when the Typhoon was running up; and the tail was reinforced with a series of fishscale plates on the rear fuselage. These problems were not ironed out until 1942, at which time the Typhoon was switched from interceptor to ground attack duties. It was in this role that the Typhoon excelled. The good low altitude performance and heavy load capacity of the Typhoon meant that it could carry two 1,000 lb bombs to targets on the continent. From September 1943, the Typhoon would be equipped with eight 60 lb RP-3 rockets, which were used to devastating effect against ground targets until the end of the war. The Hawker Typhoon was constantly improved over its period of wartime service. The initial “car door” canopy offered only limited rearward vision so this was eventually replaced with a clear-vision sliding bubble canopy. The original three-bladed propeller was upgraded to a four-bladed unit to
make the most of the powerful Napier-Sabre engine. Later Typhoons were also retrofitted with the larger horizontal tailplanes of the Hawker Tempest. By pilot accounts, the Typhoon was a solid gun platform, fast at low altitudes and impressively powerful, although controls were heavy at high speed. Although it proved unsuitable as a pure fighter, the Typhoon lives on in legend thanks to its remarkable ground attack record against Axis airfields, shipping, vehicles and trains.
wing mounted landing lights; and early small tail planes or later large (Tempest) tail planes. An excellent selection of ordnance is offered including eight rockets, two styles of rocket rails, streamlined wing fuel tanks, two 250lb bombs and two 500lb bombs. The undercarriage may be built lowered or retracted, and the wing cannon may be displayed with the access covers open or closed. Parts for the early car door version are not included but the fuselage breakdown suggests that it might be a possible future release.
IN THE BOX
SURFACE TEXTURE
The Airfix 1:24 scale Hawker Typhoon Mk.IB comprises 430 parts on 13 sprues in pale grey coloured plastic and 19 parts in clear plastic. The model may be built as any of the common Typhoon bubbletop sub-variants, with options including three or four bladed propeller assemblies; three styles of spinner; shrouded or unshrouded exhausts; alternative radiator intakes, “cuckoo doors” and tropical filter; leading edge or lower
The first thing that struck me when I examined the contents was the surface texture. Airfix has moulded this kit with a rippled “oil canning” texture on all the exterior metal surfaces. This creates the effect of a slight bulge between rows of rivets. It is quite a daring move on Airfix’s part, but the result is both striking and convincing. The fuselage and wings are covered with rows of recessed holes representing rivets. Although rivets
Aircraft Edition
p42-45 extended preview - airfix typhoon 041.indd 43
43
01/08/2014 10:14
EXTENDED PREVIEW: Airfix 1:24 Hawker Typhoon Mk. IB. • Kit No. A19002
Facial features are excellent. He should look great after a careful paint job.
A seated pilot figure is included. The stirrup-style retractable pilot’s step.
The front of the kit’s instrument panel – simple yet effective.
The seat backrest is moulded with lovely quilting texture.
may have been better represented by recessed circles rather than the holes, the effect is more than acceptable, especially when viewed more than a few inches from the surface of the plastic. The fuselage and wings also feature a number of raised surface features – panels, fairings and bulges – that contribute to the overall impression of a robust design that favoured functionality over elegance. Of particular note is the inclusion of raised “fish plates” – external reinforcements for the tail after a number of early structural failures. The elevators and ailerons are moulded with raised domed rivets. I think these look great, and they are certainly appropriate for these metal surfaces. The rudder presents the believable impression of fabric stretched over framework, capped by a metal fairing at the bottom. The rudder, ailerons and elevators are all designed to be workable. The landing flaps may be posed open or closed.
Kit Engineering
The fuselage is moulded with a number of inserts. The upper and lower cowls are separate parts, as are upper cockpit panels. The bottom of the fuselage is also a separate part, as is the vertical stabiliser (fin) and a section of fuselage at its base. The fuselage cowling inserts allow four different configurations for the engine: 1. All the cowling panels may be glued in place, completely enclosing the engine. 2. The upper and lower panels may be left off, displaying the top of the engine and the radiator with its associated plumbing and mounting hardware. 3. The bottom panels may be glued in place and the top panel left off to display the top of the engine, or 4. The centre side engine cowling sections may
44
be cut off the front of the fuselage to display the engine in its entirety. It would appear that the model is not designed to make the cowlings removable (i.e. taking the cowlings on and off the completed engine), although the top cowl might be partially removable with a little extra work. The separate upper cockpit fuselage panels appear to be an indication that we might see the car door early version Typhoon in the future. The lower fuselage insert is probably an engineering feature to permit the moulding of the sophisticated surface detail without suffering from moulding imperfections. The upper tail insert allows either the early small tail surfaces or the late Tempest tail to be used. The pilot’s hand holds and footholds on the fuselage side are separate parts that may be posed open or closed. The retracting stirrup-style step is also supplied as a separate part. Detail is very complete in almost every area.
Cockpit
The cockpit looks fantastic, being built up in layers of tubular framework and detail parts just like the real thing. Construction takes place in steps, adding consoles, the quadrant, control column and actuators, wheels, knobs, handles and the rest. Electrical cabling and hydraulic wires are also present in the cockpit. The seat is made up from four pieces and features gorgeous subtle quilted texture for the pilot’s backrest. The harness straps are supplied as injection moulded plastic parts. A separate seat cushion is provided too, if desired. A seated pilot figure is also offered as an option. Moulding quality is very good, and the pose is quite natural – right hand on the control yoke and left hand on the throttle. We don’t get to see much of the face, as he is wearing his flying helmet and oxygen mask, but what we can see looks excellent – good eye detail and even creases on the skin of his forehead. Interestingly, in the instructions, the pilot appears to be wearing modern glasses. I am wondering if this is some
sort of Airfix “in” joke. The instrument panel is a sandwich of clear and grey plastic parts with decals designed to represent dials on the back of the clear section.
Engine and Internal Wing Structure
The engine is a marvel of modern plastic engineering. Once again, it is built up in many layers and detail is very complete. Airfix offers an electric motor – available separately – as an option if you want your propeller to spin. The internal wing structure is fully represented including spars, frames, fuel tanks, wheel wells and a full cannon bay on each side. The four Hispano cannon are quite simple in parts breakdown but they look effective when complete. The bottom of the gun bays have a few ejector pin circles that should be cleaned up before assembly – one of the few places where moulding imperfections will be visible after the model is built. Cannon bay covers are supplied. These may be posed in open or closed configuration. The wheel wells are each made up from a large plastic part for the ceiling supplemented by seven perforated strips to add authentic structure to this space. The wheel well is boxed in on all sides by the spars and other panels. A jumble of injectionmoulded wiring completes the wheel wells.
Finishing Touches
The undercarriage legs are simple but accurate. Airfix supplies five-spoke main wheels and a solid anti-shimmy tail wheel. The main wheels are flattened and bulged. The canopy may be posed open or closed, but is not designed to actually slide.
Instructions
Instructions are called out over a whopping 229 steps. Each step is well illustrated, with a clear indication of part numbers where applicable. There are no construction notes to accompany the illustrations. Paint callouts are solely numbers of Humbrol enamel paints.
Markings
A large decal sheet with markings for four aircraft is included.
Military Illustrated Modeller - September 2014
p42-45 extended preview - airfix typhoon 041.indd 44
01/08/2014 10:14
Fabric texture on the control surfaces is well done.
Extensive stencil markings and a variety of national markings are also included.
CONCLUSION
Airfix has delivered a truly stunning kit with this 1:24 scale Typhoon Mk.IB. In my opinion, it is easily the best kit that Airfix has produced. As nice as the 1:24 scale Mosquito was, this one is quite clearly better. Whereas in places the Mosquito felt a bit like a scaled-up project, the Typhoon does not. The detail stands close scrutiny – quite a feat for such a large model. The Typhoon stands apart from all the 1:24 scale kits that have gone before it. This model radiates quality. Surface texture is positively daring with its rippled oilcan effect and the
Cockpit detail looks great under a coat of paint.
The kit windscreen – beautifully thin and free from distortion.
combination of raised and recessed rivets. Detail is dense, just as it was on the original aircraft. In fact, this kit conveys the rugged core of this aircraft so completely that there is very little to add. If the modeller wishes to display the engine or the wing cannon bays, Airfix offers a number of options that do not compromise scale or detail. Engineering is clever too, although tight tolerances will mean challenges in constructions here and there. Options are abundant and fit is generally excellent. Furthermore, the fact that Airfix has delivered a model to this exemplary standard using only plastic parts is a real tribute to the designers’ ambition and flair. They really have managed to squeeze the maximum from the medium.
The model builds up just like the real aeroplane.
The cockpit is built up inside a tubular framework.
The lower fuselage insert.
It won’t be a fast build, and it might not be easy either, but it will be a memorable journey delivering a spectacular result! •
Detail inside the wing includes full cannon bays.
The finished product!
Aircraft Edition
p42-45 extended preview - airfix typhoon 041.indd 45
45
01/08/2014 10:14
FEATURE ARTICLE: ITALERI 1:32 LOCKHEED-MARTIN F-104G/S STARFIGHTER • Kit No. 2502
FLIEGENDER SARG; LOCKHEED’S FLYING COFFIN
46
Military Illustrated Modeller - September 2014
p46-55 F-104G Pt.1 041.indd 46
01/08/2014 10:19
In Part 1, Marcus Nicholls starts work on Italeri’s new 1:32 F-104G Starfighter
T
he F-104 Starfighter needs no introduction from me; it’s an instantly recognisable icon of the Cold War era and an eternally popular modelling subject. Various kits have been released over the years but particular attention was paid to Italeri’s announcement of a new-tool ‘G model in 1:32; would it be a revolutionary release or another of the company’s ‘curate’s egg’ kits, ie, good in parts. The box certainly is big and the pile of grey sprues is encouraging – the will be no weekend build. The model comes with avionics bays and their hinged covers, an engine with removable tail cone and a six-barrelled 20mm M-61 Vulcan gun which can be shown off thanks to a removable cover. A huge decal sheet provides markings for no less than nine aircraft covering the air forces of Italy, Germany, Belgium, Greece, Canada and the Netherlands. A full suite of data stencils will also be found on the sheet. A set of photo-etched parts is included, carrying parts for the cockpit, gun and internal fuselage structures. A
generous supply of underwing ordnance comes as standard, so you won’t have to buy any aftermarket sets for these parts.
STARTING OFF
Construction of the kit begins, as you’d imagine, with the cockpit and straight off the mark, the modeller is offered the option of ejector seats in the form of a Martin Baker item for the Italian, German and Greek machines and a Lockheed seat for Canadian, Dutch and Belgian aircraft. I chose the Martin Baker seat as I’m building the German Marineflieger version (option ‘D’ in the instructions) and I’d describe it as ‘okay’ at best. It carries a decent level of detail and does come with photo-etched brass harnesses but these look as little skinny and don’t represent the straps of a real bang-seat very well. The fit of parts for the seat is not impressive either, with vague location points, requiring the modeller to consult references to see where things line up. It’s all a bit lacklustre
and the whichever seat you use, it’s best ‘retired’ to the circular wicker storage facility on the floor and replaced with an aftermarket resin item for a more authentic result. The side consoles are moulded in with the cockpit tub and they are a reasonable representation of these areas, with lightly raised detail and a recessed line between each panel ‘facet’. The floor of the tub is completely devoid of detail, something that becomes quite noticeable on a model of this scale, and while the instrument panel actually looks okay once painted, a full replacement cockpit assembly with new seat and instruments cannot come soon enough for this kit. I first painted the tub matt black, masking off the consoles then spraying light grey; it’s easier to do it this way round than paint the grey first. Colour washes and detail touch-ins were then carried out and finished effect was passable at best.
COCKPIT The cockpit is a fairly simple affair, built up from a main tub, rear bulkhead, control column and its base, rudder pedals, seat rails and throttle
Dry assembled, the various components combine to create a decent appearance of ‘busy-ness’
The seat (and possibly the instrument panel) should be left out while the fuselage is assembled to prevent damage
Here we see the Martin-Baker ejection seat assembled and waiting for its harness straps which are provided in photoetched brass
Aircraft Edition
p46-55 F-104G Pt.1 041.indd 47
47
01/08/2014 10:20
FEATURE ARTICLE: ITALERI 1:32 LOCKHEED-MARTIN F-104G/S STARFIGHTER • Kit No. 2502
The instrument panel is detailed to an adequate level. Photo-etched brass parts are provided to ‘enhance’ the moulded part, but they significantly worsen the detail, so should not be used
Prior to assembly, the surfaces of the seat pads were softened with liquid cement then wrapped in polythene which imparts the wrinkled pattern seen here
The side consoles feature a decent level of detail that will look okay once painted and the details touched in. A resin replacement cockpit and seat will massively enhance the kit
UNDERCARRIAGE
Now we come to the worst planned part of this kit, the main undercarriage, or rather, the point in the model’s construction at which the modeller is guided to install it. In stage eleven, the instructions suggest that you assemble the main bay along with the UC legs and their delicate, protruding door-closure rods at the stage where the fuselage is closed up, leaving them extremely vulnerable right through this procedure which is always fraught with danger, particularly so in the case of this kit. This is such appalling planning that I was flabbergasted when I saw it and immediately started looking for ways to re-engineer the installation sequence so the legs could be left off until final assembly, like you might encounter in a more sensibly designed kit. Luckily for me, this was quite simple, just requiring the trimming off of the location tabs from either end of the central rail under which the leg assembly is trapped, allowing the legs (and the rail) to be popped in once the airframe had been
48
assembled, painted, weathered and decalled. In stage sixteen, we encounter the nose leg and its bay and again we are guided to fit this assembly into the fuselage before the wings, tail and other parts have been fixed, not to mention painting. Clearly madness. Back-engineering this area was actually more of a fiddle than the work on the main undercarriage legs, requiring the nose leg to be cut at the point where it meets the cross-bar at the top, then drilling and pinning the leg so it could be pushed in place, again, once the airframe was complete. I truly wonder sometimes how these assembly sequence decisions are made. If the instructions are followed verbatim, huge frustration would be caused as the undercarriage legs are inevitably broken off while the modeller fights with the fuselage halves. And with a little planning, the landing gear parts could easily have been designed to fit after the model was complete. Just as well you’ve now read this, so you know how to combat this situation!
AVIONICS
Okay, with my major moaning done (for now) I could move onto the more fun parts of early assembly. Italeri have provided the avionics bays behind the cockpit and it would be a shame not to have these on display, even if having them open does disrupt the lines of the aircraft somewhat. Although the detail is a little simplified, the basic structures are fundamentally correct and just require the addition of a few extra spots of detail. Referring to the Daco book, I added some cabling from lead wire, some of which I gave a braided texture by rolling with a file. The avionics cable connectors are very prominent and simple holes drilled into the location just wouldn’t do, so I made up some decent-looking connectors using pieces of aluminium tubing. Having a near perfect reference source helped greatly in this endeavour, proving that almost anything on a model can be made from just scrap plastic and metal, with basic modelling tools.
Military Illustrated Modeller - September 2014
p46-55 F-104G Pt.1 041.indd 48
01/08/2014 10:20
Once the black had dried overnight, the consoles were masked off using Tamiya tape
The whole cockpit and seat were given an undercoat of matt black using Tamiya XF-1
Above and bottm left: With the tape peeled off, we can see the black side consoles; it’s easier to work this way round than trying to paint the black afterwards Vallejo No.71050 Light Grey was then airbrushed over all the cockpit structures
Time to fit the cockpit tub into the fuselage. The fit is good but the tub does not locate positively into one side; it must be glued in and the opposing fuselage half fitted to ensure the tub stays in the correct position
Aircraft Edition
p46-55 F-104G Pt.1 041.indd 49
49
01/08/2014 10:20
FEATURE ARTICLE: ITALERI 1:32 LOCKHEED-MARTIN F-104G/S STARFIGHTER • Kit No. 2502
A short length of sprue was superglued to the back of the rear bulkhead to hold it in place and prevent the tub from ‘drooping’
The instrument panel remains vulnerable once the cockpit is installed and it might be worth checking if it can be inserted at a later stage
AVIONICS
The hatch over the bay includes various avionics boxes and these were also wired up with lead solder wire
The kit includes an avionics bay to the rear of the cockpit canopy and the detail is reasonably good, made to look better with the addition of some lead wire detailing
Before attaching to the kit parts, some of the lead wire was rolled over with a file to impart the texture of a shielded cable
For variety, some of the lead wire cabling was left un-textured. The plugs were made from fine aluminium tubing from Albion Alloys
50
Here we see the avionics bay in its place within the fuselage; quite a lot of it is on show
Military Illustrated Modeller - September 2014
p46-55 F-104G Pt.1 041.indd 50
01/08/2014 10:20
ENGINE
The ceramic surfaces of the afterburner were simulated with matt white paint, over-sprayed with more Alclads Italeri provide a complete engine for their kit and it’s generally well detailed, inside and out. The rear section was airbrushed with various Alclad II metallics and clear colours to create a heat-stained appearance
The completed engine, sitting on the maintenance stand, which is provided in the kit
The kit comes with a decent replica of the GE J-79 engine
Surface detail is good, but all this will be hidden if the modeller chooses to instal the engine, because it must be cemented in as there is no push-fit location to allow it to be removed for display
The actuator rods are individual mouldings and are A choice of two engine outlets is provided and here well depicted we see the open version. Actually, the other version is appropriate for the version of the F-104G being modelled here, as we’ll see in the next instalme
Aircraft Edition
p46-55 F-104G Pt.1 041.indd 51
51
01/08/2014 10:21
y with ained
FEATURE ARTICLE: ITALERI 1:32 LOCKHEED-MARTIN F-104G/S STARFIGHTER • Kit No. 2502
UNDERCARRIAGE
The legs and their various struts and actuators can then be built in situ into the undercarriage bay, taking care not to cement them in place too soon
If the instructions are followed to the letter, you’ll be required to fix the main (and nose) undercarriage legs before the fuselage halves are mated, which is an illogical way of doing things because they will be extremely exposed while you wrestle with the fuselage when trying to close it up. To rectify this, we must first trim off the two tabs on the central rail
Once the cement on the leg sub-assembly has cured, the rail can be pulled out and the legs released, to be fitted, much more sensibly, at the final assembly stage. Why do kit manufacturers try to get us to install UC gear so early on in construction?
Having trimmed off the tabs, the rail can be installed much later on, and thus the undercarriage leg assembly too
The nose leg suffers a similar premature-installation direction in the instructions. It was modified to allow it to be installed at final assembly, as was done for the main legs
Here we see the main undercarriage gear with wheels pressed in place during one of many, many dry-fitting runs
52
Military Illustrated Modeller - September 2014
p46-55 F-104G Pt.1 041.indd 52
01/08/2014 10:21
Intakes
The engine air intakes are provided with inner portions and a choice of outer panels depending on which version you are building
The metallic internal portions were first sprayed, then masked off before the outer panels were cemented in place; the tape can be reached with tweezers though the intake mouthes once the main colours have been applied
After parts clean-up, a quick test-fit was done, showing a reasonably close fit. Filler would be required though
Some filler was needed to blend the intake parts into the surrounding bodywork. Filler has also been applied to the joint along the spine but is yet to be sanded
Airbrakes
The fit of the airbrakes is poor, with a very noticeable gap around their outer edge; they also sit too low in the cut-outs
p46-55 F-104G Pt.1 041.indd 53
Aircraft Edition
53
01/08/2014 10:21
FEATURE ARTICLE: ITALERI 1:32 LOCKHEED-MARTIN F-104G/S STARFIGHTER • Kit No. 2502
To remedy this, thin plastic card was cemented to the outer faces of the airbrake mouldings; once the cement had cured, the plastic card was trimmed back, leaving a small, protruding edge to span the gap
The thickness of the plastic card addressed the issue of the ‘brakes sitting too low too by raising their outer surfaces to become flush with the fuselage
The modified airbrakes were the cemented in place and a light application of liquified filler (Holts Cataloy dissolved in liquid cement) to hide any fine gaps. Not perfect, but better than the gappy appearance of the un-modified parts
GUN
Italeri provide an excellent replica of the six-barrelled gun that sits in the lower left side of the Starfighter’s fuselage. A photoetched brass bracing disc is included which makes assembly of the gun quick, precise and easy
AIRFRAME
Here we see the model on the author’s workbench during the mating of the two fuselage halves. Multiple rubber-bands and a couple of clamps were need to ensure a close fit but it did all come together eventually. Gaps were inevitable and these were tackled with Holts’ marvellous Cataloy Knifing Putty, available in the UK from the Halfords chain of car-parts stores
54
The basic fuselage with rubber bands finally removed. The procedure is helped by having the tail section as a separate sub-assembly
Military Illustrated Modeller - September 2014
p46-55 F-104G Pt.1 041.indd 54
01/08/2014 10:21
The engine aperture features a smart photo-etched frame which must be trapped by the two fuselage halves when they are brought together Above and centre: Carefully check the instructions; various holes must be drilled in the wings’ lower halves depending on which version and ordnance fit you choose. For the Kriegsmarine machine (option C) just the two holes in each wing are required
FUSELAGE
The wings are a simple but positive fit into the fuselage and they appear to acquire the correct anhedral by themselves
The tail section is provided with a maintenance stand which is rather nicely detailed
Possibly the biggest ‘make or break’ stage of any model is the mating of the fuselage halves. It’s all well and good dry-fitting them when it’s just the two halves, but the real test comes when you have to include the cockpit, undercarriage bay, engine pipe and other internal structures. I tested all these parts between the halves several times but as always, when I wanted to finally cement it all together, it just would not go. As you can see from the photos, I had to use rubber bands and clamps to close the halves up, applying a dash of liquid cement, liberal quantities of cyanoacrylate and a whole lexicon of fruity Anglo-Saxon language to secure the long mouldings around their internal components. This ungainly apparition was left alone for forty-eight hours for the glues to fully harden, and for me to calm down. Where there had been a barely visible seam on my multiple dry-fittings of the two halves, there was now a significant trench along the length of the cemented union (mostly the spine) and this needed to be filled. For these operations I favour Holts ‘Cataloy’ putty, available in the UK from the Halfords chain of car parts shops as it’s extremely easy to apply and dries very smooth indeed. It also sands beautifully and is roughly equivalent in density to the the surrounding kit plastic. The putty did, of course, fill the panel joints where the they cross the spine but this was removed once the putty had cured.
ENGINE
The kit comes with a decent replica of the GE J-79 engine and it can be displayed either in place within the forward fuselage or on its maintenance stand which is also supplied, and is rather well done. Another stand, this time with castors, is provided for the detached tail cone, useful for when the engine is on show. I didn’t add any detail to the engine, I just spent a little extra time cleaning up the joints where the two halves met. And that folks, is about where I got to for Part One of this article. Next time, I will push the model on further and get some paint onto it. See you then! •
Aircraft Edition
p46-55 F-104G Pt.1 041.indd 55
55
01/08/2014 10:21
FEATURE ARTICLE: Airfix 1:72 Bristol Blenheim Mk.I • Kit No. A04016
B R A W Y L EAR
brand new The Editor gets to grips with the Mk.I. Airfix 1:72 scale Bristol Blenheim
Box art for the brand new Airfix 1:72
56
scale Blenheim Mk.I
Military Illustrated Modeller - September 2014
p 56-63 Blenheim 041B.indd 56
01/08/2014 14:10
R E B BOM
Surface detail is crisp and fine.
The wings are full span, guaranteeing correct dihedral.
T
he Bristol Blenheim was a British light bomber aircraft designed and built by the Bristol Aeroplane Company that was used extensively in the early days of the Second World War. It was adapted as an interim long-range and night fighter, pending the availability of the Beaufighter. It was one of the first British aircraft to have all-metal stressed-skin construction, to utilise retractable landing gear, flaps, a powered gun turret and variable pitch propellers. A Canadian-built variant named the Bolingbroke was used as an anti-submarine and training aircraft. The Blenheim Mk.I outshone most biplane fighters in the late 1930s but stood little chance against the German Messerschmitt Bf 109 during daylight operations, although it proved successful as a night fighter. The Mark IV variant was equally unsuccessful in its
daylight bombing role, suffering major losses in the early stages of the war. The Blenheim Mk.I was powered by two 840 hp (630 kW) Bristol Mercury VIII radial piston engines, armed with a 0.303 in (7.7 mm) machine gun in the port wing, plus a 0.303 in (7.7 mm) Vickers K gun in the dorsal turret, with a maximum bombload 1,000 lb (450 kg). 1,552 were built.* Airfix released a 1:72 scale Blenheim Mk.IV way back in the mists of time. I can recall the model from my childhood, so we are talking about the 1960s here. The original Airfix Blenheim was a typical product of its time – minimal interior detail, clunky raised surface textures and indistinct fit. Mercifully, the new Airfix 1:72 scale Bristol Blenheim Mk.I is a totally new kit that shares none of its ancestor’s attributes!
The clear glasshouse canopy is split down the middle – scary!
The location for the rear bob bay bulkhead.
I incorrectly glued the wing spars to the inside of the bottom wing, but this actually worked out okay.
Stout locating positions for the wings!
Aircraft Edition
p 56-63 Blenheim 041B.indd 57
57
01/08/2014 14:10
FEATURE ARTICLE: Airfix 1:72 Bristol Blenheim Mk.I • Kit No. A04016
Tape and clamps held the wing halves in place as the glue dried. You never can be too careful!
WHAT’S IN THE BOX?
Fit of the fuselage halves and the wing to fuselage is superb.
This all-new Airfix 1:72 Bristol Blenheim Mk.I comprises 135 parts in light bluish-grey plastic and six in clear. The model is packed in a cardboard box with a separate lid – a small detail perhaps but certainly preferable to end-opening. The plastic is smooth and a little softer than the material used by Japanese manufacturers. This makes the plastic easy to clean up, but you also need to be careful not to take chunks out of the pieces when removing them from the sprues. Fine flash needs to be removed from some of the parts. Surface details are crisp and fine. The recessed panel lines are the best I have seen in a new Airfix 1:72 scale kit to date. Recessed foot/hand holds and various raised bumps are present too. The cockpit looks a bit basic on the sprues, but all the main features are present and it actually looks quite convincing once it is painted up. A fully
Cockpit parts cut out and ready for gluing in sub-assemblies.
Parts were tacked to a paint box to ease handling during painting.
58
fitted out bomb bay is supplied with ordnance, plus the option of eight small external fuselage bombs and racks too. The bomb bay doors may be posed open; and a single closed-door part is included as an option. The wheel wells look good, with deep legs extending to the top of the nacelles. Kit engineering is thoughtful. The wings are broken down into full span top and bottom. The bottom wing includes the central section of the bomb bay. Further reinforcement is offered by two wing spars, which also act as the front and rear bulkheads for the undercarriage bays. The control surfaces are all supplied as separate parts, as are the landing flaps. These include internal rib detail on the wing and flap parts, and stout tabs are moulded on to glue them in the dropped position. These may simply be cut off if you prefer your flaps up. The engines are simple in terms of part numbers – only six per side – but the moulded detail is good
The seats and rear bulkheads.
Cockpit sub-assemblies painted and weathered.
and they very much look the part once they are painted and installed. Airfix offers the option of open or closed cowl flaps (each one part per side), and alternative intakes. The chisel-shaped clear nose is supplied in three parts – two halves and a top piece. The two sides are joined along the centreline and are keyed to each nose half with a clever small oval window. As scary as this looks, it actually works very well. Markings are offered for two aircraft: • F-FX, Serial L1134, No.62 Squadron RAF, Butterworth, Malaysia, December 1941. This aircraft is finished in Dark Earth and Dark Green upper surfaces, with Night below. • Red 8, Romanian Air Force, Translyvania, 1939. Finished in Dark Green over Light Blue lower surfaces. The decals are flat in finish, with good colour saturation and registration.
Sub-assemblies ready for paint.
I added a set of harness straps from Eduard’s 1:72 Hurricane Mk.I colour photo-etched fret.
Military Illustrated Modeller - September 2014
p 56-63 Blenheim 041B.indd 58
01/08/2014 14:10
The clear parts and the nose halves were sealed with Tamiya Extra Thin Liquid Cement flowed into the joins. Fit was mercifully good!
I adapted Eduard’s 1:72 scale masking set for Special Hobby’s Blenheim kit for the Airfix glasshouse. It was easier than starting from scratch.
How to glue the clear canopy parts to the forward fuselage? Carefully!
Masking complete.
Some jiggling was required to get a good fit between the nose and the fuselage, but the result was pretty good.
The open bomb bay. The single closed door part did not fit very well here.
The top clear part was masked prior to installation.
The top clear parts was carefully glued in place using Revell Contacta Cement applied using the bottle’s fine metal tube applicator.
Aircraft Edition
p 56-63 Blenheim 041B.indd 59
59
01/08/2014 14:10
FEATURE ARTICLE: Airfix 1:72 Bristol Blenheim Mk.I • Kit No. A04016
All control surfaces are separate parts and may be posted to taste. I glued mine neutral except for the elevators, which I dropped slightly.
It’s looking like a Blenheim now!
The landing flaps are separate parts now. I glued these in the lowered position.
INSTRUCTION ERRATA
The engines are simple in terms of number of parts, but look very effective when painted and installed.
There are a couple of errors in the instructions that might lead you on a wild goose chase searching for parts on wrong sprues.
The engines painted and assembled.
Please note the following before you start construction: • In Step 18 – the part labelled D19 should read E19. • In Step 48 – the parts labelled D6 and D17 should read E6 and E17.
OFF ON THE WRONG FOOT
This is a simple kit, right? We don’t need no steenkin’ instructions! Well, apparently I do. I merrily started cutting parts off the sprues and glued the wing spars to the lower wing, which seemed the logical place for them to be fitted. However, as the glue was setting I finally consulted the instructions to find that they should be glued to the upper wing (Part A1). I decided that, rather than rip the spars off and risk poor fit later on, I would leave the spars in place and work around my error. In the end it was not a major problem. I had to carefully secure the upper undercarriage mounts (Parts D20 and D21) with super glue, as they were now floating around until the wing halves were joined, but I got away with my error. However, your build will be easier if you follow the instructions!
BACK ON TRACK
With the wings assembled, it was time to move onto the cockpit. I built this in subassemblies – the seats and rear bulkhead and each of the sidewalls. These were then painted Tamiya XF-71 Cockpit Green. Details including the seat cushions were picked out using a fine brush, then the cockpit sub-assemblies received a weathering wash. This was a mix of water and Future floor polish, plus a few drops of Tamiya acrylic XF-1 Flat Black and XF-64 Red Brown. This was then simply brushed over all the cockpit elements. As it dries, this mix clings to the recesses and natural shadow areas. After a few hours I applied a subtle dry-brush of XF-71 Cockpit Green over the top of the cockpit parts, then added a seat harness from Eduard’s Hawker Hurricane self-adhesive colour photo-etched fret. The simple kit instrument panel decal was applied before a flat coat to seal the paint job.
60
The fit of the cowling parts was less than stellar, but a few smears of Tamiya Surfacer did the trick.
The leading edge landing light was glued in placed and masked off at this stage.
The canopy framing was painted Interior Green, then the entire model received two coats of Tamiya’s Grey Primer, straight from the spray can.
The flap cavity was painted Interior Green and masked off before camouflage painting commenced.
Military Illustrated Modeller - September 2014
p 56-63 Blenheim 041B.indd 60
01/08/2014 14:10
The bottom of the model was coated in “scale black” – a 50/50 mix of Tamiya XF-1 Flat Black and XF-64 Red Brown. Streaks and patches were sprayed using 100% black for a bit of variety.
The lower fuselage, lower engine nacelles and bottom of the tailplanes were masked off in preparation for the next stage.
The turret was packed with Blu-Tack prior to masking and spraying. This was intended to prevent unwanted overspray on the inside of the turret.
CLEARLY IMPORTANT
The chiselled lines of the big clear canopy is the defining characteristic of the Blenheim Mk.I, so it was important to get this right. I confess that I was nervous about this area, as the canopy joins down the centreline so fit would have to be perfect and glue would have to be very, very neat. Fortunately, Airfix helps us with a well engineered nose and canopy area. Each canopy half was carefully attached to the nose halves with Tamiya Extra Thin Liquid Cement. I touched the join in a few places with the tip of the brush and capillary action drew the liquid glue along the seam without smears or smudges. After the glue was allowed to set, the cockpit interior was fitted and the two nose halves were joined. Once again, Tamiya Extra Thin Liquid Cement and capillary action were used. The halves were taped while the glue set. This seemed like a good time to mask the complex glasshouse. Rather than start from scratch, I bought the Eduard die-cut mask set for the 1/72 scale Special Hobby Blenheim kit. I thought that this would need some modification, but that it would be easier and faster than cutting from tape. I was right! Some of the masks fitted without modification, while others needed a bit of trimming or extra strips. However, it was pretty painless in the end.
The base coat is Mr Colour RAF Dark Earth Lacquer. The paper patterns were cut out with scissors and held in place with tape and Blu-Tack.
Printscale’s decal instructions were scaled up and printed out for use as 1:72 scale camouflage masks.
Gunze- Sangyo’s acrylic RAF Dark Green was used as the second camouflage colour.
BRINGING IT ALL TOGETHER
Test-fitting the assembled nose to the main fuselage/ wing suggested that the fit might not be perfect. At the first attempt there appeared to be a bit of a gap at the top sides. However, I found that a little extra force reduced this gap, and by the time glued was applied there was almost no gap at all. I added the top clear part once the nose was glued to the fuselage. This time I used Revell Contacta adhesive, carefully applying glue to the thin mating surfaces with the needle applicator. Construction was fast and straightforward from this point on. The only problem I had was a poorly fitting closed bomb bay door (Part A16), but I suspect most people will probably pose this open to display the bombs. I posed the flaps dropped and also slightly dropped the elevators. With construction complete, I only needed a few smears of Tamiya Surfacer at the forward wing root, upper fuselage side nose join and under the horizontal stabilisers. A more generous coating of Tamiya Surfacer was applied to the bomb bay door joins.
Voila! The result immediately after the paper masks are removed.
Aircraft Edition
p 56-63 Blenheim 041B.indd 61
61
01/08/2014 14:11
FEATURE ARTICLE: Airfix 1:72 Bristol Blenheim Mk.I • Kit No. A04016
EARLY WAR COLOURS
Tamiya Grey Primer was sprayed on the model straight from the can after the canopy frames were sprayed Interior Green. The first camouflage colour to be applied was a 50/50 mix of Tamiya XF-1 Flat Black and Red Brown on the lower surfaces, including the bottom of the engine nacelles. This blend is less stark than 100% black, and delivers the impression of black in scales from 1:72 to 1:24. I have always liked Gunze’s Mr Color lacquer range for its smooth coverage, fast drying properties and tough finish. However, I find the Mr Color usually left a trail of dried paint that looks like spiderwebs, especially when the paint has been heavily thinned or when it comes into contact with masking tape adhesive. I recently read about Gunze’s Mr Hobby Mr Color Leveling Thinner 400, which was supposed to retard the drying time of the lacquer paint. This thinner has greatly reduced the spiderwebbing problem. The lower surfaces were masked with Tamiya tape, and the fuselage, wings and tailplanes received a base coat of Mr Color 369 Dark Earth, mixed with 50% Mr Color Leveling Thinner 400. The camouflage plans included in Printscale’s 1:72 Blenheim decal set were scanned, scaled to 1:72 in Photoshop before being printed and cut into masks. These were attached to the model using small blobs of Blu-Tack underneath, and Tamiya tape at the edges, in preparation for the disruptive camouflage colour of Dark Green. Gunze-Sangyo H73 RAF Dark Green was used for this colour. When all the masking tape was removed, the overall picture was revealed. Panel lines were then airbrushed with lines of very thin black/brown paint. Two coats of Future were now sprayed, providing a nice glossy coat for the decals. To my horror, though, the Future coat had converted my nice subtle panel line post-shading into dark outlines. I decided to leave these alone until I had applied the decals and the final flat coat, hoping that this might subdue the weathering.
Two coats of Future floor polish resulted in a nice glossy finish but it also greatly emphasised the panel shading.
The turret, masking removed and assembled.
Decals were a combination of Airfix kit markings (upper wing), old CMK roundels for the fuselage, and Printscale for the serials and codes. All performed perfectly.
DECALS
I bought Printscale’s new Blenheim Mk.I decal set to use on my model, but I thought that the Printscale roundels looked more like the later dull colours. I therefore used the kit decals for the upper wing roundels, and some old leftover CMK decals for the fuselage roundels. These both appeared to represent the brighter roundel shades used on prewar and early-war aircraft. The Airfix decal was also used for the light grey wing walk. Some HyperScale visitors have reported that Printscale decals are fragile and difficult to use, but my experience was very positive. I used the Printscale codes and serials on this model, and they performed perfectly. Far from being fragile, I accidentally folded one leg of my "A" code back onto itself after I had applied it to the model, and I managed to fold it back without damaging the decal. Opacity was excellent over the relatively dark camouflage, and there were no problems with silvering despite a large expanse of clear decal film on the inside of the “D” codes.
All the decals responded well to Solvaset decal setting solution too. A coat of Alclad Klear Kote Flat sealed the decals and toned down the heavy panel shading a bit. The Alclad Flat leaves the hint of an eggshell sheen – just what I was looking for on the upper surfaces. I sprayed Alclad Klear Kote Matte on the lower surfaces, resulting in an ultra-flat, almost chalky finish. This was a nice contrast to the satin finish of the upper surfaces.
FINISHING TOUCHES
A little extra weathering was applied to the area behind the forward engine nacelles and on the pale grey wing walk. The undercarriage, wheels, tail wheel and various antennas and tubes were painted at this stage. I carefully fitted the main wheels to the main undercarriage legs, ensuring they could rotate. The whole assembly was then painted black. The sides of the tyres were treated to Tamiya’s “Mud” coloured weathering pastel. The same shade was applied to the sides of the tail wheel.
Alclad’s Klear Kote Flat offers the hint of an eggshell sheen to the final finish.
The undercarriage elements. These fit positively.
The engine nacelles complete. The cowl ring was painted silver then weathered with thinly sprayed Tamiya XF-1 Flat Black and XF-64 Red Brown.
62
I found that it was helpful to use a plastic handle to press the top of the gear legs into their locating slots.
Military Illustrated Modeller - September 2014
p 56-63 Blenheim 041B.indd 62
01/08/2014 14:11
MODELSPEC Airfix 1:72 Bristol Blenheim Mk.I.
Kit No. A04016
Accessories Used: Eduard (SS501) - Self-Adhesive Hurricane Mk.I photo-eched detail set Eduard (CX253) - Blenheim Mk.I Masks for Special Hobby kit Tools and Modelling Products Used: Tamiya Extra Thin Cement, Revell Contacta Cement, Selley’s Super Glue, Zip Kicker (super glue accelerator), Tamiya Masking Tape, Irwin Clamps The pale wing walk was a decal provided in the kit. This looked a little stark straight from the box so it was heavily weathered.
I had not glued the engine nacelles to the wings yet, which worked out quite nicely because the hole in the front of the rear nacelles offered access to the top of the undercarriage legs. The top of the gear legs have to slots that fit over two raised locating pegs on the front of the wing spar, but it is tricky to get leverage when the legs are fed in from below. I poked the narrow plastic handle of a microbrush through the hole in the front of the rear nacelle, and pressed it against the front of the undercarriage leg. This was enough to fit the slots firmly over the pegs. The pitot and antenna mast were super glued to the painted model. The propellers were sprayed with Tamiya White Primer straight from the can, before receiving a coat of TS-34 Camel Yellow. The tips were masked off with Tamiya tape and the blades were sprayed black. Once dry, the hubs were painted silver and weathered with a brushed mix of Future, water and the ubiquitous red-brown mix.
‘Mercifully, the new Airfix 1:72 scale Bristol Blenheim Mk.I is a totally new kit that shares none of its ancestor’s attributes..!’
Paints and Finishing Products Used: Tamiya (acrylic): X-18 Semi-Gloss Black; XF-1 Flat Black; XF-71 Cockpit Green. Tamiya Spray Cans: Grey Primer; TS-34 Camel Yellow; AS-12 Bare Metal Silver Tamiya Weathering Master: Weathering Pastels Parts A. Mr Color lacquer paints: H369 Dark Earth Gunze-Sangyo Acrylic H73 – RAF Dark Green Mr Hobby Mr Color Leveling Thinner 400. Vallejo Model Color (acrylic): 847 Dark Sand; 919 Foundation White; 70953 Flat Yellow; 70957 Flat Red Vallejo Panzer Aces (acrylic): 337 Highlight Ger. (Black) Alclad Klear Kote Flat Solvaset decal setting solution Future Floor Polish Crisp and fine surface features; nice level of detail; good quality moulding; generally very good fit. A few errors in the instructions; poor fitting bomb bay in the closed position. Rating: 9 out of 10
Airfix has a real winner with its new 1:72 scale Blenheim.
* Historical summary courtesy of Wikipedia http://en.wikipedia. org/wiki/Bristol_Blenheim Airfix kits are available online and from hobby shops worldwide. I bought mine from Hannants www.hannants.co.uk
CONCLUSION
Airfix has delivered a sweet little kit with their 1:72 scale Blenheim Mk.I. Detail is good, surface textures are restrained and crisp, options are useful and parts breakdown is clever. It would be great to see a similar new-tooled Airfix Fairey Battle and Boutlon-Paul Defiant. I hope that we see some of these scaled up to 1:48 scale too! Well done Airfix. You’re on a roll! •
Sub-assemblies including the engine nacelles, propellers, tail wheel, turret and antenna were glued in place.
Aircraft Edition
p 56-63 Blenheim 041B.indd 63
63
05/08/2014 12:29
For the serious Modeller Issue 39
Issue 40
Subscribe Today 12 issue subscription for all issues (AFV and Aircraft) UK £60, Euro £75, World £85 12 issue subscription for AFV issues (2 years) UK £60, Euro £75, World £85 12 issue subscription for Aircraft issues (2 years) UK £60, Euro £75, World £85 Single issue UK £6.50, Euro £7.95, World £8.95 www.militaryillustratedmodeller.com
Get it first • Delivered to your door • Save Money ORDER FORM - MIMODELLER
Please debit my credit/debit card for £ .......................................
First name ..........................................................................................................
Visa
Surname..............................................................................................................
Card No. ....................................................................................................
Address................................................................................................................
Expiry date................................. Start date ........................................
...................................................................................................................................
Security Number (last 3 digits on signature strip) ............................
Post/zip code ................................................................................................... Country ................................................................................................................ Telephone Number....................................................................................... Email Address..................................................................................................
p 64 Subscribe 041.indd 1
/Mastercard
/Maestro
/other ............................
Cheques payable to: ADH Publishing Ltd. Aircraft & AFV editions: UK
Euro
World
Aircraft editions only: UK
Euro
World
AFV editions only:
Euro
World
UK
Starting from issue ............................................................
Issue No (if applicable) ........................................................................... Signature................................................Date ..................... Please mail this form to; ADH Publishing, Doolittle Mill, Doolittle Lane, Totternhoe, Bedfordshire, LU6 1QX, United Kingdom Tel; +44(0)1525 222573 Fax; +44(0)1525 222574 Online; www.militaryillustratedmodeller.com (Photocopies of this form are acceptable)
01/08/2014 14:25
modeller Next Issues military illustrated
ISSUE No.041 September 2014
Aircraft Edition - Brett Green AFV Edition - Marcus Nicholls Publisher; Alan Harman Graphic Design; Alex Hall, Colin Trundle Advertising Manager; Gareth Liddiatt Advertising Assistant; Joe Brown Office Manager; Paula Gray Administration Manager; Hannah McLaurie MIM Website; ADH Web Team Editors;
Printed by; Symbian Print Intelligence, Hertfordshire, UK Distributed by; Seymour Distribution 2 East Poultry Avenue, London, EC1A 9PT Tel; 020 7429 4000
Military Illustrated Modeller Issue 42 - AFV Edition on sale 18 September 2014 COLD WAR CHAR
Meng’s 1:35 AMX-30B in detail
THE GORKY AUTOMOBILE PLANT’S ARMOURED JEEP
Tamiya’s jewel-like BA64-B in 1:48
Newstrade; Select Publisher Services 3 East Avenue, Bournemouth, BH3 7BW Tel; 01202 586848 Email;
[email protected] Military Illustrated Modeller is published on the third Thursday of each month by; ADH Publishing, Doolittle Mill, Doolittle Lane, Totternhoe, Bedfordshire, LU6 1QX UK www.militaryillustratedmodeller.com Tel; +44 (0)1525 222573 Fax; +44 (0)1525 222574 Editorial enquiries; Aircraft email;
[email protected] AFV email;
[email protected]
ENTWICKLUNGSFAHRZEUG!
Trumpeter’s 1:35 E-10 experimental tank destroyer and Hetzer relacement
Advertising enquiries; Tel; +44 (0)1525 222573 Email;
[email protected] Subscription enquiries; Tel; +44 (0)1525 222573 Fax; +44 (0)1525 222574 Email;
[email protected] Reproduction in part of any text, photograph, or illustration without written consent from the publisher is strictly prohibited. While due care is taken to ensure the contents of Military Illustrated Modeller is accurate, the publishers and printers can not accept responsibility for errors and omissions.
Military Illustrated Modeller Issue 43 - Aircraft Edition on sale 16 October, 2014
Advertisements are accepted for publication in Military Illustrated Modeller only on ADH Publishing’s standard terms of acceptance of advertising, copies of which are available from the advertising department. Please write to the address above. All advertising, circulation and subscription enquiries should also be directed to the UK address above.
Subscription rates are; Option 1 - 12 Issues (AFV & Aircraft) 1 year UK - £60.00 / Europe - £75.00 / World - £85.00 (prices include shipping) Option 2 - 12 Aircraft Editions 2 years UK - £60.00 / Europe - £75.00 / World - £85.00 (prices include shipping) Option 3 - 12 AFV Editions 2 years UK - £60.00 / Europe - £75.00 / World - £85.00 (prices include shipping) For all orders, please call; (UK) +44(0)1525 222573 or visit www.miltaryillustratedmodeller.com
LOCKHEED’S FLYING COFFIN PT.2
Marcus Nicholls paints and weathers the new 1:32 scale F-104 G Starfighter from Italeri.
SACRIFICIAL SALLY
SPITFIRE REFRESHED
MPM’s 1:72 Ki-21 Sally by Harvey Low.
Brett Green builds and improves the brand new 1:32 scale Revell Spitfire Mk.IIa.
TENSIONAL INTEGRITY
Dirk Polchow presents his 1:32 scale Wingnut Wings Fokker E.III. © ADH Publishing 2014
...AND MORE! Aircraft Edition
p65 NextIssues 041.indd 65
65
05/08/2014 12:24
Tailpiece ROMANIAN RHAPSODY Azur FFROM 1:32 IAR81C. Kit No. FR8001 The Editor gets an early look at Azur FFROM’s all-new IAR81C – the first time this type has appeared in 1:32 scale.
T
he IAR-81 was a Romanian WWII low-wing, monoplane, all-metal monocoque fighter and ground-attack aircraft. When the IAR-80 first flew in 1939, it was comparable to contemporary designs such as the German Messerschmitt Bf 109, the British Hawker Hurricane Mk.I, and the American Curtiss P-40B/ Tomahawk Mk.I and superior to the Dutch Fokker D.XXI and Polish PZL P.24. However, production problems and lack of available armament delayed entry of the IAR 80 into service until 1941. It remained in front line use until 1944.* This is Azur FRROM’s first 1:32 scale kit. The IAR-81C is a very welcome debut as the type has not been previously available in large scale. Azur FRROM’s 1:32 scale IAR-81C comprises 197 grey styrene parts, 5 resin parts, one photoetched fret of 26 parts, 6 clear styrene parts, plus decals for five subjects. Surface features are really well done. Panel lines are crisp and finely recessed. Rivet detail is also present in selected areas, and specific parts of the model even feature screw heads with slot detail - nice! Raised and recessed vents, scoops, slots, hinges and bumps complete the sophisticated surface terrain. The plastic is typical of today’s limited run kits well presented but with a slightly rough texture to the touch. A few minutes polishing the main parts with Micro Mesh cloths will quickly deliver a silky smooth surface. The cockpit is well equipped, mainly using plastic parts although a photo-etched harness is
The main engine cylinder parts.
also included. The framed cockpit tub will be trapped between the fuselage halves, which are also moulded with raised interior detail. The instrument panel is broken down into three plastic sections with instrument dial decals broken down the same way. The gunsight features a resin body and two clear plastic lenses. Flaps and ailerons are moulded as separate parts. The flaps may be extended and dropped thanks to separate plastic hinges. The rudder and elevators are separate and may also be posed to taste. The engine is a well detailed model in its own right with around 70 plastic parts plus resin exhaust manifolds. A choice of standard and tropical filters is provided. Both of these are resin parts. A streamlined centreline bomb rack is also offered as an option. The main undercarriage and tail skid are well detailed. The model is completed with the addition of the propeller assembly with its separate blades and two spinner parts; and the canopy, which is thin and admirably free from distortion. The windscreen and sliding sections are separate so that the canopy may be posed either open or closed. You might be inclined to believe that this will be an easy build due to the good detail, the narrow sprue attachments and the fine surface textures, but you should always remember that this is a limited run kit.
Surface detail is crisp and convincing.
The kit’s photo-etched fret.
You won’t have locating pins to guide you, and you should be prepared to take plenty of time cleaning up parts and test fitting before committing to glue. This applies especially to the engine and fitting the cowling. FRROM’s IAR-81C may demand more attention than a shake-the-box mainstream kit, but take your time and you should have an impressive result. Five Royal Romanian Air Force (ARR) options are provided. All five are finished in Olive Green upper surfaces and Light Blue Grey lowers, but this uniformity is relieved by the vivid yellow theatre markings plus variations of individual aircraft markings, kill marks and nose art. The two decal sheets, designed by Radu Brinzan and printed by Aviprint, are printed with perfect registration and good colour saturation. This is Azur FRROM’s debut 1:32 scale offering, and it is also the first time that the sleek IAR-81C has appeared in 1:32 scale. It is an attractive and nicely detailed model. If you have a couple of limited run kits under your belt, I don’t expect this one will give you too many nasty surprises, and it will offer a colourful contrast to other models on your display shelves. Highly recommended to experienced modellers. *Background courtesy of Wikipedia Thanks to FRROM for the review sample www.frrom.com •
Moulding quality is very good. One of the two decal sheets.
66
Military Illustrated Modeller - September 2014
p66 Tailpiece 041.indd 66
01/08/2014 10:26
NEW in the ‘HOW TO BUILD...’ series ORDER NOW ‘How To Build The Leopard Family In 1:35’ is a comprehensive guide to modelling this famous vehicle in its many forms. From battle tanks to recovery vehicles, homeland protectors, to battle-hardened veterans, you’ll find much to enjoy and inspire within the pages of this exciting new book. Along with the work of the author, you will also find guest features from Brett Green, Marcel Jussen and John Murphy, who’s combined talents help tell the story of the seven models, including the Leopard 1A3, 2A4NL, 2A5, AEV, 2A6 and as a specially extended section, the incredible Canadian, C2 MEXAS. Each of the chapters tells the story of a model using in-depth construction and painting guides, as well as hints and tips on detailing, conversions, sculpting and figure painting. Add to that some exclusive, full-sized reference material and the reasons to add this book to your library, are there for all to see.
Only
£12.95 plus p&p
Cover subject to change
ALSO AVAILABLE Visit adhbooks.com for details PLACE YOUR ORDER NOW ON TEL: 01525 222573 FAX: 01525 222574
✁
The Leopard Family in 1:35 book HOW TO BUILD... LEOPARD Name ..................................................................................................................... Address................................................................................................................ ...................................................................................................................................
Please debit my credit/debit card for £ ....................................... Visa
Mastercard
Maestro
P&P: UK; £2.00 Europe; £4.00 World-Wide airmail; £6.00 Cheques payable to: ADH Publishing Ltd.
other .............................
Card No. .................................................................................................... Expiry date................................. Start date ........................................
...................................................................................................................................
Security Number (last 3 digits on signature strip) ............................
Post/zip code ...................................................................................................
Issue No (if applicable) ........................................................................... Date ............................................................................................... Please mail this form to; ADH Publishing, Doolittle Mill, Doolittle Lane, Totternhoe, Bedfordshire, LU6 1QX, United Kingdom Tel; +44(0)1525 222573 Fax; +44(0)1525 222574 Online; www.adhbooks.com (Photocopies of this form are acceptable)
Country ................................................................................................................ Telephone Number.......................................................................................
Signature .....................................................................................
www.adhbooks.comwww.adhbooks.comwww.adhbooks.com p 67 Leopard Book 041.indd 8
01/08/2014 14:29